Form and payments
This guide is about the Form and payments block. Read the full guide to find out how to use the block, or go to a specific section if you are looking for the answer on how to:
The Form and payments block allows you to:
- Collect information. Users can place orders, book, subscribe to the newsletter, and so on.
- Accept payments. Users can pay for what they choose.
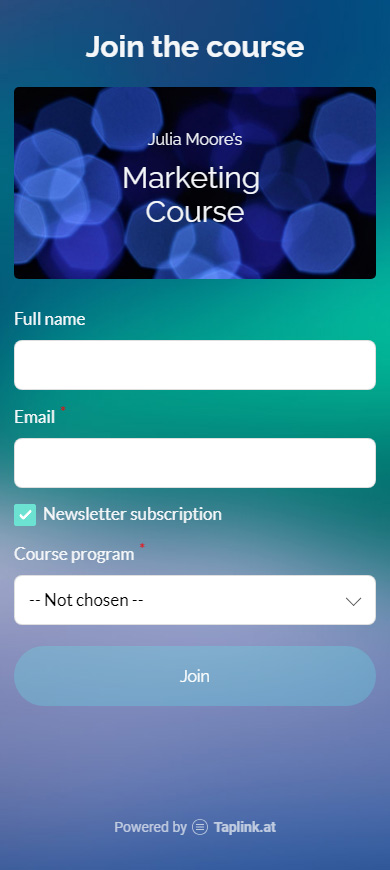
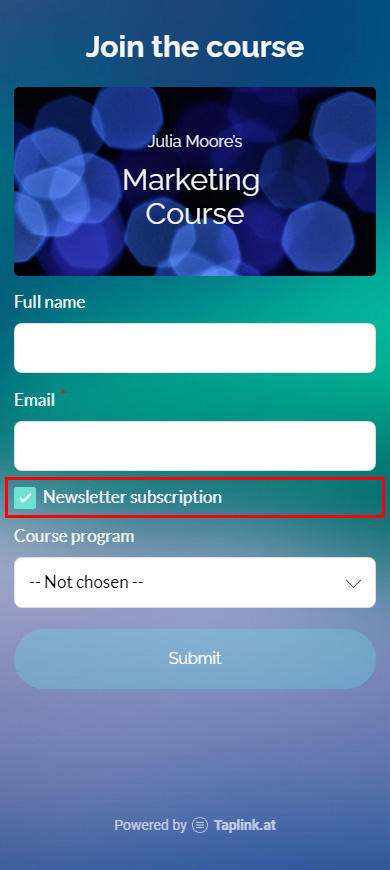
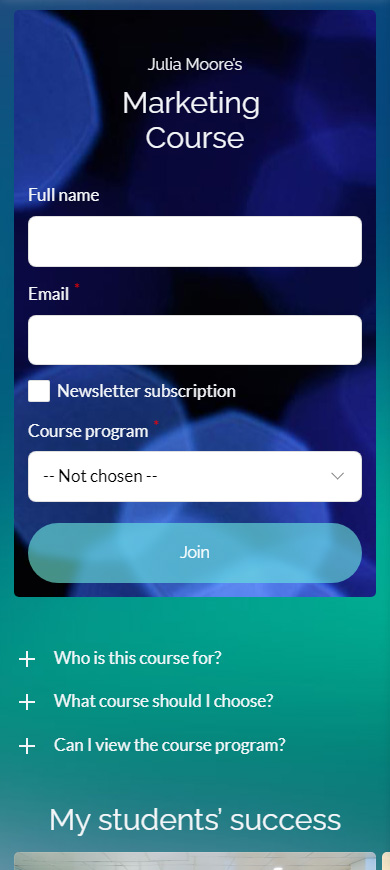
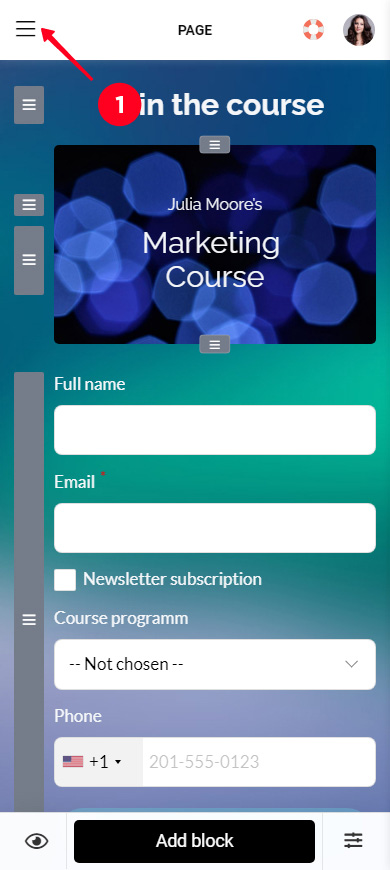
This is how the block looks on a page:
You need the Business plan to be able to add a Form and payments block. If you are on a different plan now, upgrade the plan here.
If you are adding a long form, it is better to place it on a separate page. Read how to create a page here. We place the form separately in the example. So the form doesn't distract users who don't need it.
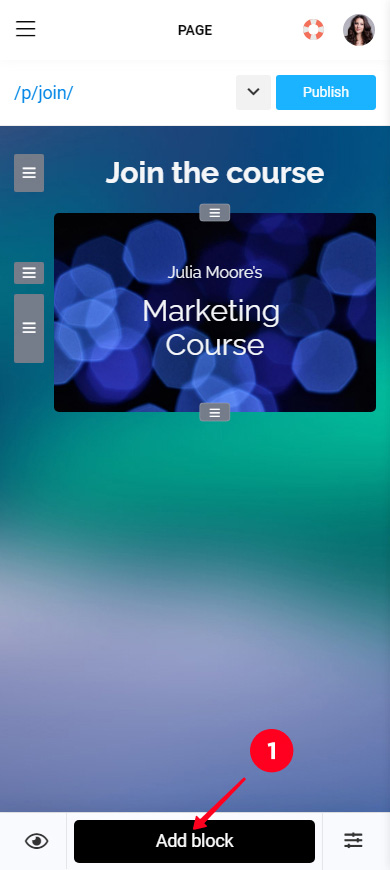
Add a Form and payments block:
- Tap Add block.
- Select Form and payments.
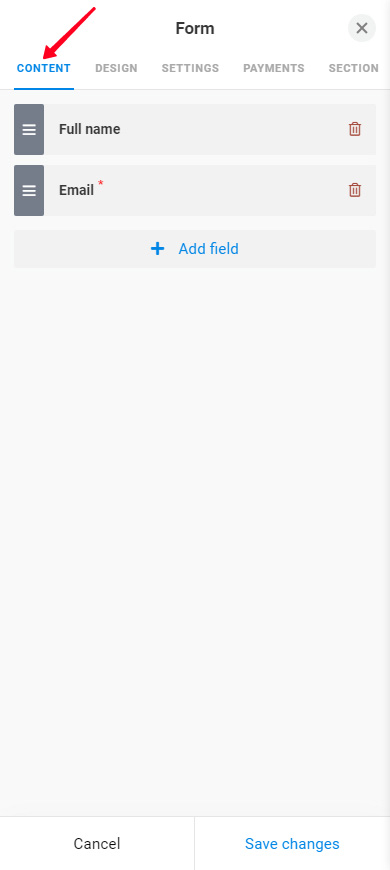
Now you need to adjust the block.
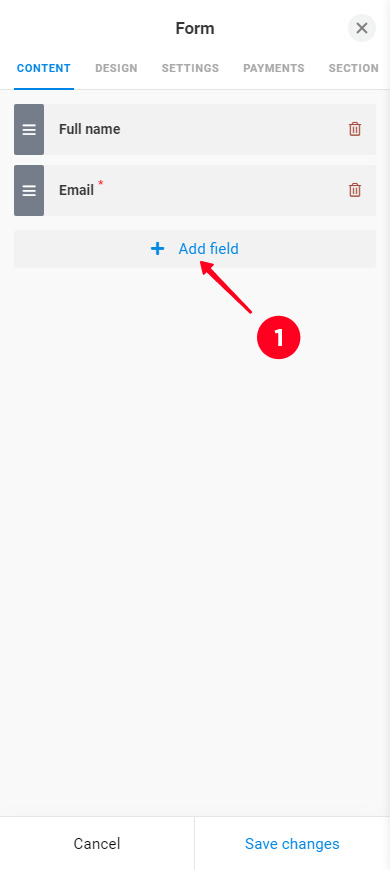
You can add and delete fields in the Content tab.
Add more fields if necessary:
- Tap + Add field.
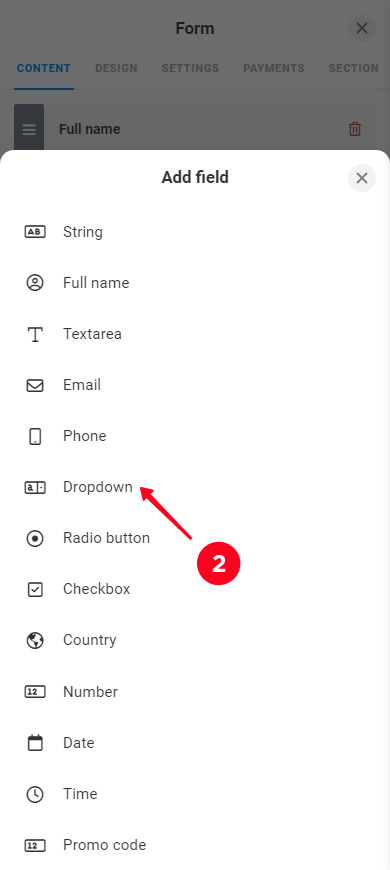
- Choose a field type. We choose the Dropdown list to show an example.
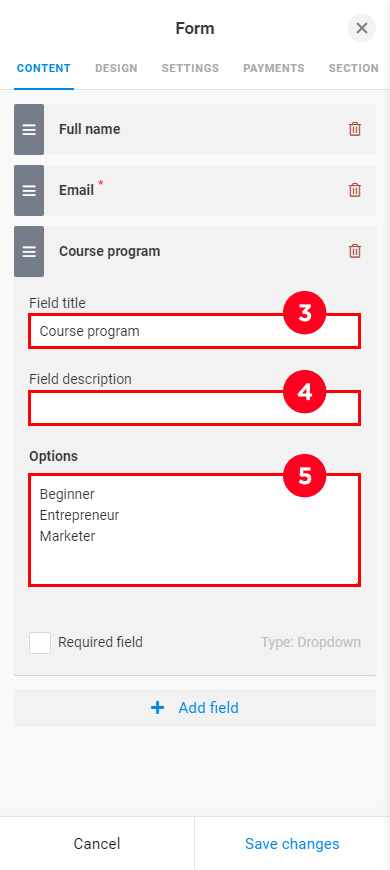
- Set the field title. If the field is Dropdown, the title can be the course option, item color or size, and so on.
- Optionally, add the field description. Explain what exactly a person chooses at this step. For example, "Choose a course program relevant to your goal".
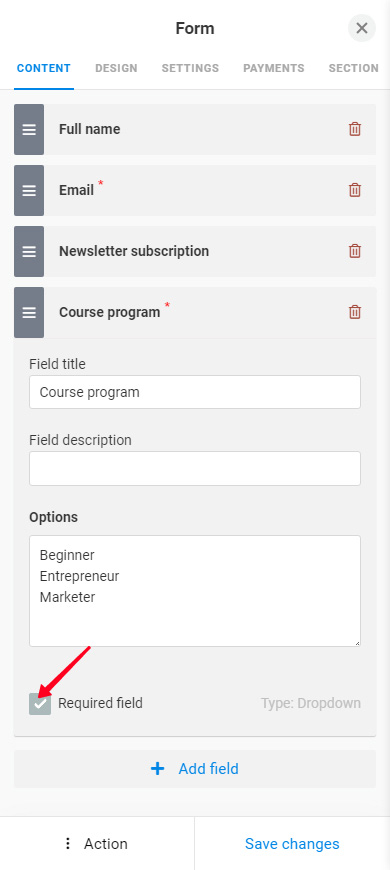
- If you are adding a Dropdown or Radio button list, then add the list items. Note, that each item must be written in a new line as shown in the third screenshot.
If you need one more field, repeat steps 1–5.
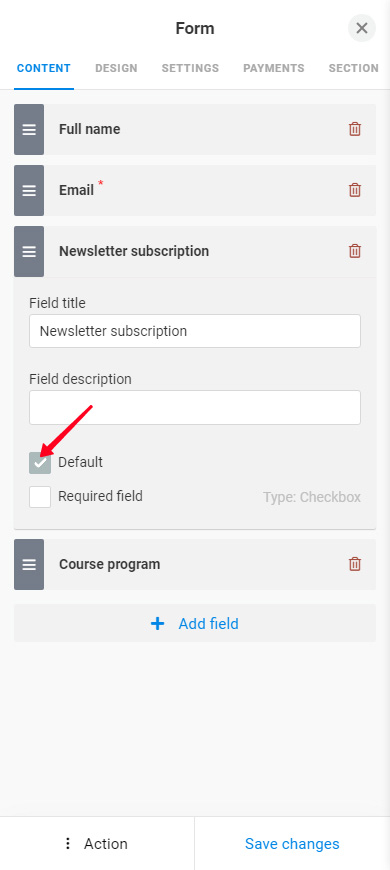
We have also added a Checkbox field. You can check the box next to Default (screenshot 1) in the settings, this makes the box automatically checked when users fill out the form (screenshot 2). Users can uncheck the box if they want.
Required fields are fields that users must fill in to be able to send data or proceed to payment. You can choose which and how many fields are required. However, remember, there must be at least one Email or Phone field among them.
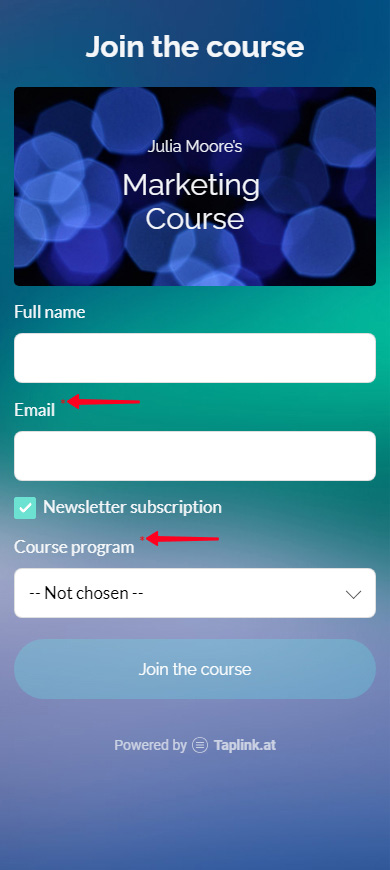
Check the Required field box (screenshot 1) in the field settings to make the field required. Uncheck the box when you want to make the field optional again. Required fields are marked with asterisks (screenshot 2).
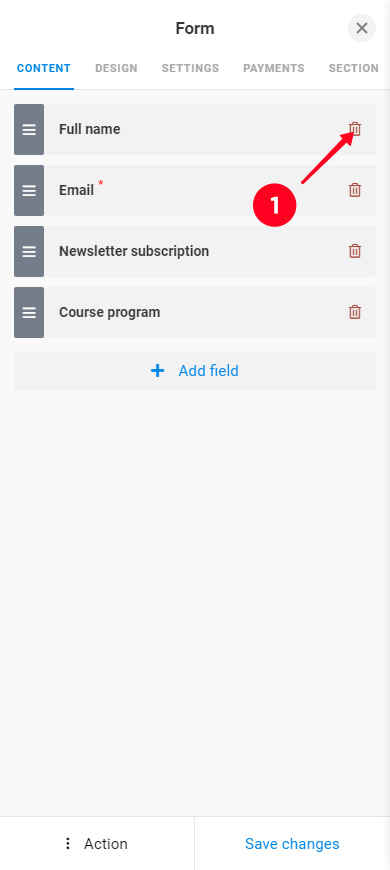
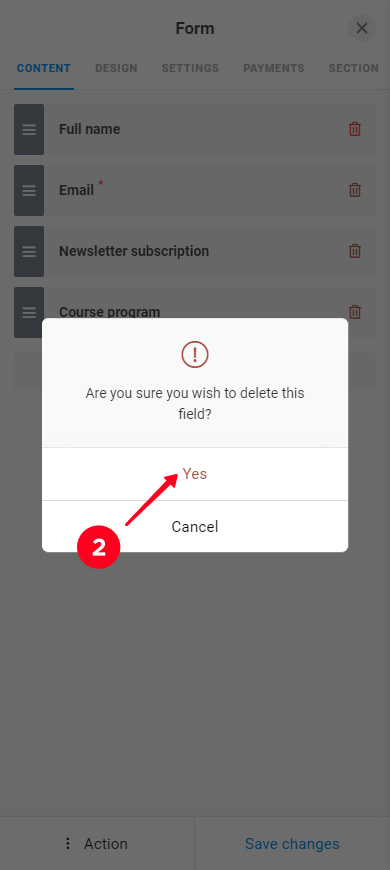
If you need to remove a field:
- Tap the trash icon in the field settings.
- Tap Yes to confirm the deletion.
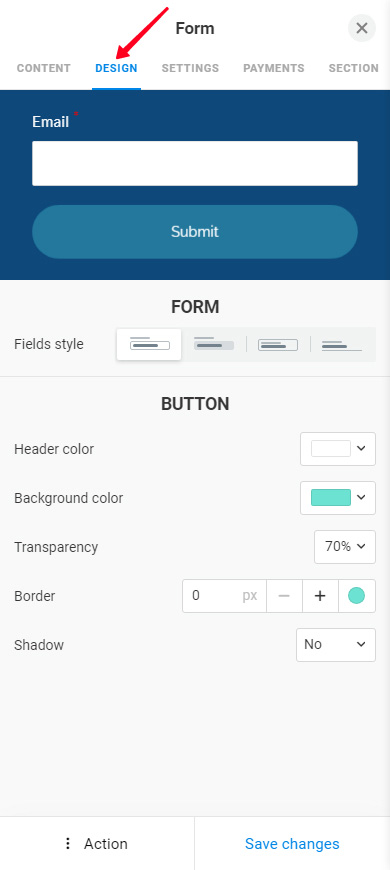
You can customize the block design in the Design tab.
Choose a Fields style option:
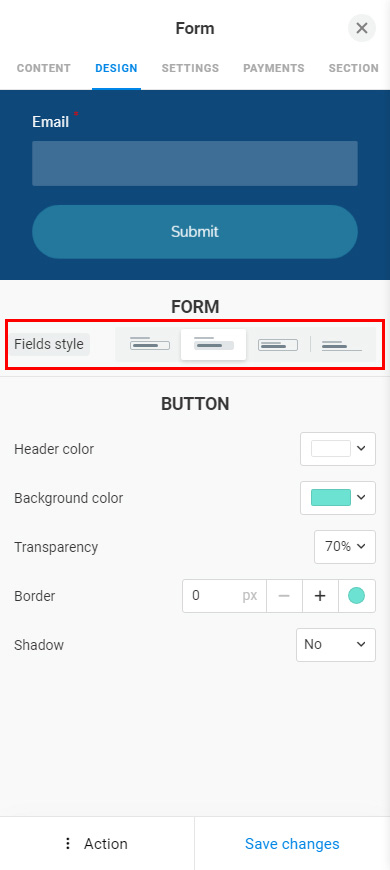
You can set the style simultaneously for all the Form and payments blocks on your Taplink. Read here how to do it.
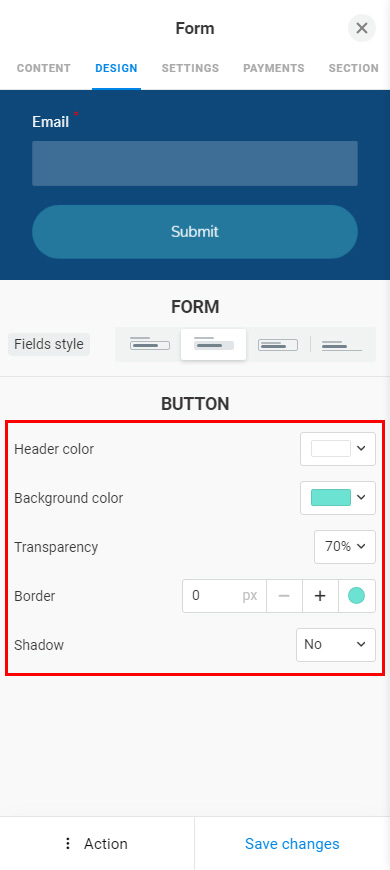
Adjust the button appearance. You can choose:
- Header color. Select the text color.
- Background color. Set the button color or gradient. Here we explain in detail how to do this.
- Transparency. Set the transparency of the button. The higher the value, the more transparent the button.
- Border. Set the thickness and color to add an outline to the button.
- Shadow. Add a shadow, here we explain its settings in detail.
Now let's see what you can adjust in the Settings tab.
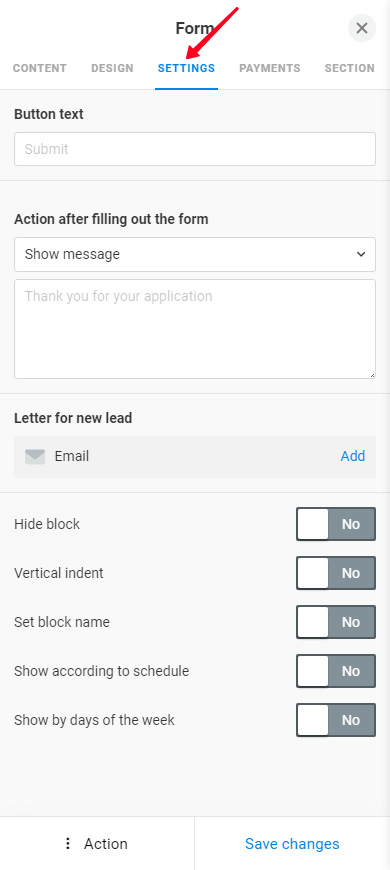
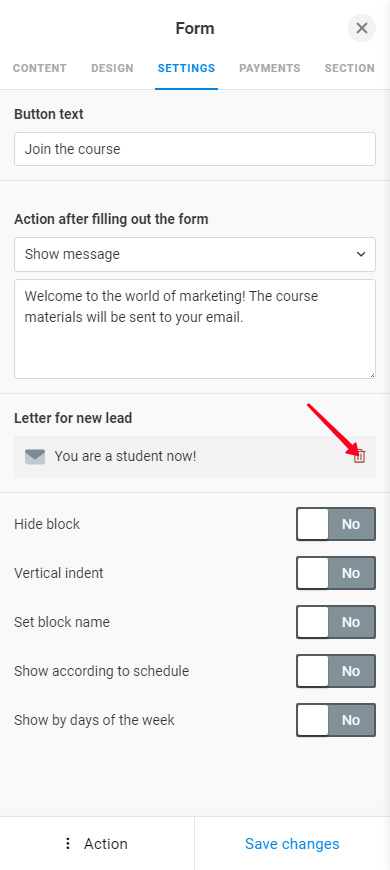
Here you can set:
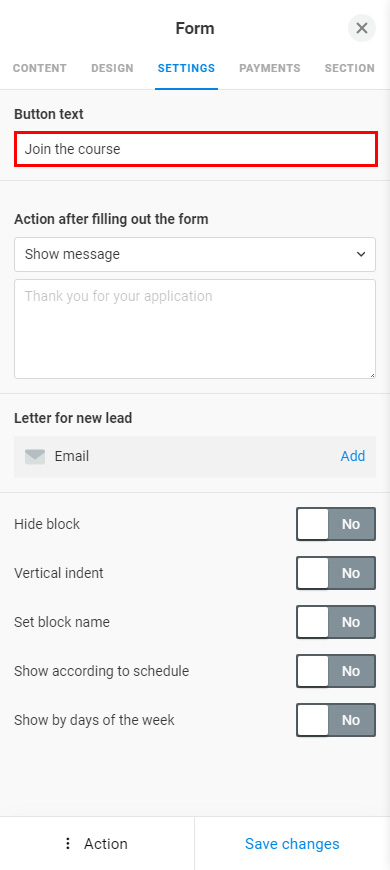
- Button text. Specify the text that will be displayed on the button. Otherwise, the default text "Submit" will be displayed.
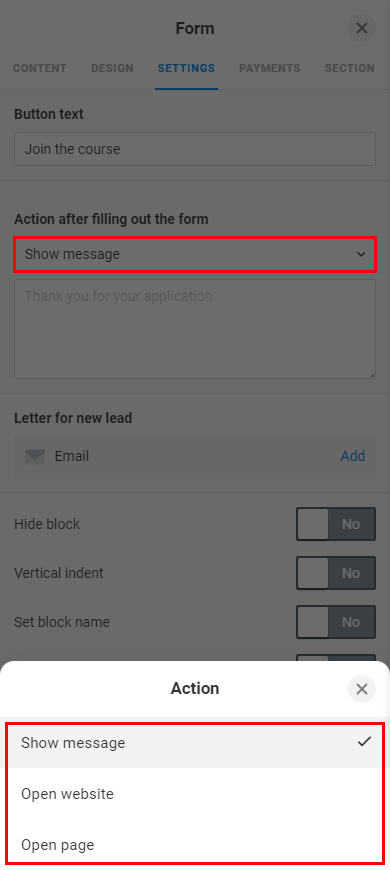
- Action after filling out the form. Select what happens when a user taps the button: a message shows, an external web page opens, or another page of your Taplink opens. Note, that if you set up payment acceptance, this happens after a user makes a payment.
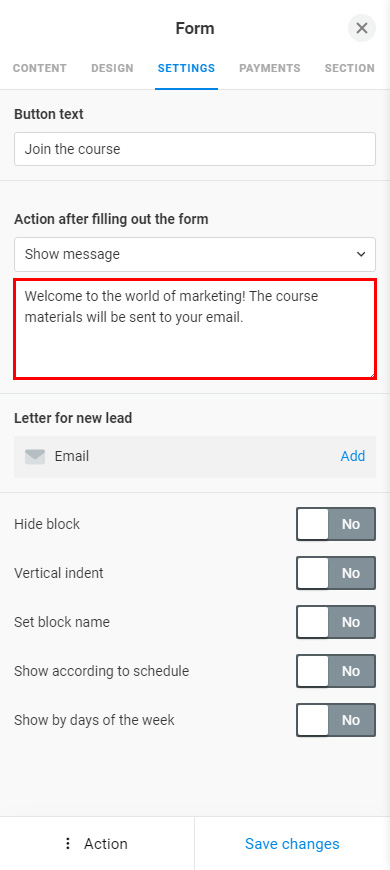
- The message text, web page URL, or a particular page of your Taplink. The information you need to specify depends on what you've selected in the previous setting "Action after filling out the form".
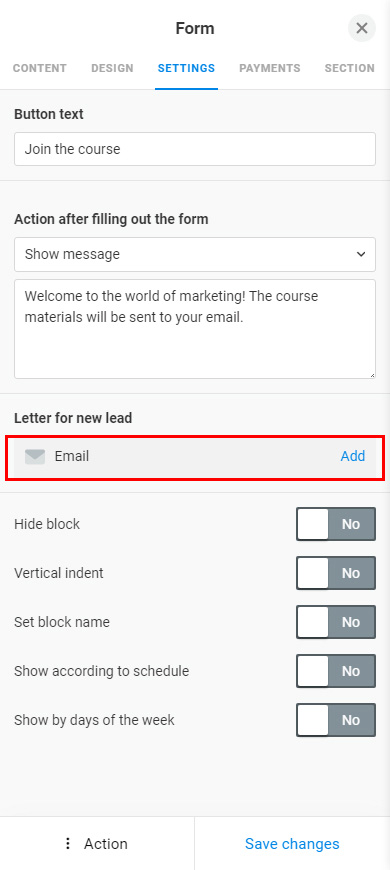
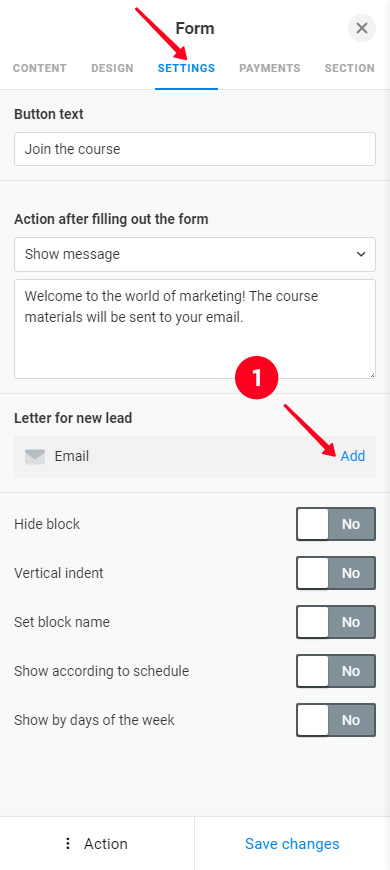
- Email for new leads. Add an email that will be automatically sent to each user who fills out the form. Read more below.
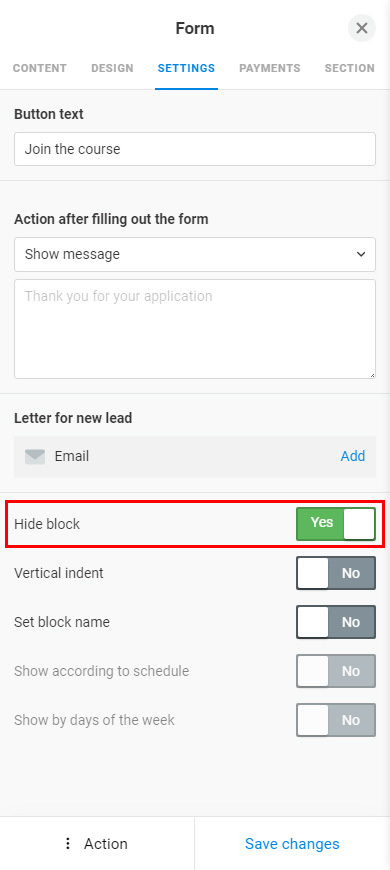
- Hide block. Activate the feature to hide the block. Deactivate the feature when you want to make the block visible again.
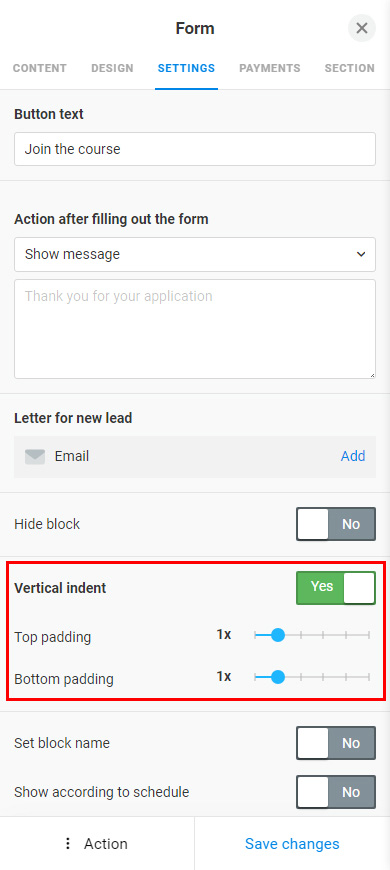
- Vertical indent. Activate the feature and select values for the upper and lower indents of the block. Deactivate the feature to make the indents default.
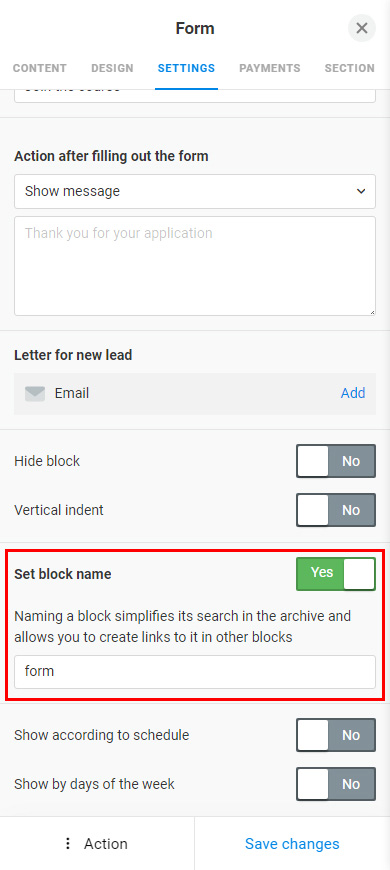
- Set block name. Give a name to the block, then you can add the block link to the navigation menu. Read here how to set up the menu.
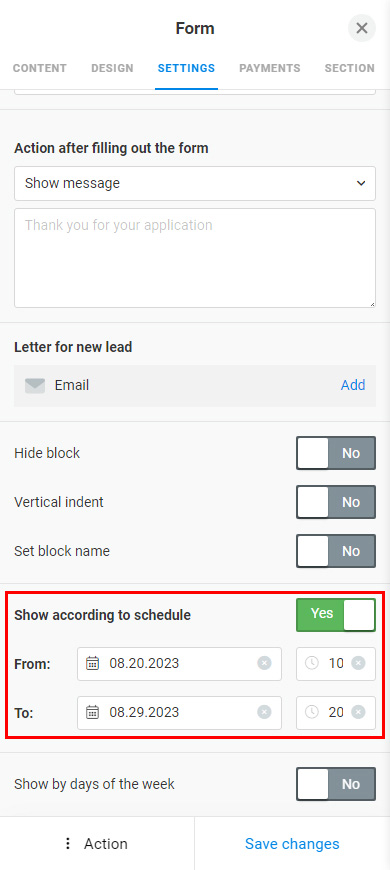
- Show according to schedule. Set the block display schedule accurately to the minute. Detailed instructions are here.
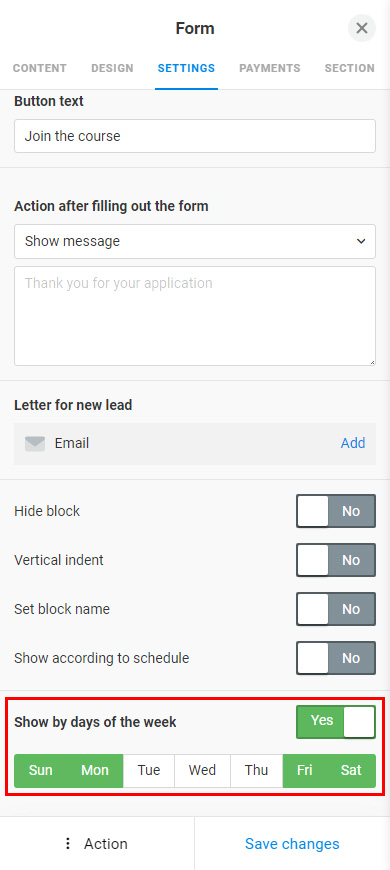
- Show by days of the week. Select the days of the week when the block will be displayed. Read the detailed instructions here.
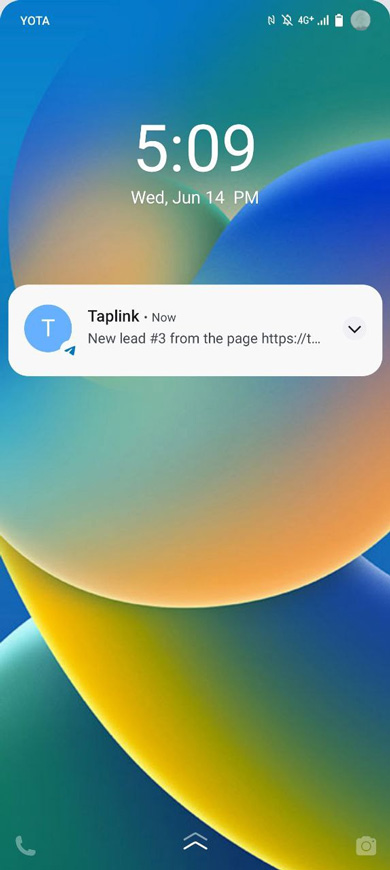
Now let's look at setting up automated emails for leads in detail.
The automated email for leads is sent to each user as soon as this user sends the filled-in form.
Create the automated email to enable its sending:
- Tap Add in the Settings tab.
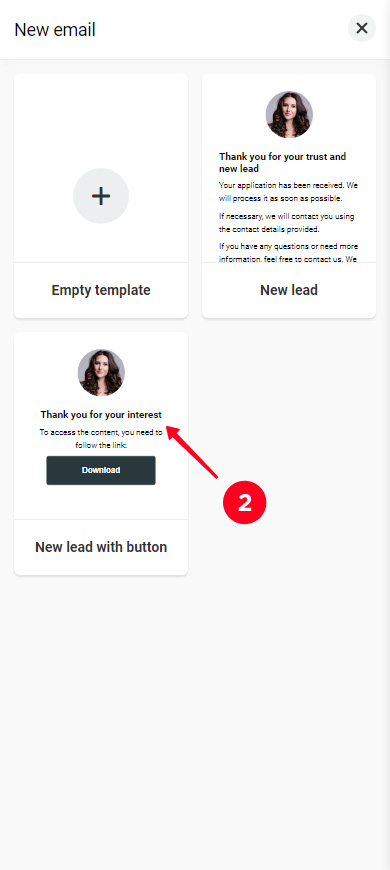
- You can choose a ready-made email or choose Empty template to create your custom email.
- Edit the email subject, if necessary: erase the existing one and write a new one.
- Specify the sender's name.
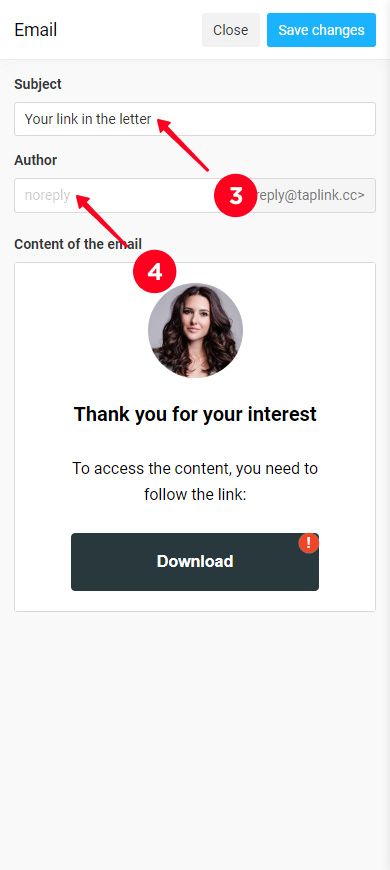
Now you need to customize the contents of the letter.
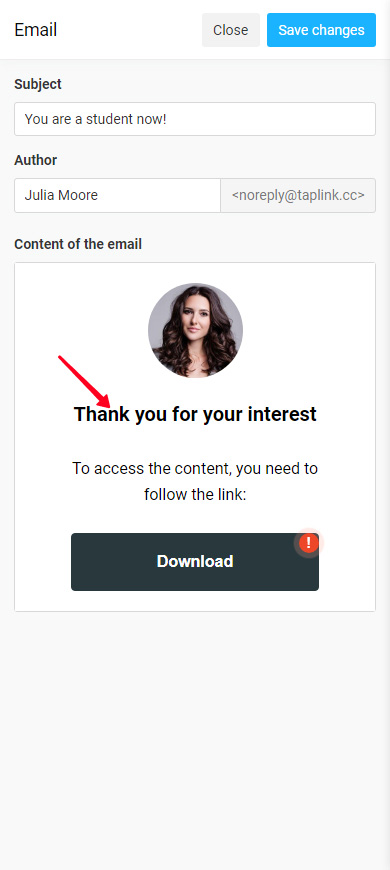
Edit the elements in the email.
Tap an element for this. If it's a text, erase it and write a new one.
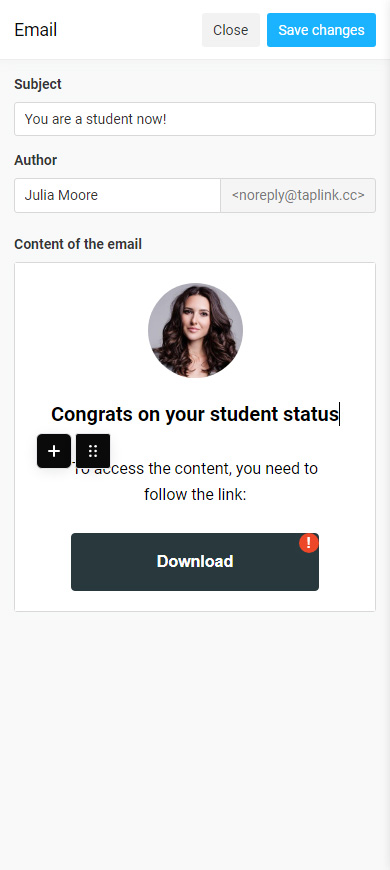
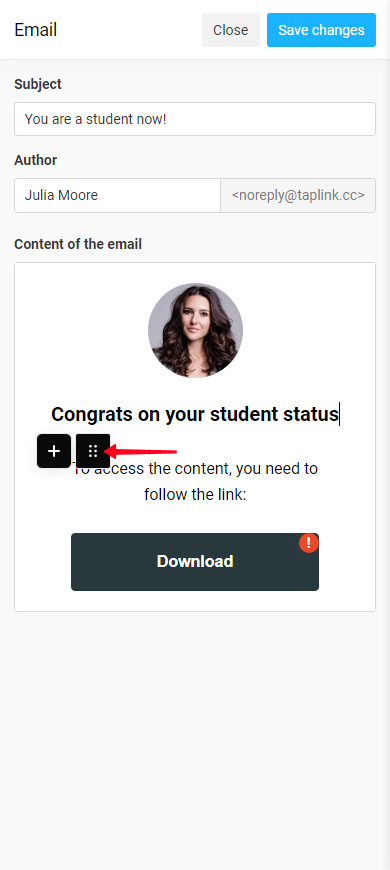
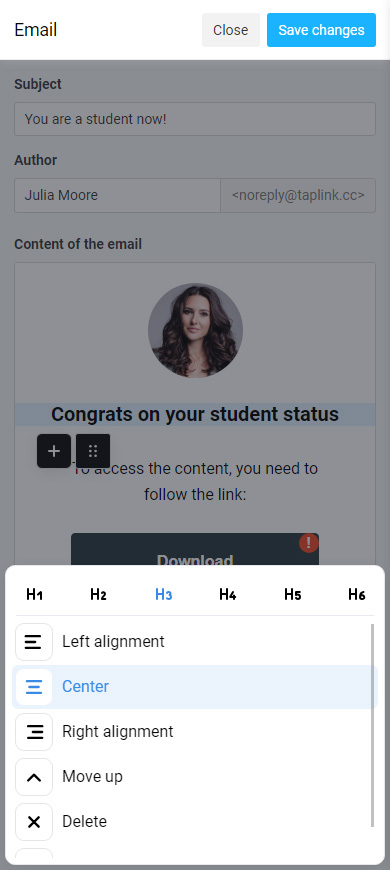
Tap the 6 dots to see more settings. Each element has different settings. Headlines, for example, have size and alignment settings. Also, all elements have moving and deleting options.
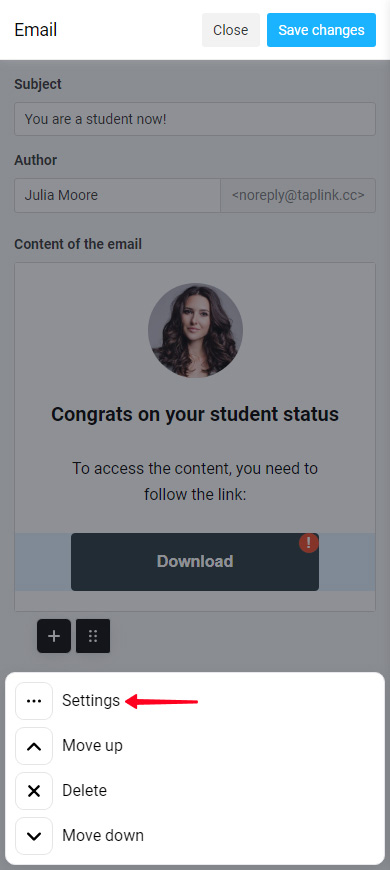
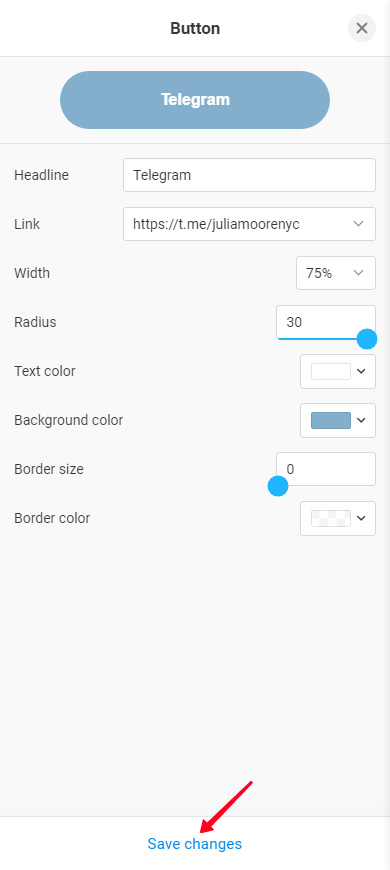
Some elements have advanced settings. When you tap the 6 dots near such elements, you can see the option Settings. For example, buttons have such advanced settings. They allow you to set the text on the button, specify a link, and customize the design:
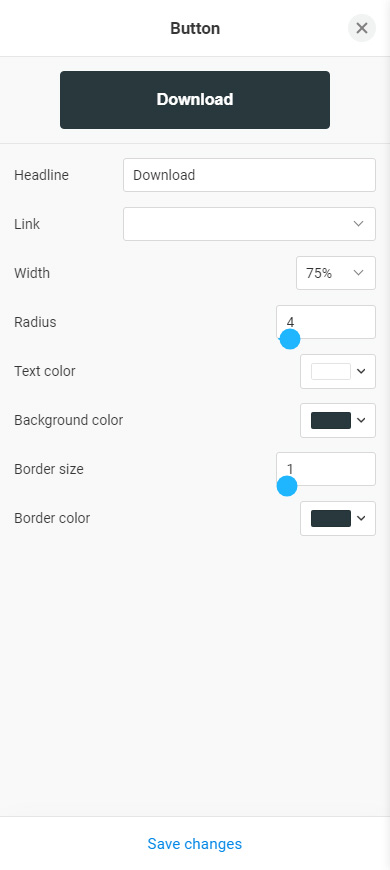
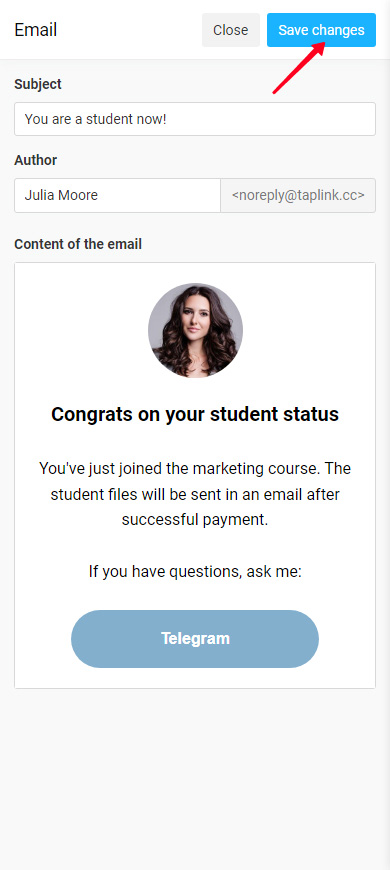
Once you've adjusted the advanced settings, tap Save changes.
Edit other elements in the letter in this way.
Note, that the Avatar image is set automatically, it is always the same image that you've set in the Avatar block on your Taplink. If you want to change the Avatar image in the email, you need to change the image on the Taplink. Read how to do it here.
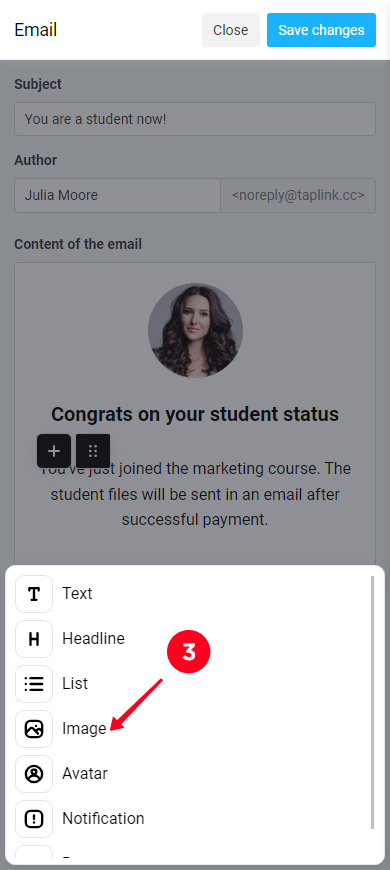
You can add a new element to the email:
- Text.
- Headline.
- List.
- Image.
- Avatar.
- Notification (framed text).
- Button.
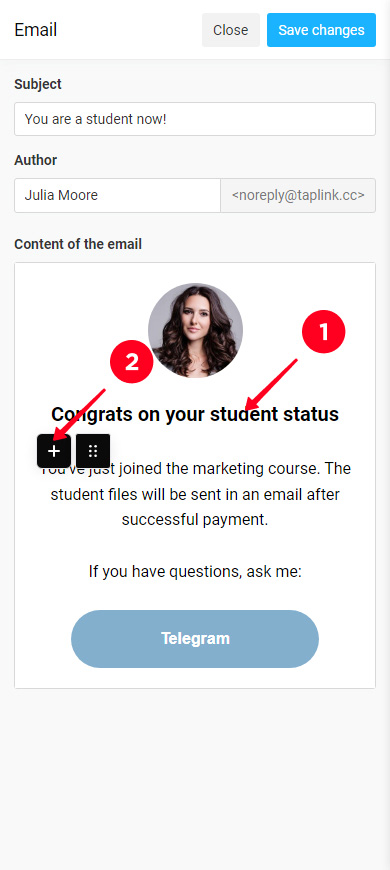
Here's how to add an element:
- Tap the element below which should be the new element.
- Tap the plus.
- Select an element on the list.
- Fill in the fields or write text. We selected the image to show an example, so we need to upload an image from our device at this step.
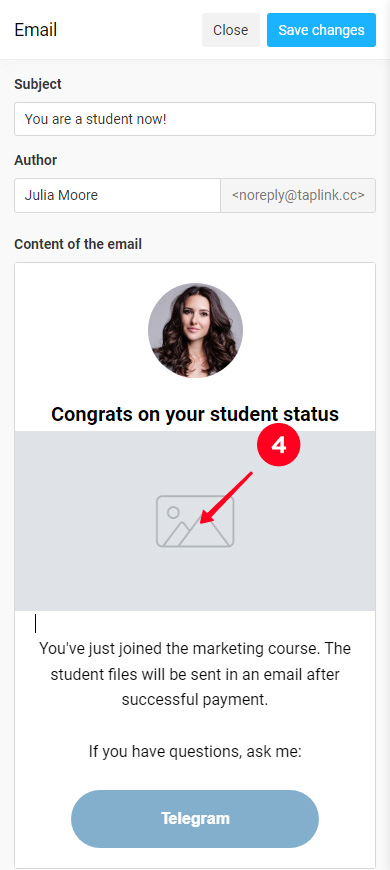
Then edit the element as explained above.
You can remove an unnecessary element from the email:
- Tap the element.
- Tap the 6 dots.
- Select Delete.
- Select Delete again.

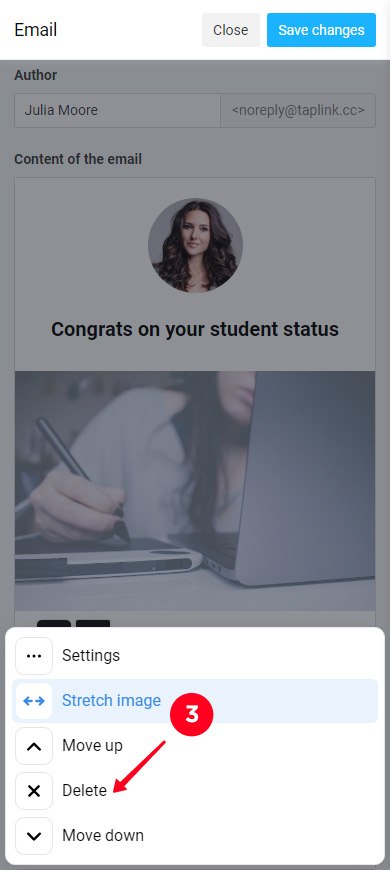
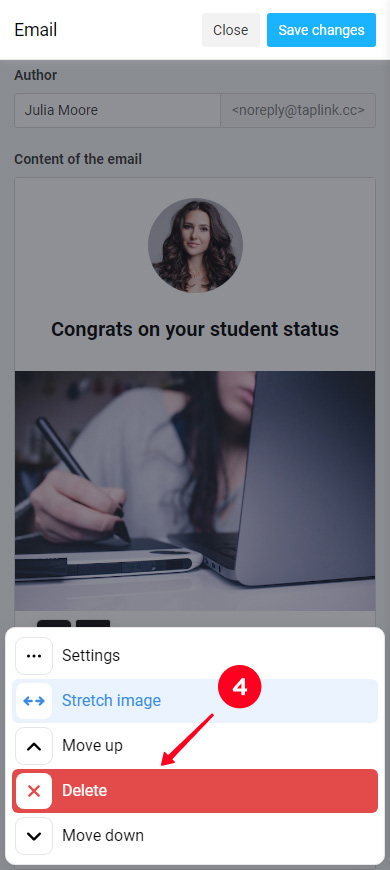
That's it, the element has been deleted.
After setting up the automated email, tap Save changes.
If you no longer want the automated email to be sent to users, delete this email. Note, that the deletion is permanent. Later you will be able to create a new email though.
Tap the trash icon to delete the email:
You can accept payments using the Form and payments block. You must have a connected payment provider for this. If you are not connected to a payment provider yet, read how to do it here.
When a payment provider is connected, you can set up payment acceptance in the Payments tab:
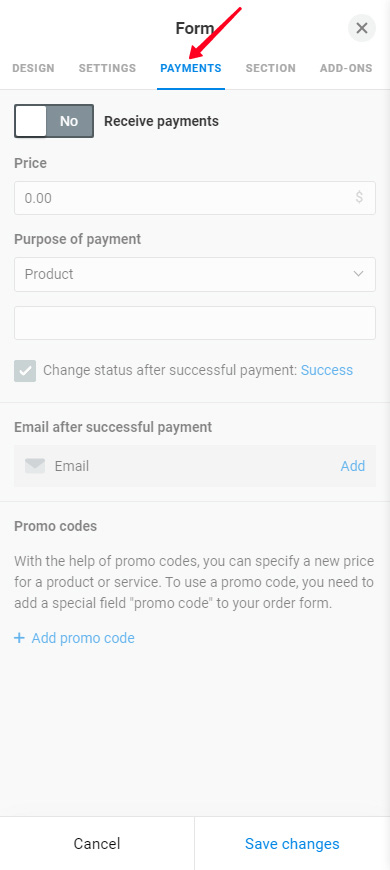
Set up payment acceptance:
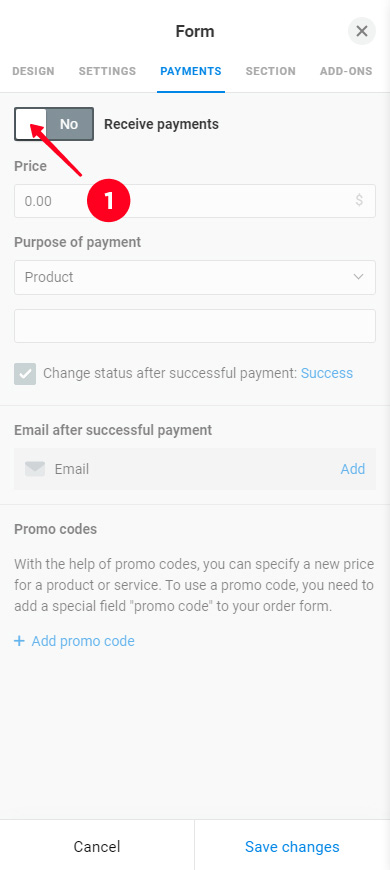
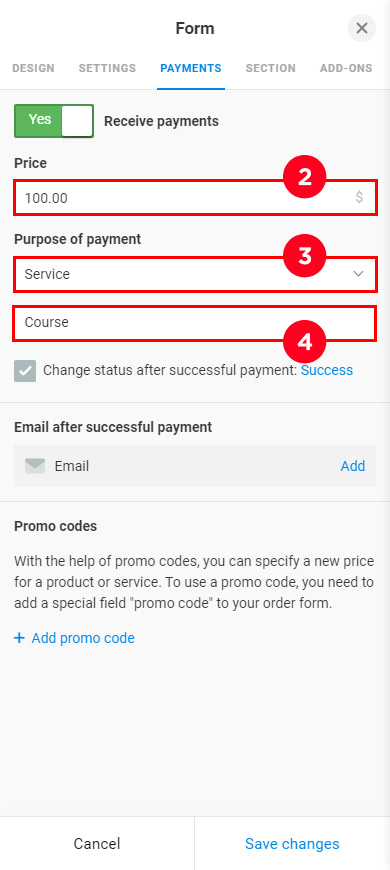
01. Activate Receive payments.
02. Set a price. Note, the currency's been set automatically for the whole profile when you signed up. It was determined by your location. You can change the currency in the profile settings in the General tab.
03. Select the product or service option.
04. Give a name to the payment purpose so that you can later find these leads among others. Below we explain how to find them.
05. Optionally, you can disable automatic status change for leads when users make payments. Uncheck the box for this. You may need this for sorting the leads, you can read more about the lead status and sorting later below.
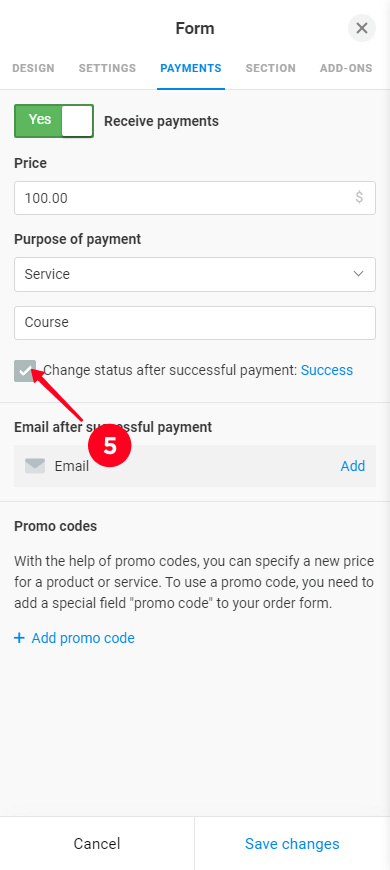
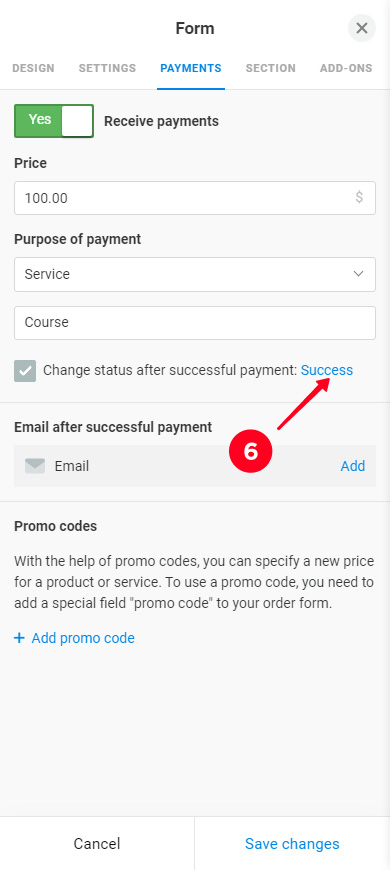
06. Optionally, if you've not disabled the automatic lead status change, select the new status that must be assigned to the leads. By default, it is Success. You can change it to In progress.
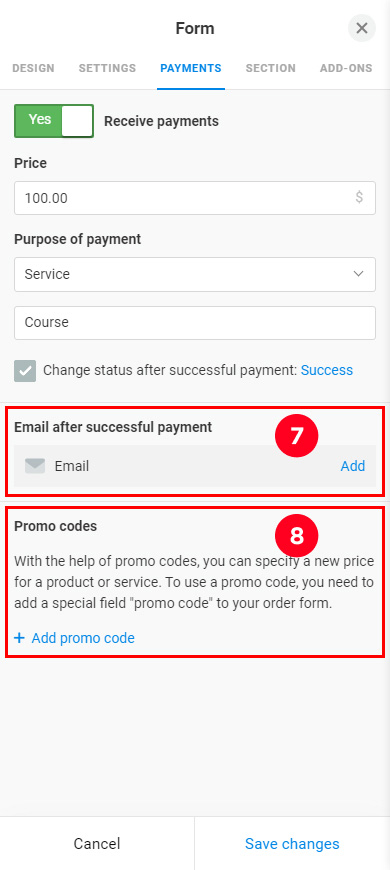
7. You can also set up the automated email for paying users. Read the instructions below.
8. You can add promo codes for customers. More on this below.
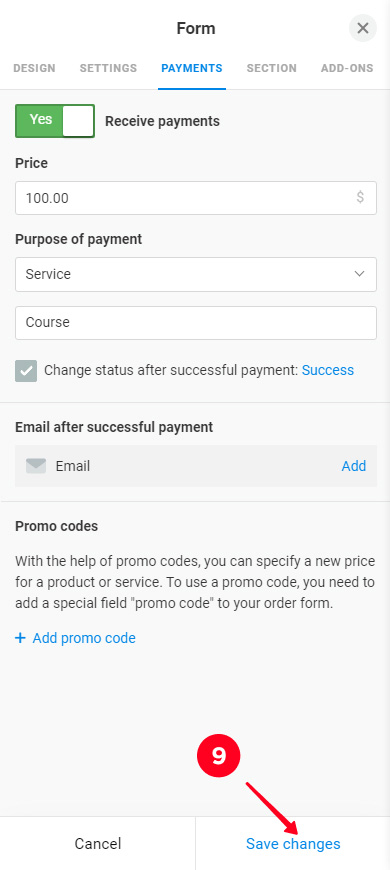
9. Tap Save changes.
Now let's look at setting up automated emails for paying users and promo-codes in detail.
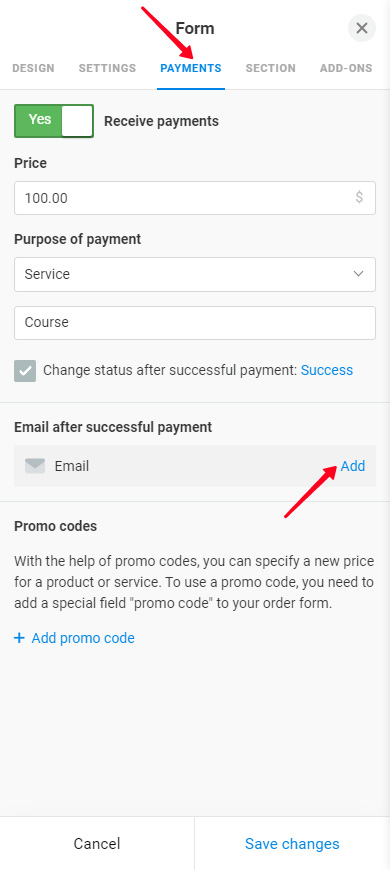
The automated email for paying users is sent to each user who has successfully completed the online payment after submitting the form.
Note, that if a user chooses a Manual payment method when paying, the email is not sent immediately. You need to manually change his payment status, then the email will be sent.
The automated email starts to be sent to the paying users once you create it. Tap the Add next to Email in the Payments tab and create the email as explained above.
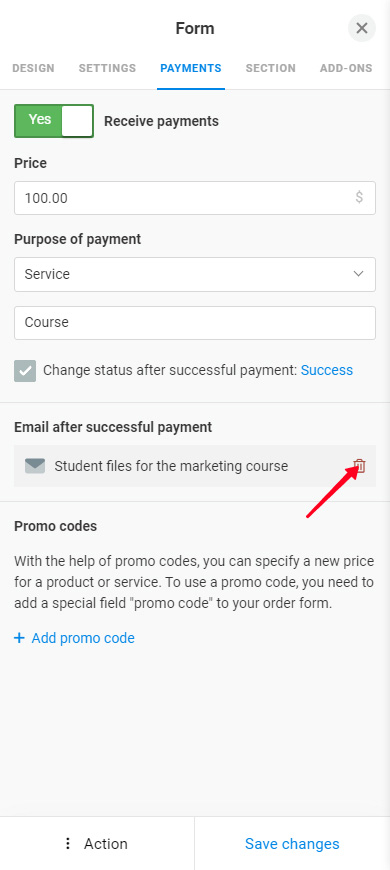
If you no longer want the automated email for paying users to be sent, delete this email in the form settings. It will be permanently deleted. But you will be able to create a new one.
Tap the trash icon to delete the email.
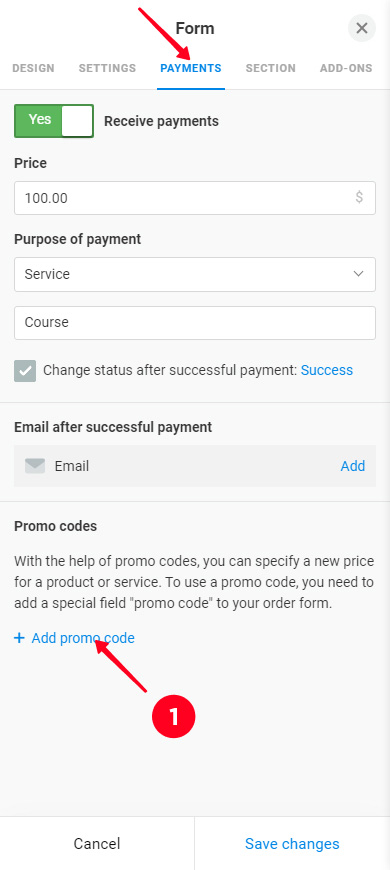
If you provide discounts on special occasions, set up promo codes in the Payments tab:
- Tap + Add promo code.
- Specify the promo code.
- Specify the price at which a product is sold with the promo code.
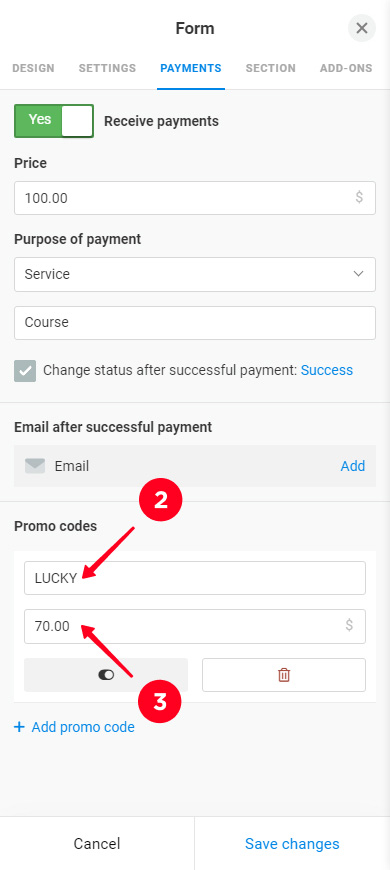
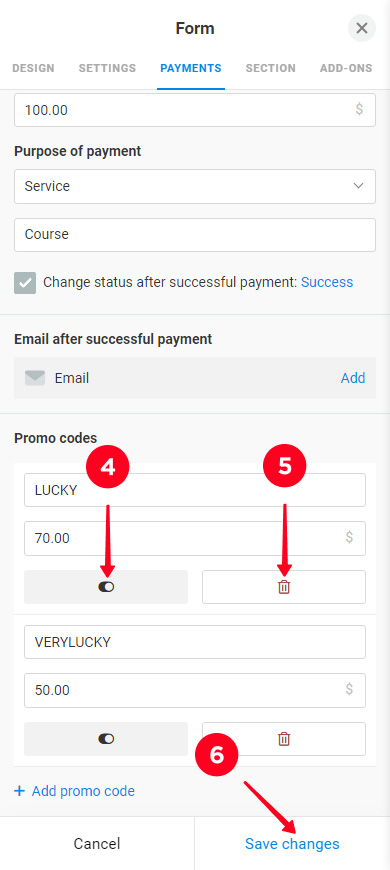
- Optionally, add more promo codes. Repeat steps 7–9 for this. At any time, you can disable a promo code. Tap the toggle next to the promo code for this. When you want to enable this promo code again, tap the same toggle.
- You can delete a promo code. Tap the trash icon next to it for this.
- Tap Save changes.
A Section can make a Form and payments block more noticeable on your page. It is useful if the block is located on the main page of your Taplink. Read here how to apply it in the Section settings (screenshot 1). Look what a Form and payments block can look like with an applied Section (screenshot 2):

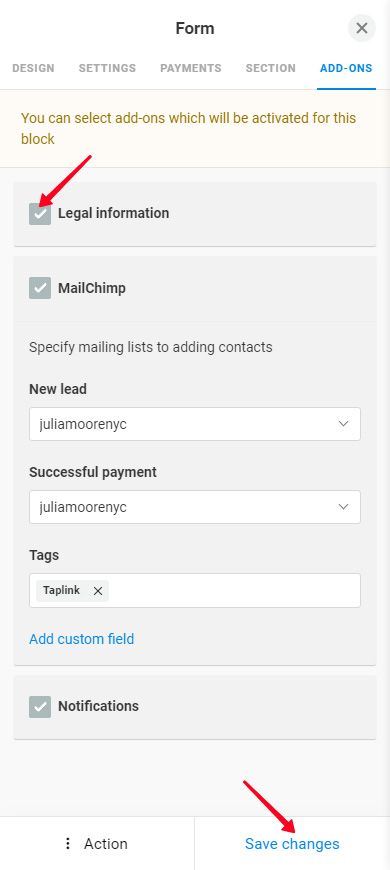
You can use add-ons for a Form and payments block. First, you need to activate and set up them in your profile settings. Go to the Add-ons tab and tap the link for this.

The following add-ons may be useful for a Form and payments block:
- Newsletter services. You can connect MailChimp, GetResponse, Automizy, and other services. Then the contact info received with the block will be automatically imported into these services.
- Notifications. Every time a user fills out a form or pays, the Taplink bot sends you a message in Telegram, Slack, or by email.
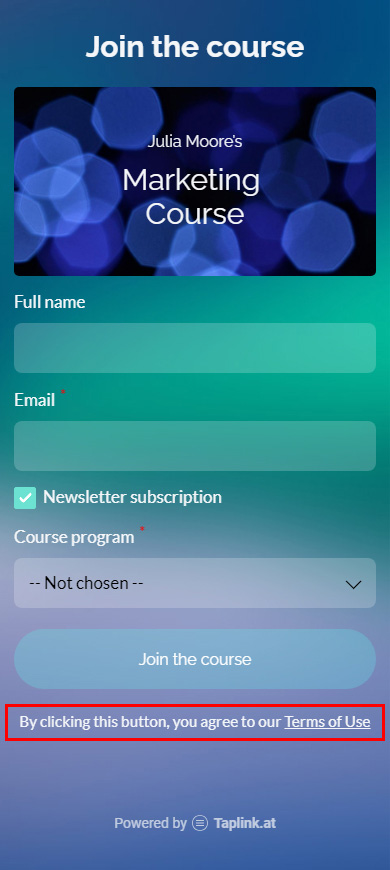
- Legal information. A text and a link appear under the form. The link can open a window or a web page with legal information.
The activated add-ons are displayed in the Add-ons tab of the block. Note, that only add-ons that can be used with the block appear in the tab. You can adjust some of the add-ons there.
You can disable an add-on for the block. Uncheck the box next to the add-on in the block settings. Once you need the add-on for this block again, check the box.
When you have set up the block, tap Save changes.
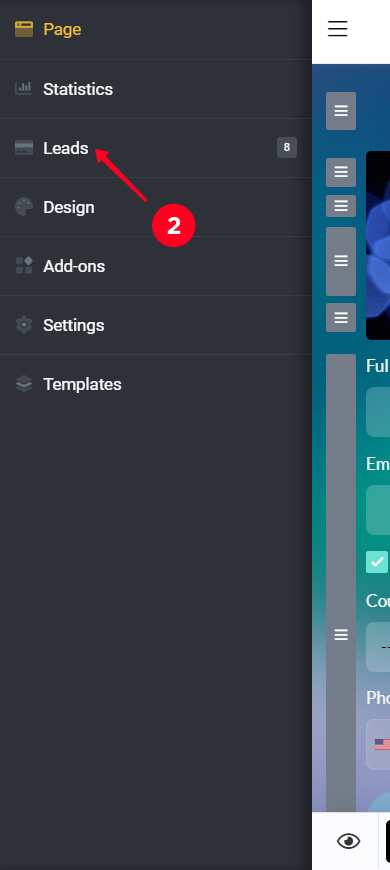
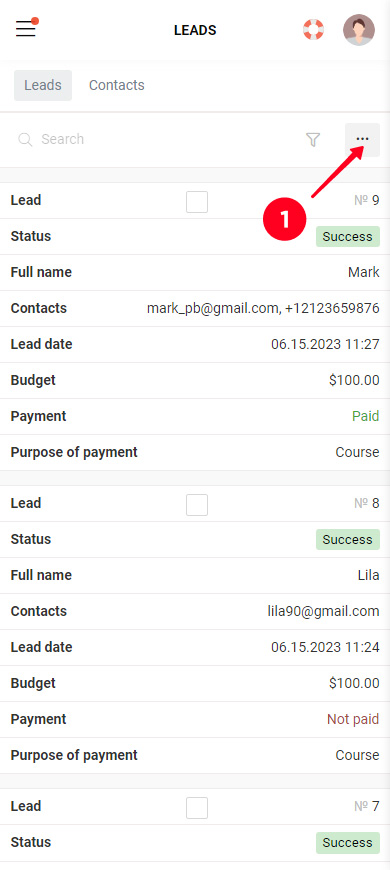
You can view and work with the data, which users send to you through the forms, in the Leads section. Get there from your Taplink profile:
- Tap the three lines.
- Select Leads.
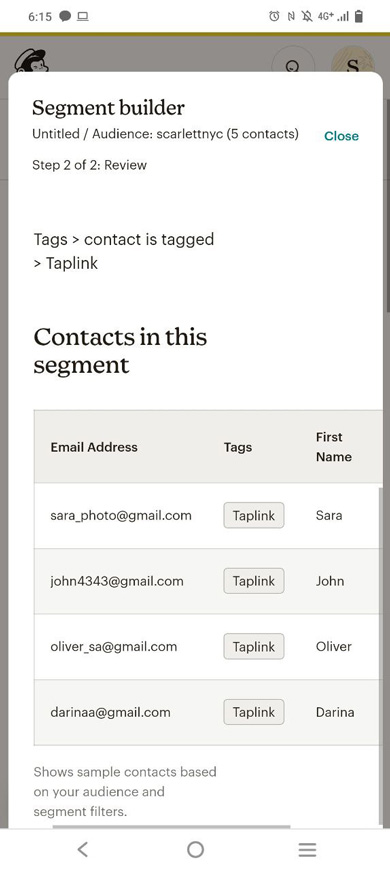
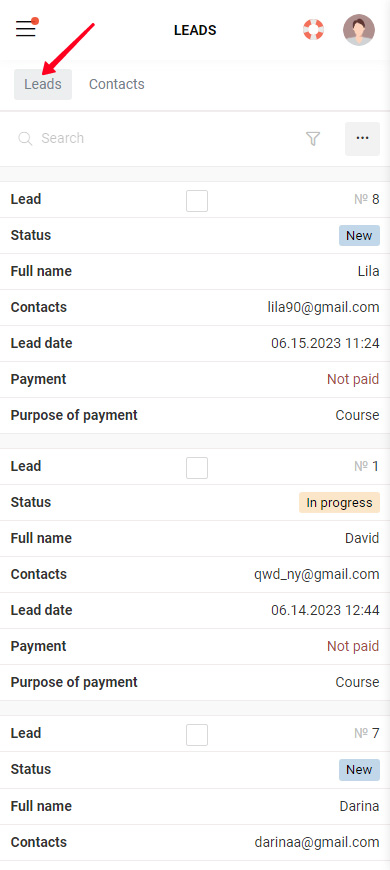
There you can see two tabs: Leads and Contacts.
The Leads tab contains a list of leads and all information on them.
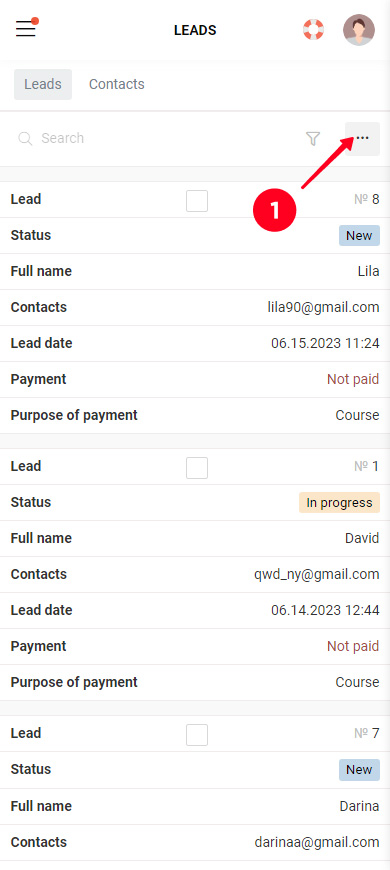
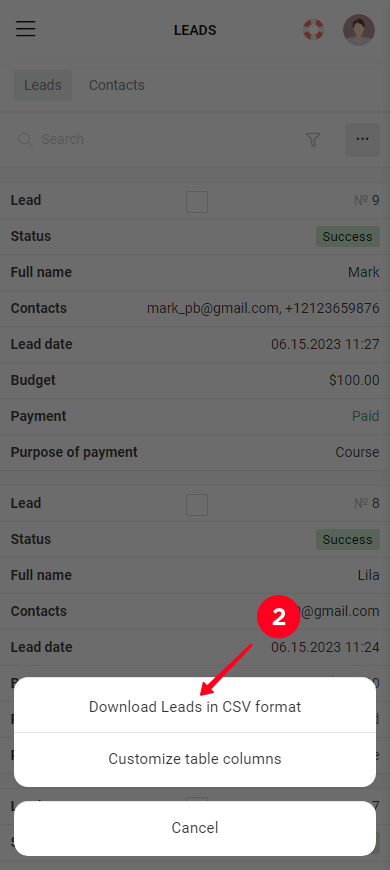
Select the lead information that is displayed:
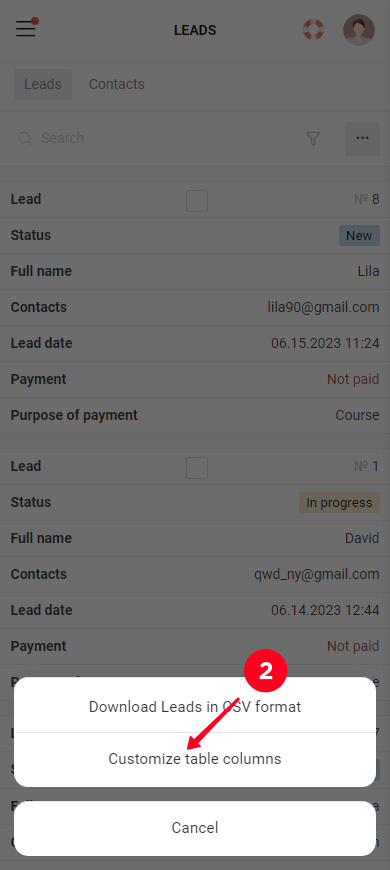
- Tap three dots.
- Select Customize table columns.
- Check the boxes next to the information that should be displayed.
- Tap Save changes.
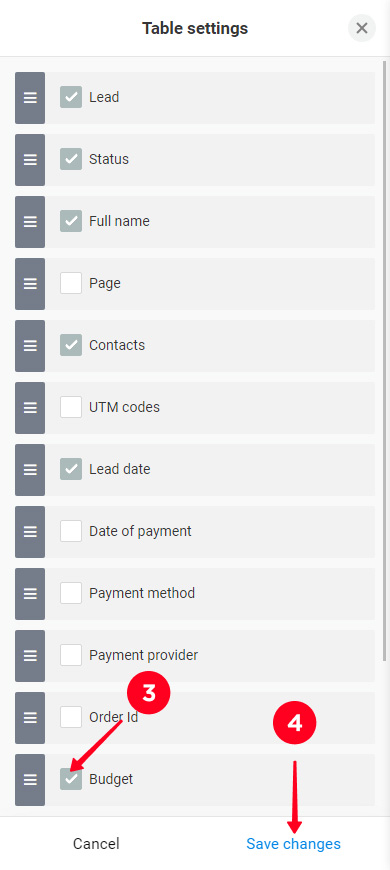
Now only the selected lead information is displayed.
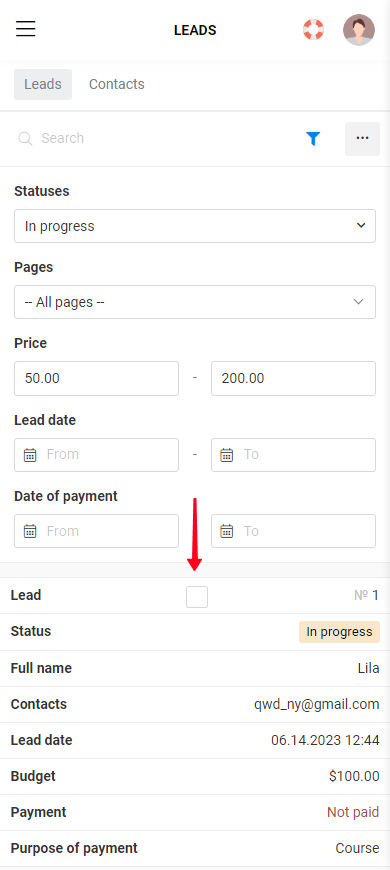
You can narrow the set of displayed leads. For example, make only the leads with the New status or received from a specific page displayed. Use the filter for this:
- Tap the funnel icon.
- Fill in the necessary fields. You can fill in one or several fields.
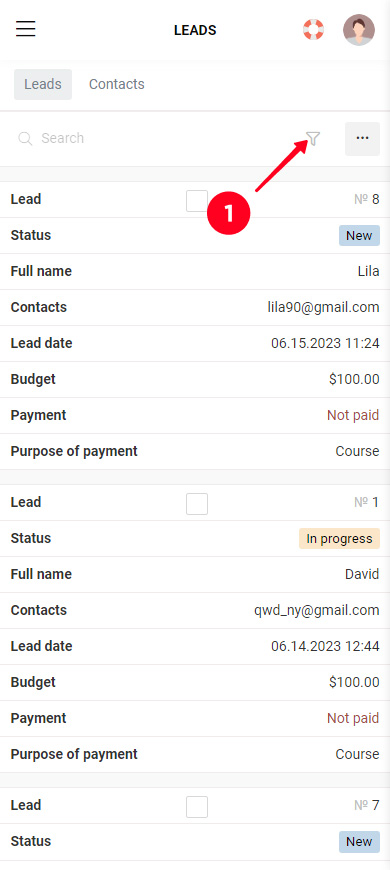
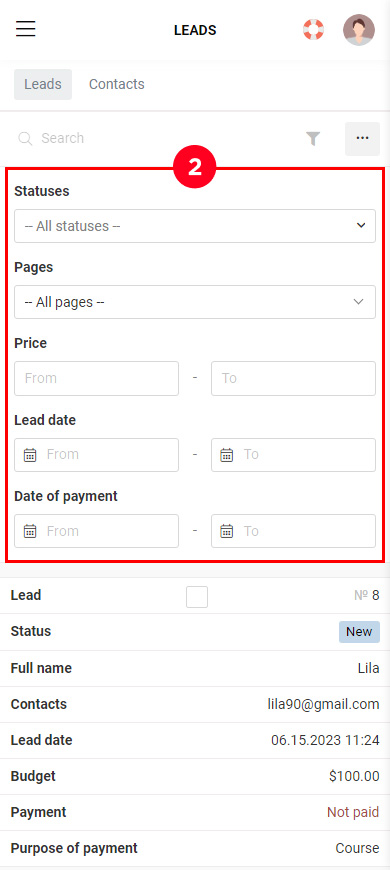
Now only leads with the set parameters are displayed.
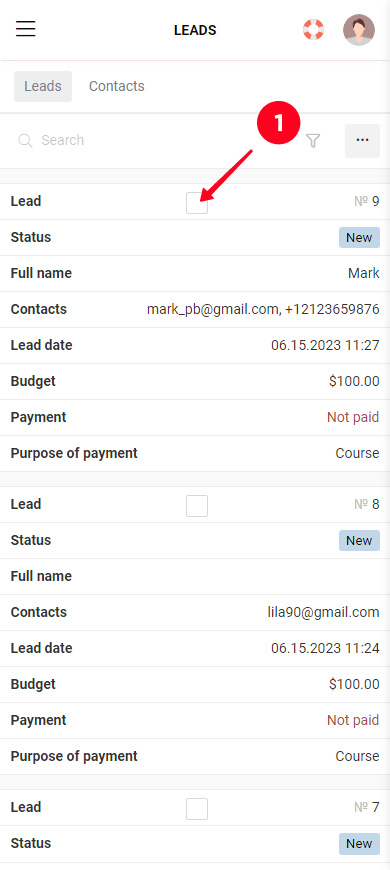
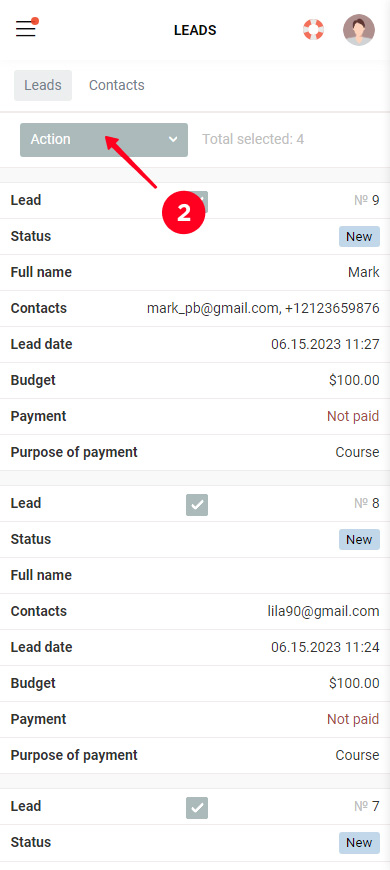
You can process multiple leads at once or each lead separately.
You can change the status of several leads or delete them at once:
- Check the boxes above the leads you need.
- Open the Action list.
- Select a status or Delete.
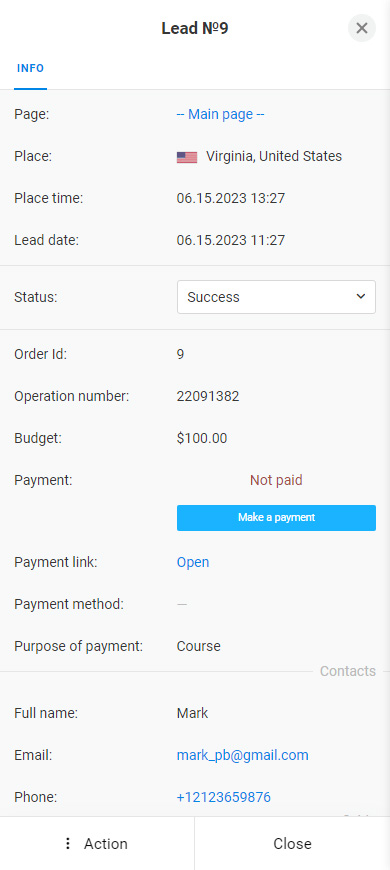
Tap any field of the lead you need so that you can view all the information on it and process it.
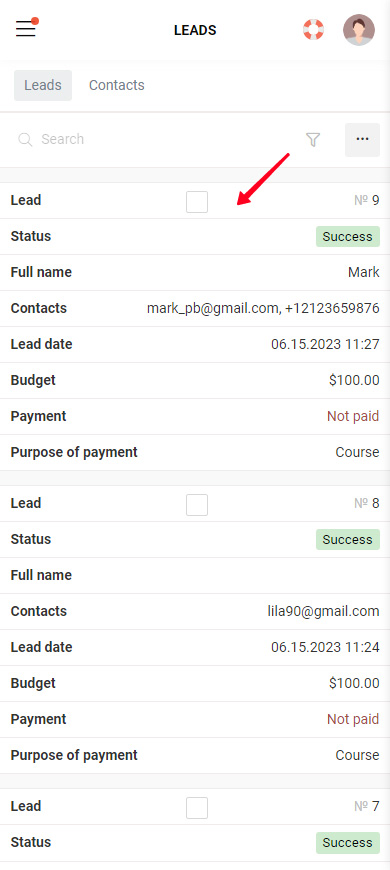
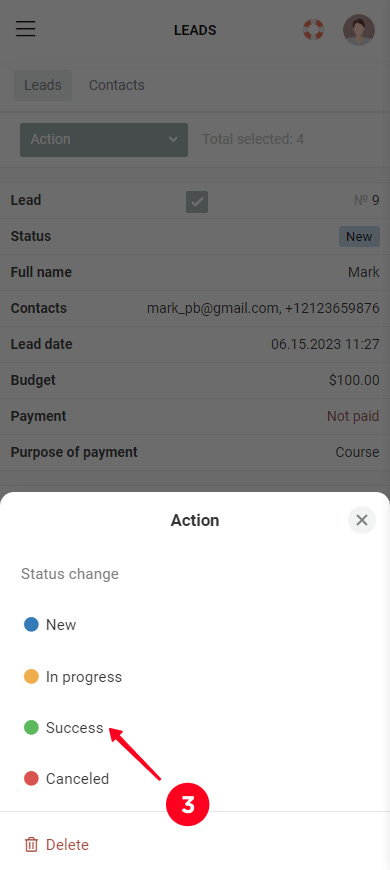
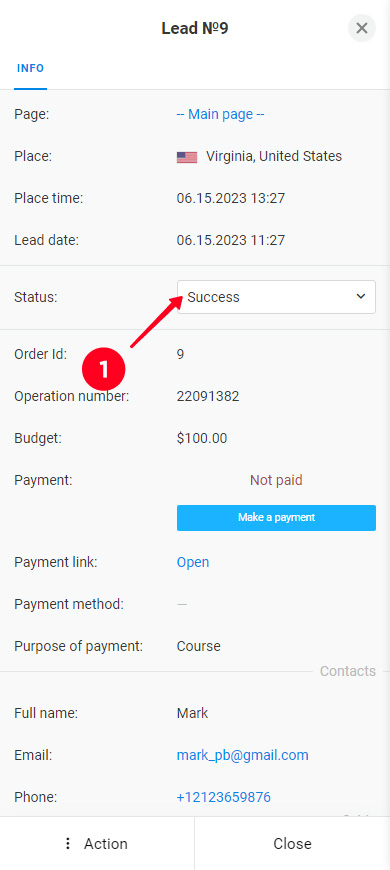
Change the status of a lead:
- Tap the Status list.
- Select a status.

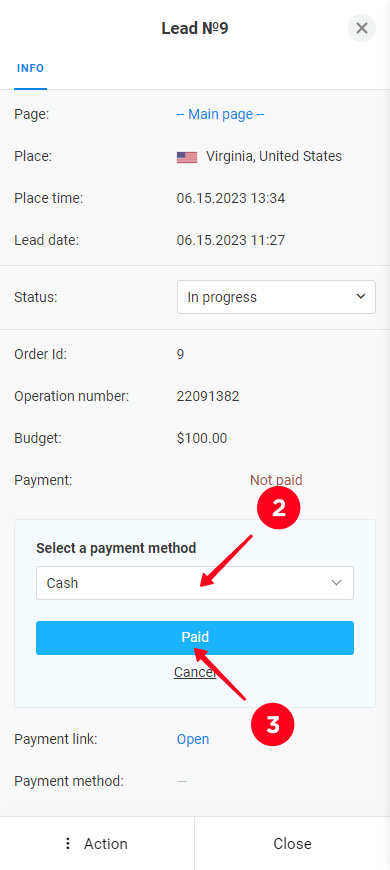
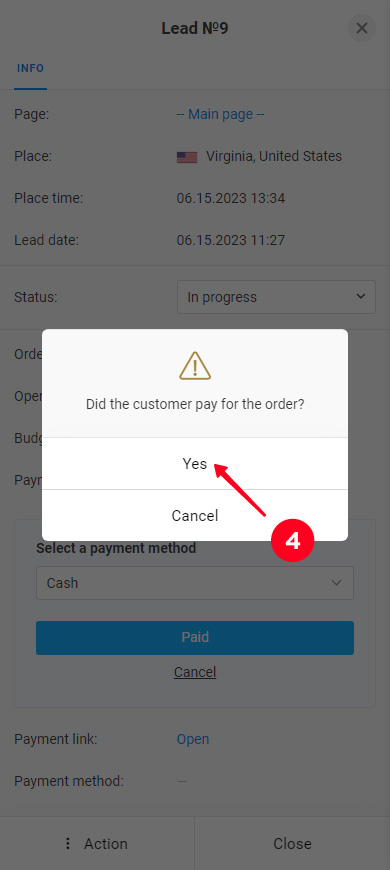
Change the lead payment status:
- Tap Make a payment.
- Select a payment method.
- Tap Paid.
- Tap Yes to confirm the change.

If you want to process the leads in a third-party CRM, download them:
- Tap the three dots.
- Tap Download Leads in CSV format.
- Tap Download.
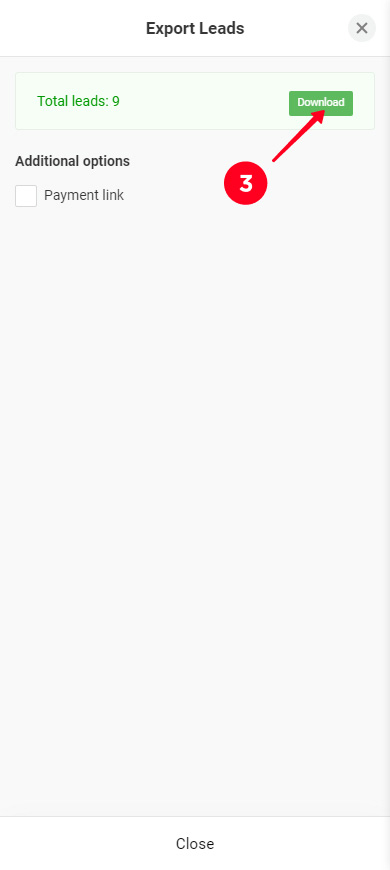
All information about the leads has been downloaded.
The Contacts tab contains only the contact information of your leads.
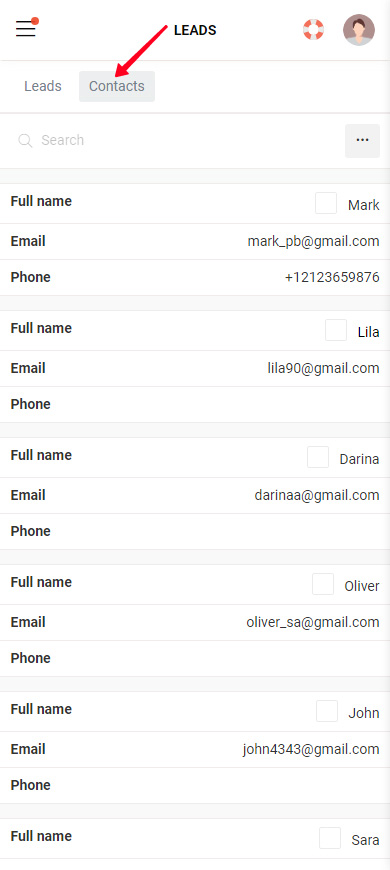
You can download all the contact information:
- Tap the three dots.
- Tap Download contacts in CSV format.
- Tap Download.

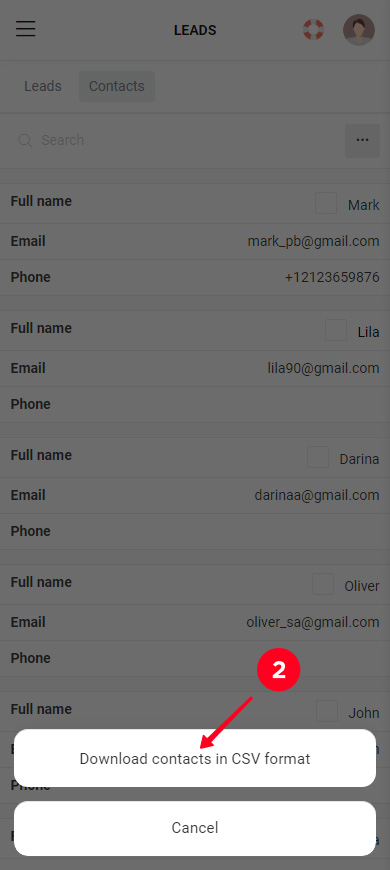
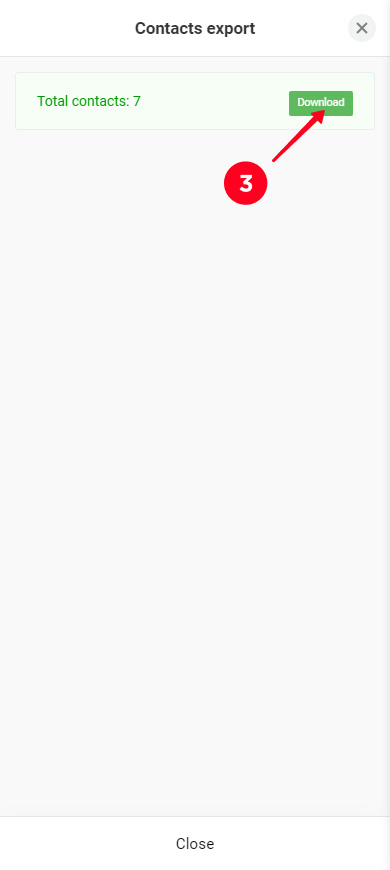
The contact information has been downloaded.
This is all you need to know about the Form and payments block on Taplink. Next, you can read how to present your product or service using the Image carousel or Media and text blocks. A good presentation means more leads!