Digital products
This is a guide about the Digital products block. Read the full guide to learn everything about how to add and adjust the block, or go right to a specific section:
Also, you may want to read additional information like:
The Digital products block allows you to sell digital products instantly. You upload a product to your Taplink, then, users pay and immediately get access to it. The block is good for selling:
- Guides.
- E-books.
- Courses.
- Templates and layouts.
And many more.
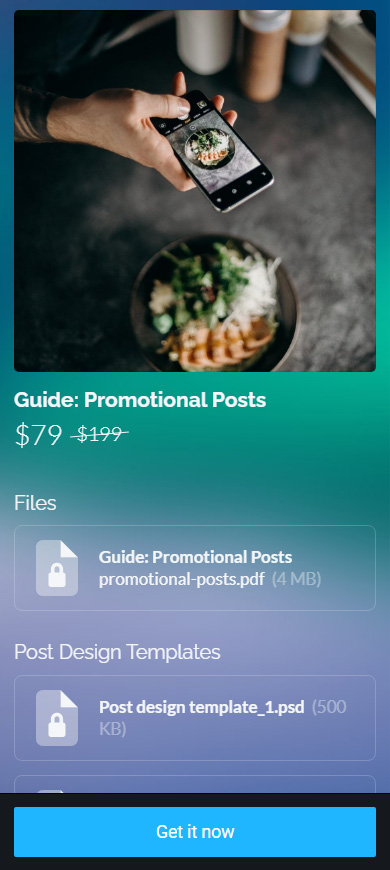
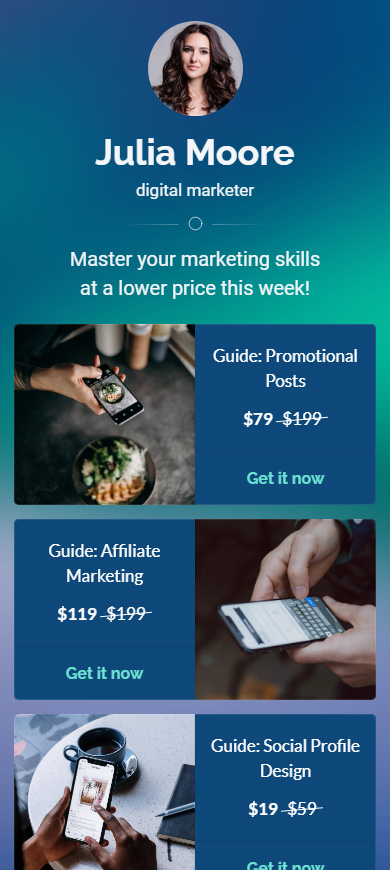
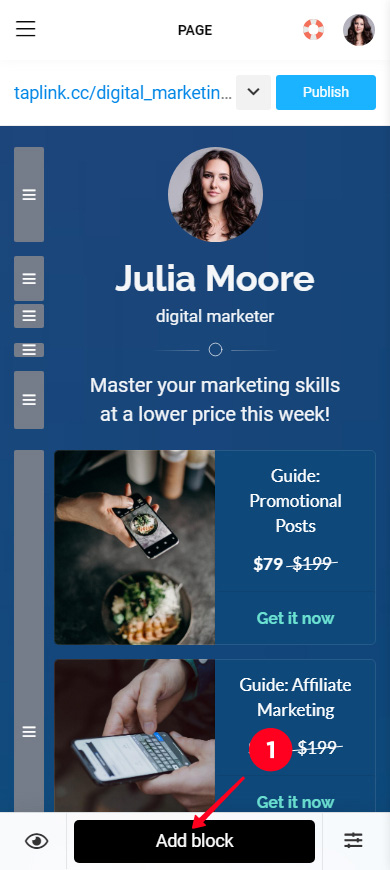
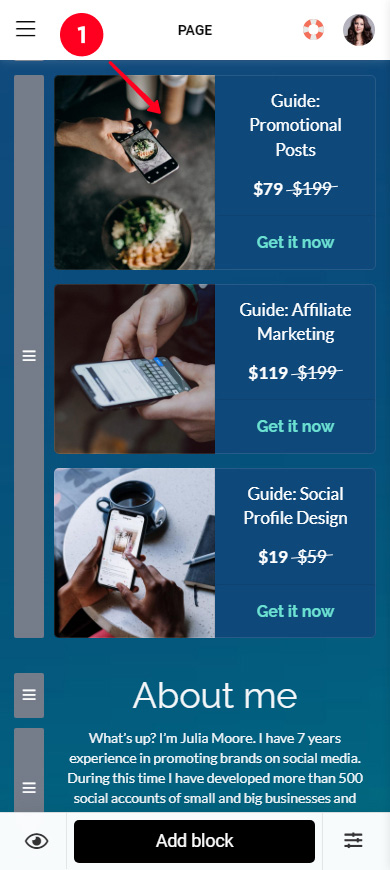
Here is an example of a Digital product block with 3 added products (on the left), and a product page (on the right):

Taplink does not take a commission. However, remember that your payment processor may charge a commission.
You can add a Digital products block if you have:
Add a Digital product to your Taplink when you have upgraded your plan to the Business and set up payment acceptance:
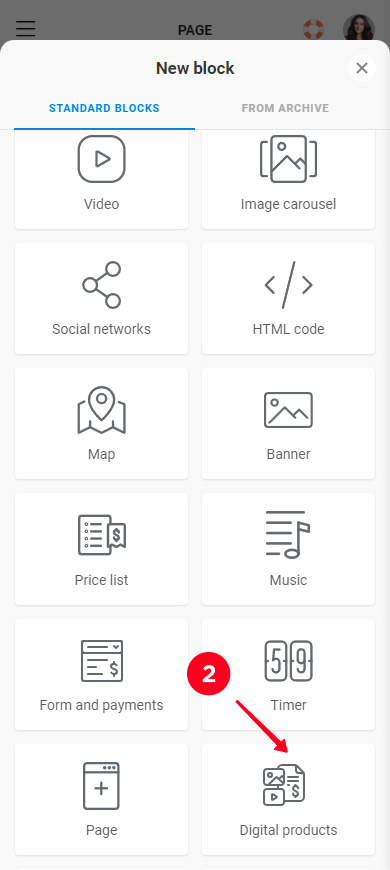
- Tap Add block.
- Select Digital products.


Now you need to add at least one digital product.
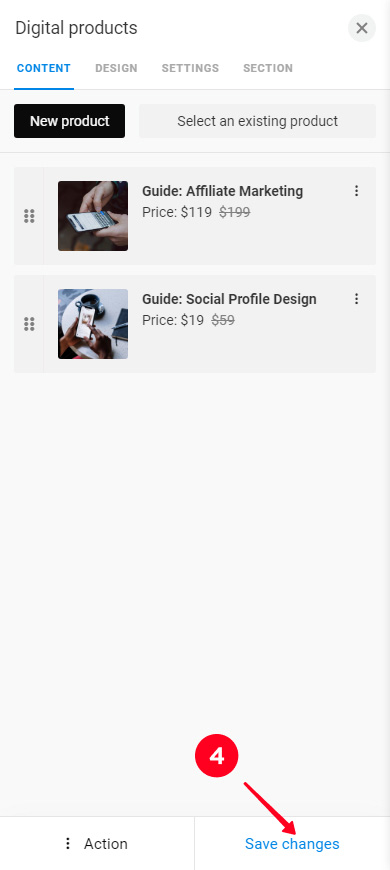
Tap New product to add a digital product:
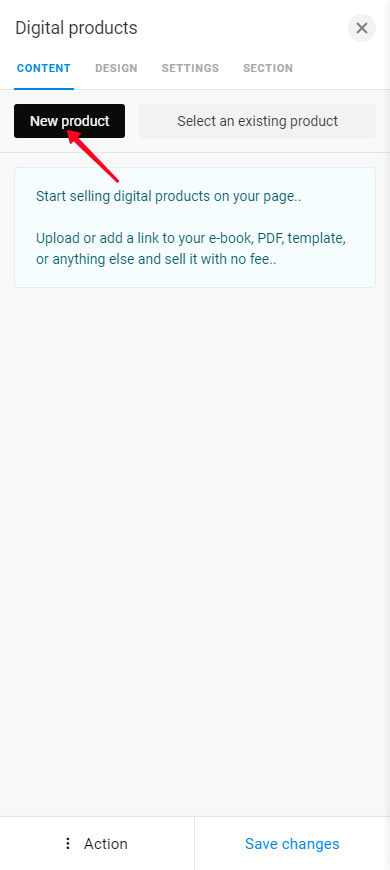
This takes you to the product settings.
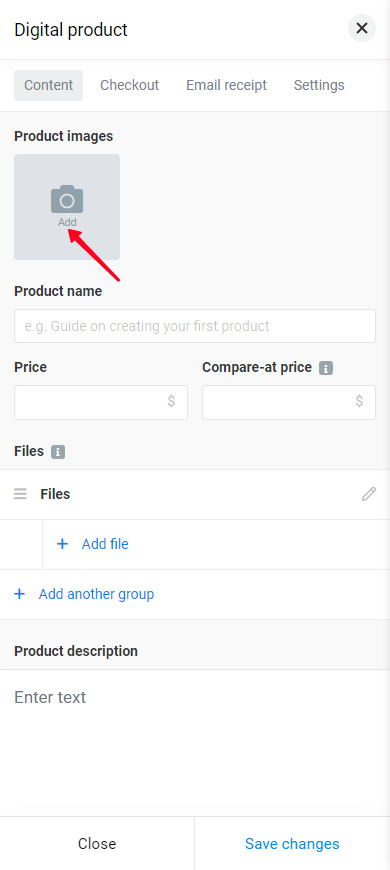
You need to add at least one photo. Tap Add and select a photo on your device.
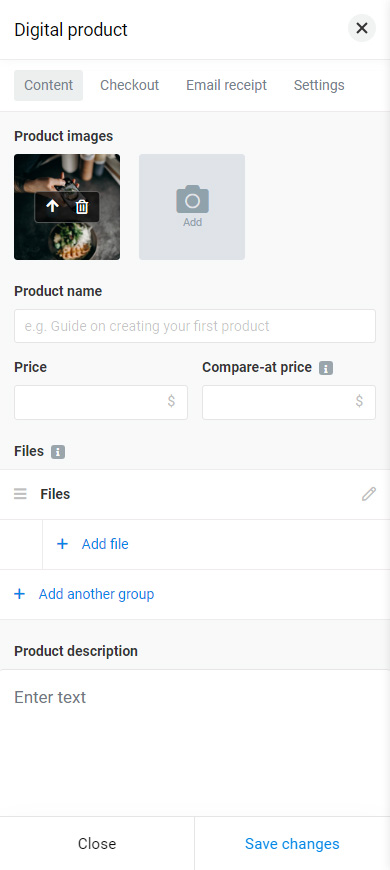
Add more product photos in the same way if necessary. We recommend using photos that have the same aspect ratio.
Fill in the Product name field:
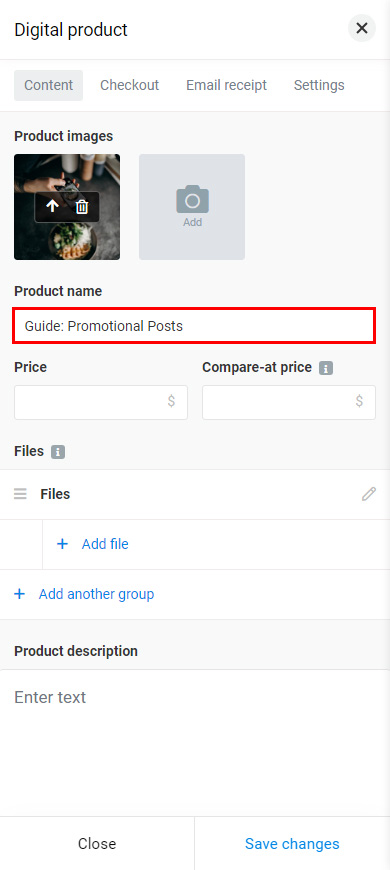
Fill in the price fields:
- Price. This is the current price that one has to pay to get the product.
- Compare-at price. This is a higher price that the product had. You add it optionally to emphasize that the offer is profitable. It will be a crossed-out price next to the current price.

Add the files that become accessible after payment. The files can be:
- Documents like images, text files, presentations, templates, etc. Remember, the maximum file size is 256 MB.
- Links. They can lead to any web page.
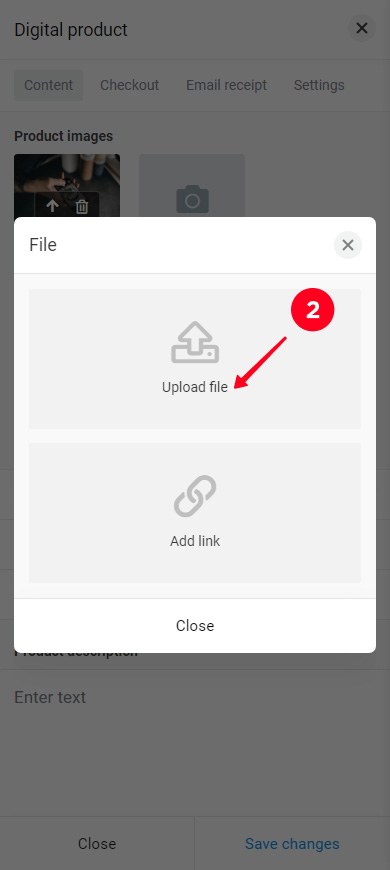
All files can be added in the same way. Here is an example with a PDF:
01. Tap + Add file.
02. Select Upload file to add a document or Add link to specify a web page.
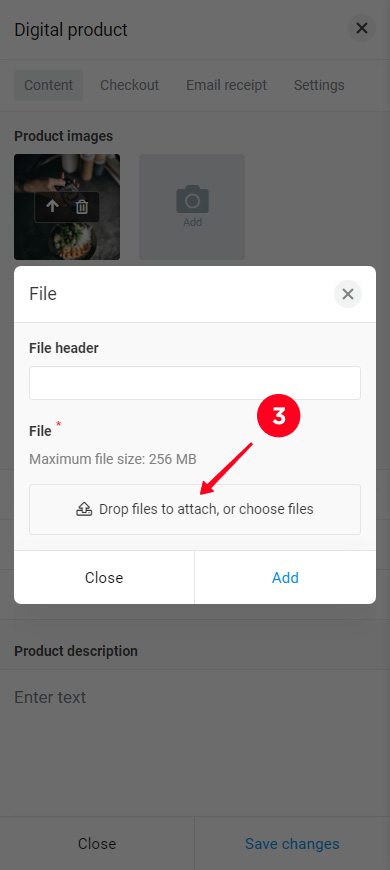
03. Tap Drop files to attach, or choose files and select the file on the device.

04. Give a name to the file.
05. Tap Add.
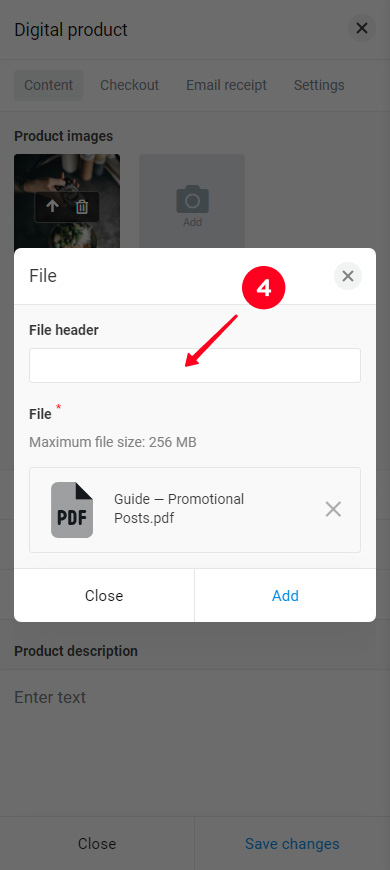
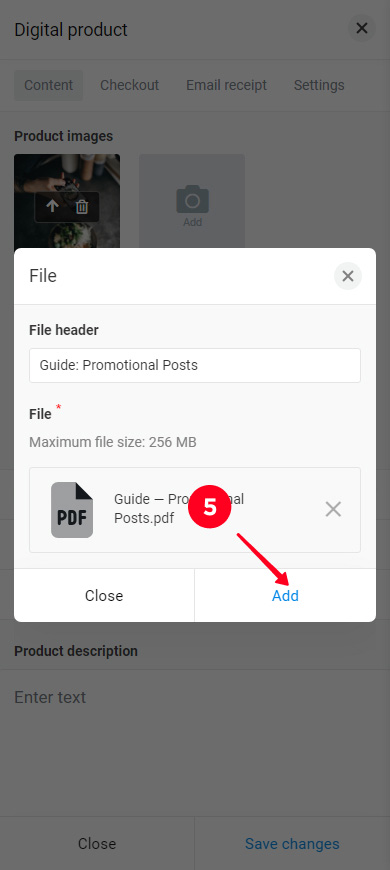
Now, the file is added.
Add more documents or links in the same way if you need.
The product files can be divided into groups for convenience. For example, separate study materials and exercises. Or separate the study and additional materials like in the examples below.
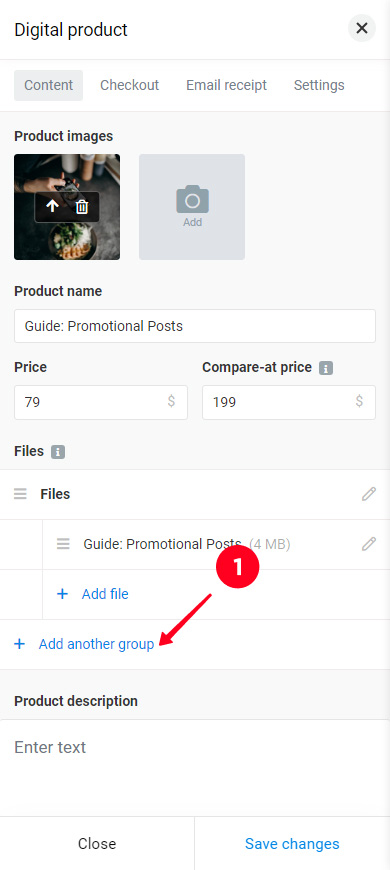
Here's how to create a new group:
- Tap + Add another group.
- Enter the group name.
- Optionally, specify a description for the group.
- Tap Save changes.

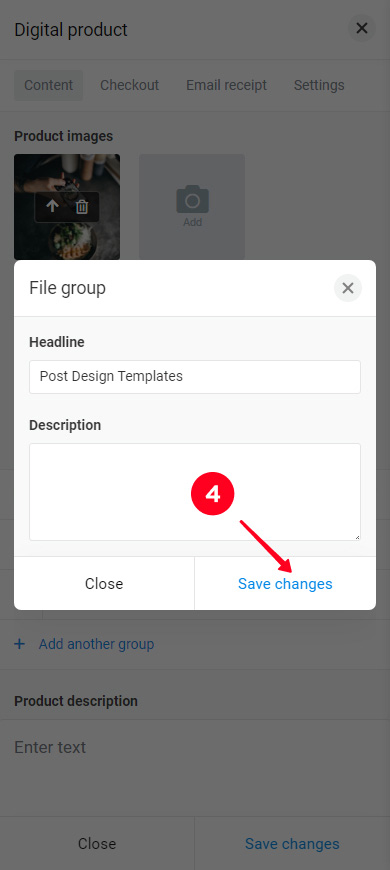
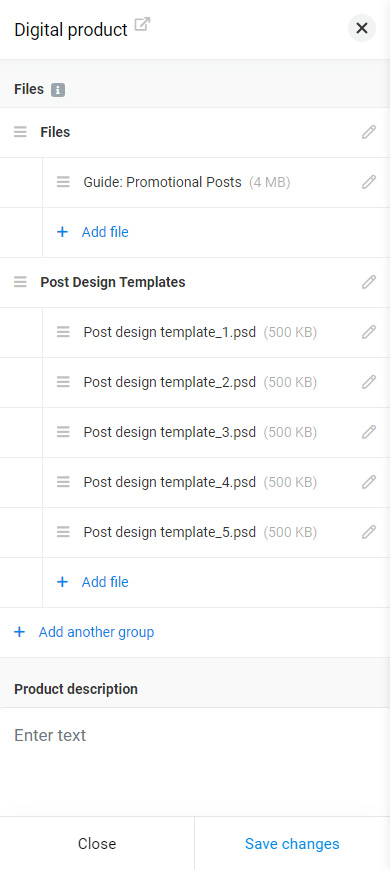
The group has been created, now you need to add files in the way described above.
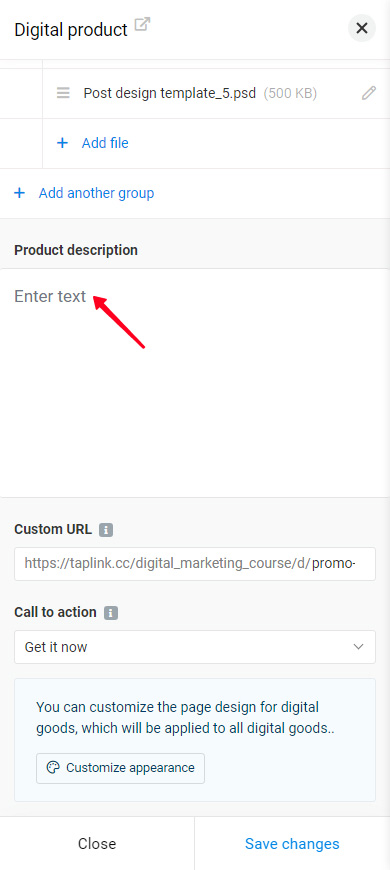
Add a product description. Write or paste the text in the Product description field:
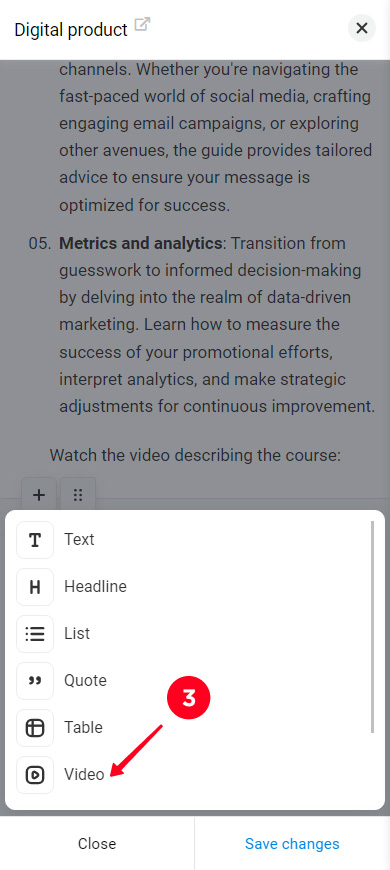
The product description may also include tables, lists, videos, and other elements. Add a new item:
- Tap an element that's already added.
- Tap plus.
- Select an element from the list.
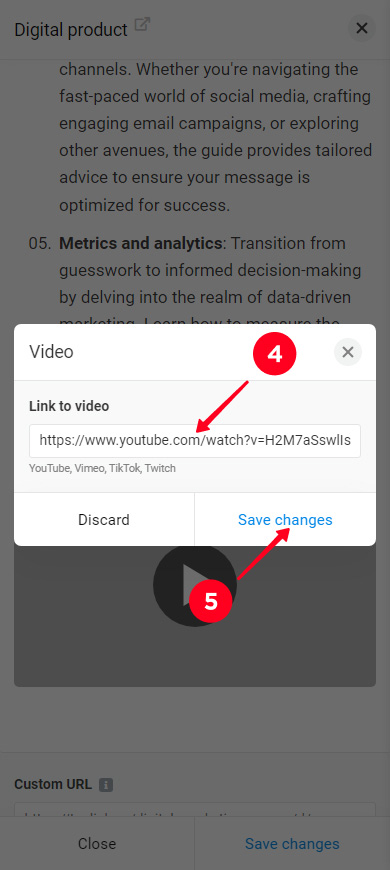
- Specify the necessary data, it depends on the selected item.
- Tap Save changes.

Add other necessary elements in the same way.
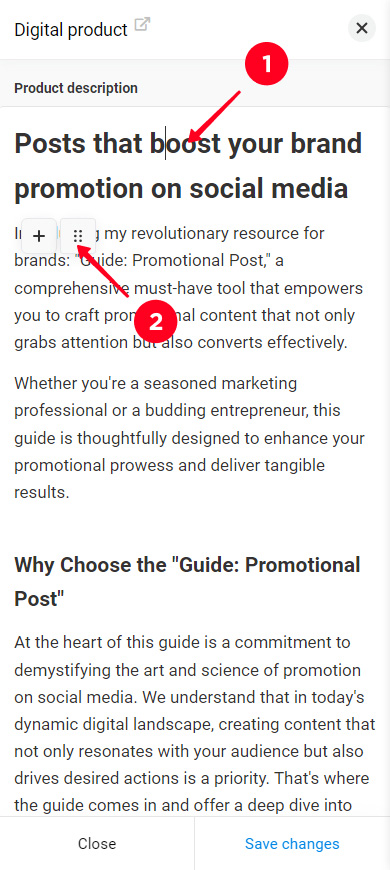
Each element in the description has its own additional settings:
- Tap an element.
- Tap the six dots.
- Select an option.

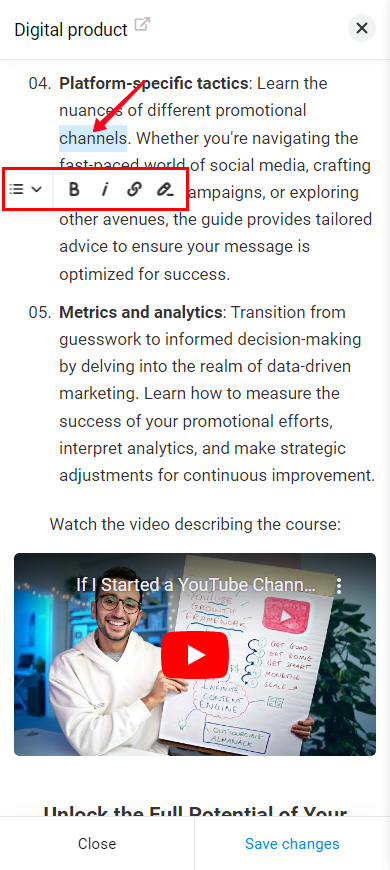
Text elements have more additional settings. Tap and hold a word in a text, title, list, quote, or notification until the menu appears. The menu allows you to:
- change the type of text.
- apply or remove bold formatting.
- apply or remove italics formatting.
- add a link.
- highlight text with a color.
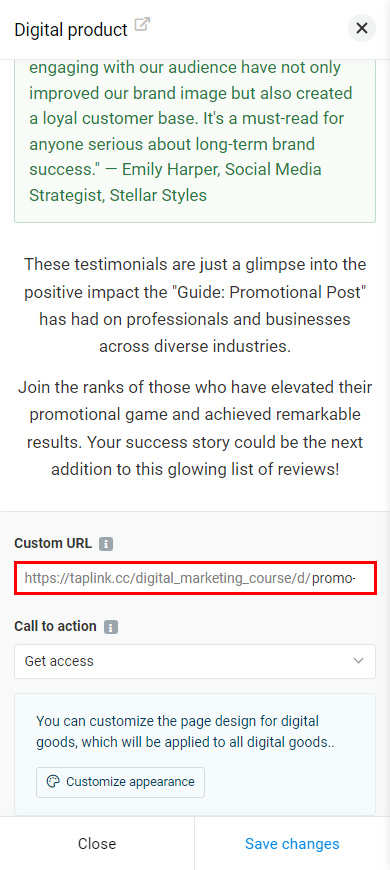
Optionally, you can specify a unique part of the product page link. This link part can contain numbers, minus signs, and letters from "a" to "z". Note, it must contain at least one letter from "g" to "z".
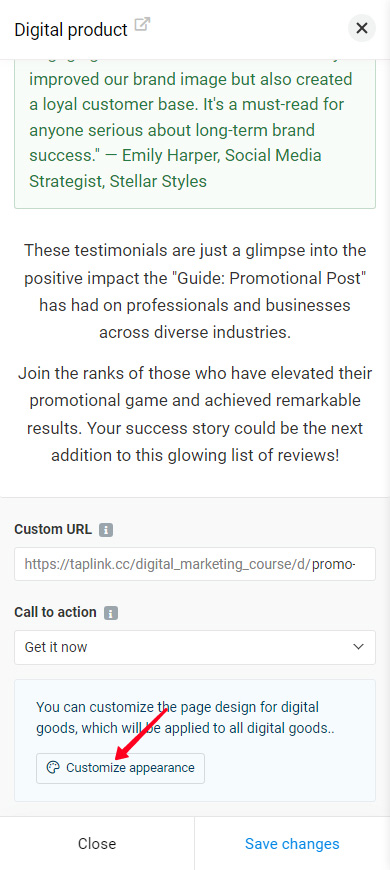
Complete the URL in the Custom URL field:
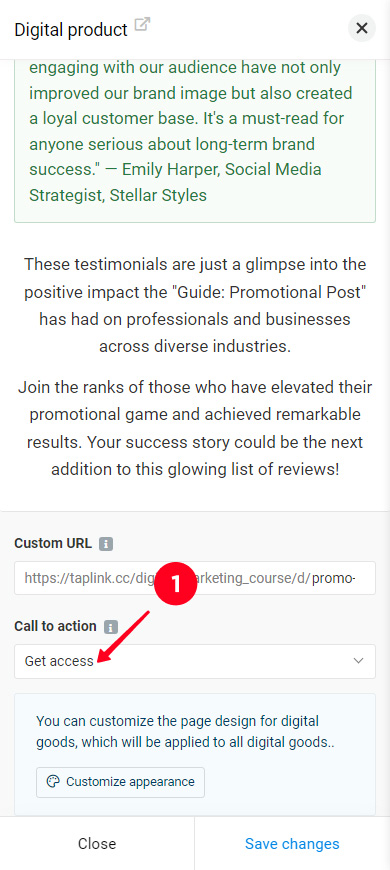
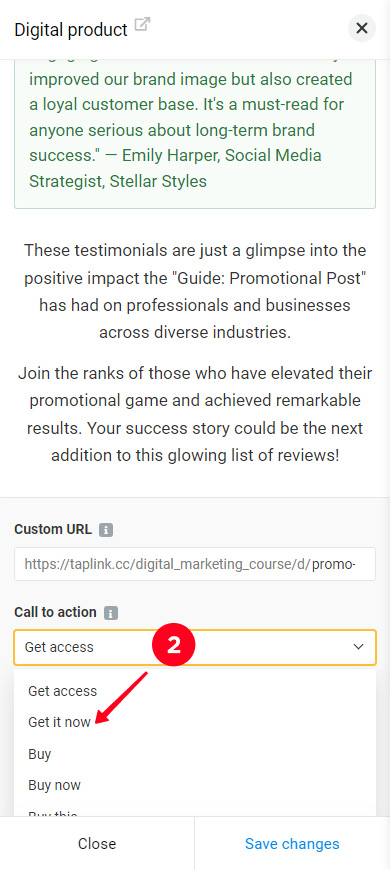
You can change the text that is displayed on the buy button. By default the text is "Get access". Choose another ready option or set a custom text:
- Tap the Call to action field.
- Select an option from the list or erase the text and write a custom one.
That's all you have to do to add a digital product to your Taplink.
Now you can go publish the product and start selling it or first also adjust:
You can customize the design of the product page. Note, this design applies to pages of all your products. That is, by changing the page design in the settings of one product, you change the page design of all your products.
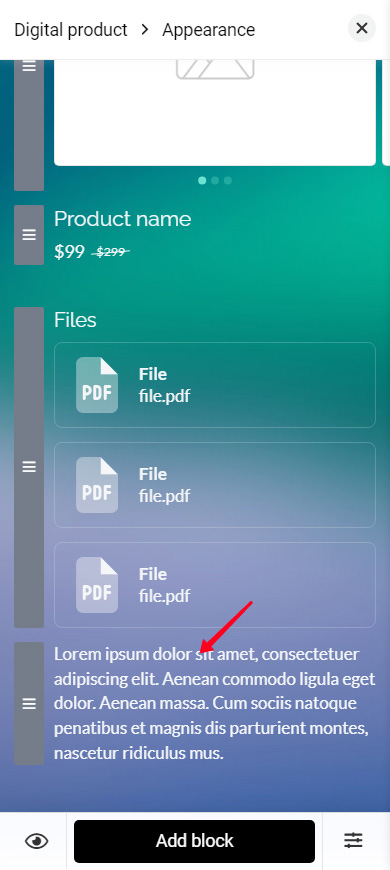
Tap Customize appearance on the Content tab, you will see a familiar editing menu.

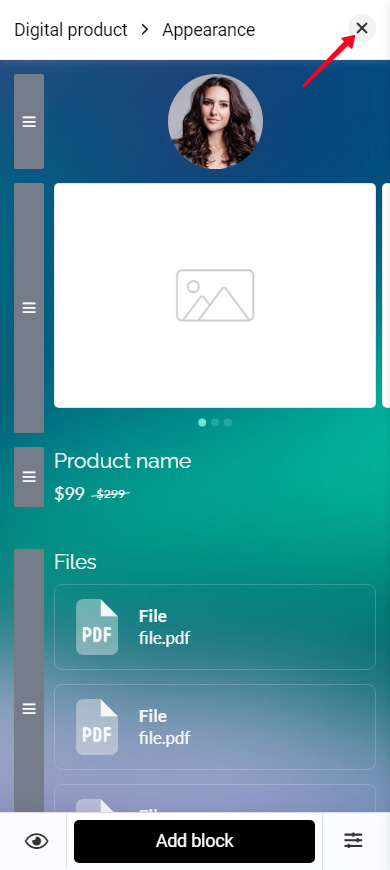
Several blocks are already added to the page design by default. These blocks display the information you added in the Content tab, plus the Avatar block.
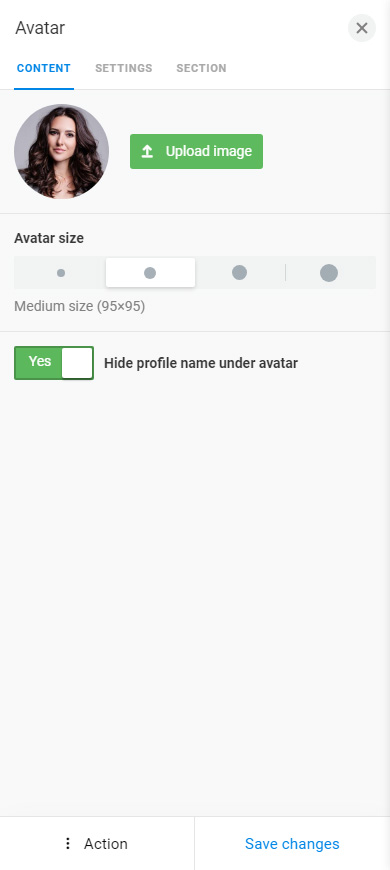
- Avatar. The avatar on the product page is the same one you have on the main page of your Taplink. You can remove the avatar from the product page.
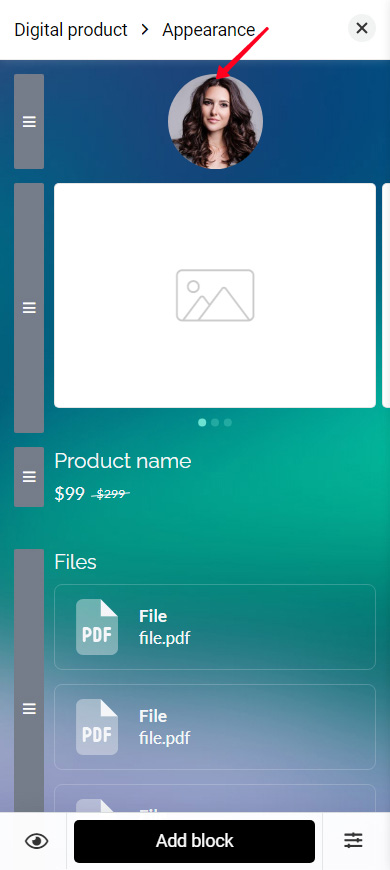
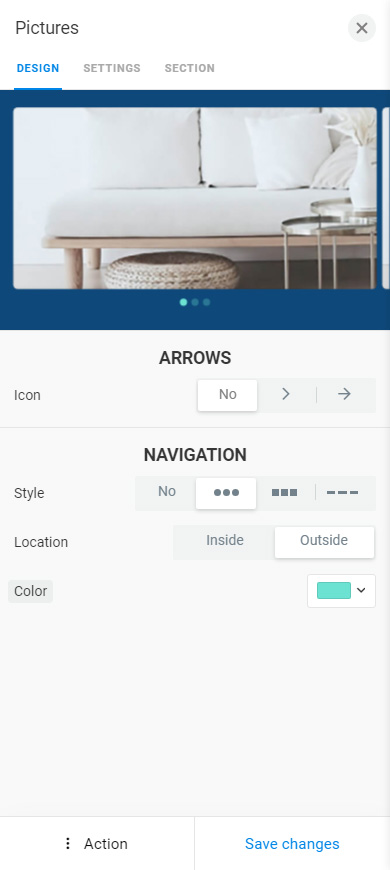
- Image carousel. This is a block with product photos. Here you can customize the appearance of the arrows and navigation dots for the cases when you add several product photos.

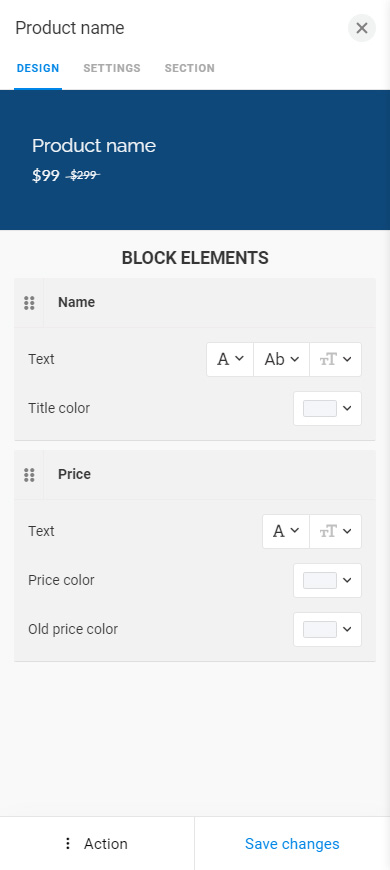
- Name and price. You can customize the style and color of the texts.

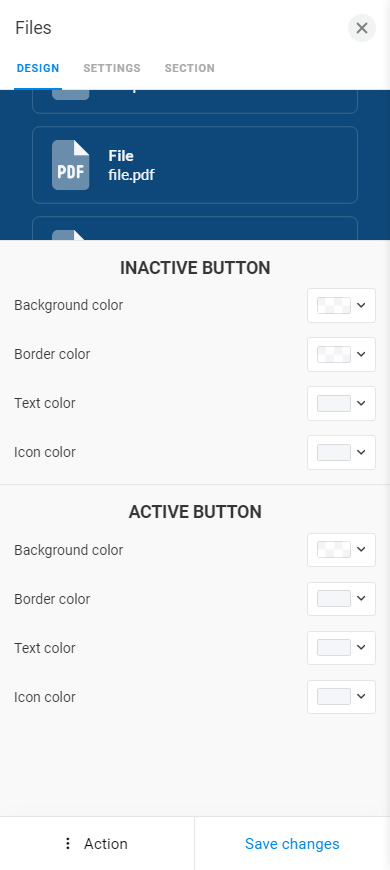
- File buttons. You can customize the colors of the buttons that direct to the product documents and links.

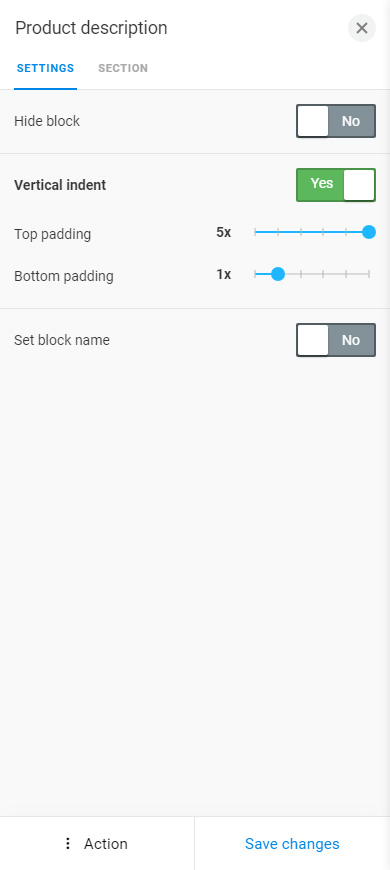
- Description. The description doesn't have the Design tab. But there are the Settings and Section tabs with standard settings.
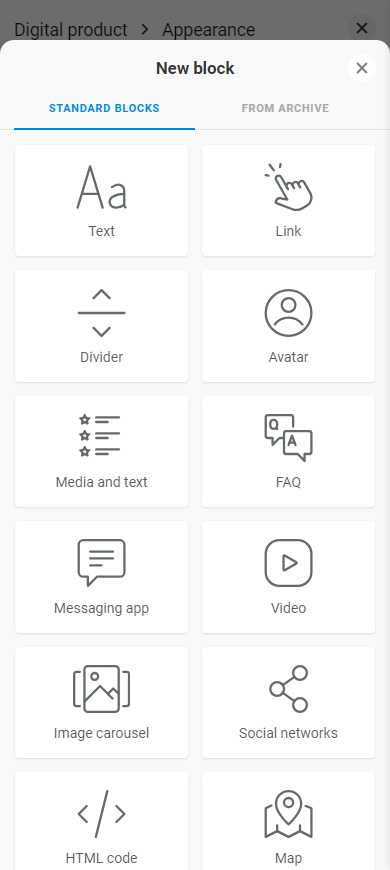
If necessary, you can add more blocks to the product page design. Tap Add block and select an item:

Tap the cross when the page design is set up:
The product purchase window is a pop-up window that a user sees after tapping the purchase button or a file. This window contains the fields that a user needs to fill in to proceed to payment. There are the name and email default fields.
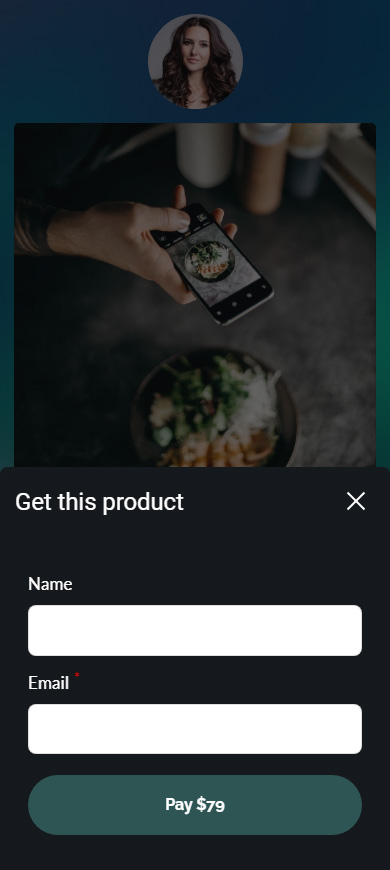
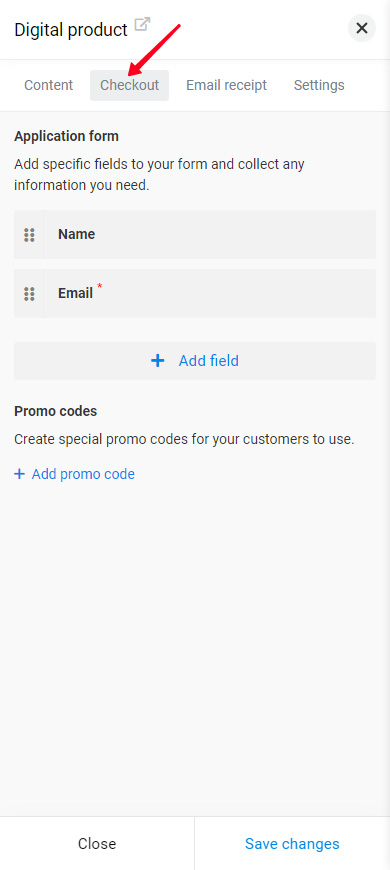
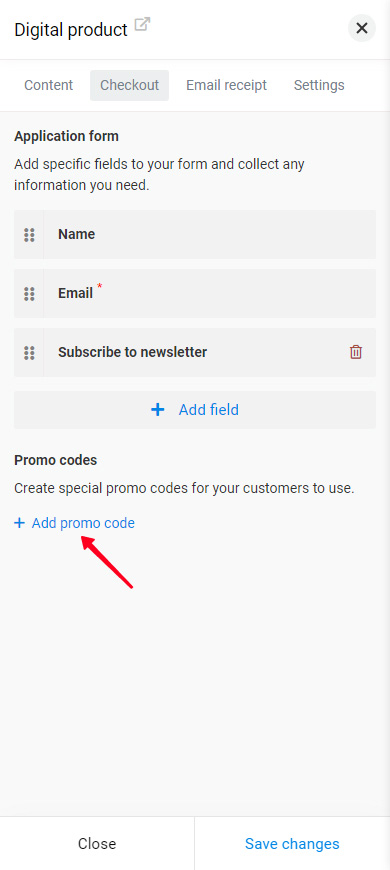
You can customize the fields of the pop-up purchase window in the Checkout tab:
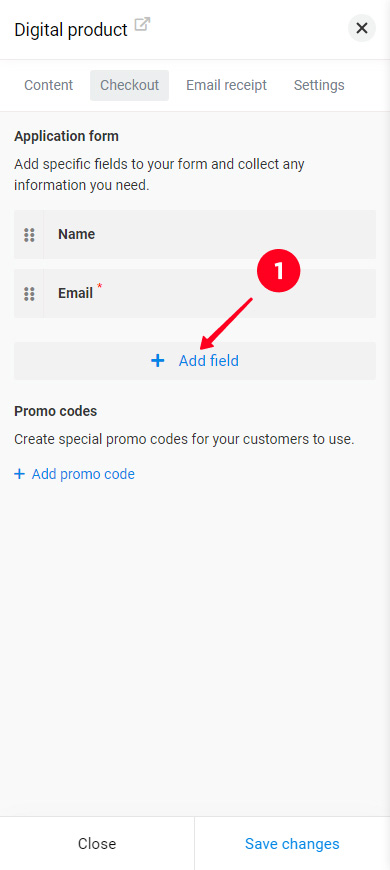
Add a field to fill in in the pop-up purchase window:
- Tap + Add field.
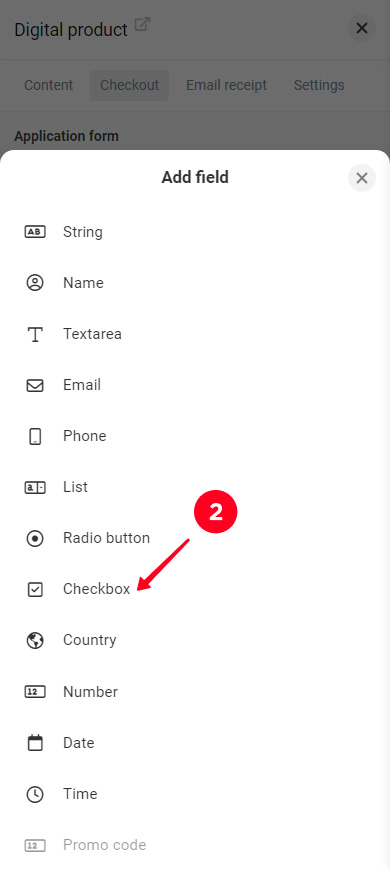
- Select a field from the list.
- Change the field name if necessary.
- Optionally, check the Required field box, then a user will have to fill this field first to be able to continue.
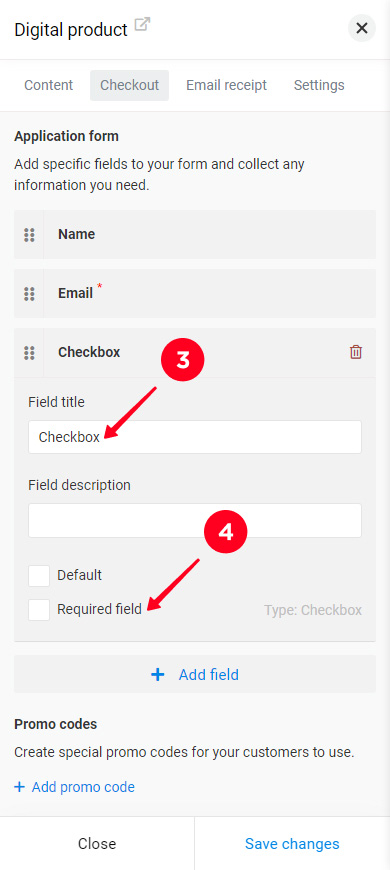
Add more fields in the same way if you need.
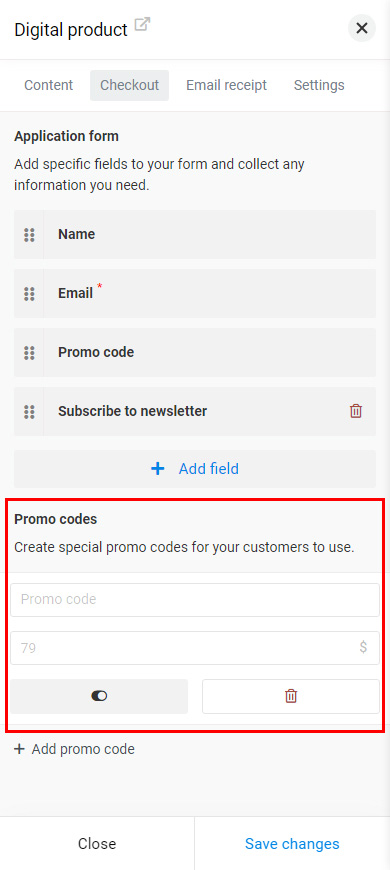
You can also add promo codes. Tap + Add promo code and fill in the fields: set the code word and the reduced price.
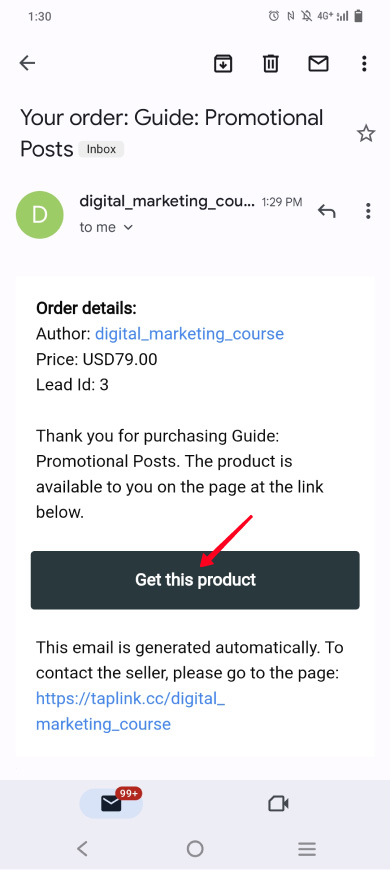
The automatic email is sent to users after they pay. This email includes a link to the product page, where documents and links are available to the users.
Optionally, you can customize the email design. Go to the Email receipt tab.
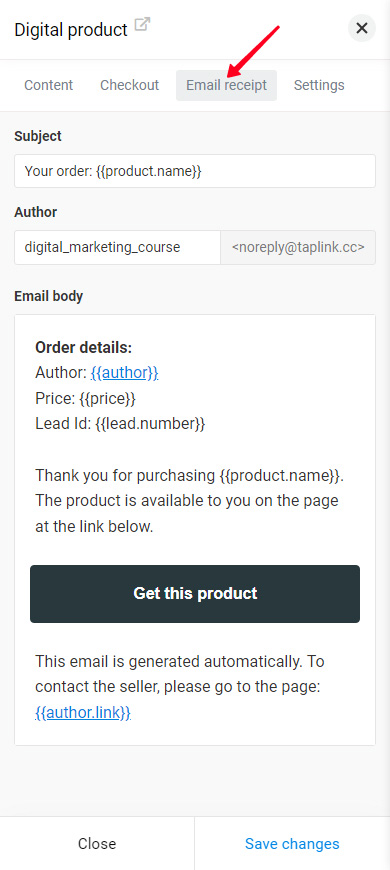
In the Email receipt tab, you can edit the text of the email, add and move blocks, and so on. Read more about editing and adding elements to automatic Taplink emails here.
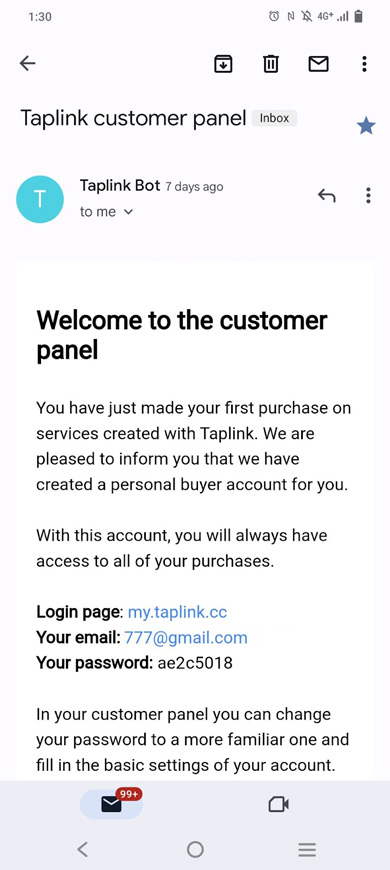
You should know: all the products that a user purchases through the Digital products block are stored together in his or her account on my.taplink.cc. The account is created automatically at the very first purchase the user makes through the block, whether it is a purchase of your or someone else’s product. The user receives an email with the login and password from the account on my.taplink.cc.
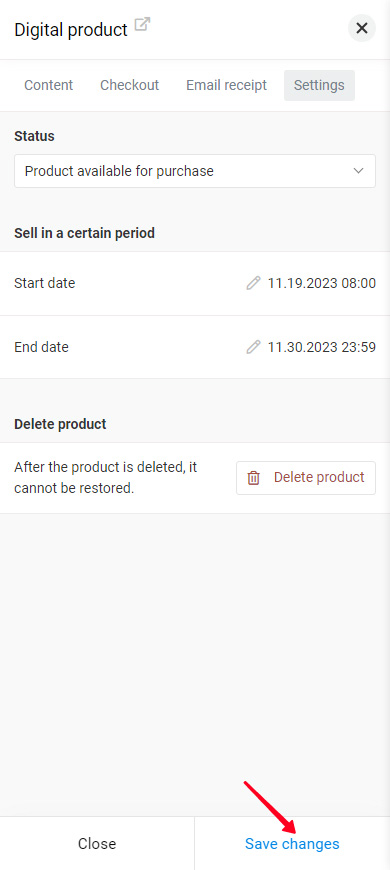
You can change the availability of a product on your Taplink in the Settings tab:
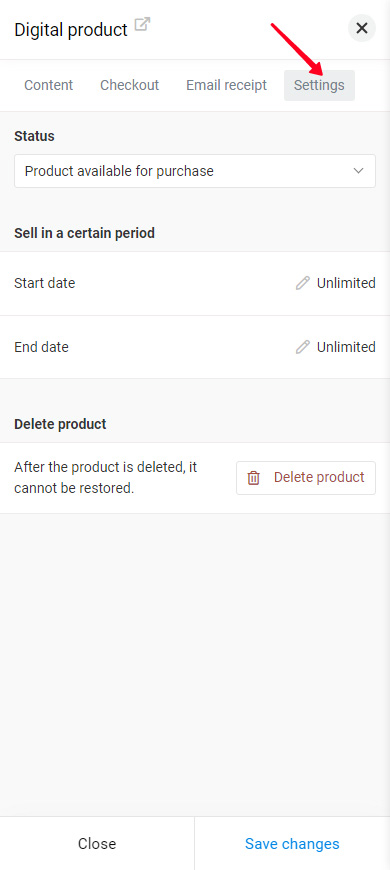
Tap the Status list and select one of the options:
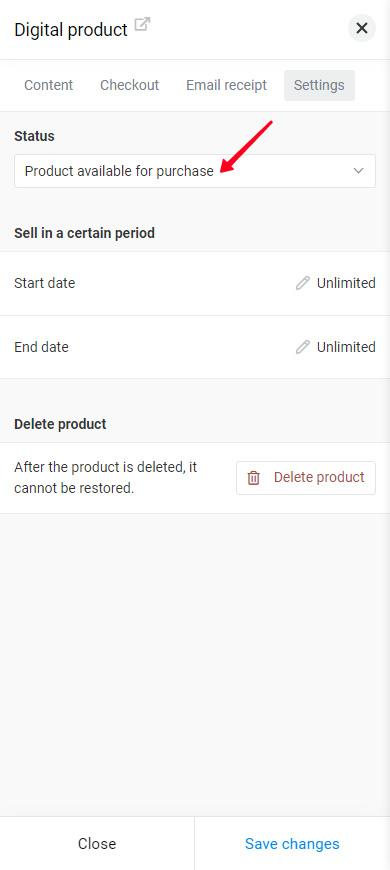
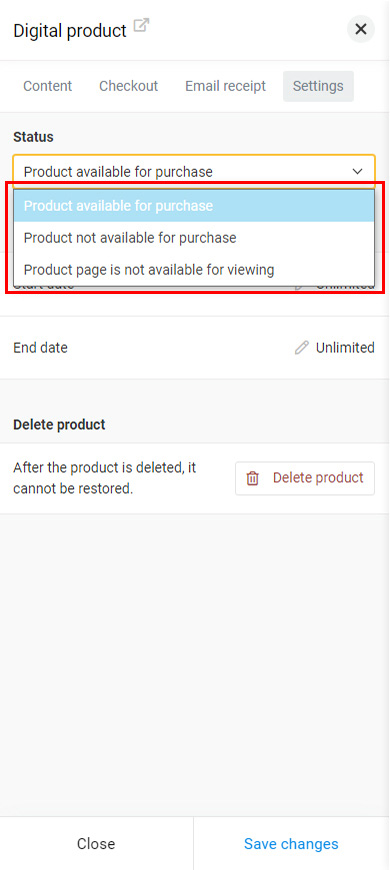
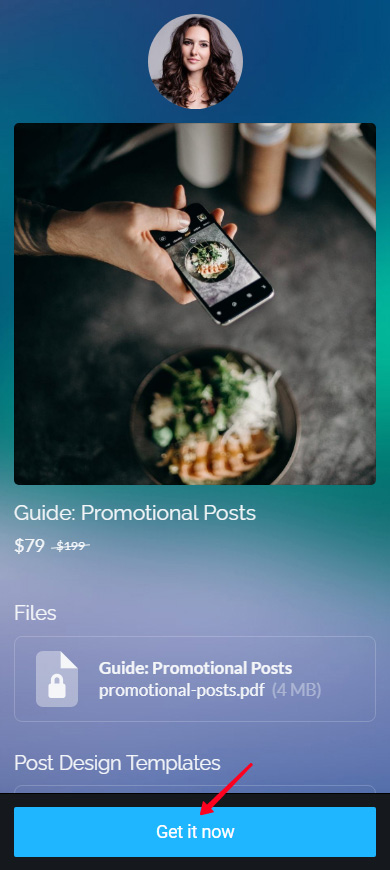
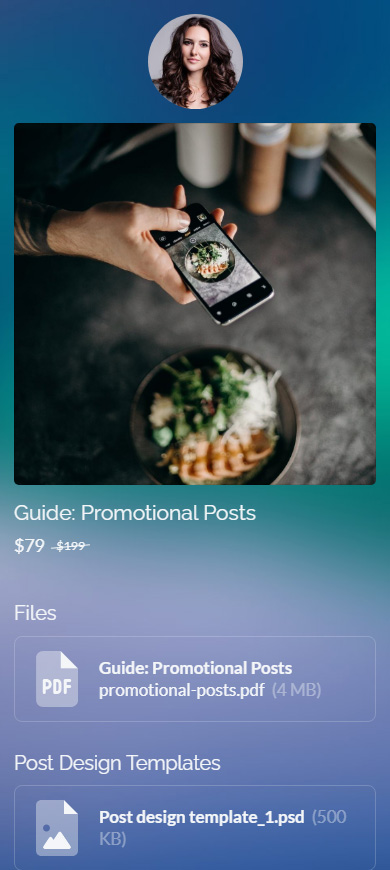
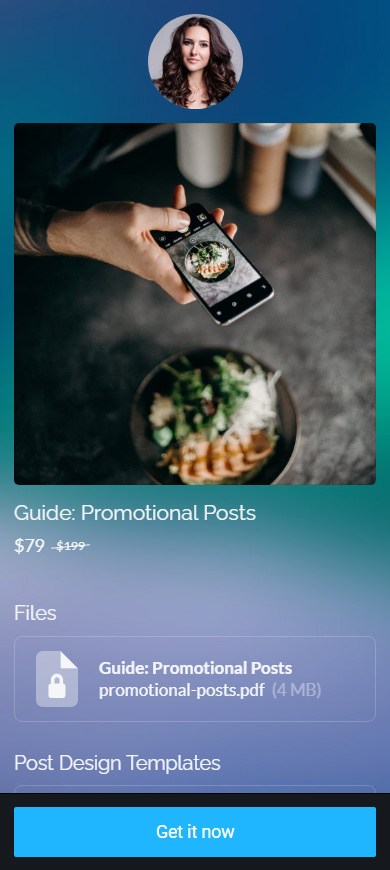
- Product available for purchase. This is the default status. Users can go to the product page and buy the product. The 1 screenshot shows what the product page looks like in this case.
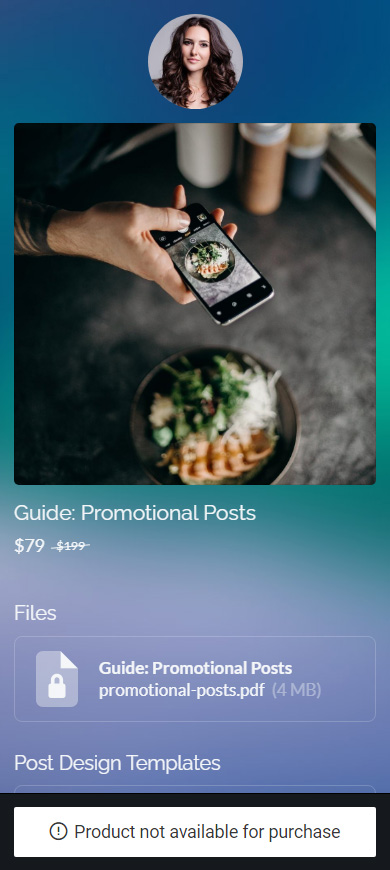
- Product not available for purchase. Users can go to the product page, but can't buy the product. The 2nd screenshot shows what the product page looks like in this case.
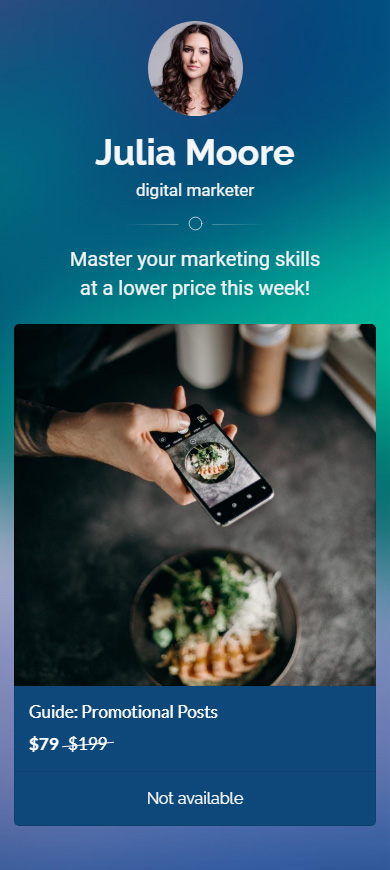
- Product page is not available for viewing. Users can neither go to the product page nor buy the product. The 3rd screenshot shows what the product looks like in the block in this case.
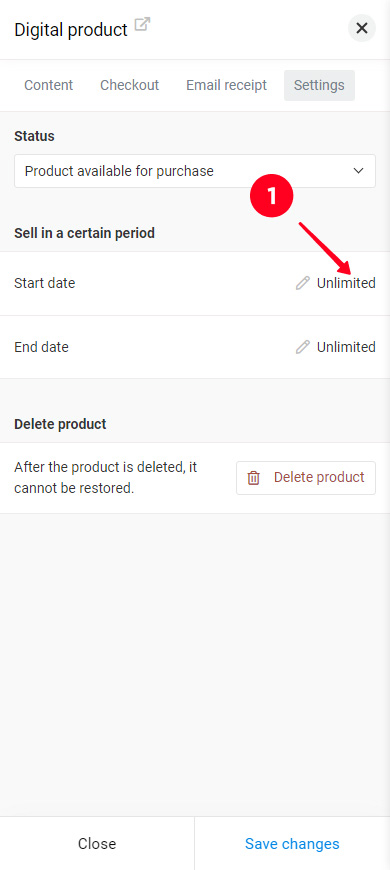
If the product status is Product available for purchase, then you can set the time when the product can be purchased. Specify the start and end dates and times in the Sell in a certain period section for this.
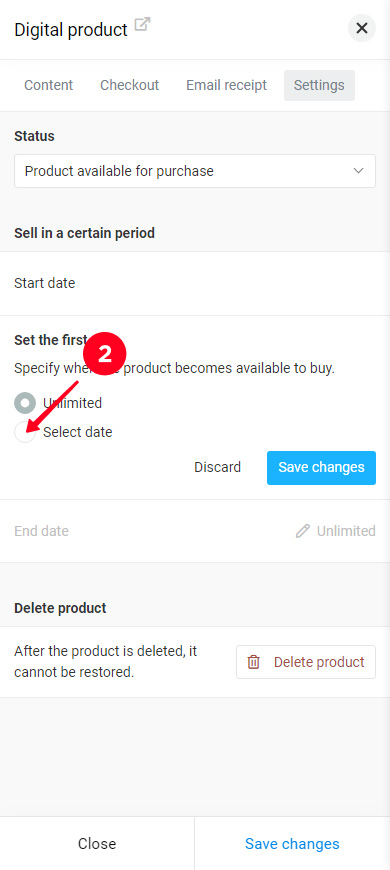
Specify when the product should become available for purchase in the Start date section:
- Tap Unlimited.
- Tap Select date.
- Tap the fields and set a date and time in them.
- Tap Save changes.
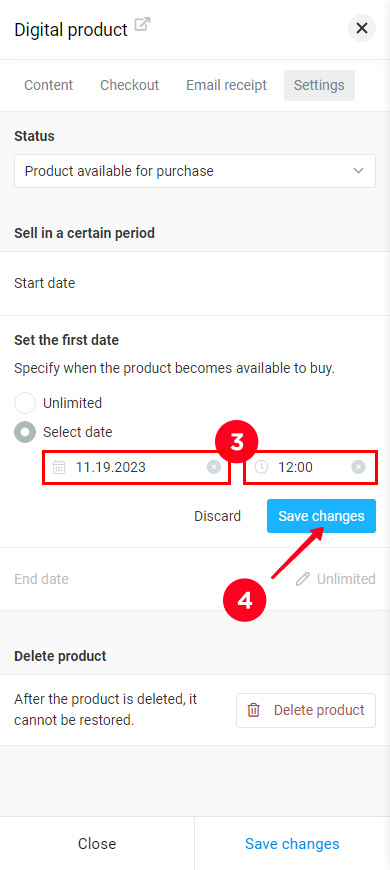
Set the end date in the same way in the End date section.
If you ever need to delete a digital product, you can do this in the Delete product section. The product will disappear from all Digital product blocks on your Taplink. You won't be able to restore the deleted product.
When you need to delete a product:
- Tap Delete product.
- Tap Yes to confirm the deletion.
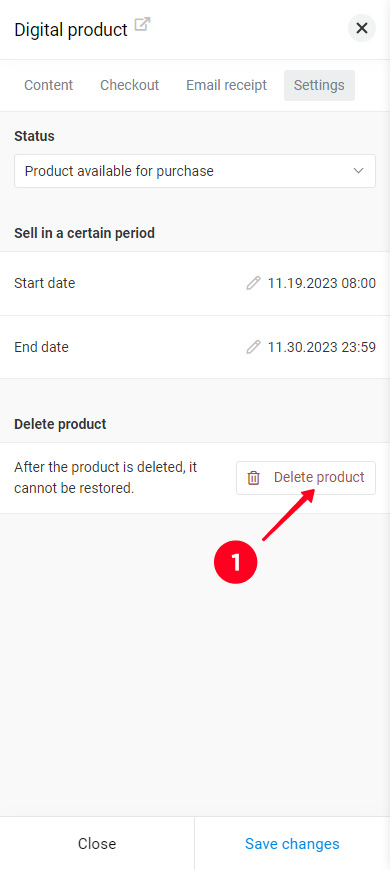
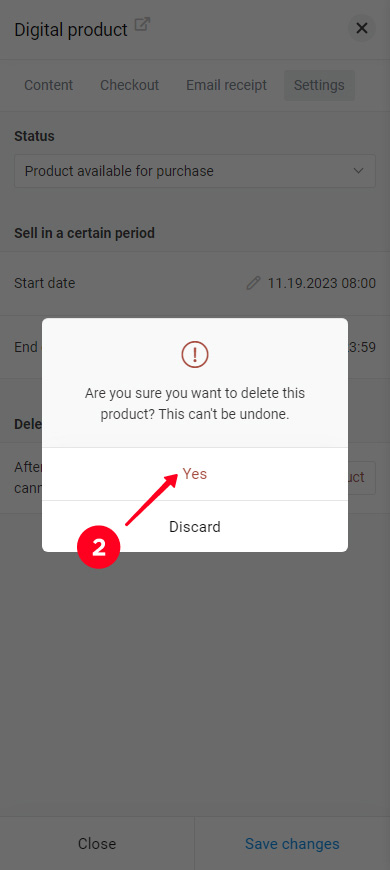
After that, you need to tap Save changes.
If you need to remove the product from a Digital product block only, do it as described below. Then, the product will remain in other blocks, and it will be still stored in your Taplink account. And users will be able to go to the product page and find the files.
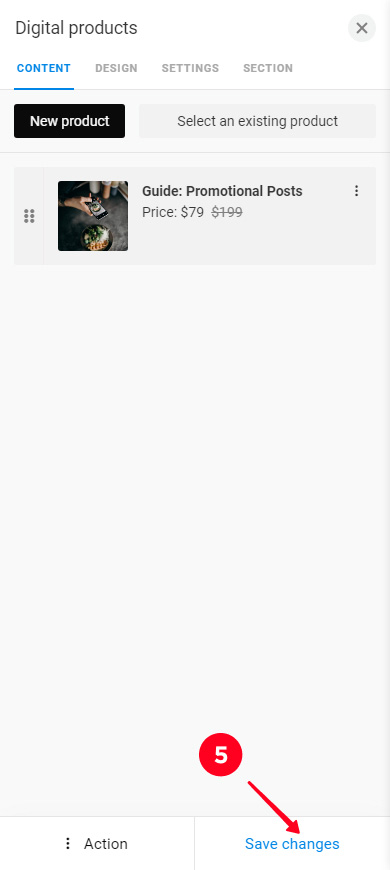
The product is set. Tap Save changes to save it:
You can add more products to the block in the same way.
Tap Save changes, when the Digital product block has all the necessary products, so that to save the block settings:

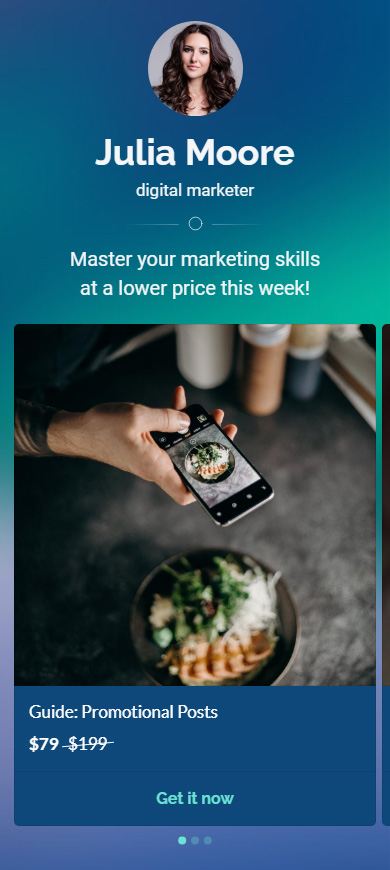
Everything is set and ready. Now users can buy your digital products. This is the page that you may have gotten by following the instructions:
Now you know everything you may need to start selling digital products on Taplink. Below is additional information about the Digital products block, which helps to get maximum from the block.
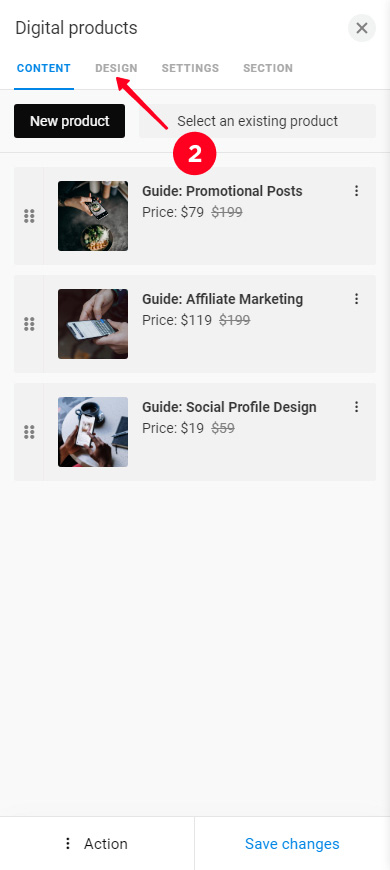
Customize the appearance of the Digital products block to present your products in the best possible way:
- Tap a Digital products block.
- Go to the Design tab.
- Choose one of the options.

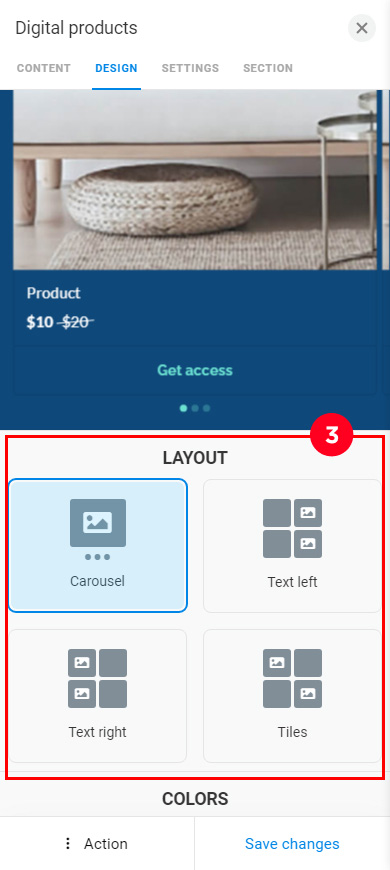
The layout options are:
- Carousel (screenshot 1).
- Text left.
- Text right.
- Tiles (screenshot 2).

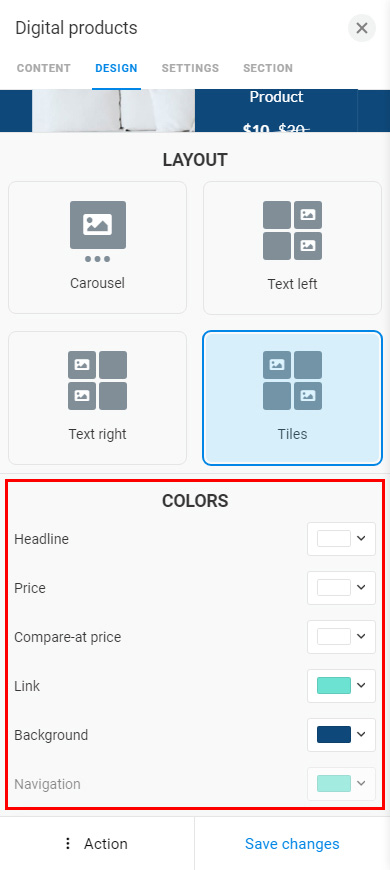
The Design tab gives you settings to customize the colors of the following:
- Headline. Product names.
- Price. The current price.
- Compare-at-price. A higher price for comparison.
- Link. The text of the purchase button.
- Background. The background of the block.
- Navigation. Navigation dots.
The page theme gives you more settings for the block appearance. Read more here.
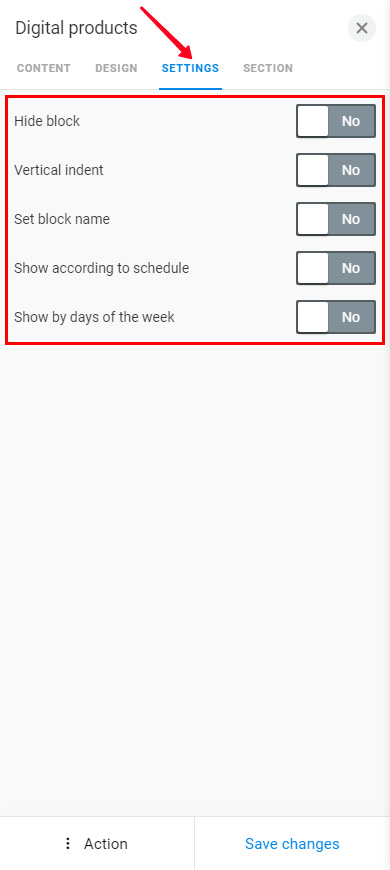
The Digital product block also has the Settings tab with additional adjustments:
- Hide block. Manually hide the block from the page and make it displayed again. More information.
- Vertical indent. Change the distance between the Digital products block and the blocks above and below it.
- Set block name. Set a name for the Digital products block so that you can link to it from the navigation menu of your Taplink. More information.
- Show according to schedule. Adjust the time interval when the block will be displayed on your Taplink. It will appear and disappear automatically. More information.
- Show by days of the week. Select the days of the week when the block will be displayed. It will automatically appear on your Taplink on the selected days and disappear on the rest of the days. More information.
You may have questions when you sell digital products. Look for the answers in this section.
You can add one and the same product to several Digital product blocks. For example, you've added several products in a block, and you want to highlight one of the products because you are launching a promo campaign and selling this product at a discount.
Add one more Digital products block with a product that you've already created:
01. Tap Add block.
02. Select Digital products.
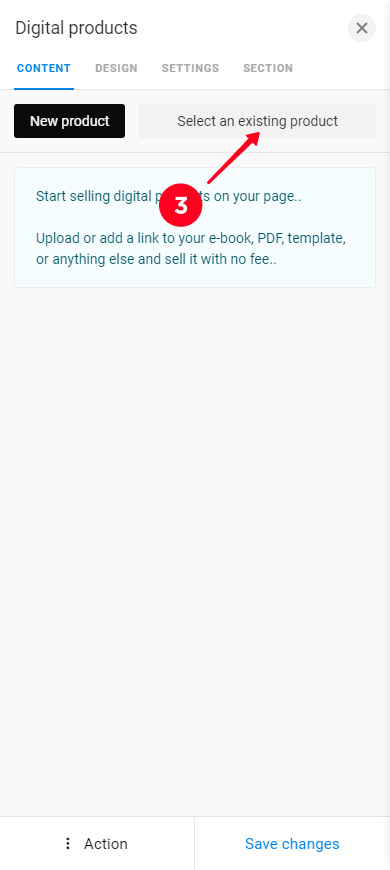
03. Tap Select an existing product.
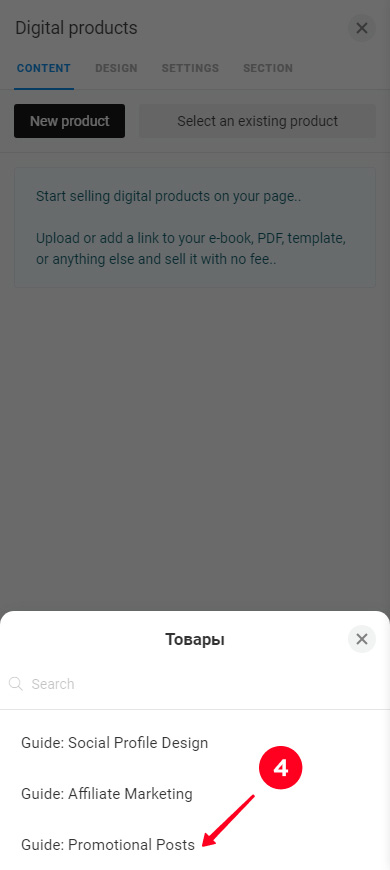
04. Select an item from the list.
05. Tap Save changes.
Now there are Digital products blocks that include the same product.
You can remove a product from a Digital products block. Then, the product will remain in your Taplink account. This means that:
- the product remains in other Digital products blocks, where you have added it.
- you won't have to create the product again when you want to add it to a Digital product block again.
- the product, and its page and files remain accessible to the users who have paid for it, unlike in the case of deleting the product from your Taplink.
If you need to remove a product from a block:
01. Tap the block.
02. Tap the three dots.
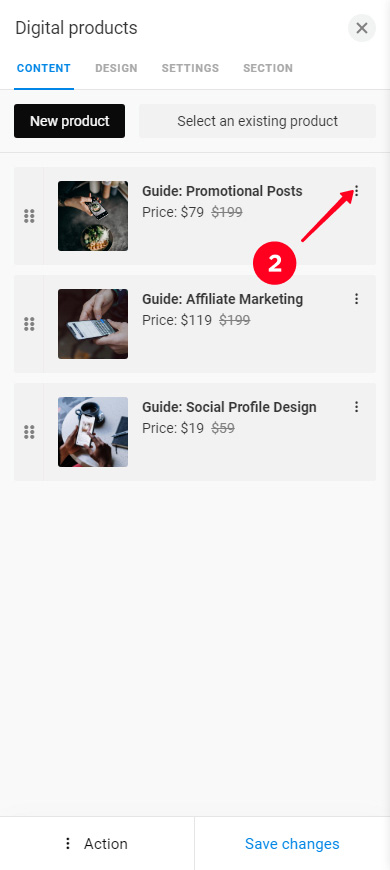
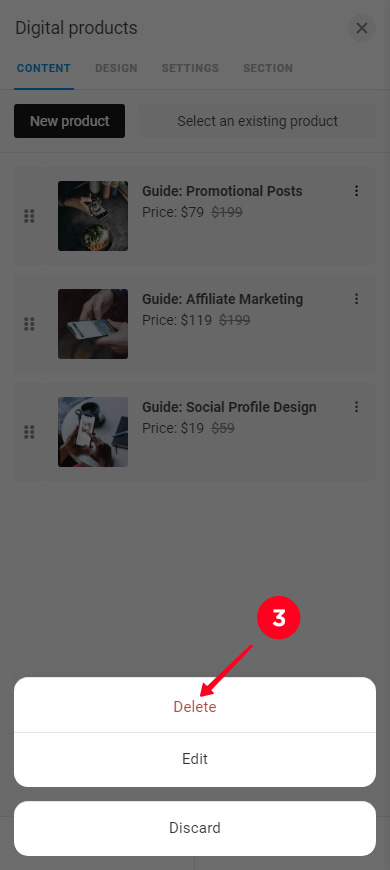
03. Choose Delete.
04. Tap Save changes.
That's it, the product has been removed from the block.
Your Taplink account stores the information on your sales. Here is how to find it:
- Tap the three lines.
- Choose Leads.

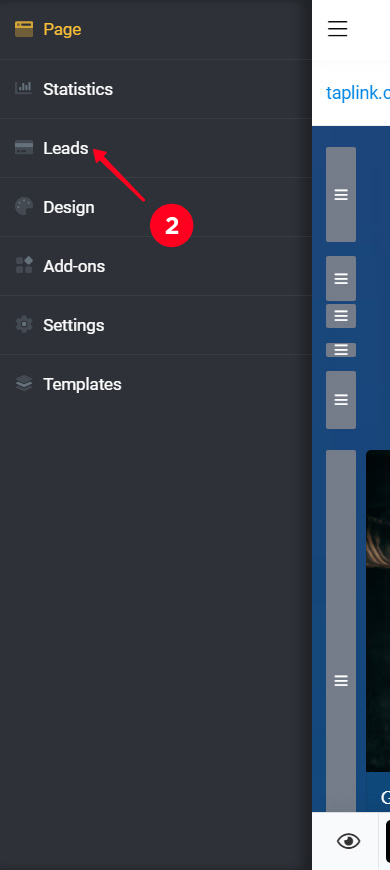
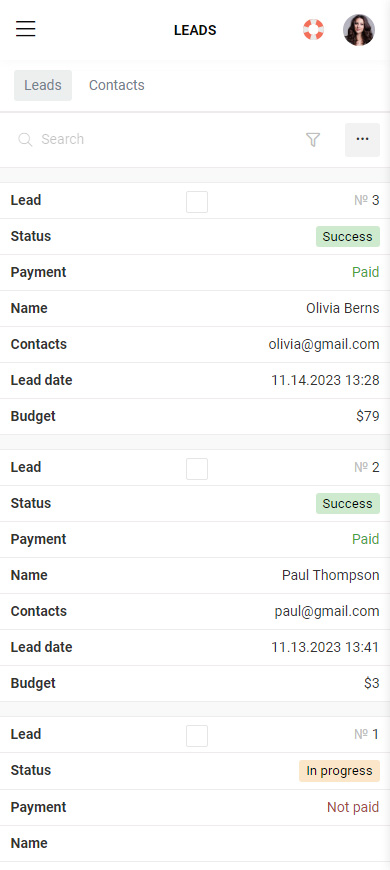
You will see a list of orders, customer data, payment data, and more. Read the guide on how to work with this information on Taplink.
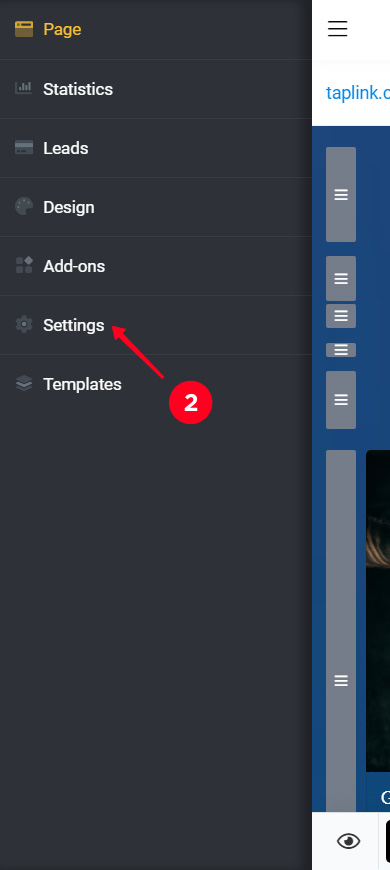
You can choose the currency for your digital products' prices:
- Tap the three lines.
- Select Settings.
- Tap the field and select a currency from the drop-down list.
- Uncheck the Decimal pricing box if you want prices on Taplink to be integers.


Now you know everything about using the Digital products block. Add products, launch promo campaigns, and design a section for the campaign on your Taplink using a countdown timer and the Section tool, so you will sell more.