Design themes
Design themes make your Taplink beautiful and stylish. Read the whole guide to find out how to use the themes or read a specific section:
If you need instructions for specific settings, go to a relevant section:
There are more than 300 ready-made design themes on Taplink. They are divided into three categories:
- Simple — minimalist themes.
- Advanced — themes have an image set as the background. There are subcategories for different topics.
- Animation — themes have animated elements.
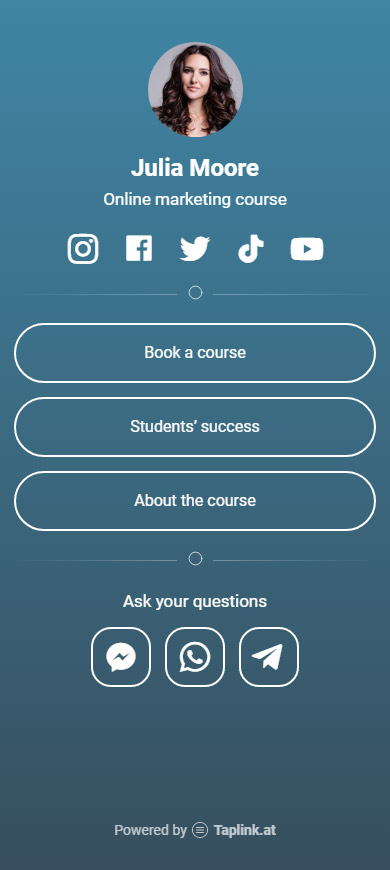
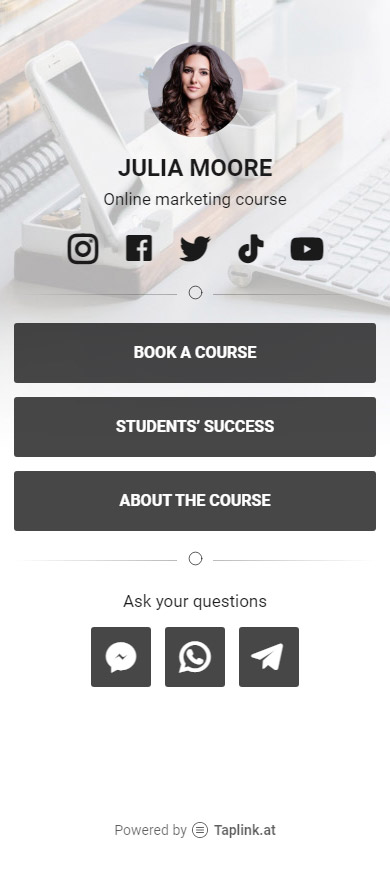

Each category has both design themes available on the free Basic plan and themes available on the paid Pro and Business plans. If you need to upgrade your plan, you can do it here.
Apply a read-made design theme in your Taplink account:
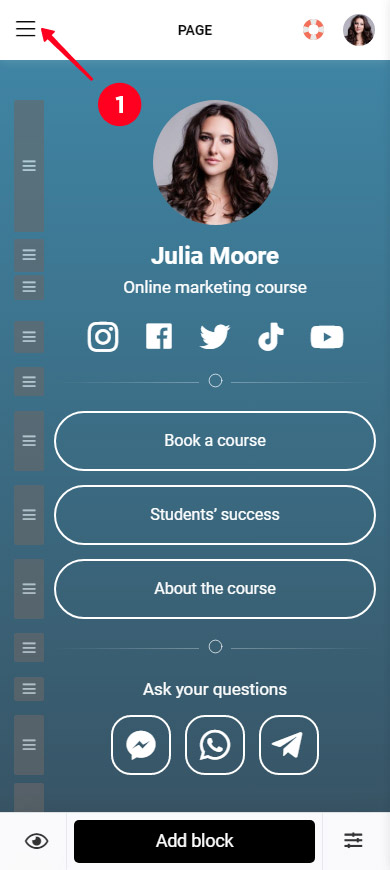
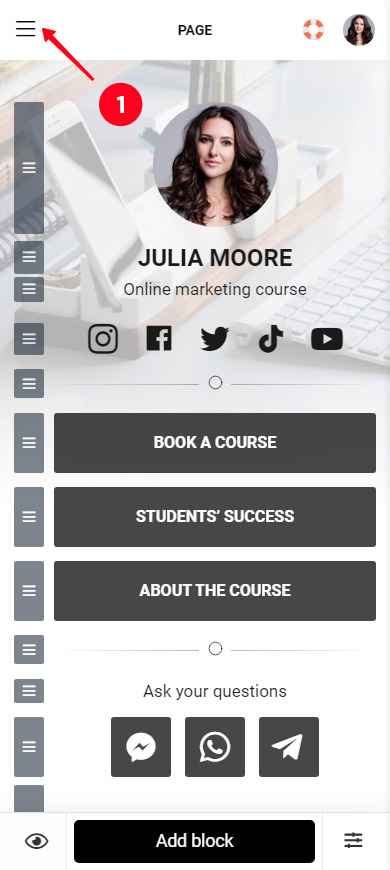
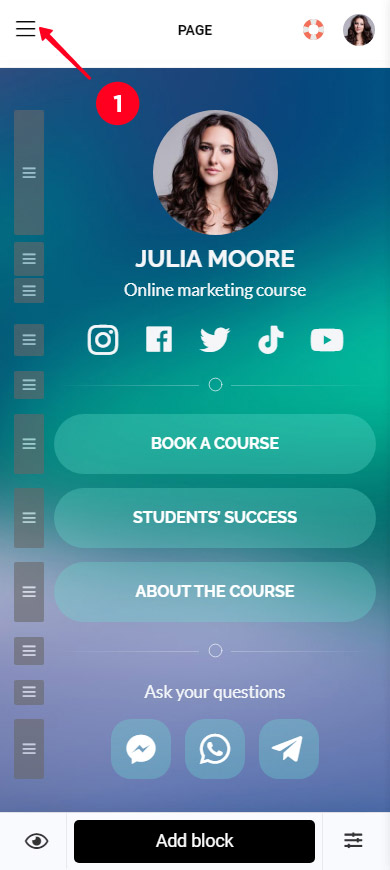
01. Tap the three lines.
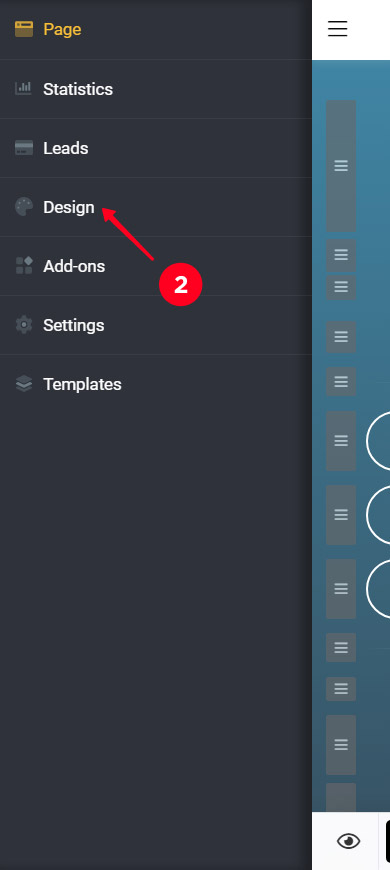
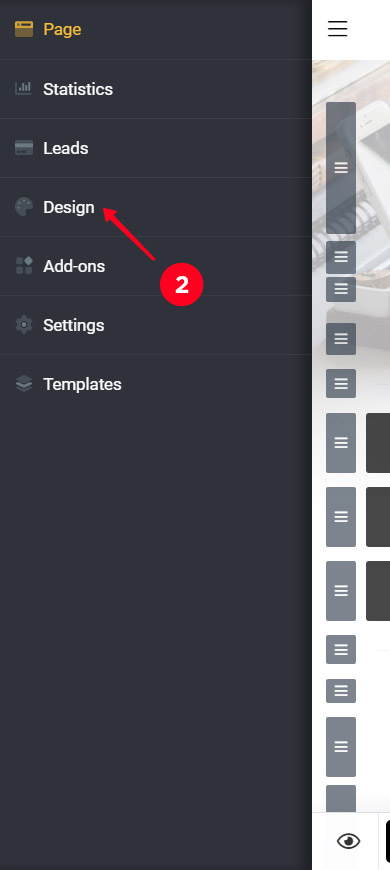
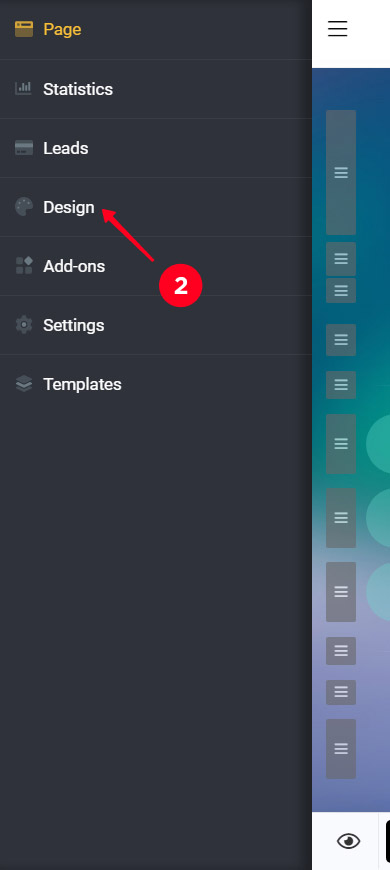
02. Choose Design.
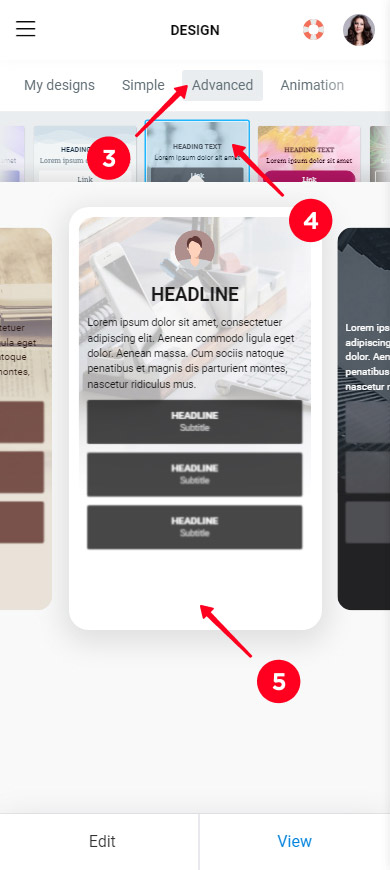
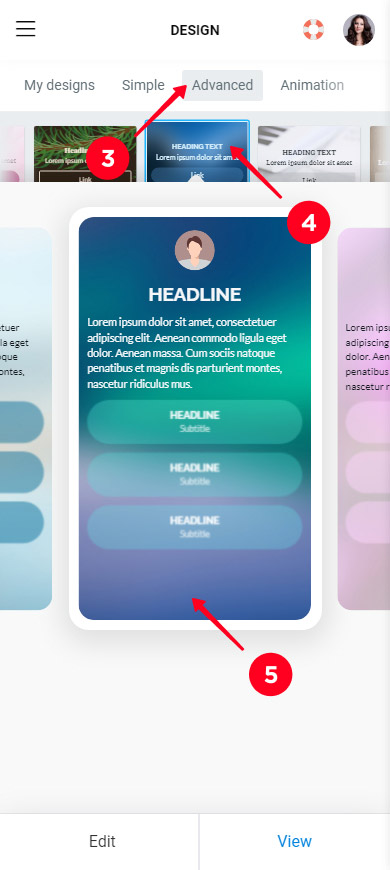
03. Choose a category.
04. Choose a style.
05. Choose a theme.
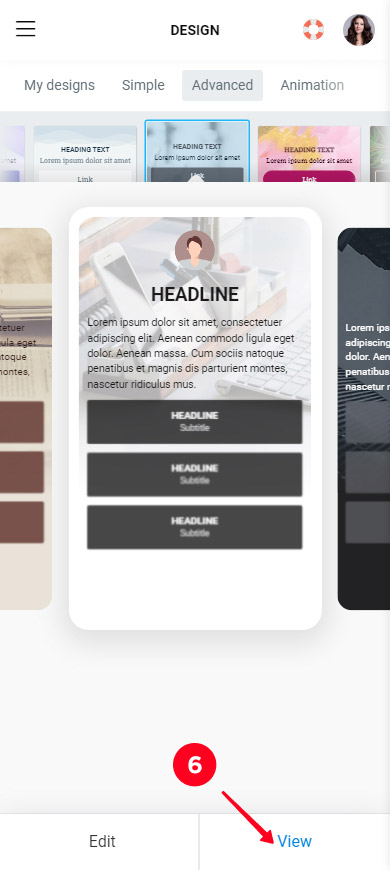
06. Tap View.
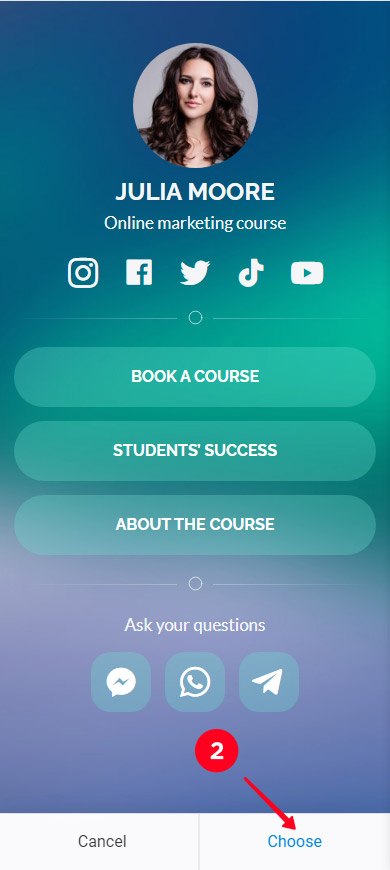
07. Tap Choose.
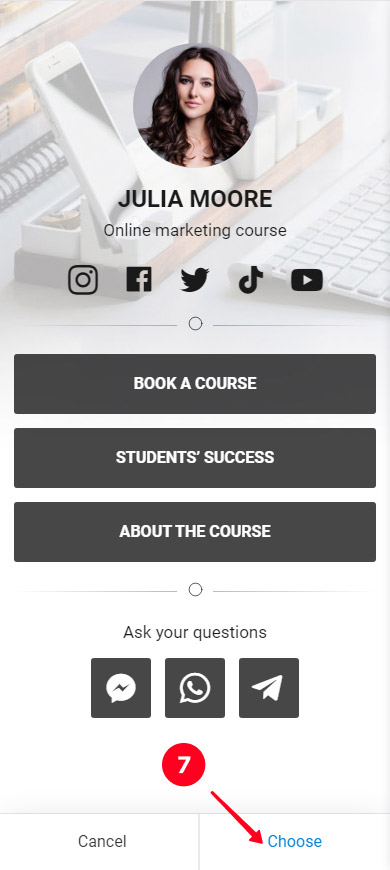
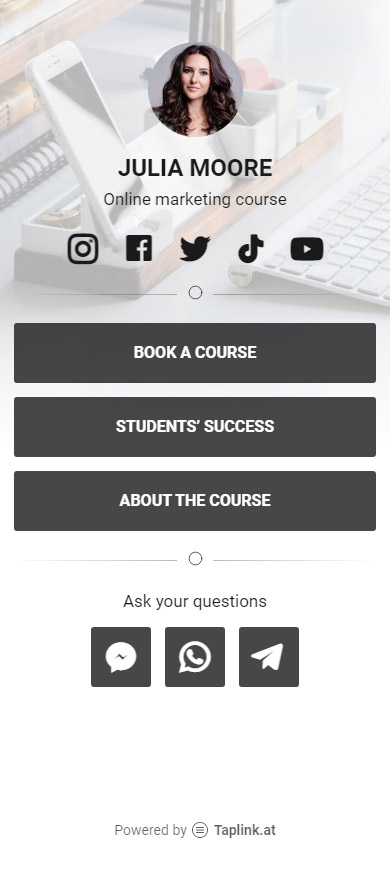
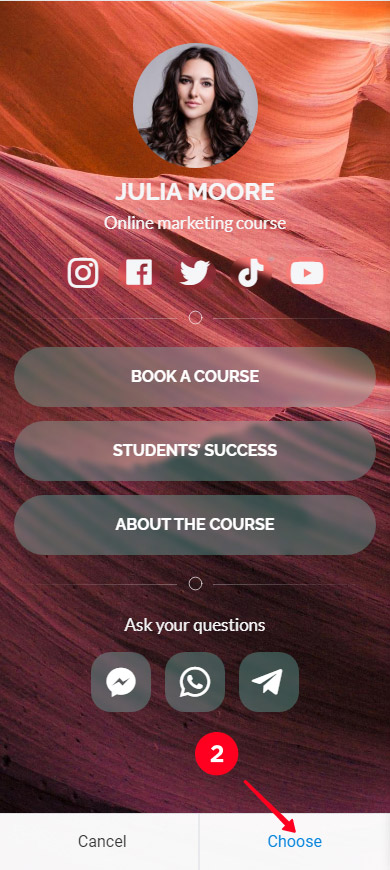
Good, now the page has a new theme:
If none of more than 300 themes looks 100% like what you need, then edit the one that is the closest to what you need. Editing is available on the Pro and Business plans.
In your Taplink account:
01. Tap the three lines.
02. Tap Design. Here you need to choose the theme that is the closest to what your page should look like.
03. Select a category. If you've created your Taplink using one of the Lite website templates, you can quickly find and edit the current design theme in the My designs tab. Otherwise, edit a design theme in one of the other three tabs.
04. Choose a style.
05. Select a theme.
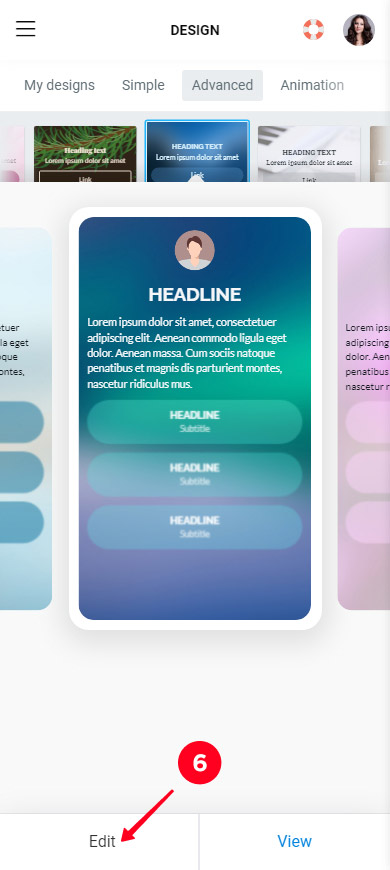
06. Tap Edit.
07. Tap Yes. Then, a new theme based on the selected theme is created. You will edit it.
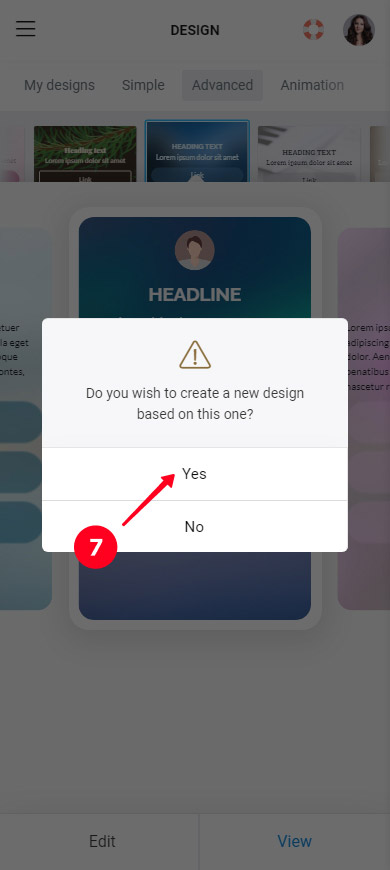
You can see the setting sections:
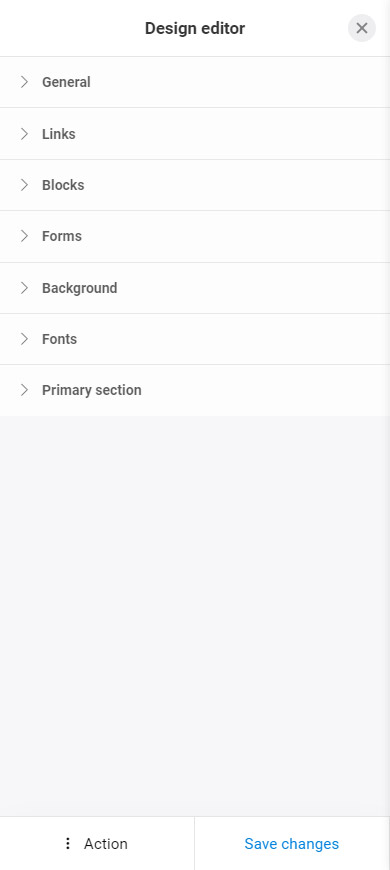
Tap one of the sections to see the settings.
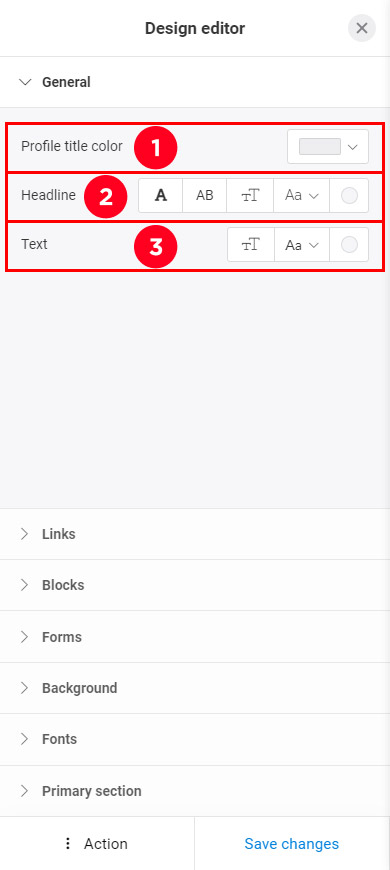
You can customize:
- the username color of the Avatar block. Choose a color.
- page headlines. Select font weight, letter case, letter size and spacing, font, and color.
- the page text. Choose letter size and spacing, font, and color.
These are available settings for customizing button appearance:
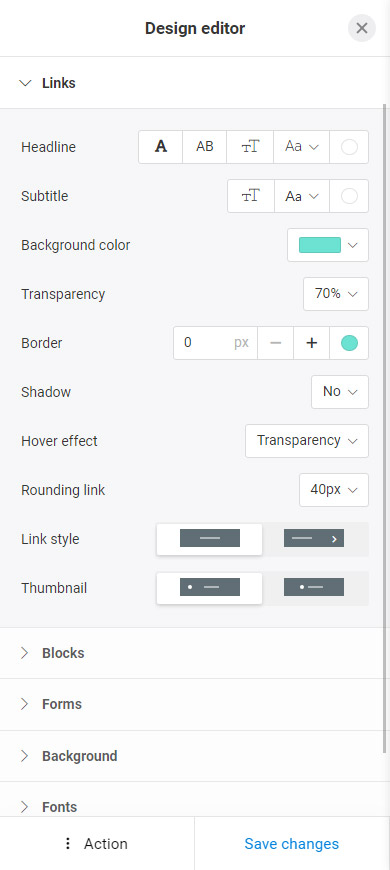
Below we explain each of the settings.
You can adjust the appearance of the button text:
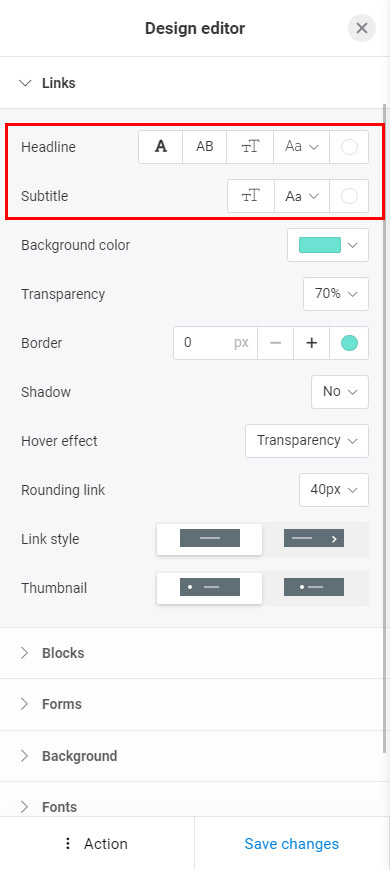
- Headline. Select font weight, letter case, size, line spacing, font, and color for the main button text.
- Subtitle. Select the size, line spacing, font, and color for the additional button text.
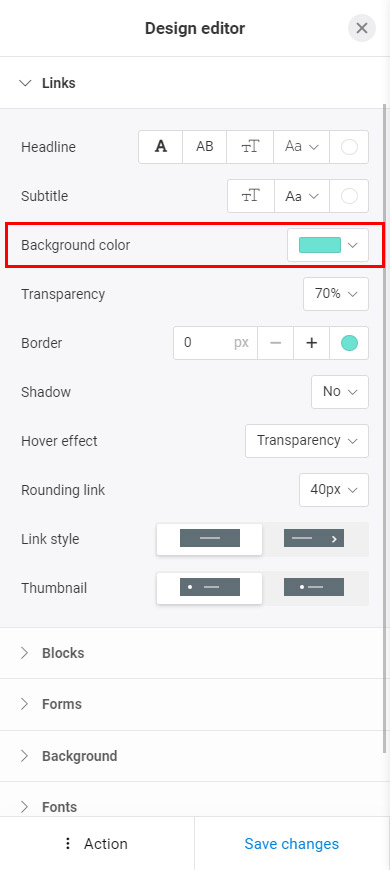
Open the Background color menu to set the button color.
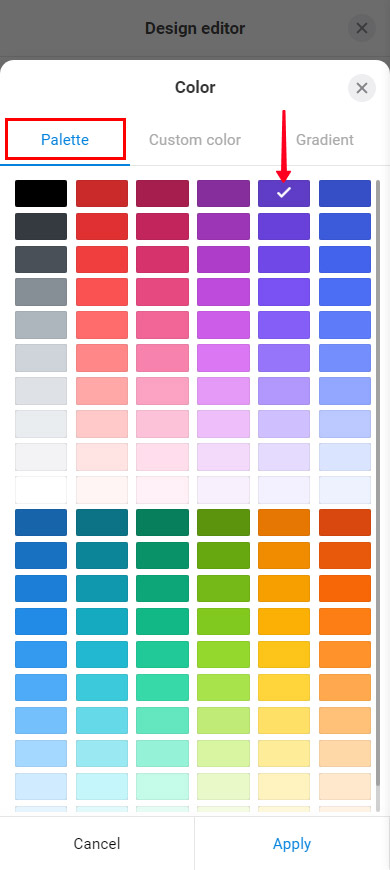
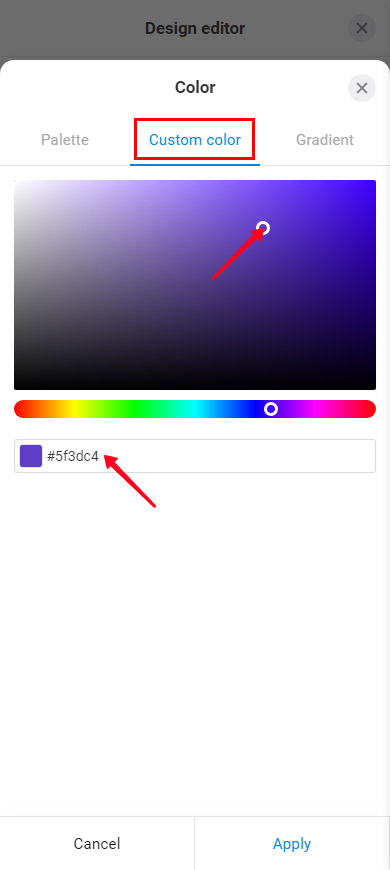
You can choose one of the options:
- Color from the palette. In the Palette tab, select one of the colors.
- Custom color. In the Custom color tab, paste the color code or tap a color on the palette.
- Gradient. In the Gradient tab, select several colors.
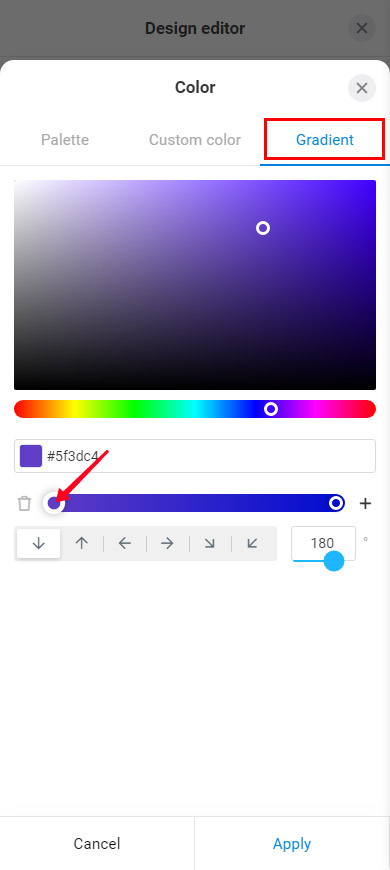
Let's look at the gradient settings in more detail.
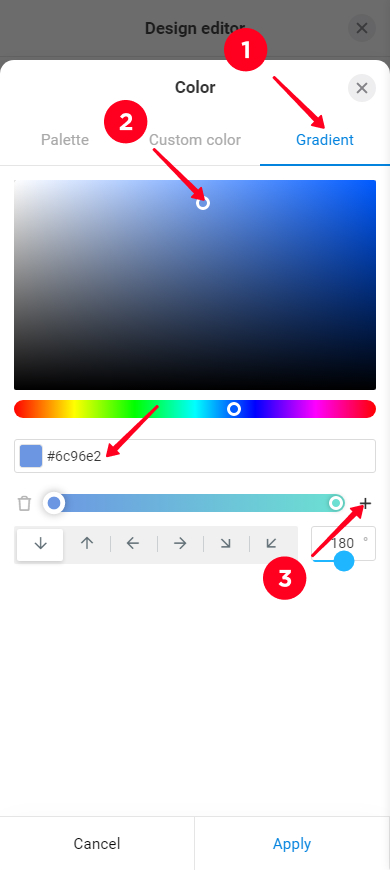
Select the button gradient colors:
01. Go to the Gradient tab.
02. Choose a color or paste a color code.
03. Tap the plus near the scale to add one more gradient color. There can be up to 7 colors in the gradient.
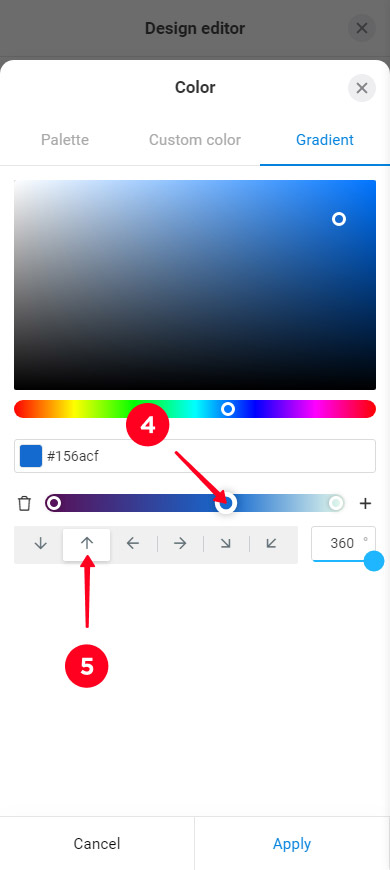
04. Tap the sliders to switch between the gradient colors. Select a color for each slider as in step 2. Move the sliders left and right to adjust the gradient length between the colors.
05. Set the gradient direction. Tap an arrow under the palette or set the degrees manually on the right.
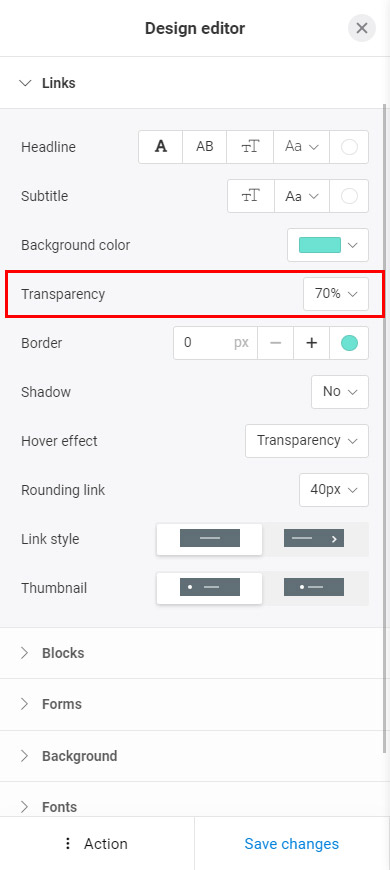
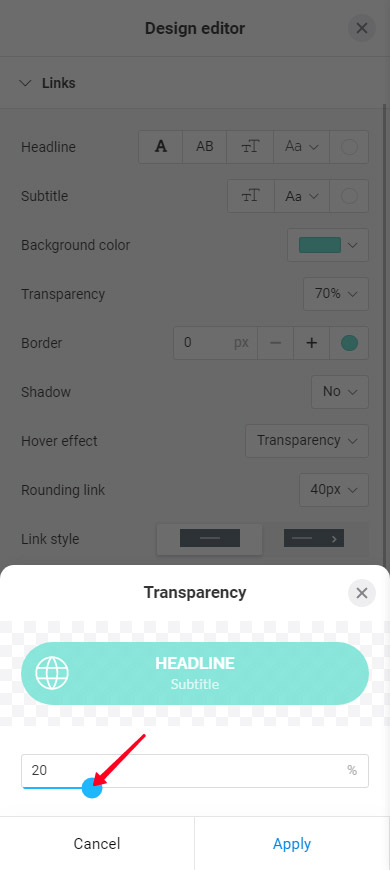
You can adjust the button transparency. Set a percentage number from 1 to 100 in the Transparency field. The higher the number, the more transparent the button. Set 100% if you want only text to be displayed instead of the button.
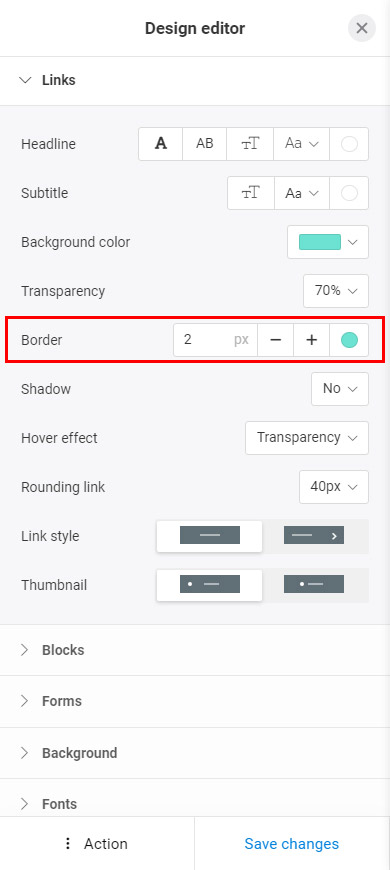
You can add a line along the button edges in the Border settings. Set the border thickness and color for this.
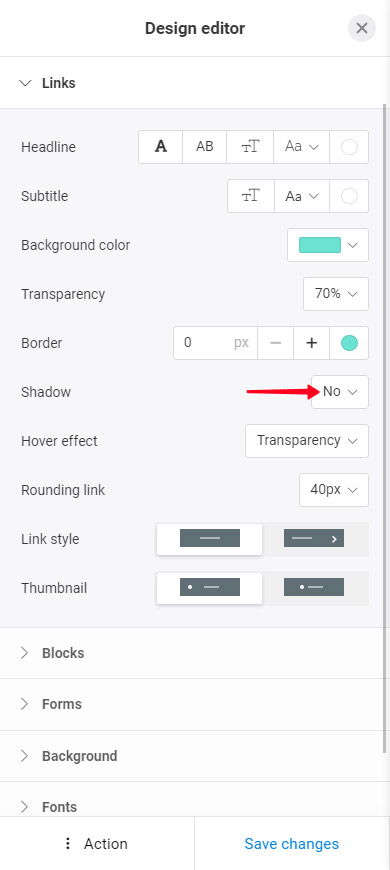
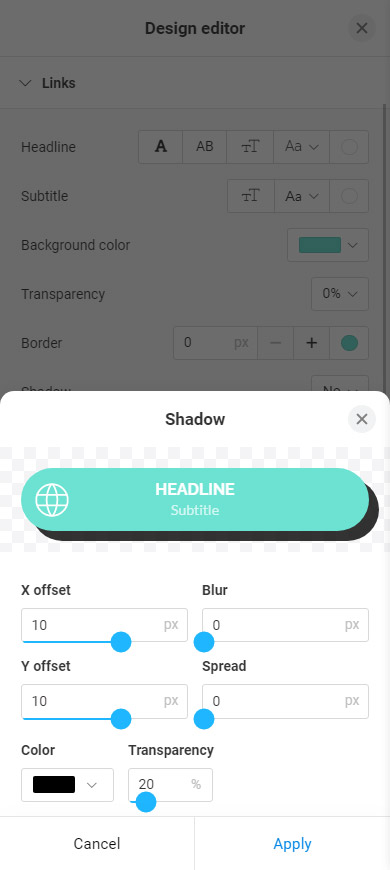
You can add a shadow to the buttons. Tap the Shadow settings and choose the positioning, color, and transparency.
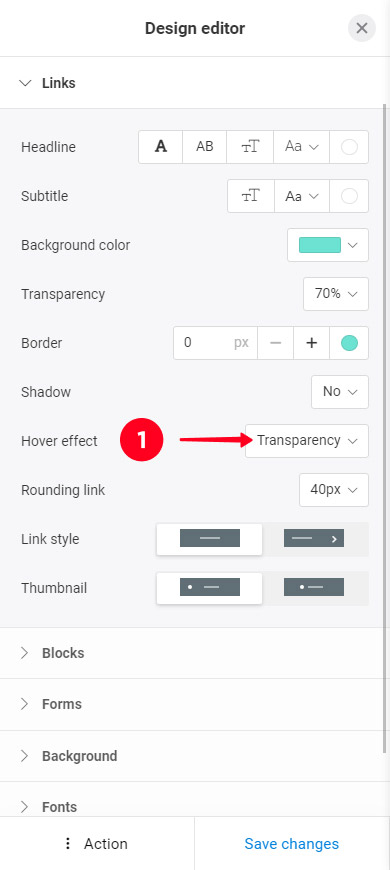
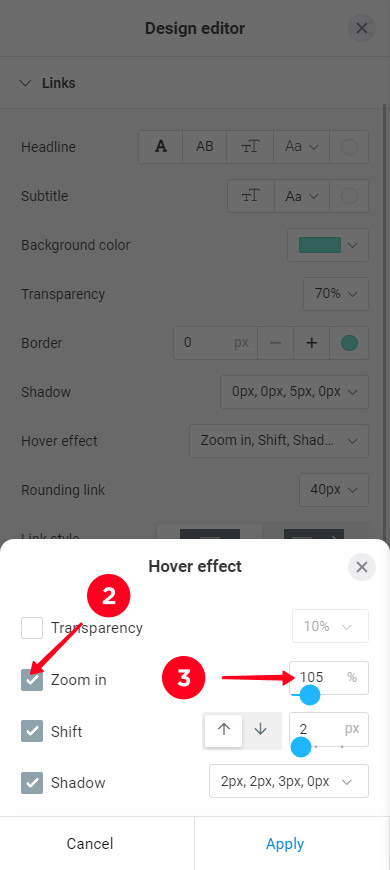
You can set the animation that is displayed when users tap the buttons using a phone and when they hover over the buttons using a computer.
- Open the Hover effect settings.
- Check the boxes next to the effects you want. You can select several effects.
- Adjust the intensity of the effects.
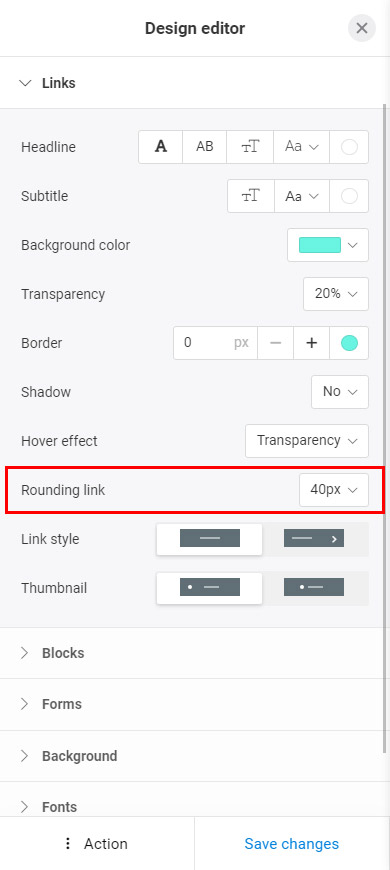
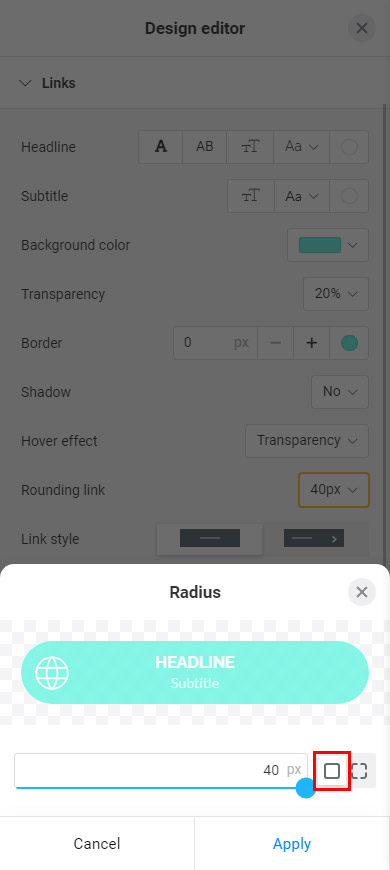
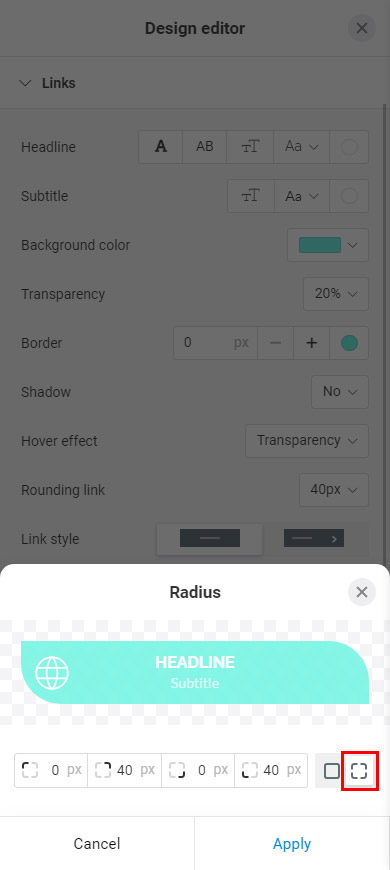
In the Rounding link settings, you can customize the shape of the buttons. You can make the same rounding for all corners (screenshot 2) or different for each corner (screenshot 3).
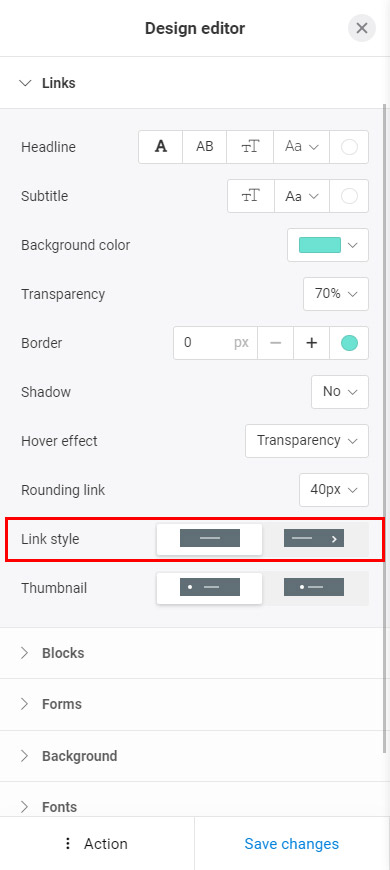
You can choose one of the two Link style options — only text in the center or text on the left with an arrow on the right.
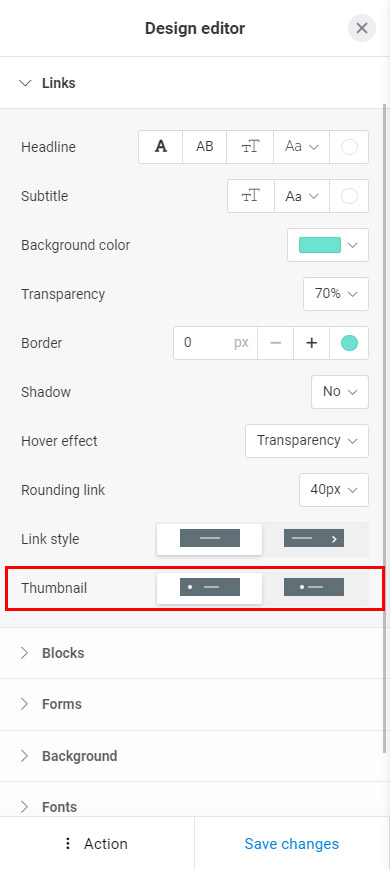
If in the previous part you selected the option with centered text only, then you can choose the thumbnail position on the buttons. Select one of the options in the Thumbnail settings — left alignment or text alignment (screenshot 1).
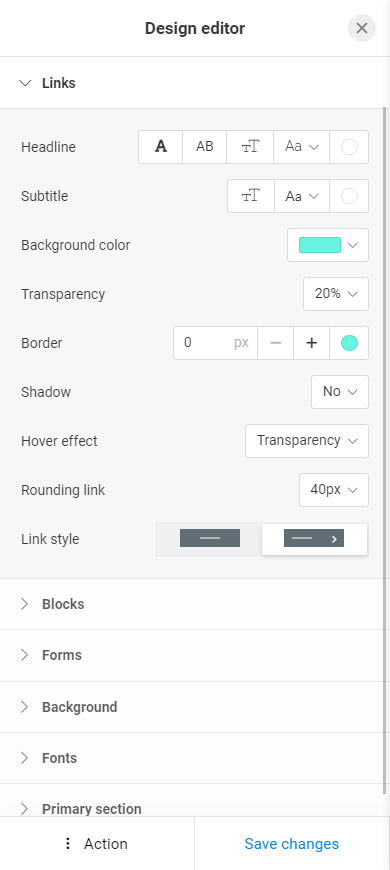
If you selected the text with an arrow in the previous part, then you can't adjust the thumbnail position (screenshot 2). The thumbnails are placed on the left edge before text.
That's all for the button settings. Let's get to the settings of other page elements.
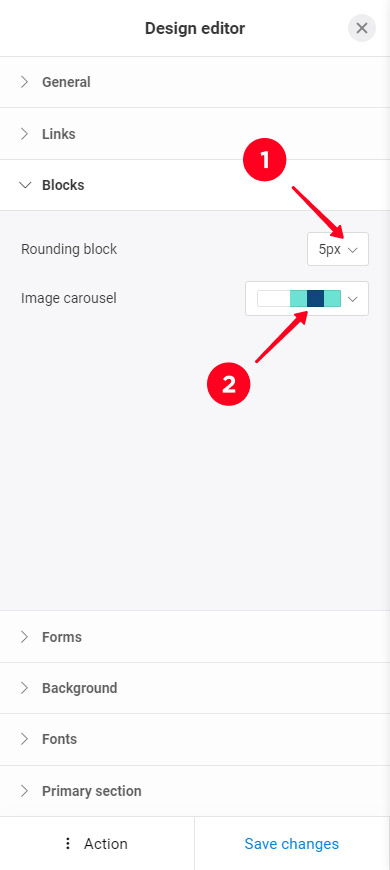
You can customize:
- Corner rounding, the setting is applied to the Video, Map, Banner, Image carousel blocks.
- Colors of the Image carousel.
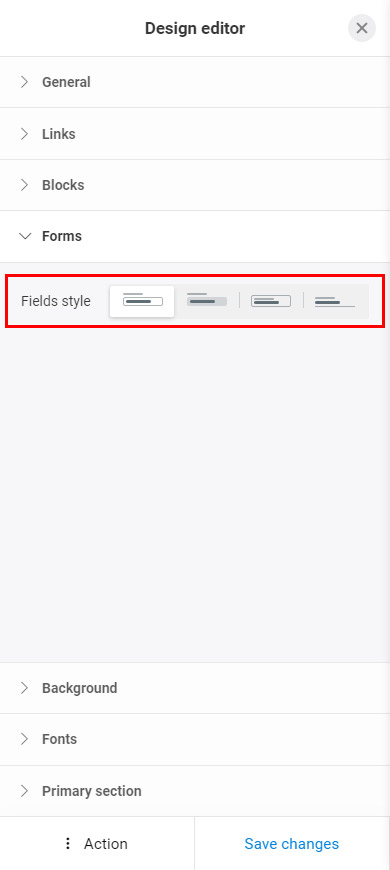
Choose how the Forms and payments blocks look. You need to choose one of the Fields style options:
Now go to the background settings. You can set a:
- Color from the palette.
- Custom color.
- Gradient.
- Image.
Below we explain each case in detail.
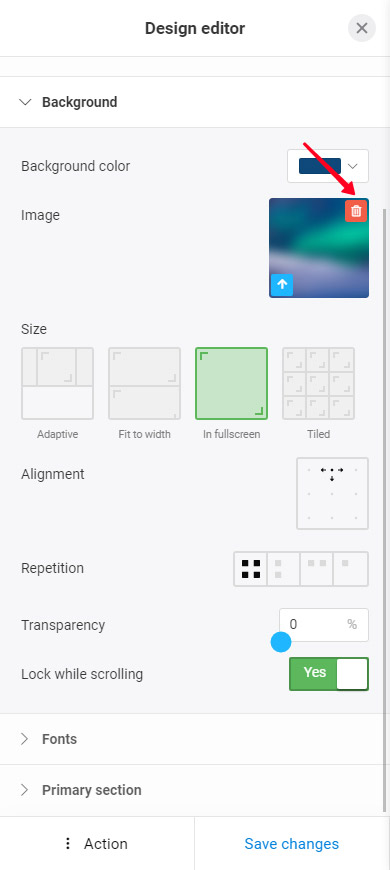
First of all, make sure that no image is set for the background. Otherwise, whatever color you choose, an image will be displayed on the background.
Check if the image is set in the Image field. If there is an image there, tap the trash icon to delete it:
Select a background color from the palette:
- Tap the Background color settings.
- Select the Palette tab.
- Choose a color.
- Tap Apply.
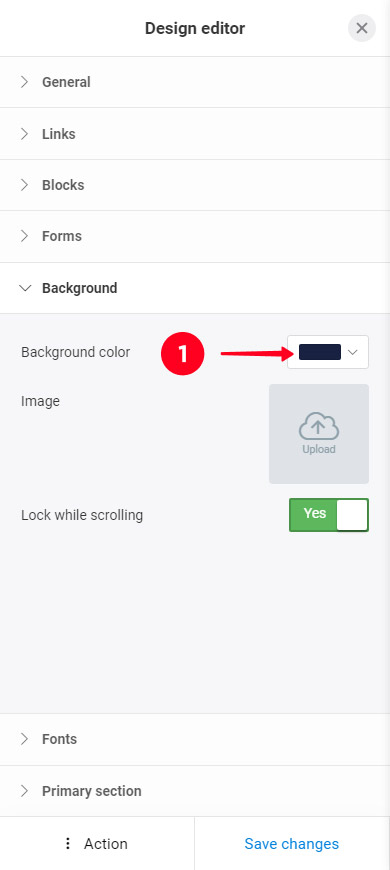
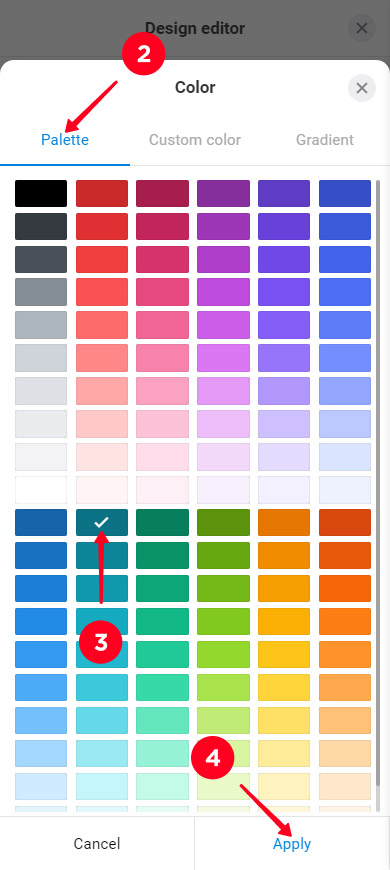
A custom color can be displayed on the background only if there is no background image set. Therefore, if an image is set in the design theme, first delete it. Read how to do this above.
Choose a custom color for the background:
- Tap the Background color settings.
- Select the Custom color tab.
- Paste the color code or tap a color on the palette.
- Tap Apply.
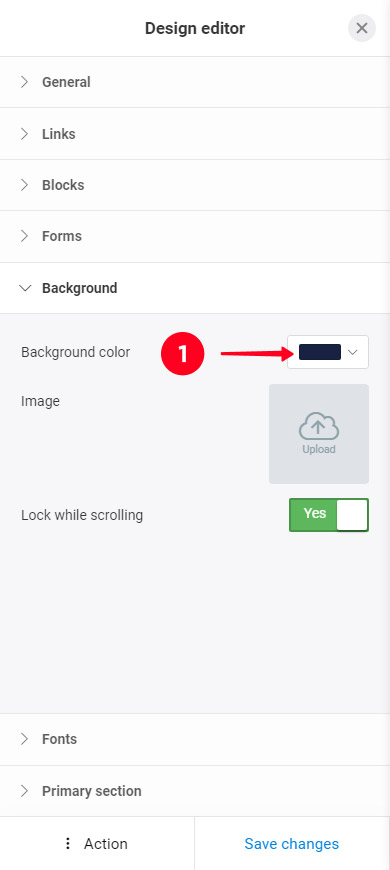
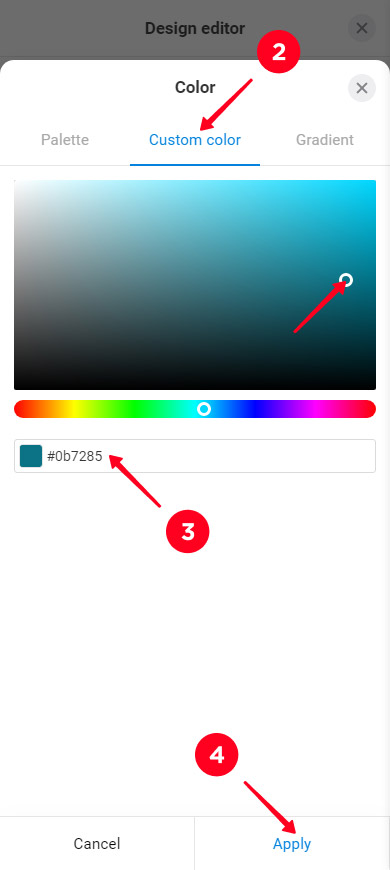
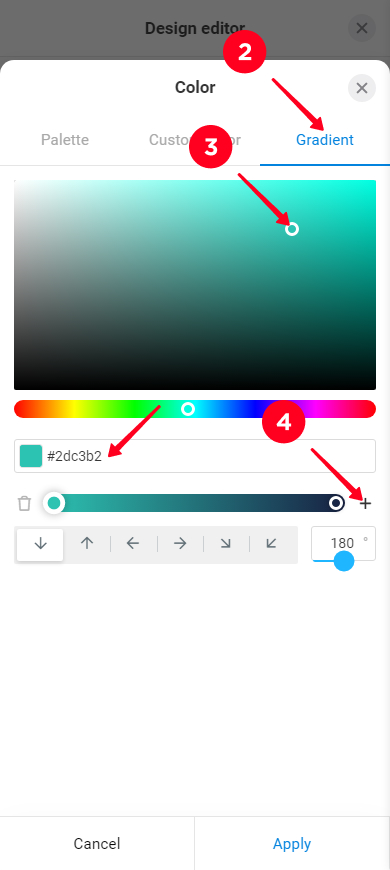
First, make sure that no image is set for the background. If an image is set, delete it. Read how to do this above. Then, you can set the gradient.
Select the gradient colors:
01. Tap the Background color settings.
02. Go to the Gradient tab.
03. Select a color or paste a color code.
04. Tap plus if you want to add one more color to the gradient. There can be up to 7 colors in the gradient.
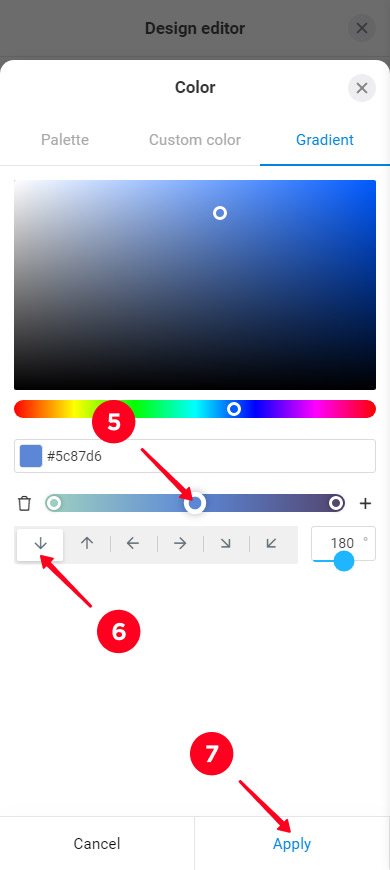
05. Tap the sliders to switch between the gradient colors. Select a color for each slider as in step 3. Move the sliders left and right to adjust the gradient length between colors.
06. Set the gradient direction. Tap an arrow under the palette or enter the degrees manually on the right.
07. Tap Apply.
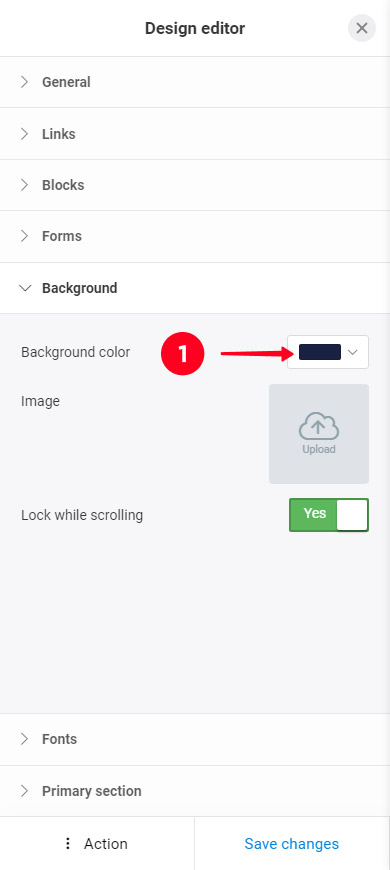
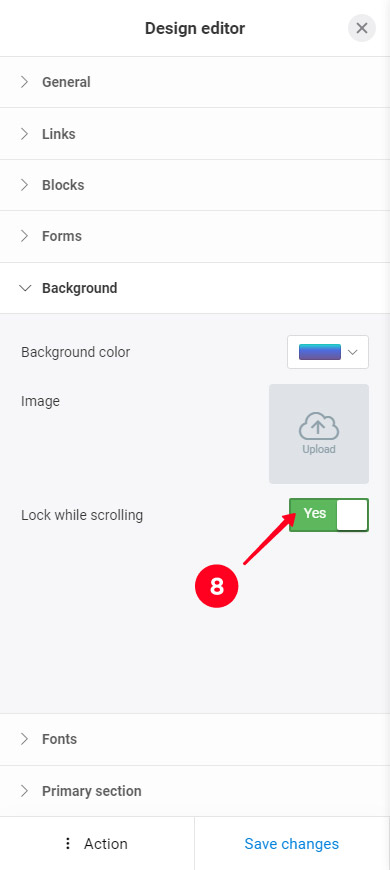
08. Pay attention to Lock while scrolling. It is turned on by default, and so the gradient has a fixed position and does not move when one's scrolling through your Taplink. Turn off the feature so that the gradient moves along with the content when one's scrolling through your Taplink.
Optimize the image size before uploading it to the background. The image should weigh no more than 5 MB so that you can upload it. Also, keep in mind that the heavier the image, the longer your Taplink loads. And users don't like to wait.
Set an image as the background:
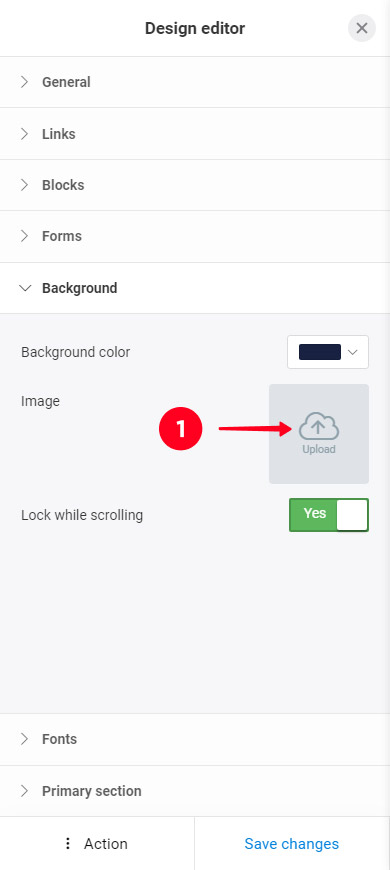
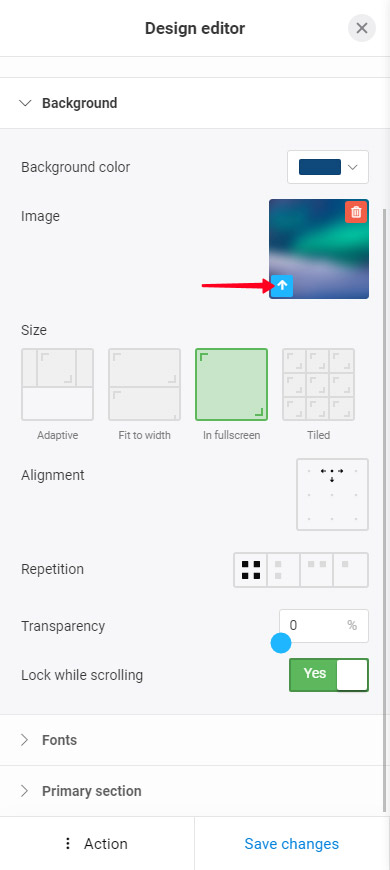
01. If no background image is set in the current design theme, tap Upload and select a file. If an image is already set, tap the upload icon and select a file.
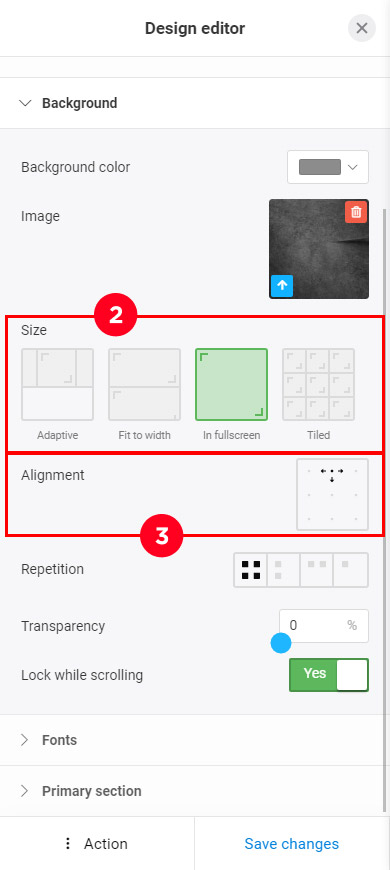
02. Select the image position on the background. Please note that the Adaptive option is only available for images with a width of at least four times the height.
03. Select image alignment.
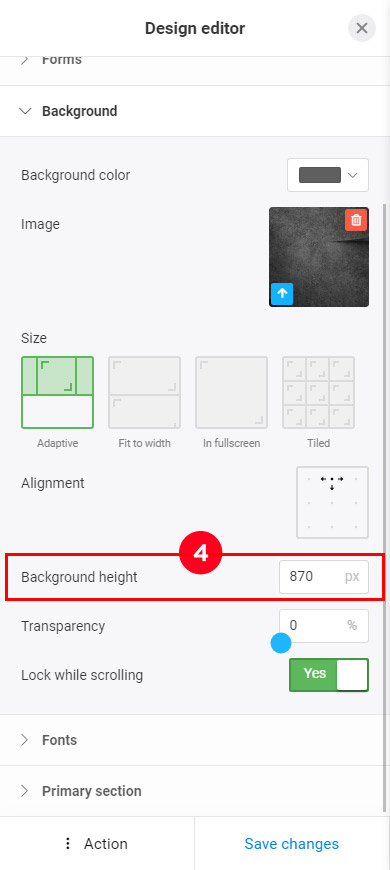
04. If you selected Adaptive size in step 2, set the background height.
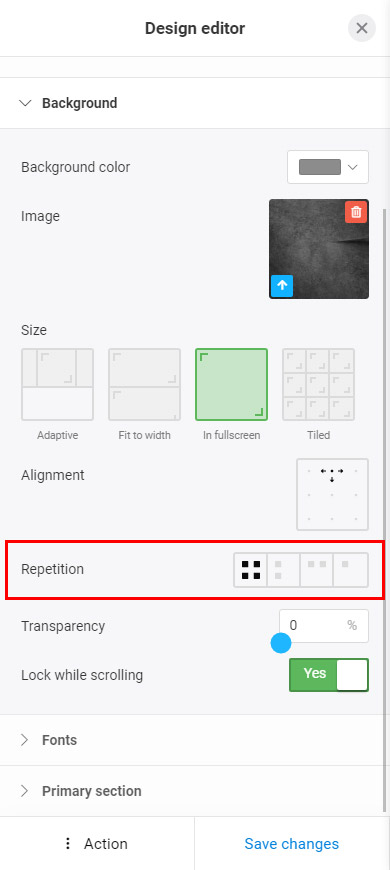
If you chose any other option in step 2, set the image repetition.
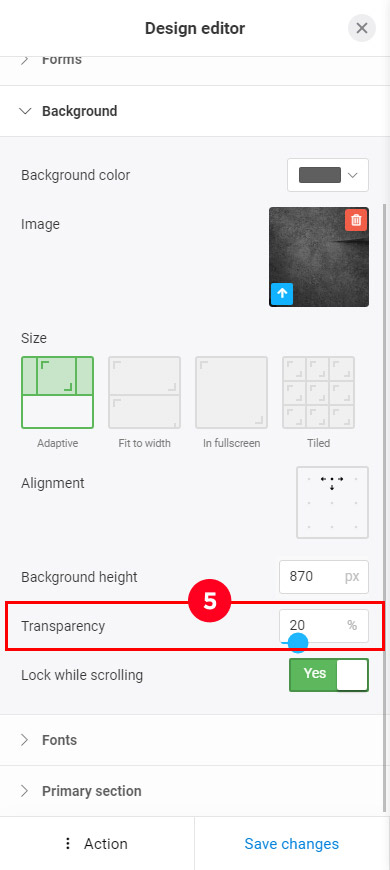
05. Select background transparency. The higher the value, the more transparent the image.
With 100% transparency, the background appears as a plain color, which is set in the Background color settings. This color is set automatically after you upload an image. But you can change it: choose a color from the palette or set a custom color.
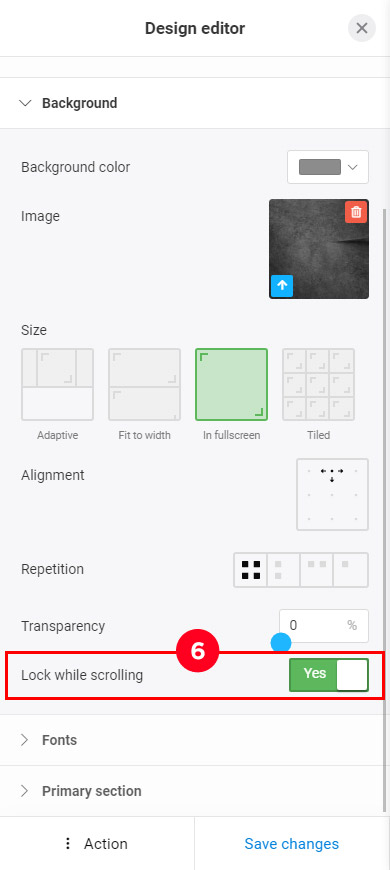
06. Pay attention to Lock while scrolling. It is turned on by default, and so the background image has a fixed position and does not move when one's scrolling your Taplink. Turn off the feature if you want the background image to move along with the content when one's scrolling your Taplink.
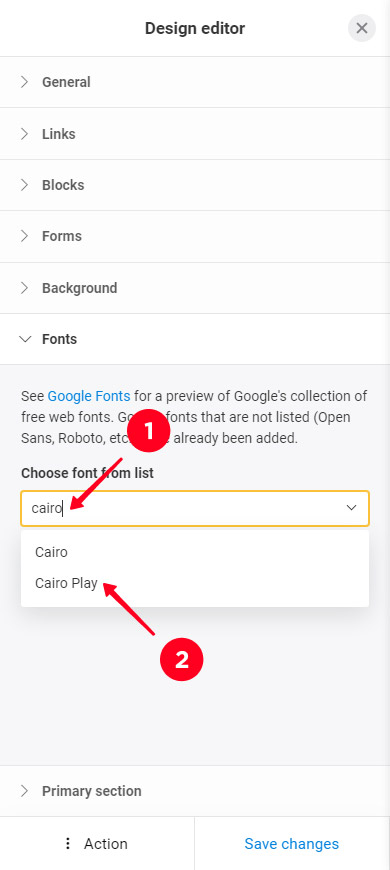
If you didn't find the font you need when setting the text and buttons, use one of the Google fonts:
- In the Fonts settings, start typing the name of a Google font in the field. You can find the name here.
- Select the font you need on the list.
- Make sure that there is a check mark next to the alphabet you need.
- Tap + Add font.
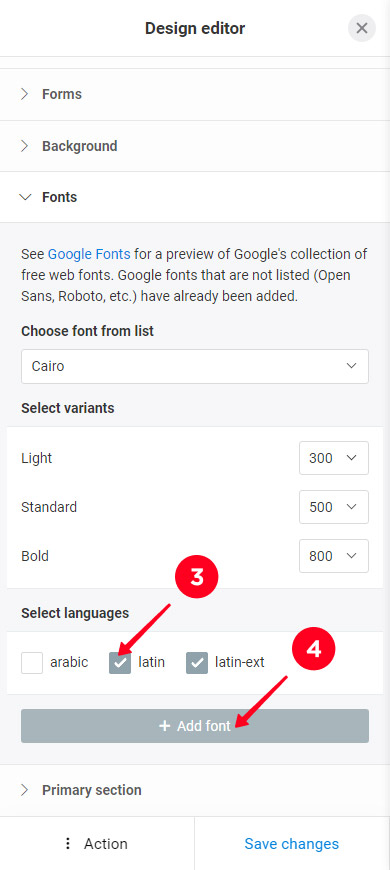
Next, you need to save the theme changes. After that, new fonts appear in the settings and you can choose them for the page text and the button text.
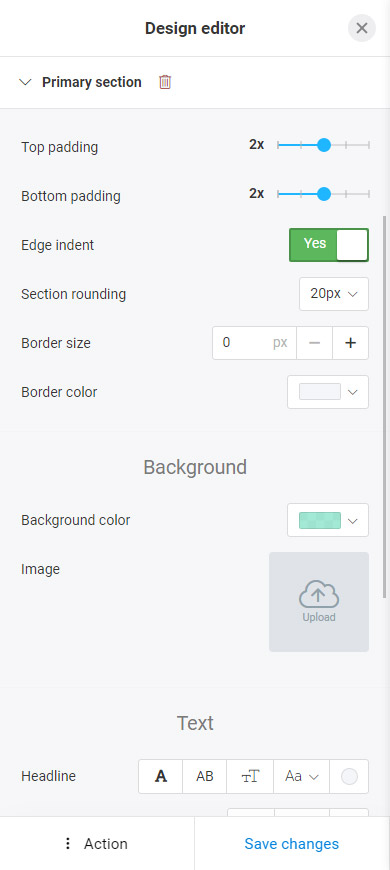
Sections are additional design theme settings. They can be applied to individual blocks on your Taplink.
Each ready-made design theme already has created Sections. You can also create your own Sections. A design theme can have as many Sections as you want.
Read the guide on how to use Sections.
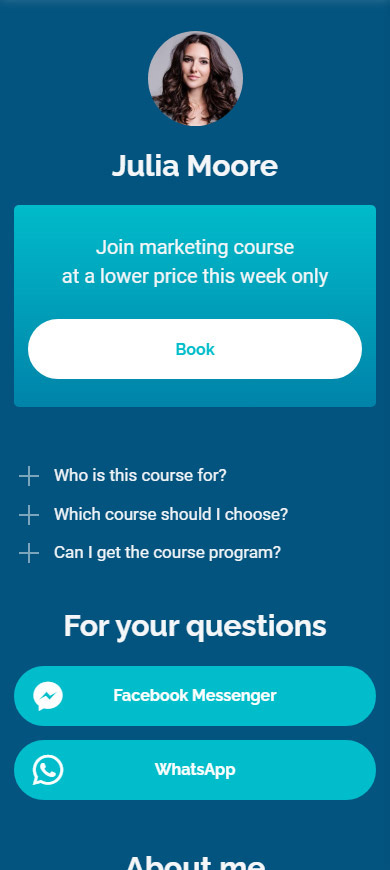
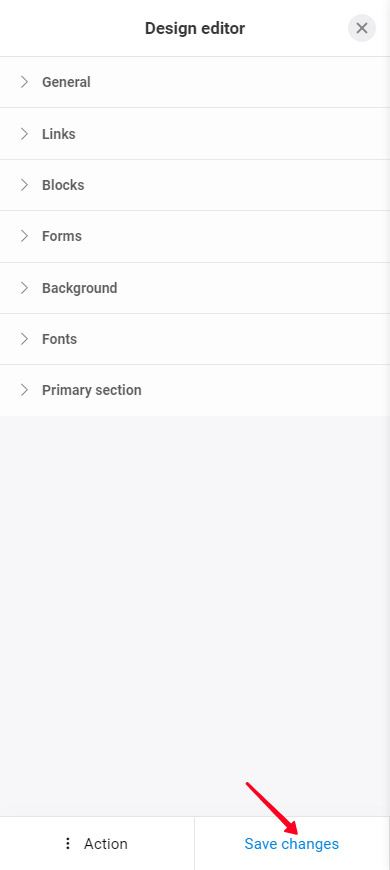
When your design theme is adjusted, tap Save changes.
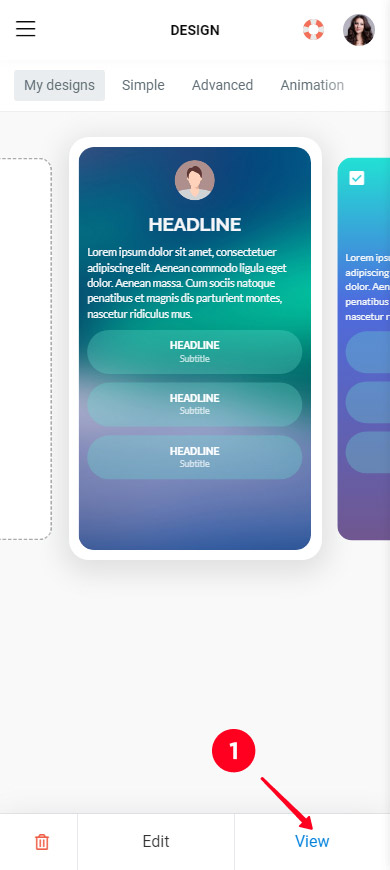
After editing a theme, apply it:
- Tap View.
- Tap Choose.
If none of more than 300 ready-made design themes is close to what you want, create your custom theme. You must have the Pro or Business plans for this.
Create a custom theme in your Taplink account:
01. Tap the three lines.
02. Select Design.
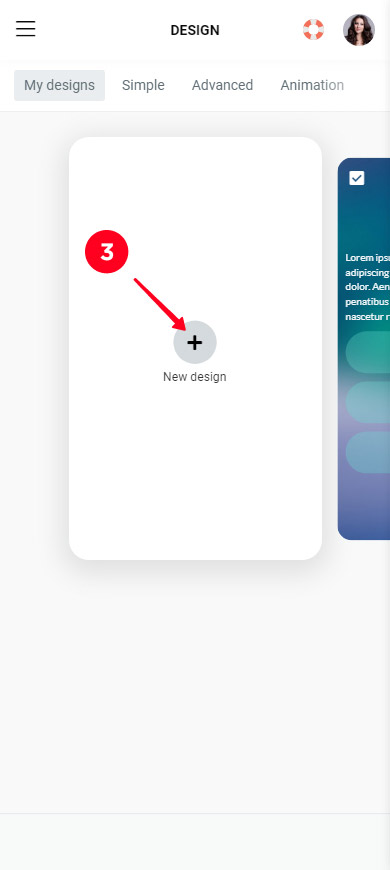
03. Swipe left and tap New design.
04. Tap Yes.
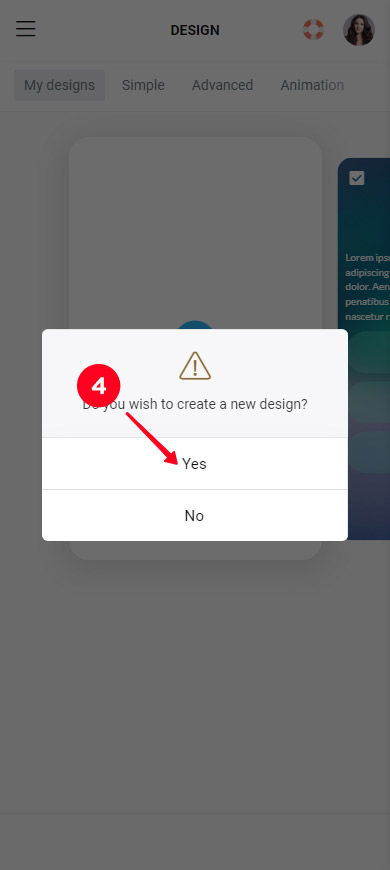
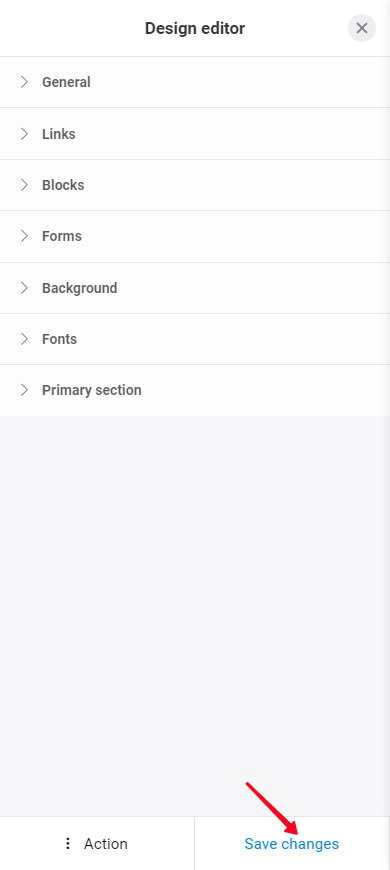
There you will see the same settings as when editing ready-made themes:
Customize your design theme and tap Save changes.
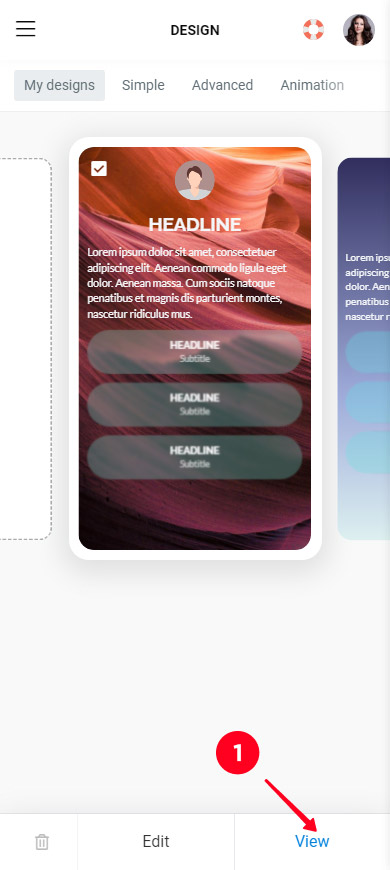
Then, your custom design theme appears in the My designs tab, which opens after you create a theme. Apply your new theme:
- Tap View.
- Tap Choose.
Well, now you know how to set and apply design themes. Try changing your Taplink appearance right now!
You can also customize the appearance of individual blocks on the page. Use Sections to customize multiple blocks. Use the block settings to customize an individual block. For example, customize the appearance of messaging buttons and the appearance of social network buttons.