Create your Taplink page
This guide explains how to create your Taplink. Read the whole guide or its part about creating:
After signing up, you are taken to the page with templates. You can choose a template for:
- a link in bio page. This is a page with multiple links. They help to share multiple links where only one link can be added. For example, in an Instagram bio.
- a landing page. The page may contain not only links, but also photos and videos, opt-in forms, maps, timers, and much more. It can be used for inclining page visitors to take an action you want them to take. For example, you may want them to call you or buy your product.
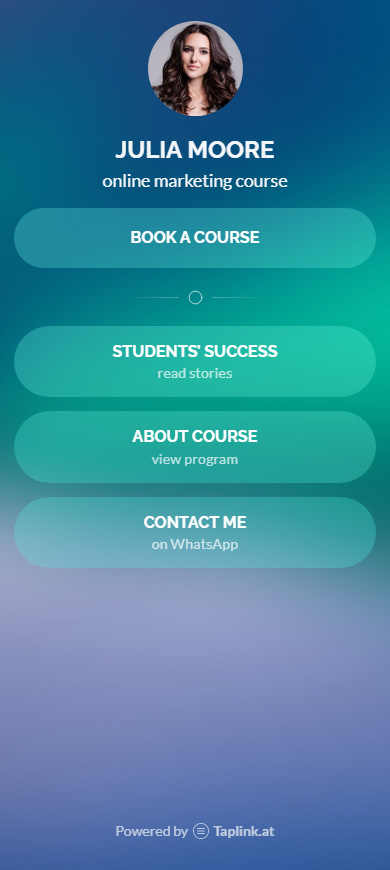
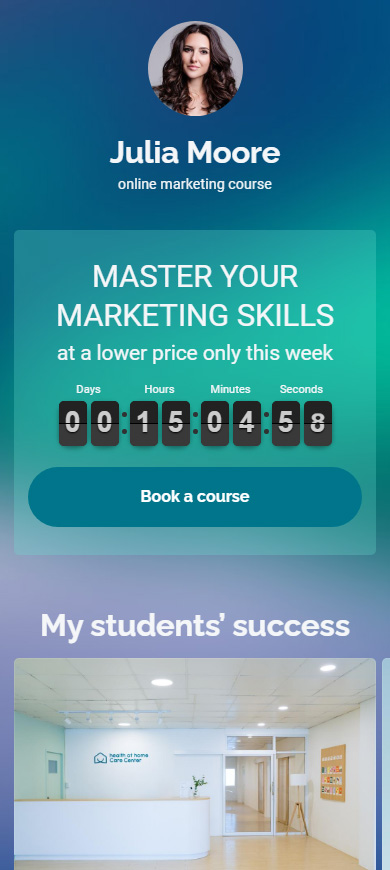
On the left screenshot, you can see an example of a link in bio page. On the right screenshot, there is the beginning of a landing page.
Let's see how to create a link in bio page using a template on a free plan. Below we:
After registration, you get to the page with templates, there you need to:
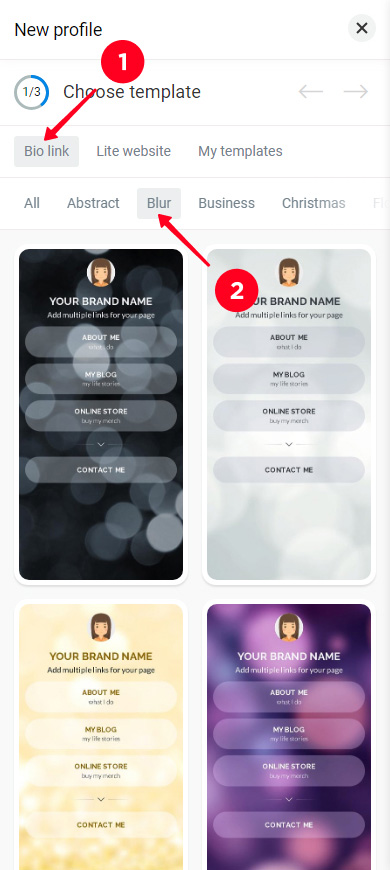
- Select the Bio link tab.
- Find a template for your page. Scroll down the templates to see them all. Or swipe the categories to the left or right and select a category to view templates on a specific topic.
- Tap a template.
- Tap Choose.
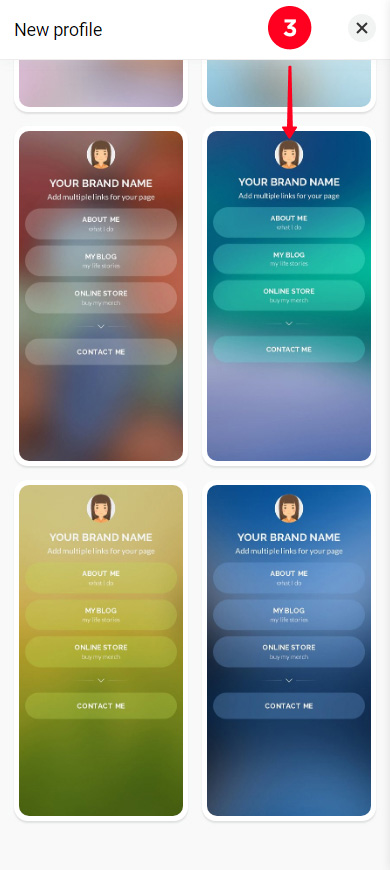
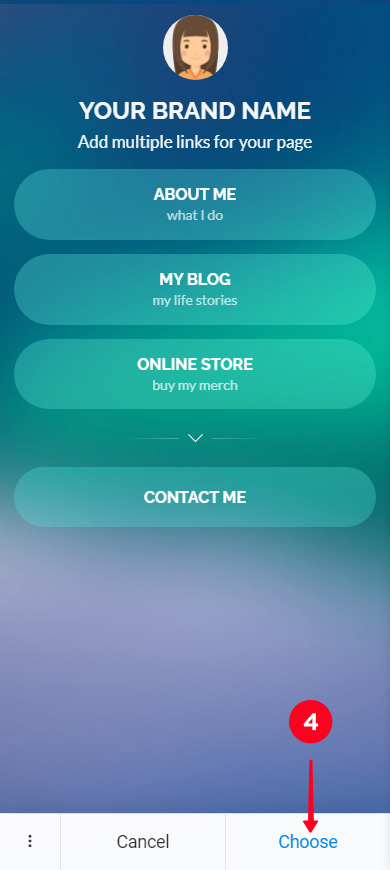
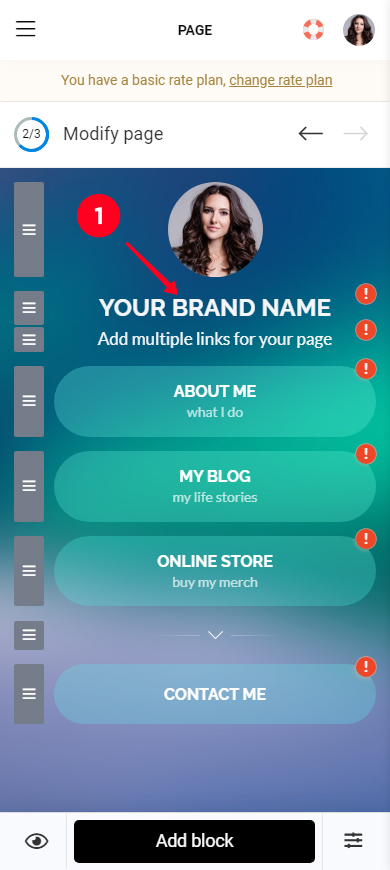
A page template consists of blocks: a profile image, texts, links, and a delimiter. You can edit, add, move, and delete blocks on your page.
Some blocks have an exclamation mark. All of these blocks must be edited.
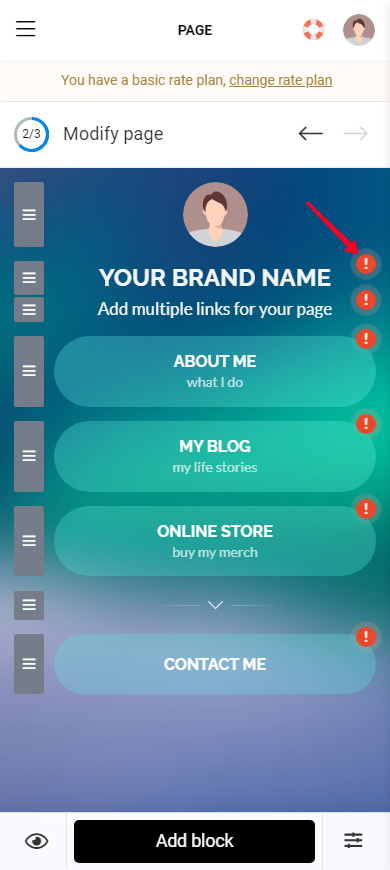
All blocks on the page are edited in a similar way. Let's see some examples.
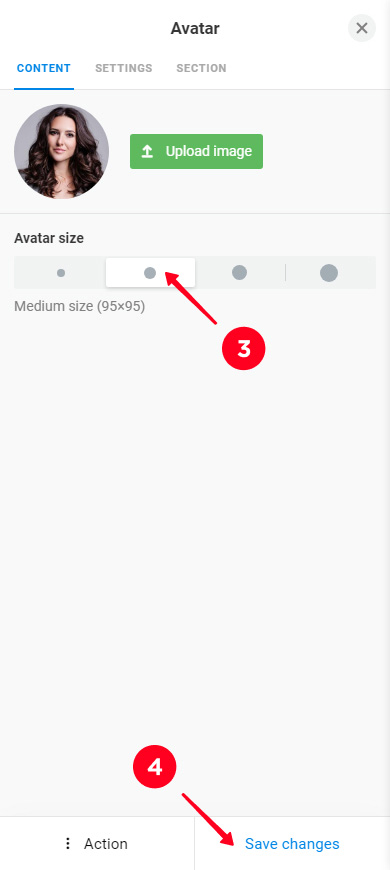
Profile image
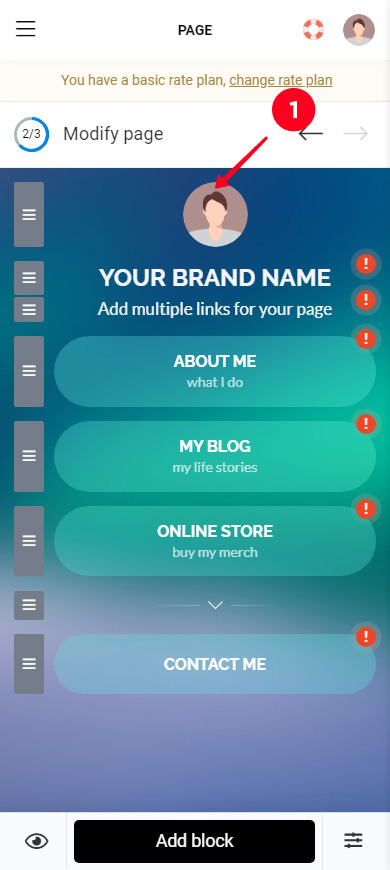
- Tap the profile image.
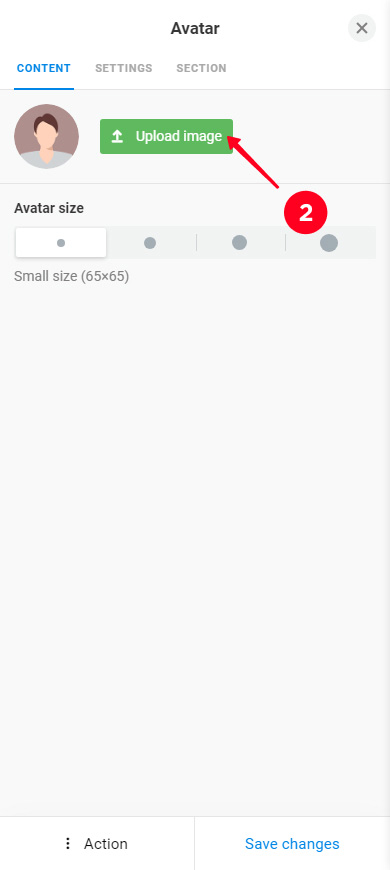
- Tap Upload image and select a photo from your phone's gallery.
- Optionally, change the size of the image.
- Tap Save changes.
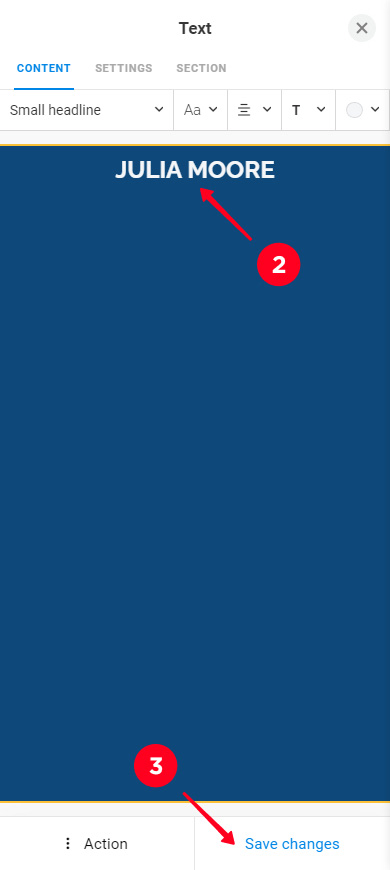
Text
- Tap a text.
- Write your text.
- Tap Save changes.
Link
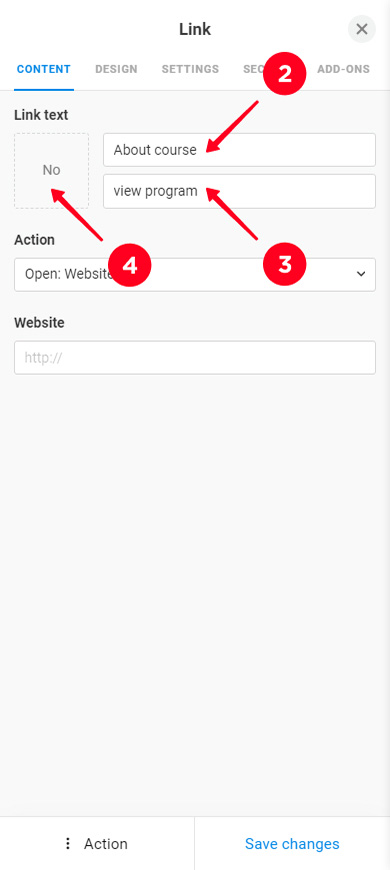
- Tap a link.
- Specify the text to be displayed on the button.
- Optionally, specify the additional text. It will be written in a smaller font under the main text.
- Optionally, set an image. You can either choose an icon from the library or upload your custom picture. We are not adding an image in the example.
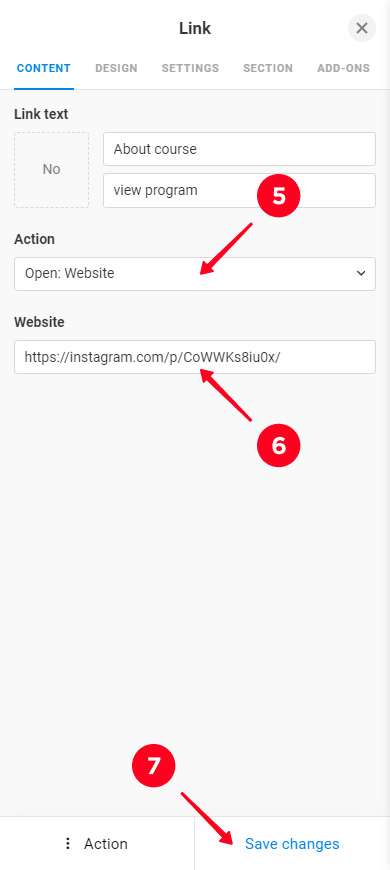
- Select an action for the button. If you want to add a link to your profile or website, leave the Website option selected. You can make it a button that allows users to call or text you, or give their email by choosing a relevant action for the button.
- Paste a link. The fields to fill in may differ depending on which action you have chosen.
- Tap Save changes.
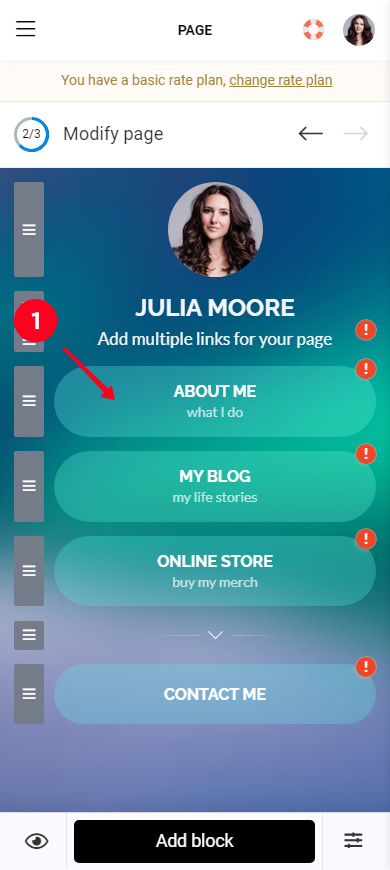
Edit the rest of the links and texts on the page in the same way.
All blocks are added to your page in a similar way. We will show how to do this by adding a FAQ block as an example:
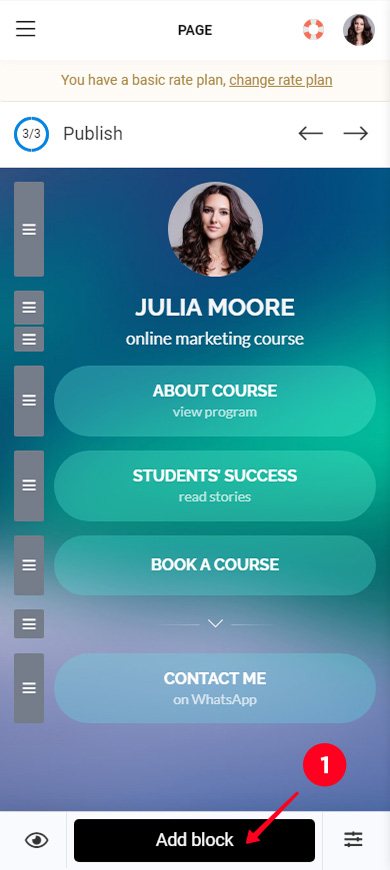
01. Tap Add block.
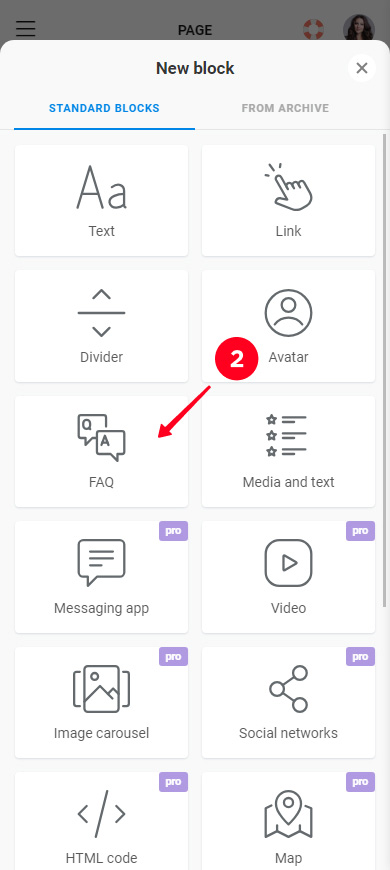
02. Select a block. We add a FAQ as an example.
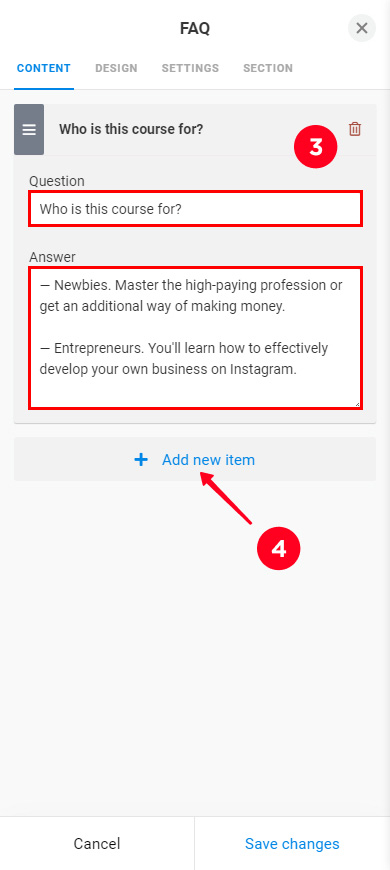
03. Fill in the fields. In our case, this is the title and the text that will be displayed when tapping the title.
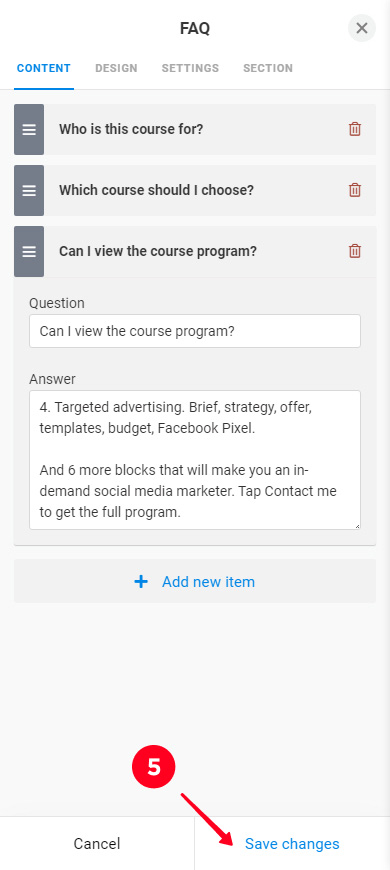
04. Let's add more titles and texts. Tap + Add new item and fill in the fields. After that, repeat steps 4 and 3 one more time. So, we've got 3 FAQ items in total.
05. Tap Save changes.
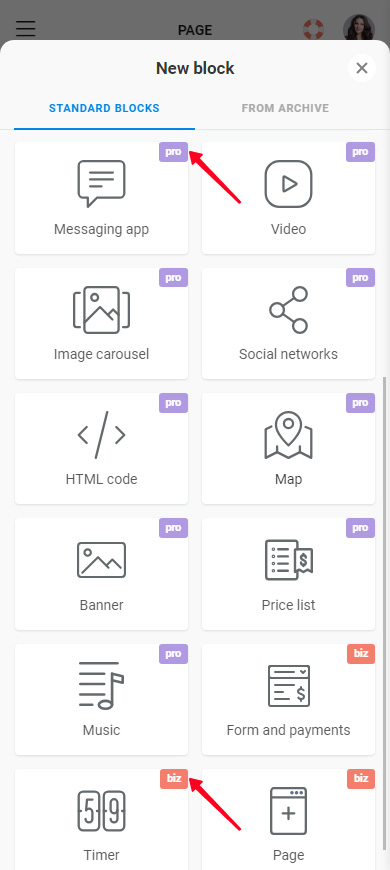
Available to you blocks depend on your plan. If a block is not available to you, you will see the name of the required plan near it. You can switch to this plan on the pricing page.
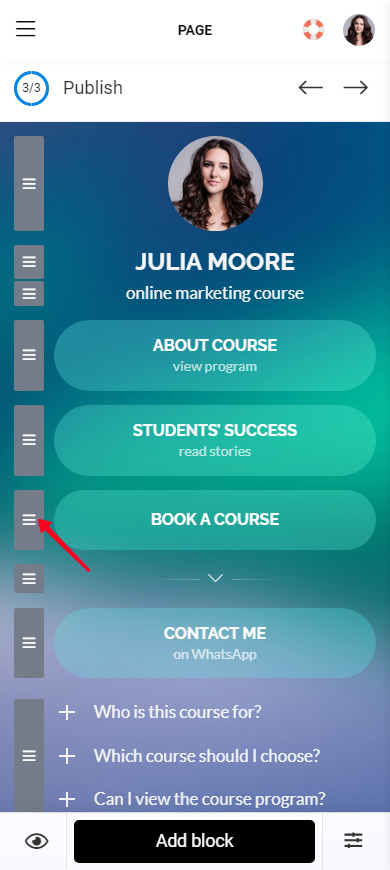
Tap and hold the three lines next to the block you want to move. Drag it to the desired place on your page and then release it.
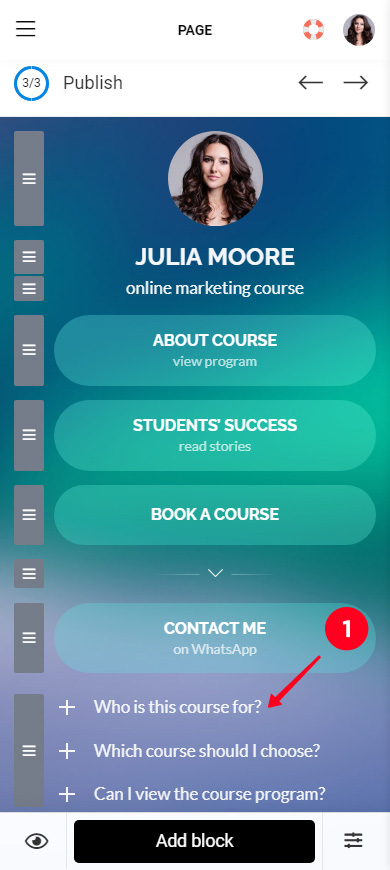
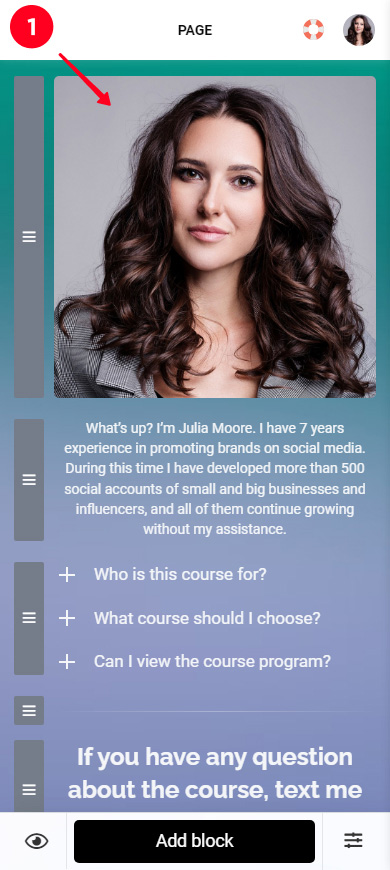
01. Tap a block you want to delete.
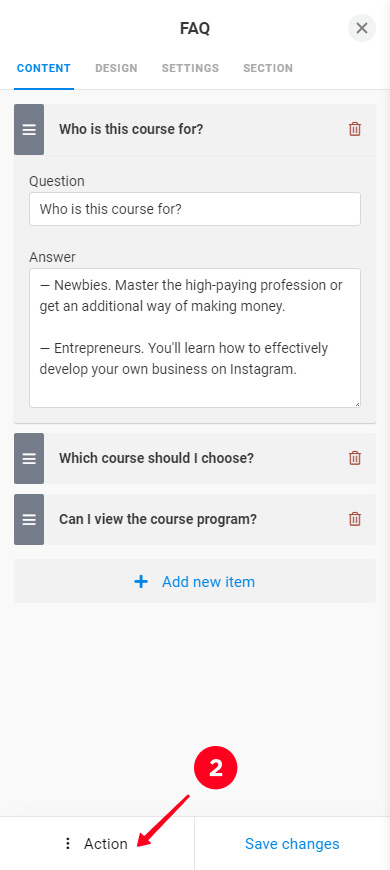
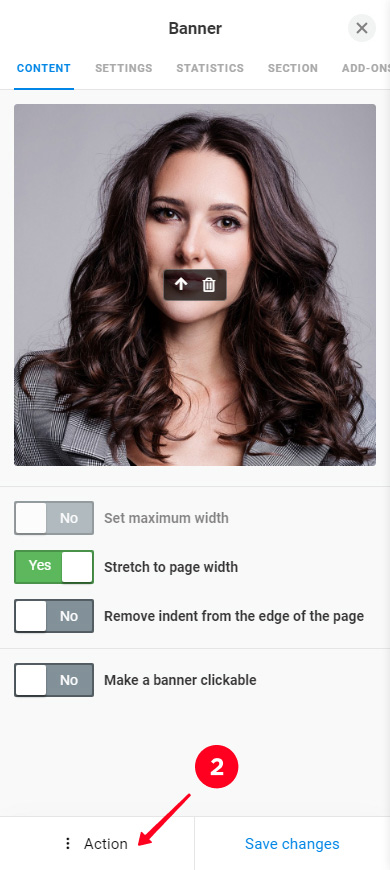
02. Tap Action.
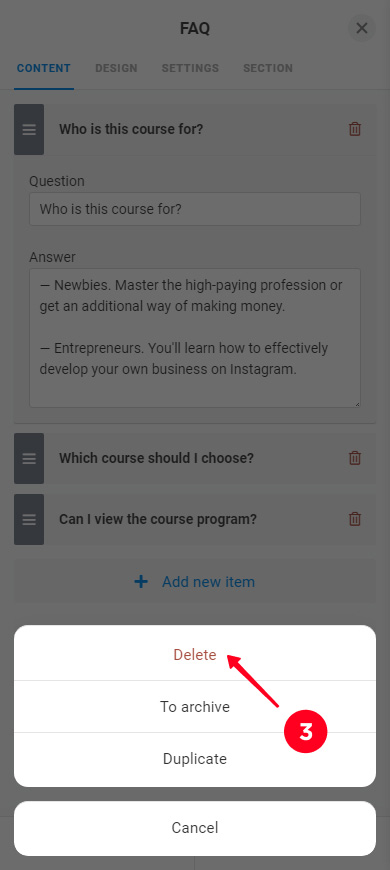
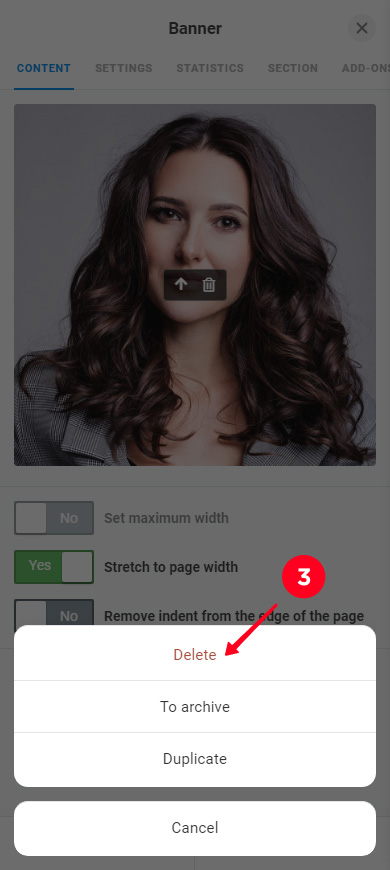
03. Select Delete.
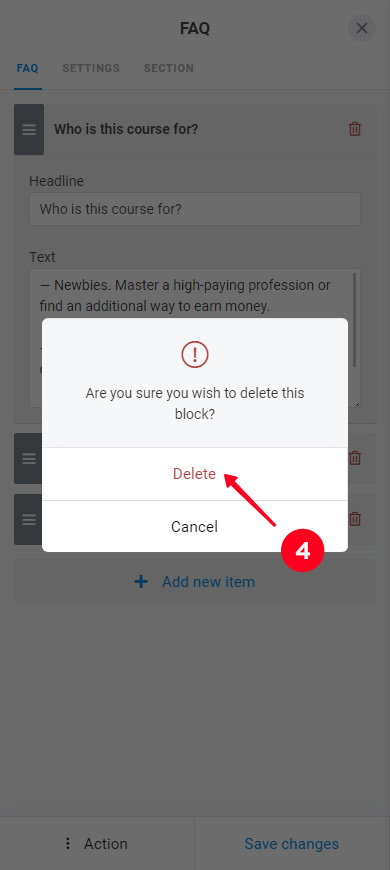
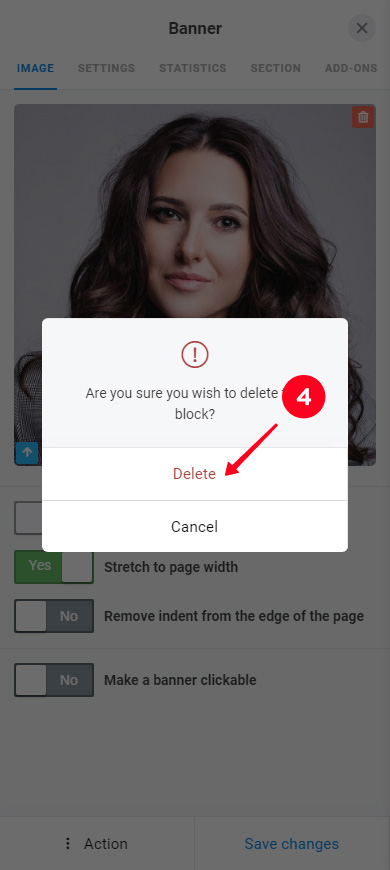
04. Select Delete again.
That's all, your link in bio page is almost ready to be presented to others. The next step is to publish it, here is a guide on how you can do this.
In this part, we show how to create a landing page using a template and explain how to:
After registration, you are taken to the page with templates. There you need to:
- Go to the Lite website tab to see landing page templates.
- Scroll through the categories, and tap your niche category to see the options.
- Tap a template. Scroll down to see if it suits you.
- Tap Choose.
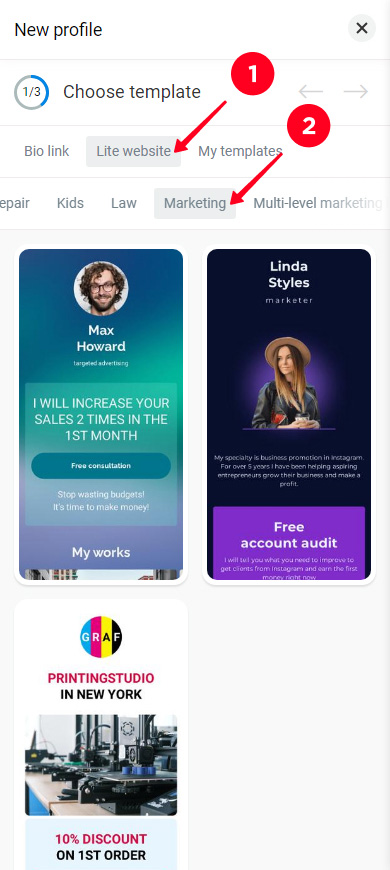
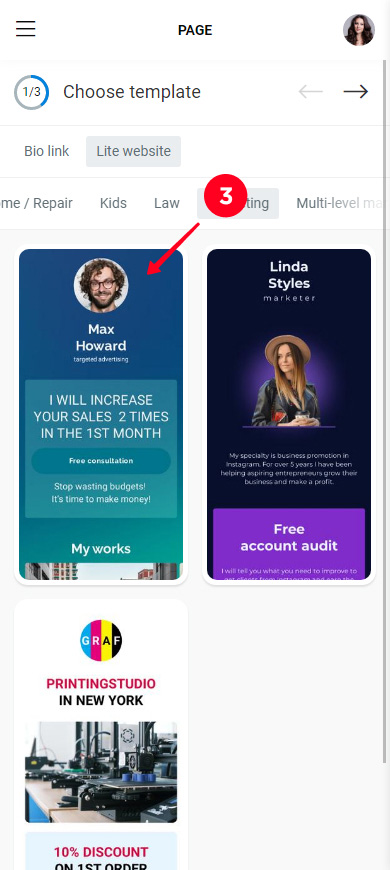
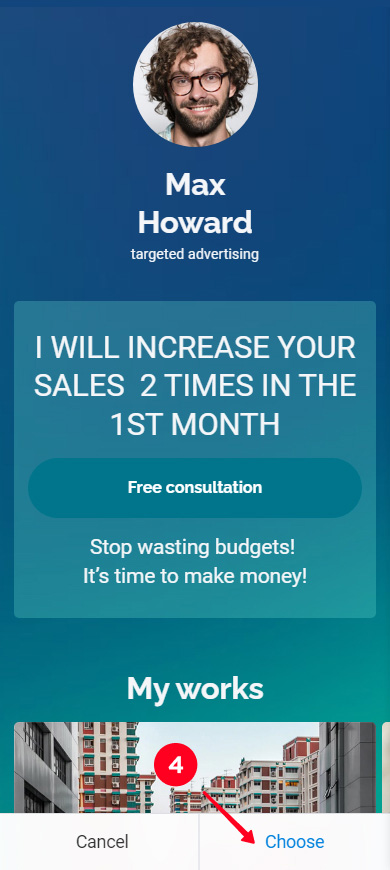
The page you have chosen consists of blocks. They are, for example, the profile image, texts, and links. Blocks on the page can be edited, added, moved, and deleted.
All blocks with exclamation marks must be edited.
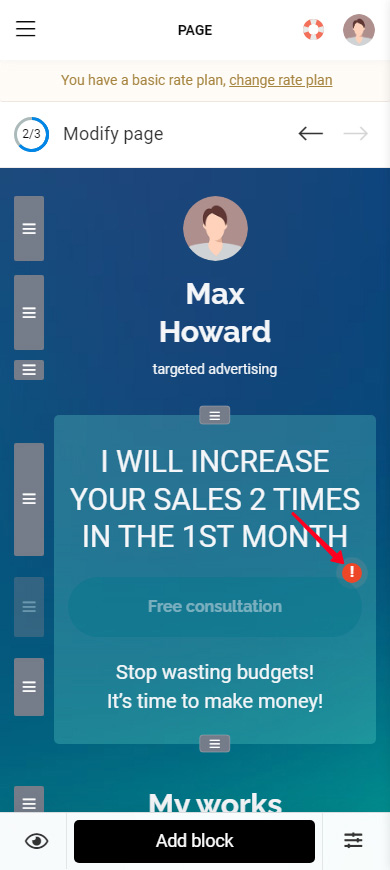
Note that available to you blocks depend on your plan. If a block on the page is translucent, then it is not available on your plan. Upgrade your plan to use it.
Tap a block to see what paid plan you need to use it.
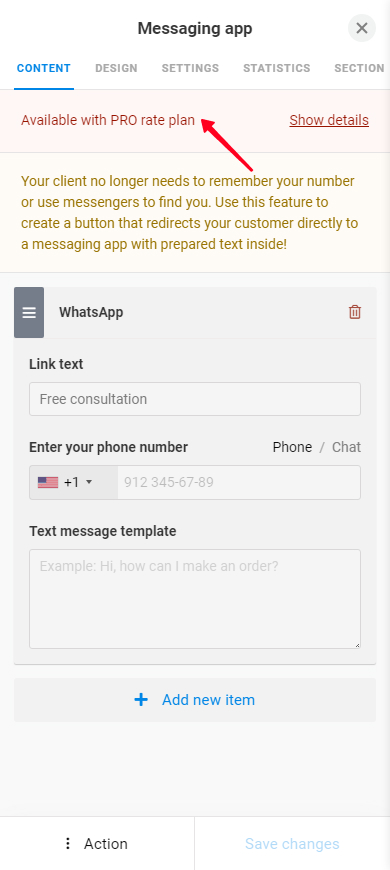
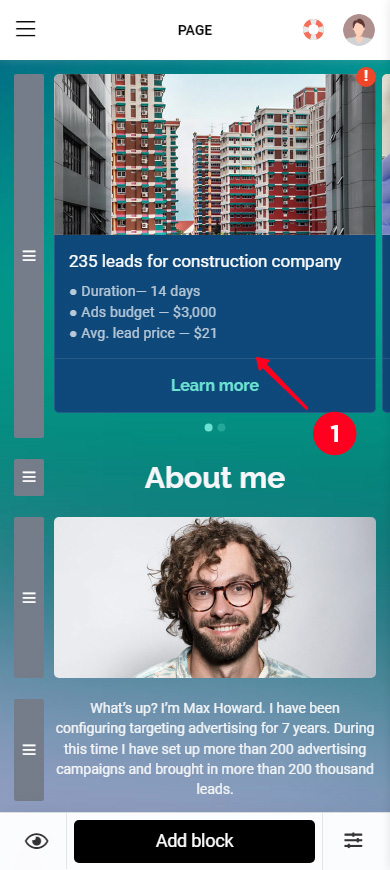
All blocks on the page are edited in a similar way. We will give an example by editing a carousel block.
01. Tap a block.
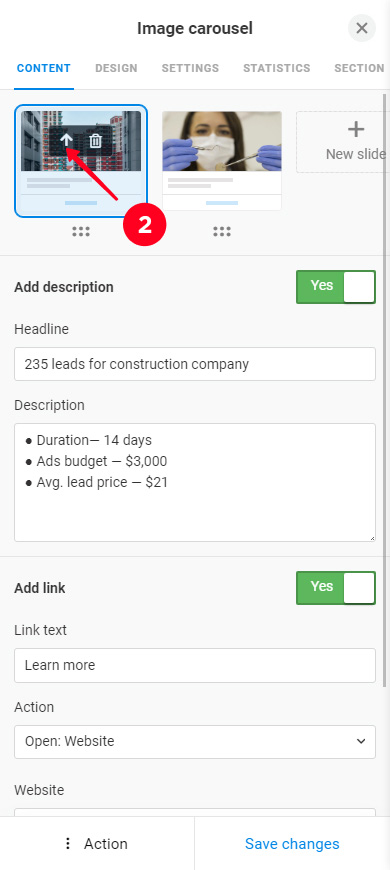
02. Tap the uploading icon and select a file from your phone's gallery.
03. Fill in the title and description fields.
04. Add a button text and link.
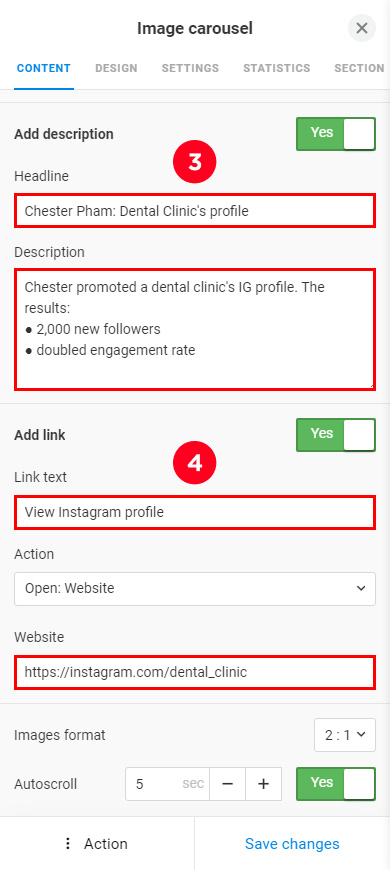
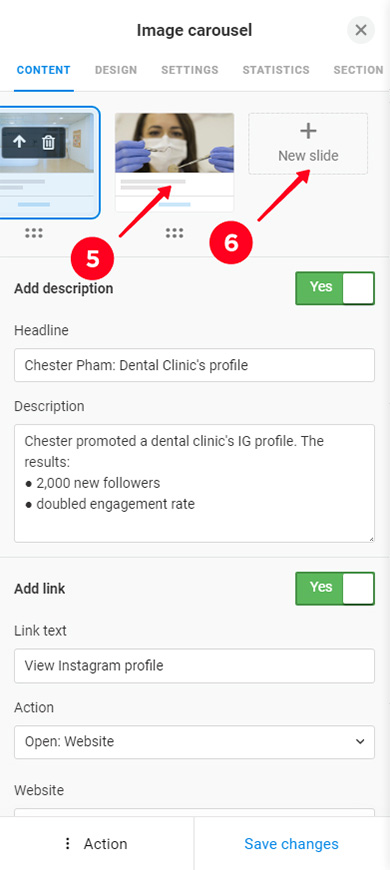
05. Tap a slide to switch to it. Repeat steps 2–4 for each slide.
06. Optionally, add new slides. Tap New slide and fill in the fields as described in steps 3–4.
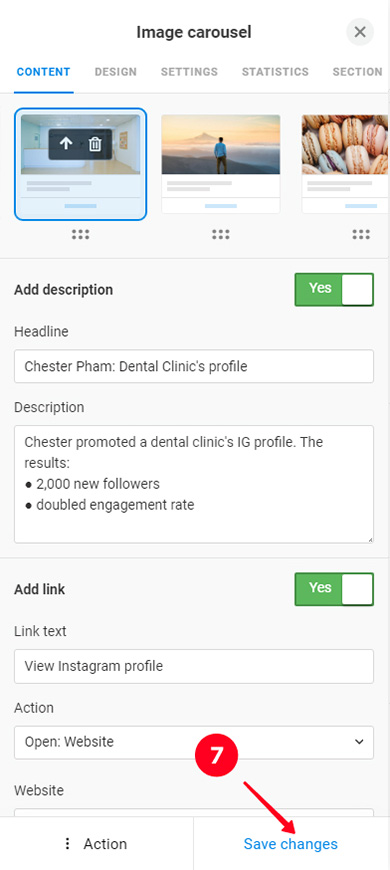
07. Tap Save changes.
Edit the rest of the blocks on the page the same way.
There are 18 blocks in total on Taplink.
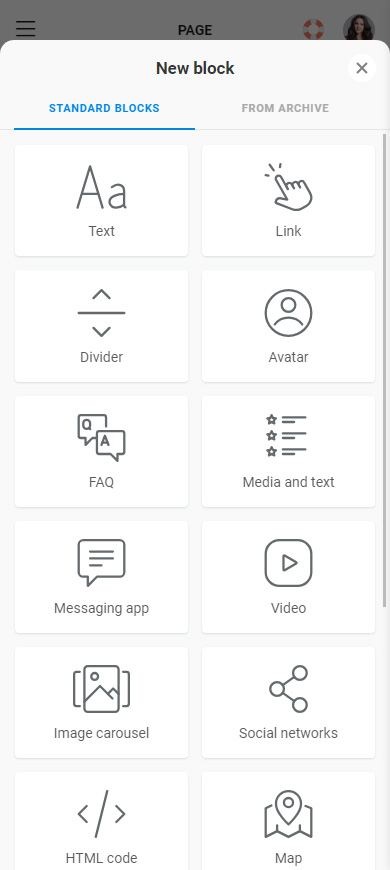
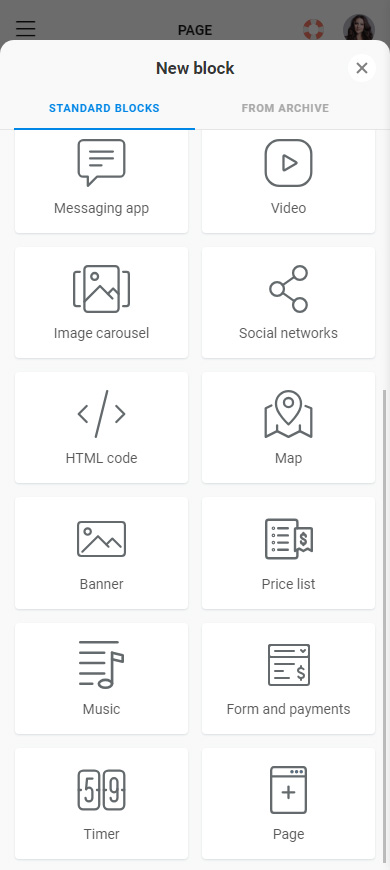
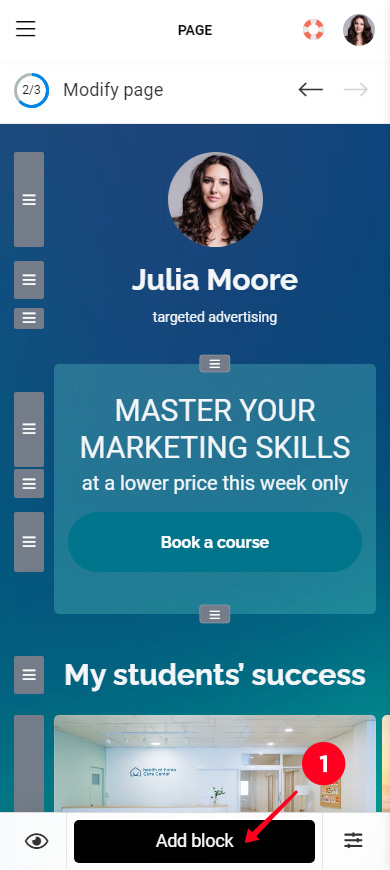
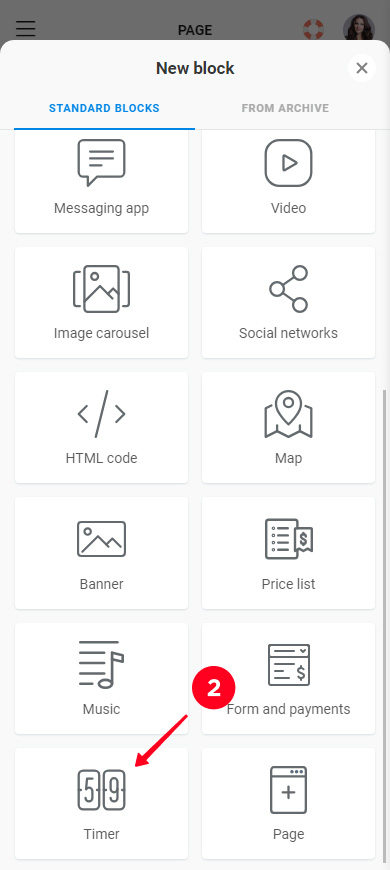
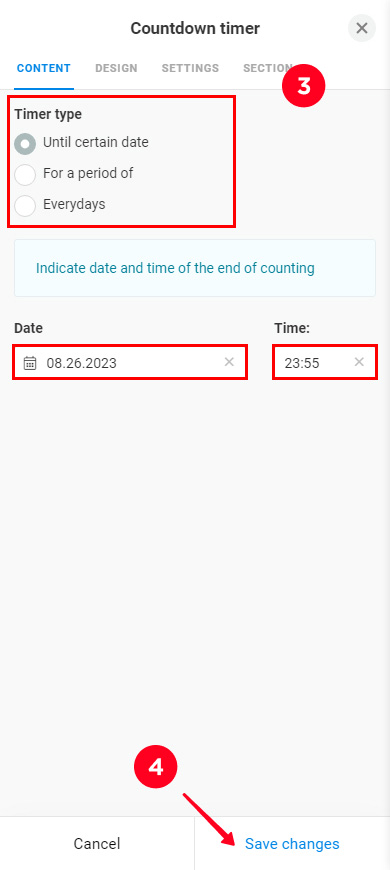
All blocks are added to the page in a similar way. We will give an example with a timer:
- Tap Add block.
- Select a block, we chose Timer.
- Adjust the settings and fill in the block fields. For example, we need to select a timer type and set the date and time.
- Tap Save changes.
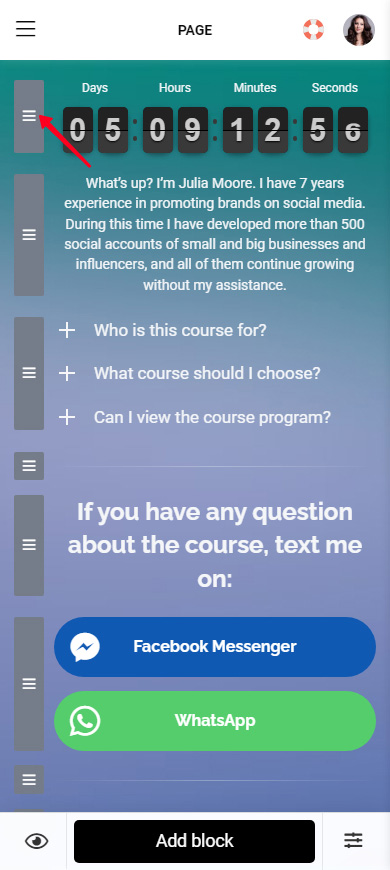
Press and hold the three lines next to a block. Move it to the desired place on the page, then release it.
If you need to remove a block:
01. Tap a block.
02. Tap Action.
03. Select Delete.
04. Select Delete again.
Check your Taplink page. Make sure that you have added all the necessary blocks to tell about yourself, and that you have removed the blocks you don't need. Check whether you have added information relevant to you instead of the template information.
When you're sure the landing page looks alright, move on to publishing it. You can find a step-by-step guide for this here.