How to create a digital business card: 3 easy steps

- What you should add to your digital business card
- Creating a digital business card: step by step
- Step 1: Select a template
- Step 2: Add your information
- Step 3: Publish your card
- How to get a QR code for your digital business card
- How to promote your electronic business card
- Share your digital card online
- Place a QR code on physical surfaces
- The bottom line
When planning how to make a digital business card, start by deciding what contact information will be most valuable to include.
- Your photo or logo: It builds trust and helps people recall your face or brand immediately.
- Your name and occupation: This clarity eliminates uncertainty and helps avoid embarrassing moments caused by forgotten names.
- Contact options: They include a phone call, email, messaging app chats, SMS, social media, and any other options people can contact you through. This will let people select the most convenient way for them.
- A save contact button: This option opens a contact app with pre-filled contact information on your client’s phone. With one tap, the client can save all your contact details on their phone.
- Your business address: You can add your address only or a map with the location of your office or store. When your client taps the address, their navigation app will open automatically, which will make it easier for them to find you.
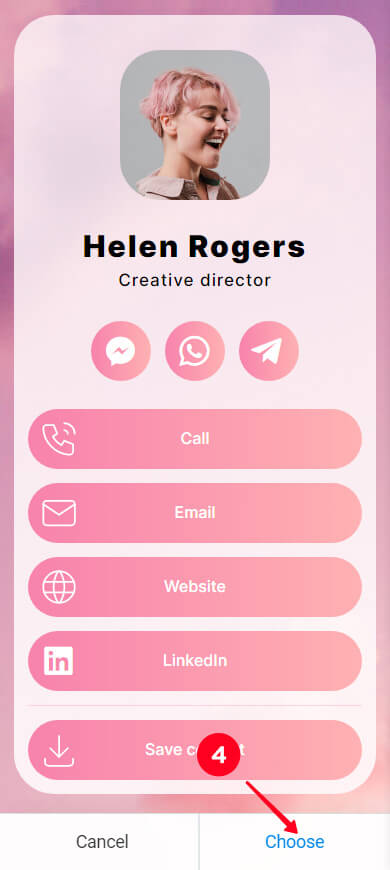
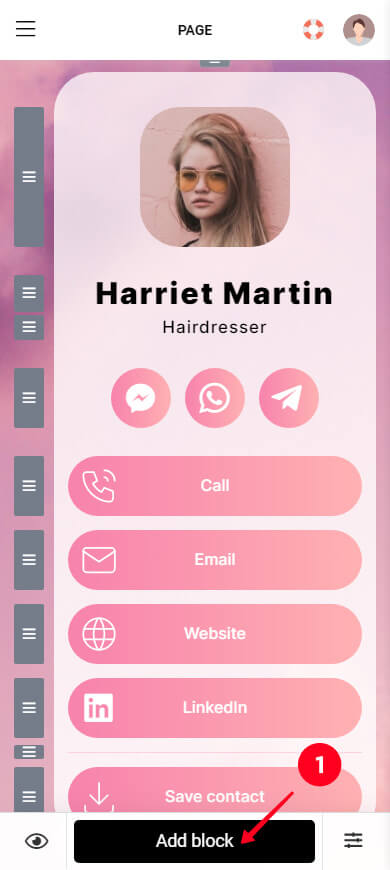
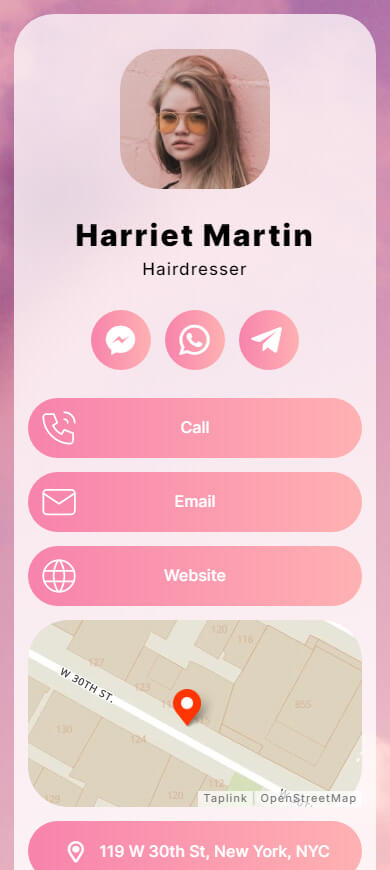
The screenshots below show two examples of a digital business card. And in this article, we’ll tell you how you can make a card similar to the one on the right.
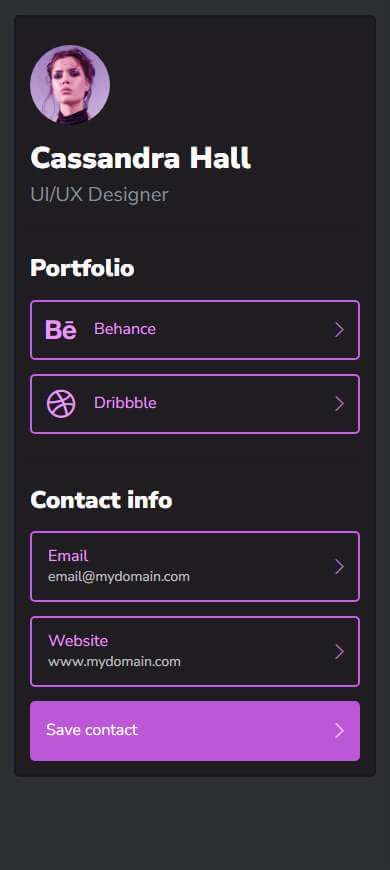
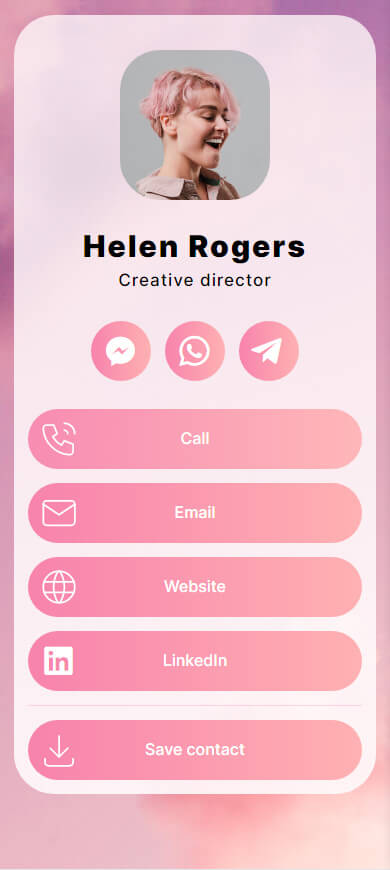
To show you the process of making a digital business card in detail, we’ll use Taplink. With it, you can create a card in 5 minutes using a template. This digital business card maker offers 200+ templates with diverse designs, so you’re sure to find the one that matches your style.
With Taplink, you can create a digital business card with no app. It’s available in any browser and designed for easy business card creation from any device — be it Android, iPhone, laptop, or PC.
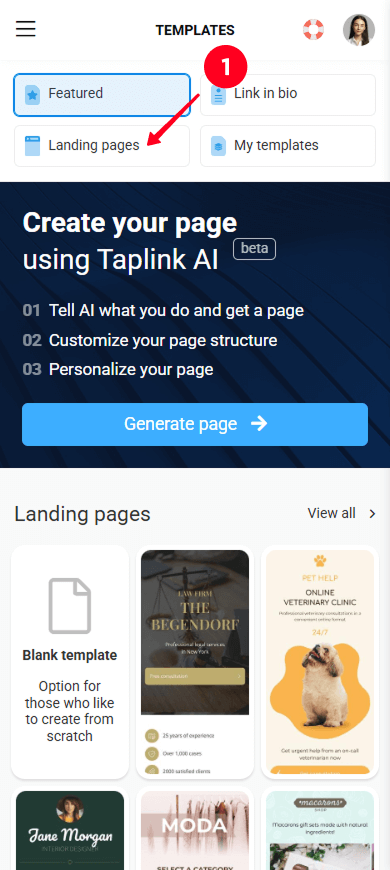
To select a template from Taplink’s library, sign up for it. You’ll be redirected to the library, where you can choose a template:
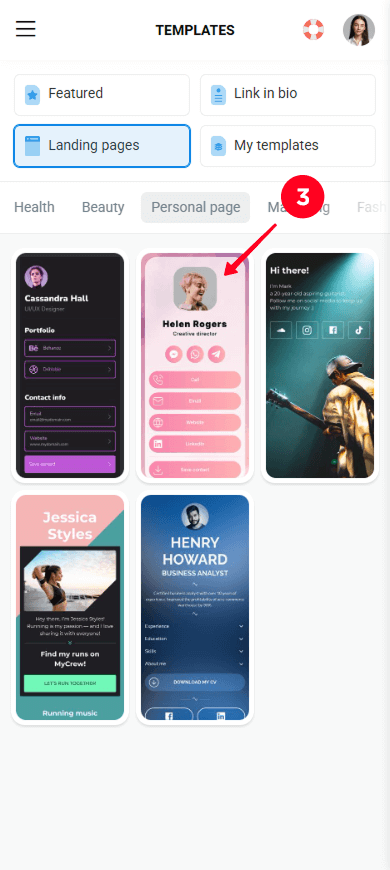
01. Choose the type of page you want: Link in bio for a concise layout with buttons or Landing pages if you want a mini-website with images, videos, maps, etc. in addition to buttons. We selected Landing pages.
02. Select a category that fits your field. In the screenshot, we’re navigating to the Personal page category.
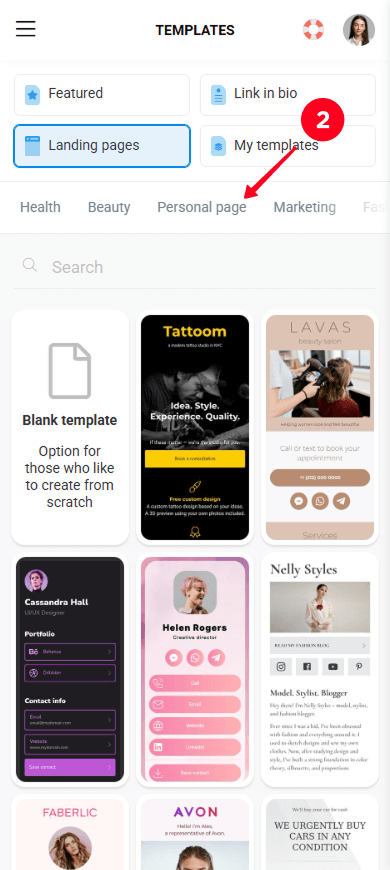
03. Pick one of the templates to see how your info might look.
04. Once you’ve found the one you like, tap Choose.
Now it’s time to personalize the business card with your data. All templates come with pre-filled content — such as text, images, addresses, etc. — which you should replace with your information. You can also remove any content you don’t need or add more. We’ll explain how to do all of this in this section.
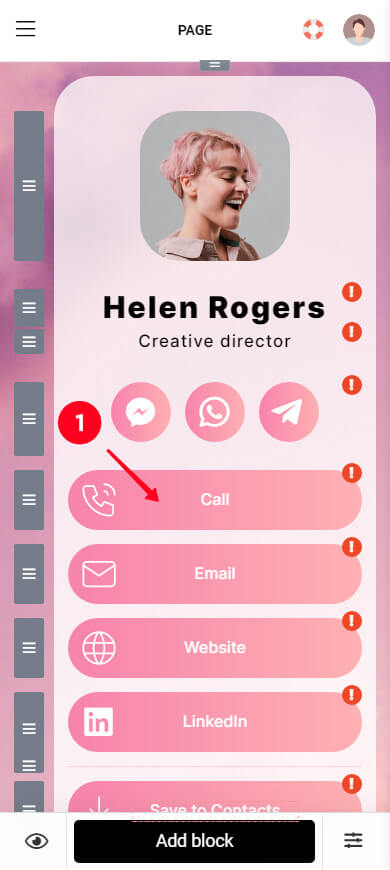
Let’s start adding relevant information to your future digital business card. To do this, you need to fill in each block you want to see on your page.
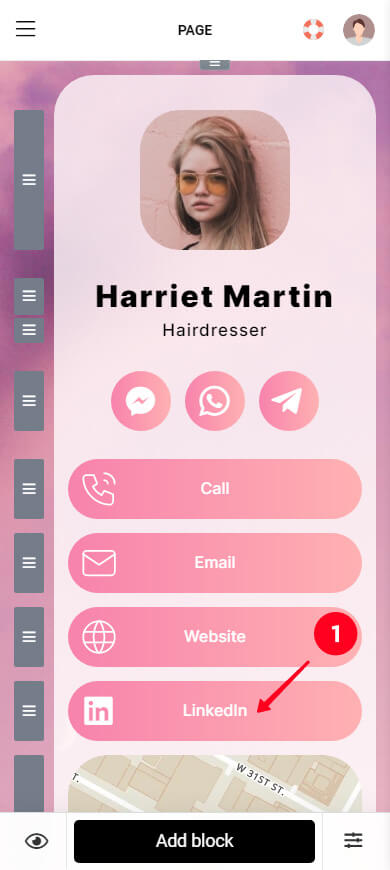
01. Tap a block that you want to edit.
02. Edit the button name in the Headline field if needed. For example, you can type “Reach me now” or “Let’s talk”.
03. Include more specifics in the Subtitle field where useful. For example, the days you work or how fast you respond.
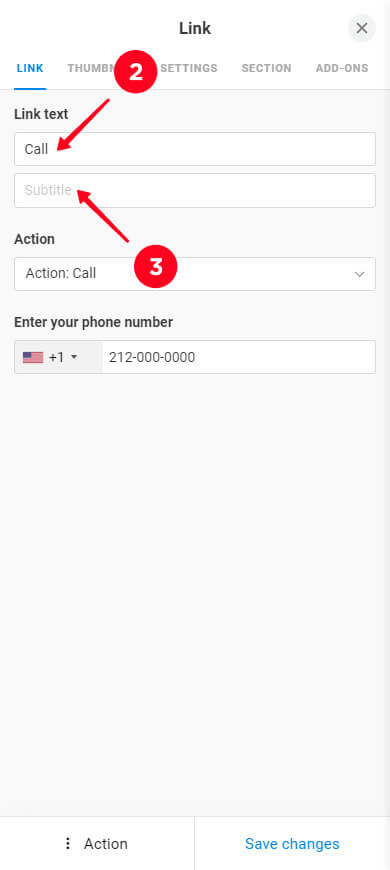
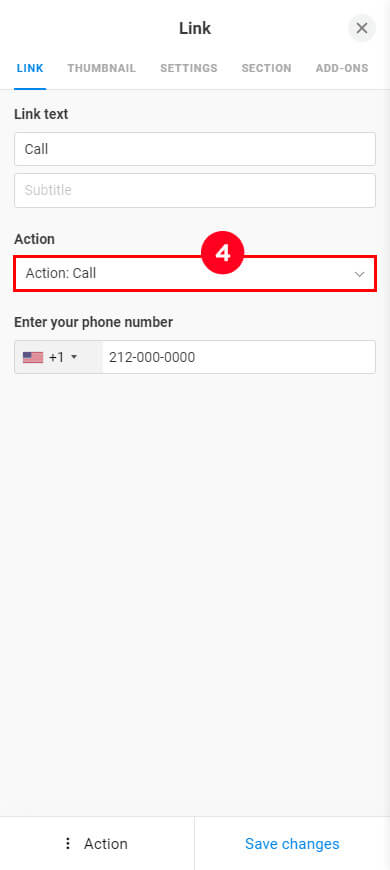
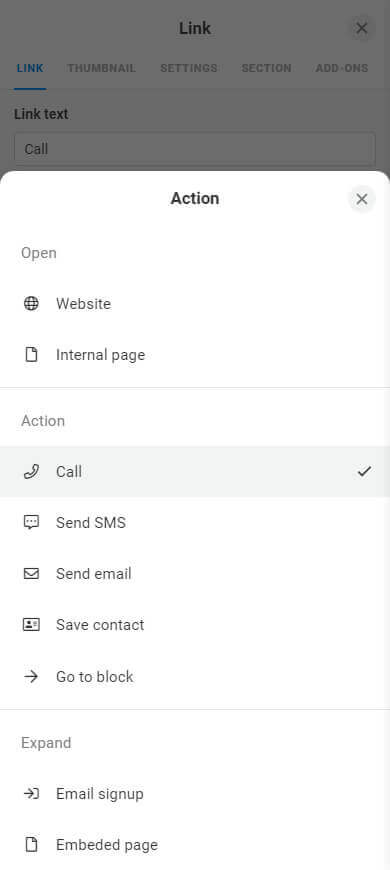
04. Choose what happens when someone taps the button. This is done in the Action field. The second screenshot below shows every action you can assign.
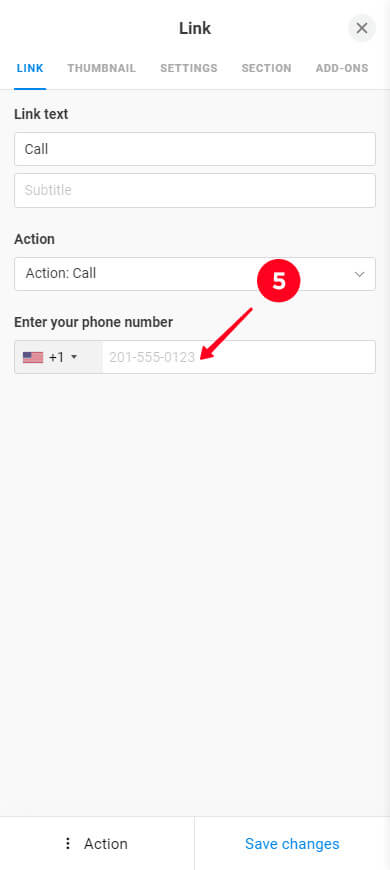
05. Fill in the field with your real contact details.
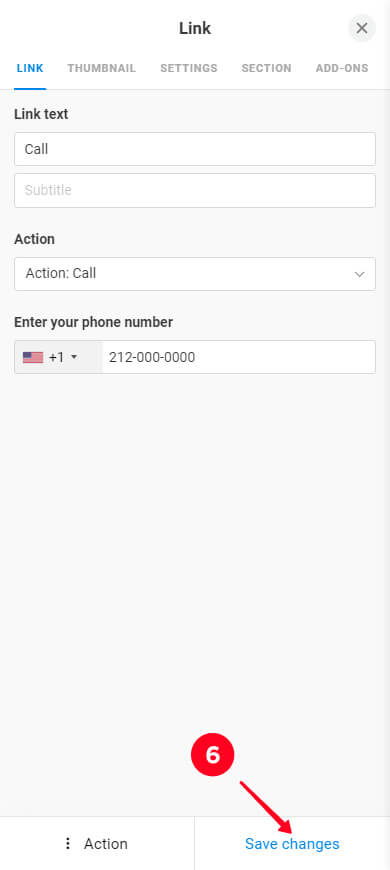
06. Hit Save changes.
Repeat these steps for every block.
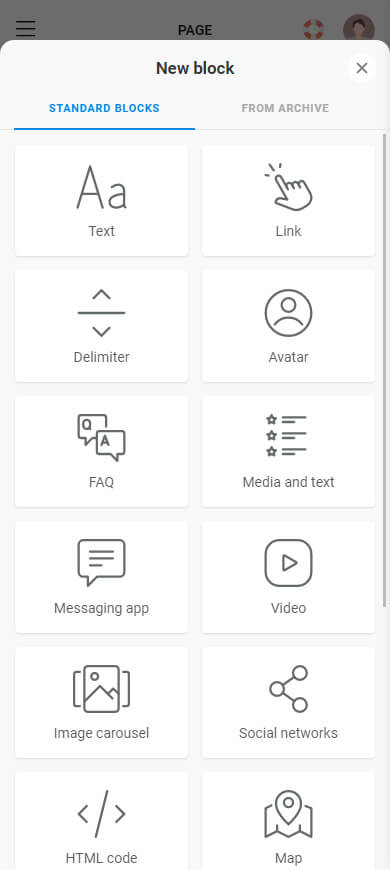
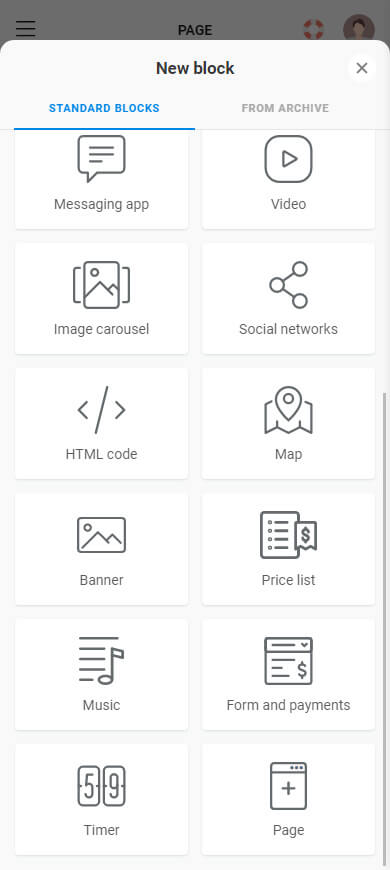
You’re not limited to what’s in the template — feel free to expand. In Taplink, you can choose from 20+ blocks, such as images, video, music, price lists and pricing plans, forms, etc.
Note that some blocks are available on paid plans. To use them, upgrade your plan or create a digital business card for free with available free blocks.
We’ll show you how to add a new element using a map as an example:
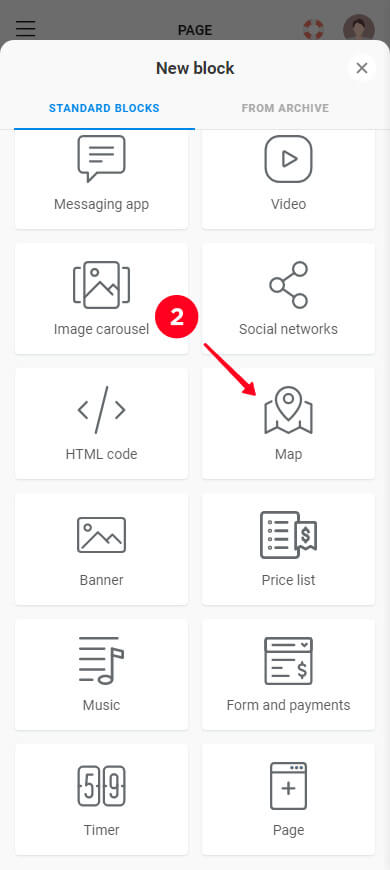
01. Tap Add block at the bottom of the screen.
02. Choose a block. We’re choosing Map.
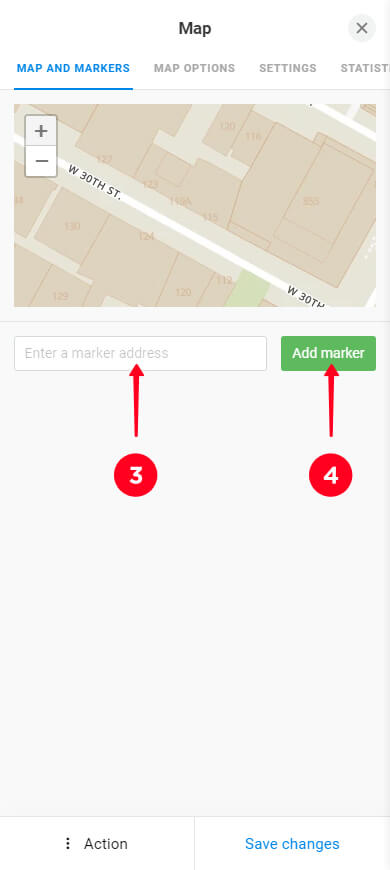
03. Enter the required details in the fields based on the block type. Since we’ve selected a map, we’re entering an address.
04. Tap Add marker. To include another location, go through steps 3 and 4 again.
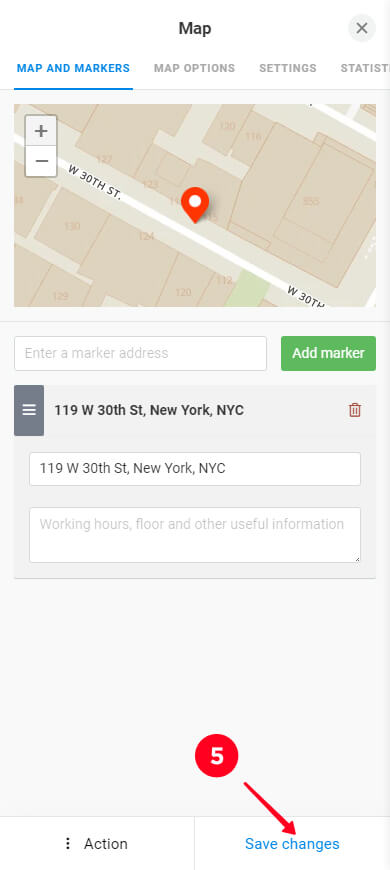
05. Press Save changes to apply your updates.
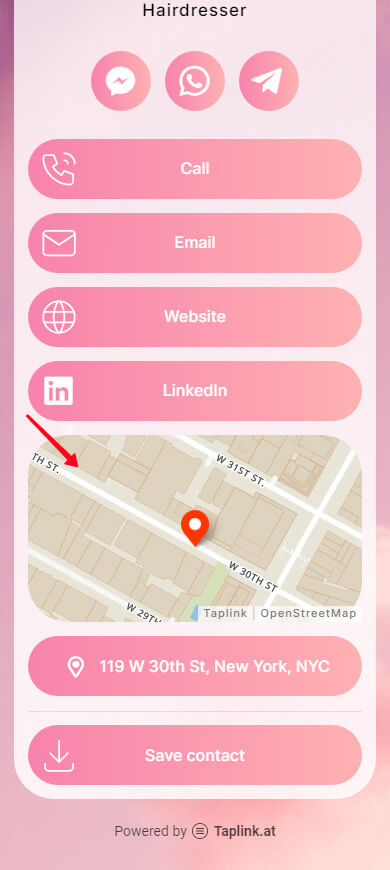
Done — the new block is now part of your card. The screenshot underneath shows how it looks.
Repeat the process for each new block you want to include. More detailed information on adding and editing blocks.
Not every block of a template will suit your needs. You can easily remove extra blocks to make your layout clean and tailored. To do this:
01. Tap the block you want to remove.
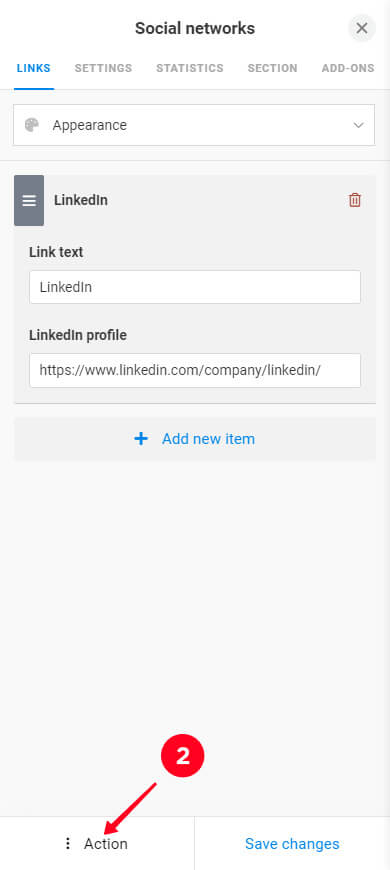
02. Tap the Action button.
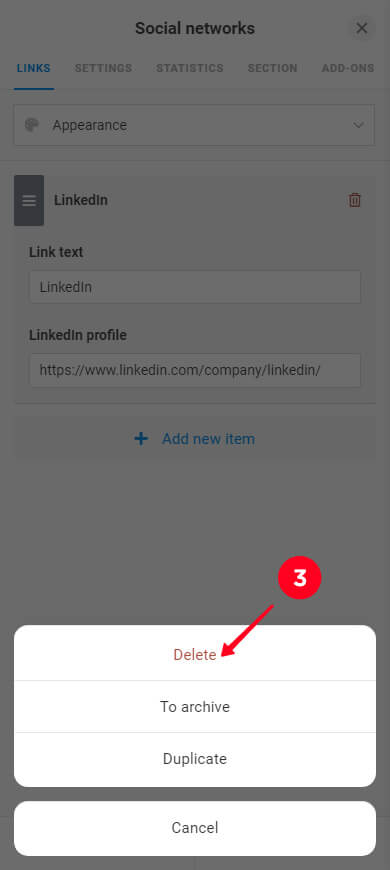
03. Pick Delete from the popup menu.
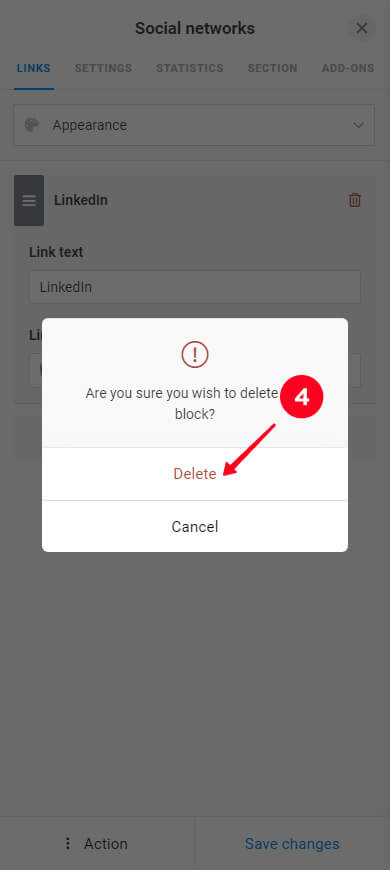
04. Select Delete to confirm the deletion.
Knowing how to make a digital business card means not hesitating to delete anything irrelevant. If you change your mind, you can always add it again later.
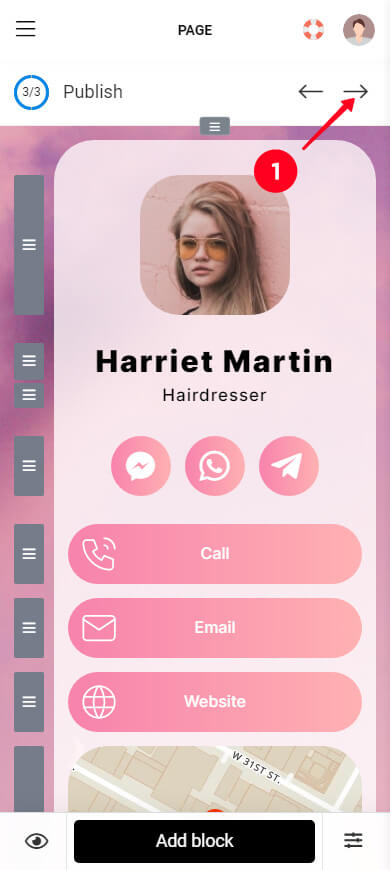
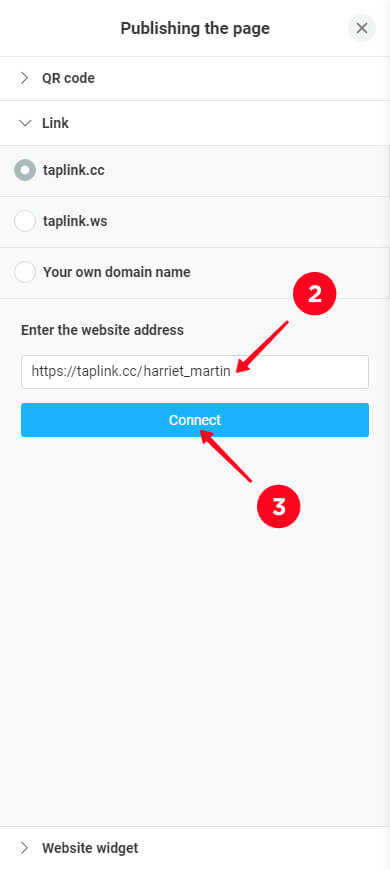
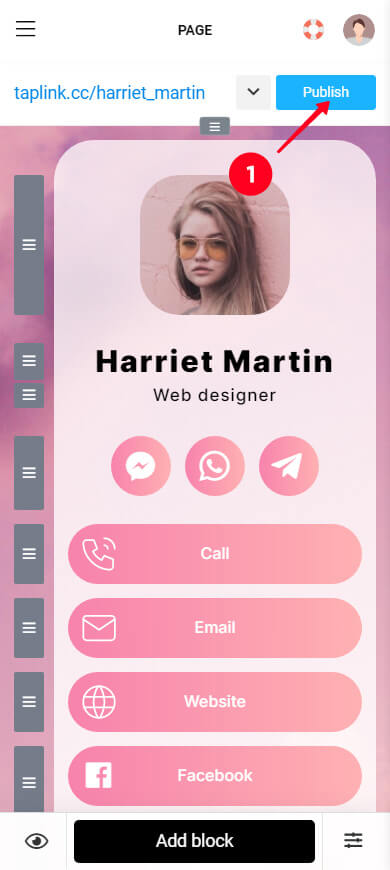
Having finished your digital business card design, publish it:
- Tap the Next arrow to access the page publishing menu.
- Type a username as part of your card website address in the Enter the website address field. For example, you can choose your social media username.
- Tap Connect.
You’ll instantly get a personalized link you can copy and share. Read about promoting your card link below.
This is the last action needed to create a virtual business card.
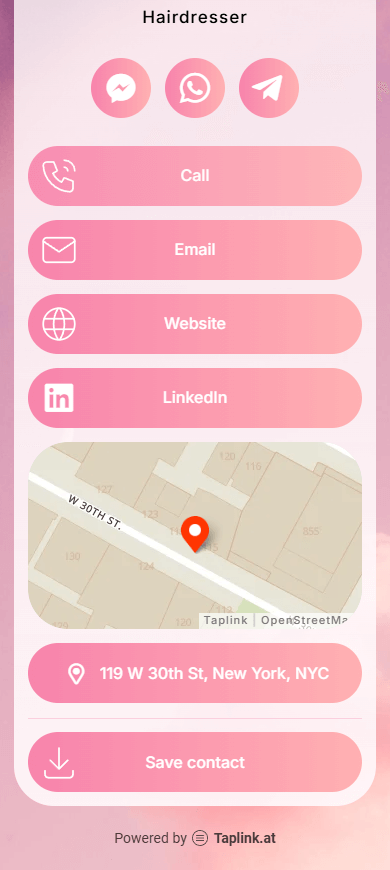
Below is the digital business card design we’ve got by following all the instructions. Follow the link to see the live version.
When you publish your digital business card, Taplink automatically creates a QR code for it. You just need to download it. Here’s how to do this:
01. Head to the publishing menu.
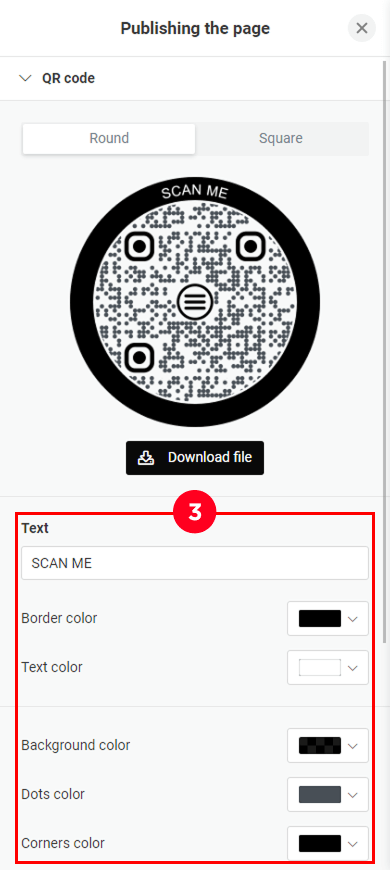
02. Open the QR code tab.
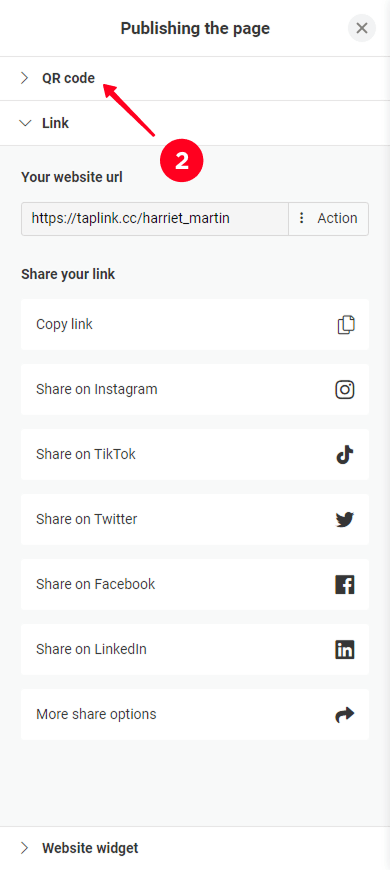
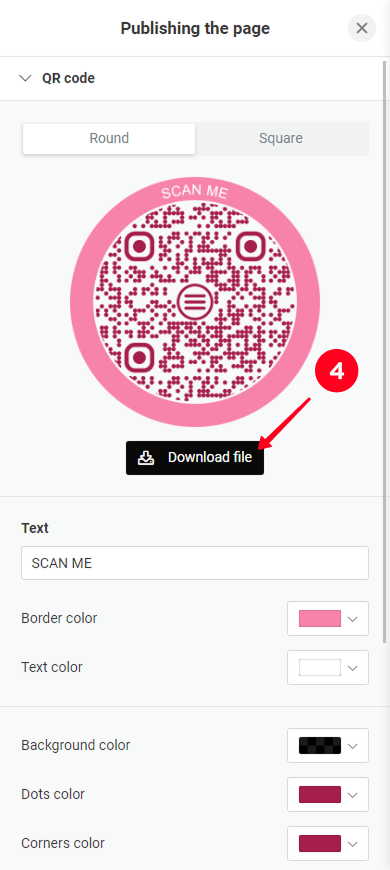
03. Adjust the design settings if you wish.
04. Tap the Download file button to get the QR code to your device.
Done! Later, we’ll tell you how to promote the QR code for your card.
Once you create a virtual business card, help others find it quickly. Use both online and offline ways to make it visible everywhere your audience can see it.
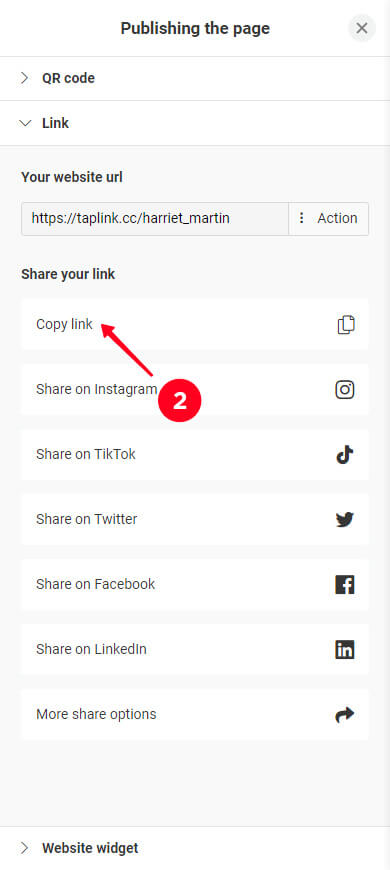
Spread the word that you have created a digital business card by placing its link in visible spots online. First, copy the card link:
- Tap the Publish button.
- Select Copy link.

Then paste it on the platforms where people already connect with you:
- Social media profiles: Attach your link to bios on platforms like X (formerly Twitter), Instagram, TikTok, YouTube, LinkedIn, and any other social media you’re on.
- Messengers: Add it to your profiles in messaging apps such as WhatsApp, Telegram, Snapchat, Viber, or Discord.
- Other websites: Place it on websites where you’re active. These can be your personal blog, online portfolio, etc.
By sharing the link to your digital business card online, you’ll attract an audience from these platforms.
Above, we’ve explained to you how you can create a digital business card with a QR code.
By placing the QR code on printed materials, you’ll boost its visibility. Here are some ideas of where you can put it:
- Business cards.
- Brochures.
- Event badges.
- Name tags.
- Storefront windows.
- Entrance doors.
- Product packaging.
- Price tags.
- Table tents.
- Countertop displays.
This is how your QR code can look on a name tag:
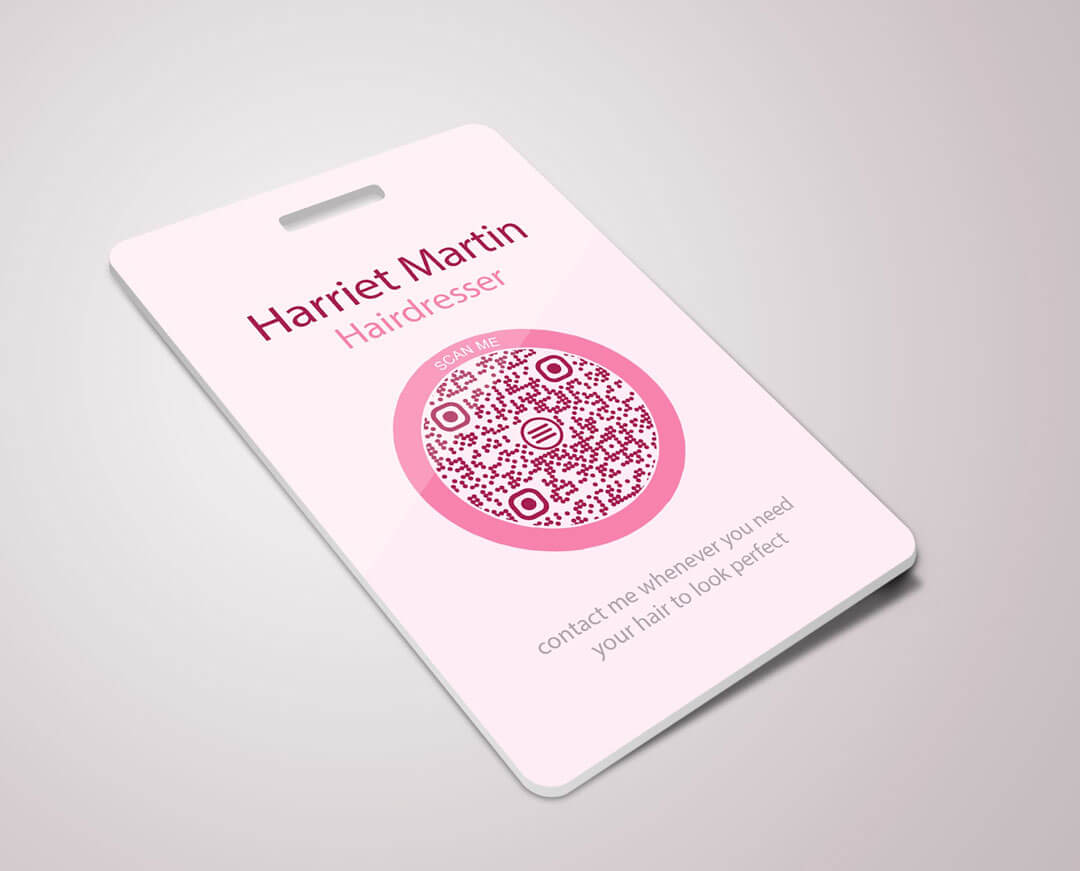
By placing the QR code on physical surfaces, you’ll easily attract an audience to your business card from offline.
Creating a digital business card is fast, easy, and eco-friendly. To make it, use the Taplink business card builder. The process includes only 3 steps:
- Picking a template.
- Adding your contact information.
- Publishing the business card.
Share your business card everywhere:
- Online: Add to link to your card on social media, in messengers, and on other websites you’re active on.
- Offline: Get a QR code for your card to place on brochures, windows, doors, product packaging, etc.