Create a Facebook pixel: setup guide

- What is Facebook Pixel
- What data Facebook pixel tracks
- How to create a Facebook pixel
- How to add your FB pixel to your website
- Install manually
- Use a Partner Integration
- How to create an audience
- Custom Audience
- How to set up Events in Facebook Pixel
- Event tool in Facebook
- Install the code manually
- How to use Facebook Pixel data in digital marketing
- Set up targeted ads
- Make a lookalike audience
- Exclude unnecessary audience
- Facebook pixel on your landing page
- The bottom line
Facebook pixel is a code collecting information about users on websites and tracking their actions. The code is generated in FB Business Manager account. A pixel for every social network platform is different. Though, since Instagram is a part of Facebook, you’ll have one pixel for both of them.
The code is named Pixel because one of its parts is a one-pixel size image loading on a website page.
After you generated a pixel code, you need to add it to a website. After that, it starts to collect information about your audience behavior on a website.
FB pixel tracks users who visited your account in a social network, for example Facebook. It collects data about pages they visited on the website, what items added to the cart, what buttons clicked and any other actions on your website. After setting up a pixel, this information automatically gets into Facebook Ads Manager.
As a remainder, Facebook and Instagram have a common pixel. And the ads are launched on one or both networks from the account.
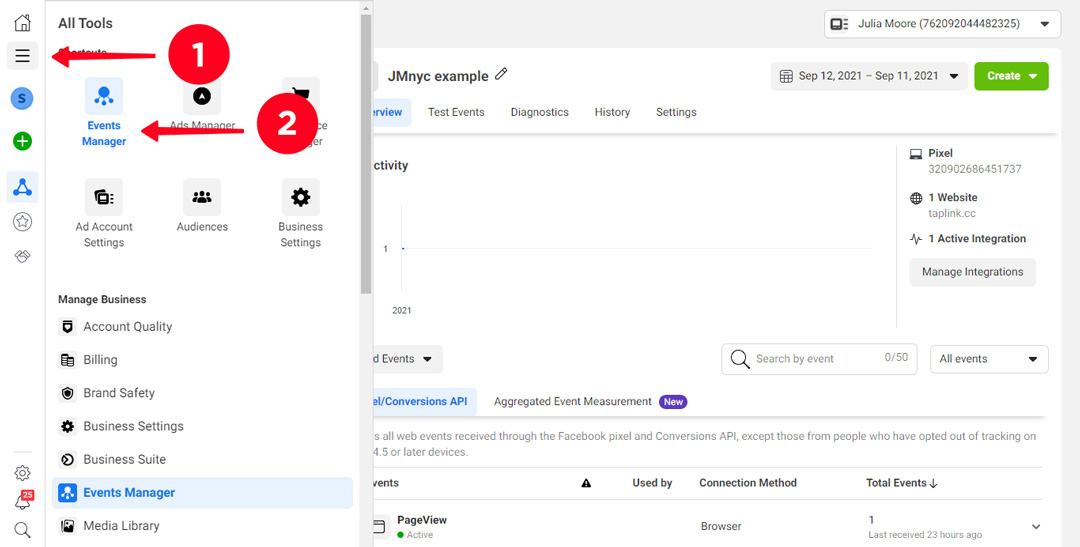
To create a pixel, go to the Facebook Ads Account:
- Open the three line menu.
- Go to the Events Manager section.
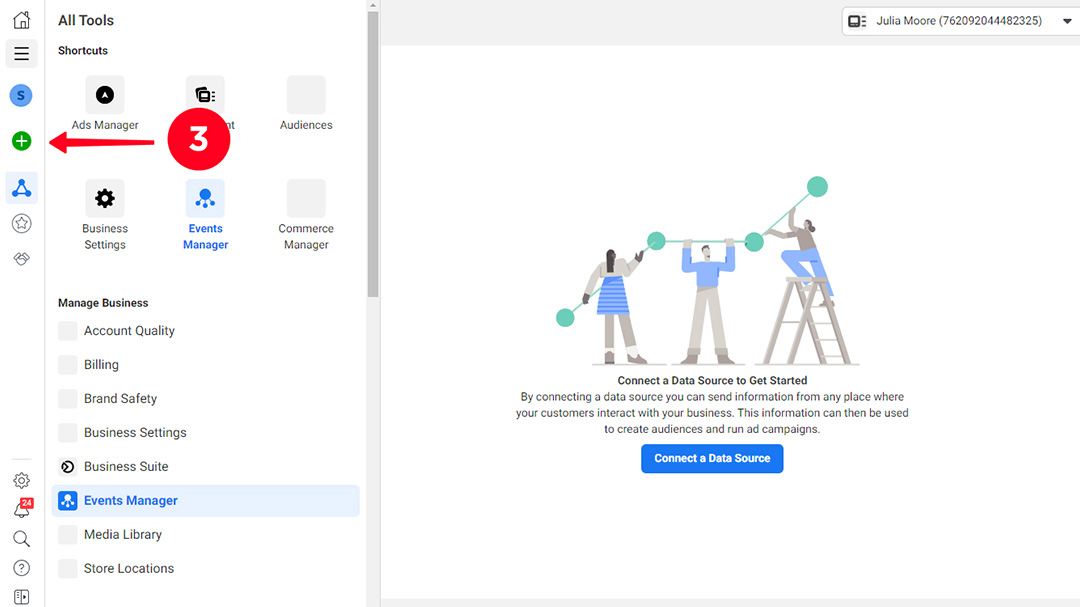
- Click Connect a Data Source.
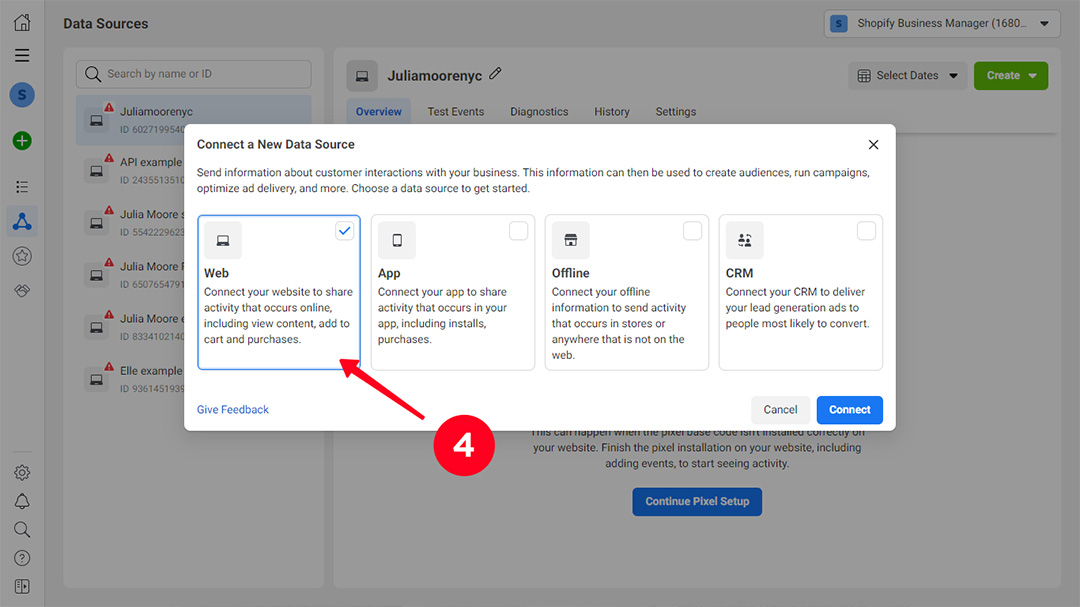
- Choose Web to connect a website.
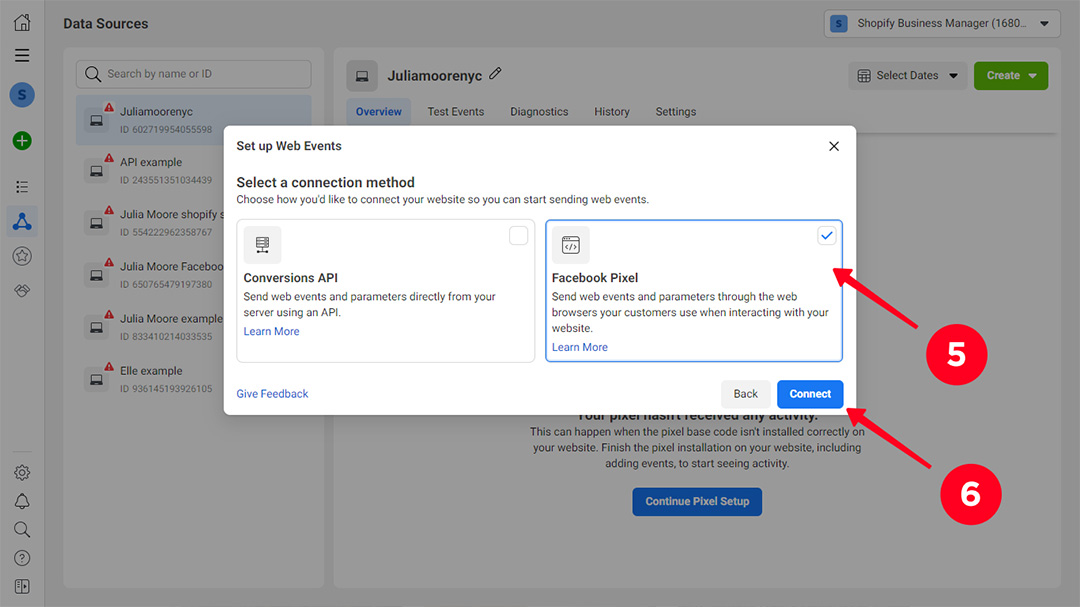
- Then you go for Facebook Pixel.
- Read the information and click Continue.
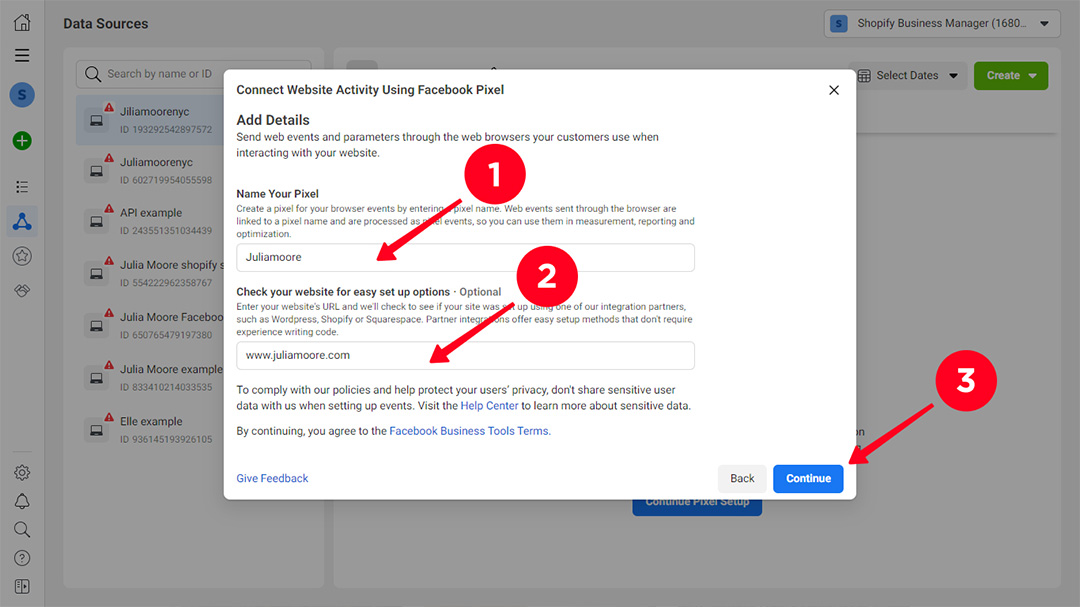
Here we need to set up the created Facebook pixel.
- Give it any name. It is necessary for you to understand what website it is for.
- Then enter your website URL.
- Click Continue.
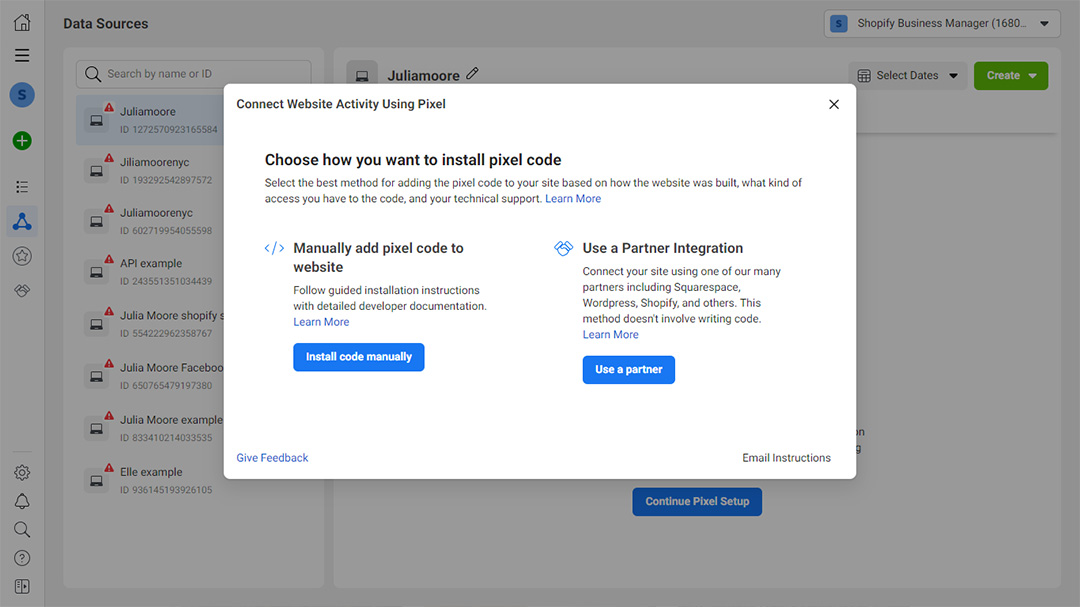
In the opened window, you see options for adding Facebook pixel on your website.
- Install the Facebook Pixel code manually. To do this, you need to copy it from the window opened next. The code must be pasted to your website. It requires HTML basic knowledge. Choose it, if you have access to HTML of your website and know how to work with it. Or choose it, if you used a CRM for making the website.
- Use a Partner Integration in all the other cases. Or if you find it easier to work with one of the partners websites than with HTML.
Now you know how to create a Facebook pixel. Let's add it to your website. We offer three ways how to do it. Go to a section according to what you chose in the previous step.
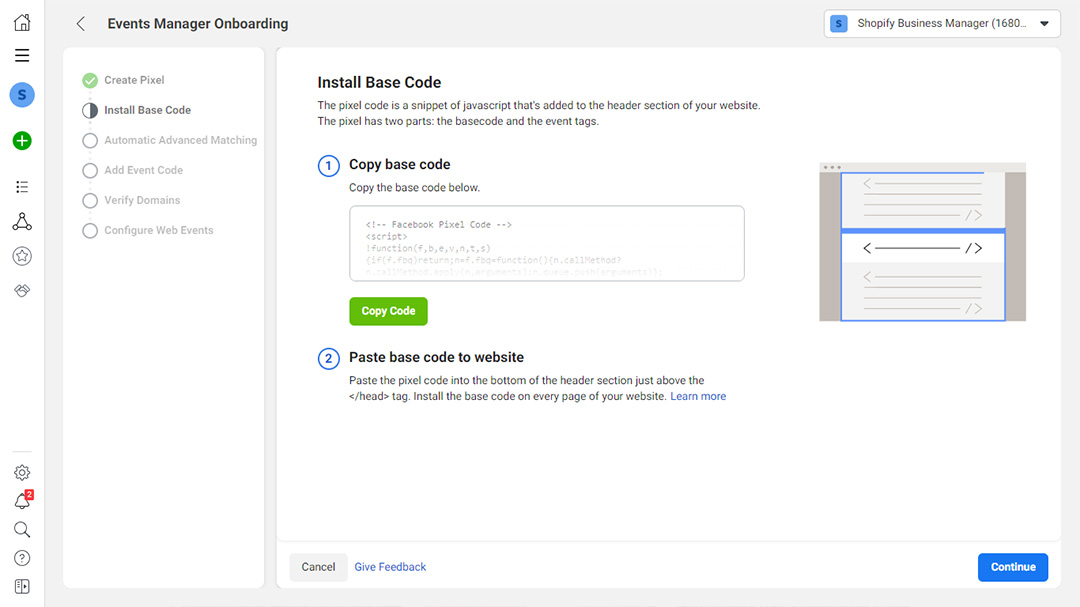
After you click it you get on a page with the code. Copy it, add to the website. If you chose Install code manually, you probably know how to do it. Or you know someone to ask for adding a Facebook pixel to your website.
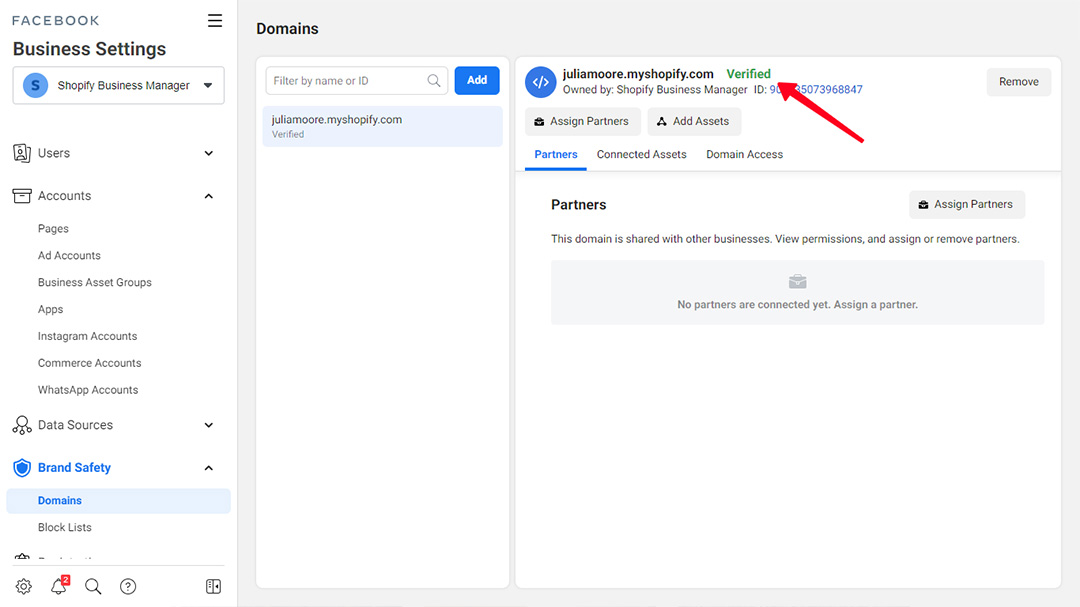
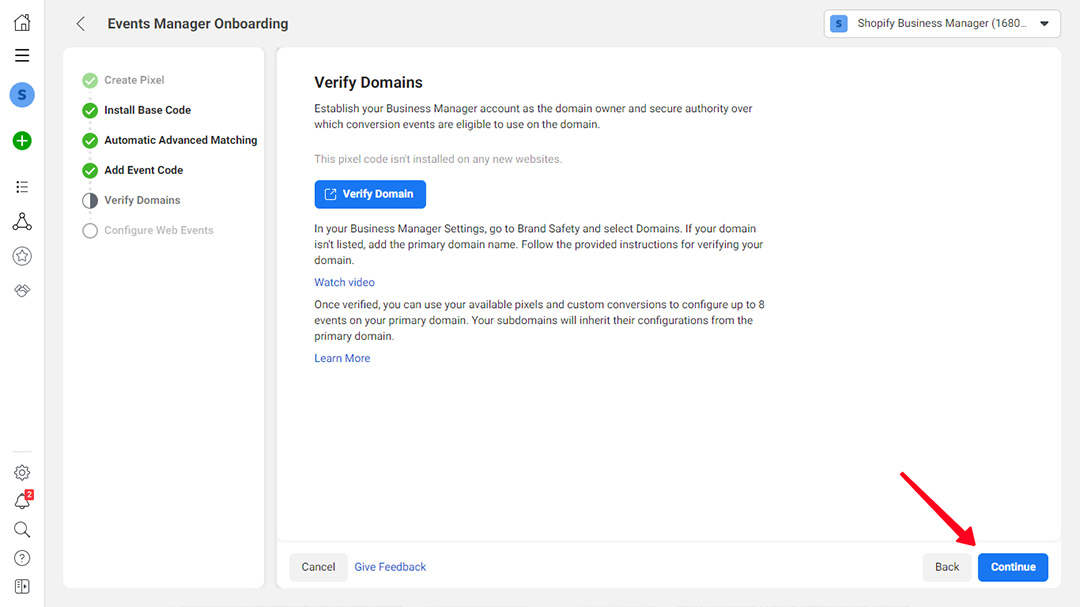
After you added the code, continue with setting up the events. Read about it in the section below. Then you need to Verify the Domain. It may take several days. Click Verify Domain to check the Progress.
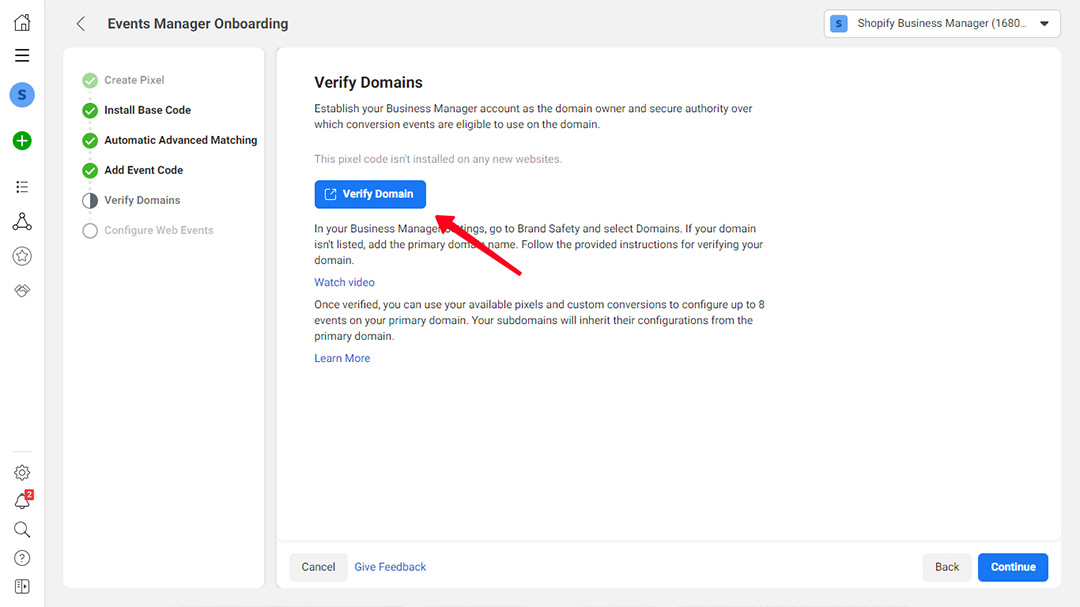
You’ll be redirected to a page. If you see the green word Verified, you can continue setting up your business.
Go back to the Verify Domain page and click Continue.
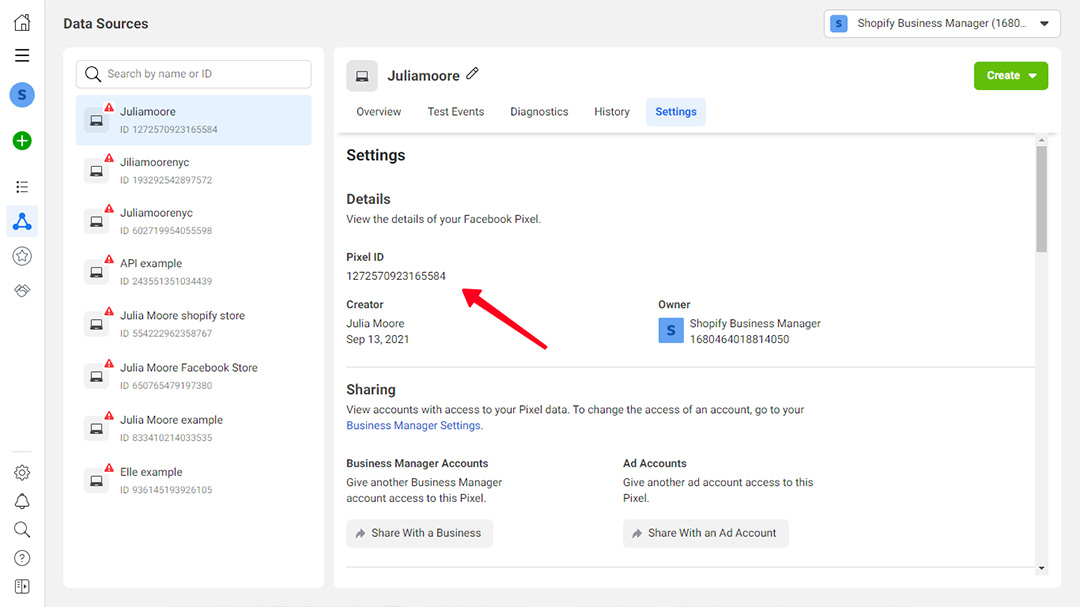
If you made your website using CMS, you can insert the code by yourself. To do this, you need to copy the JavaScript API, which is the number of the pixel, and paste it in the field in the CRM-system.
For example, you can find Facebook pixel number in the Events Manager. Choose a pixel and open the settings tab.
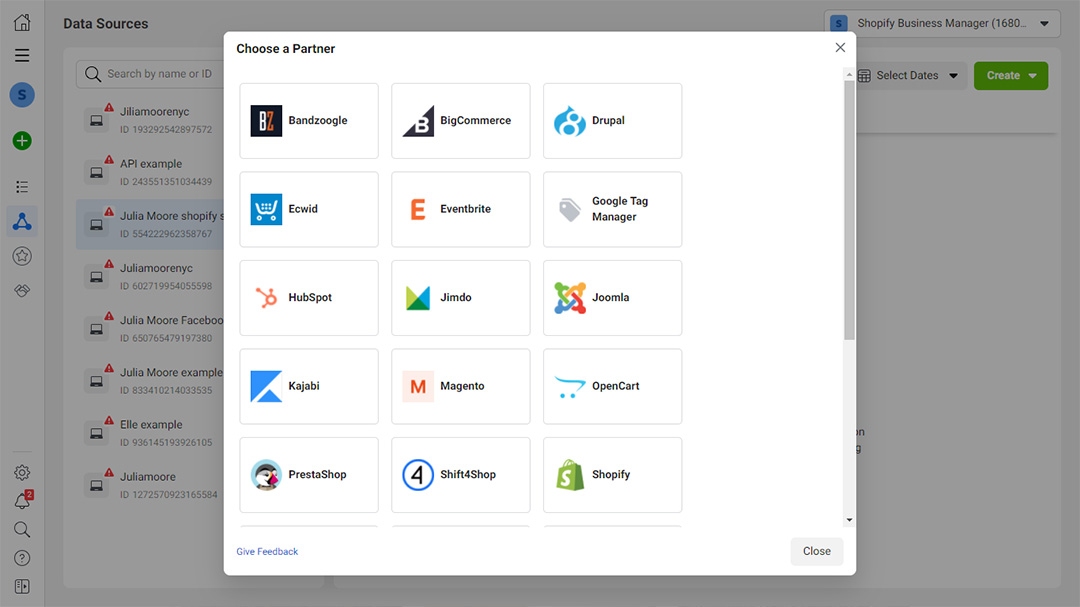
In this case you need to connect your Facebook account with one of the partners. The directions for each of them differ. You can find the instructions in the Facebook Help Center and on a help page of a partner website.
Here are partners platforms you can choose.
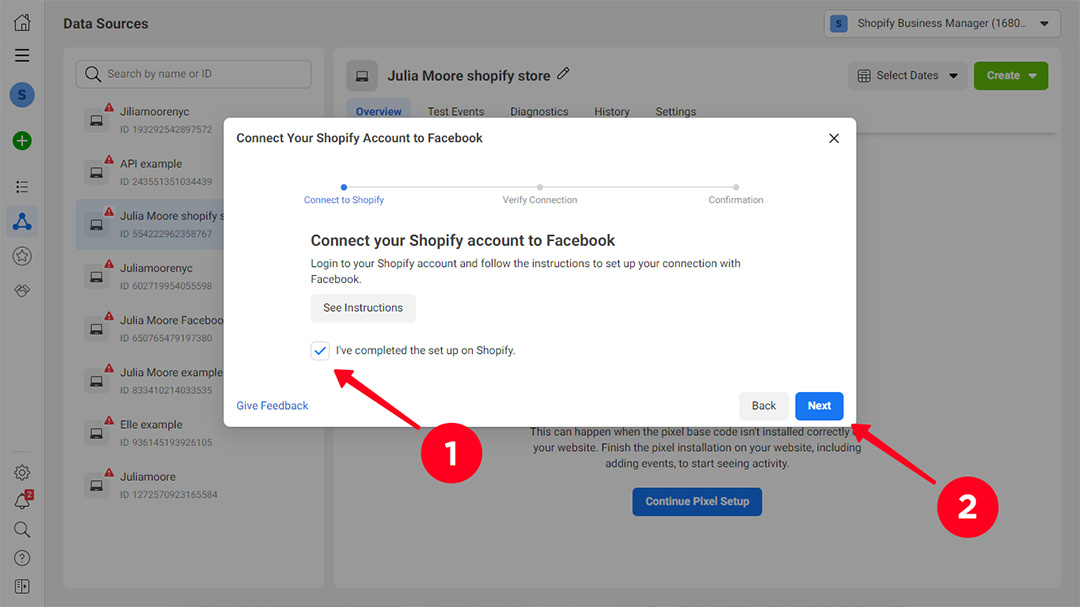
Whatever platform you work with, you need to verify the connection.
- Put a tick in the box.
- Click Next.
- Put your shop website link.
- Click Send Test Traffic.
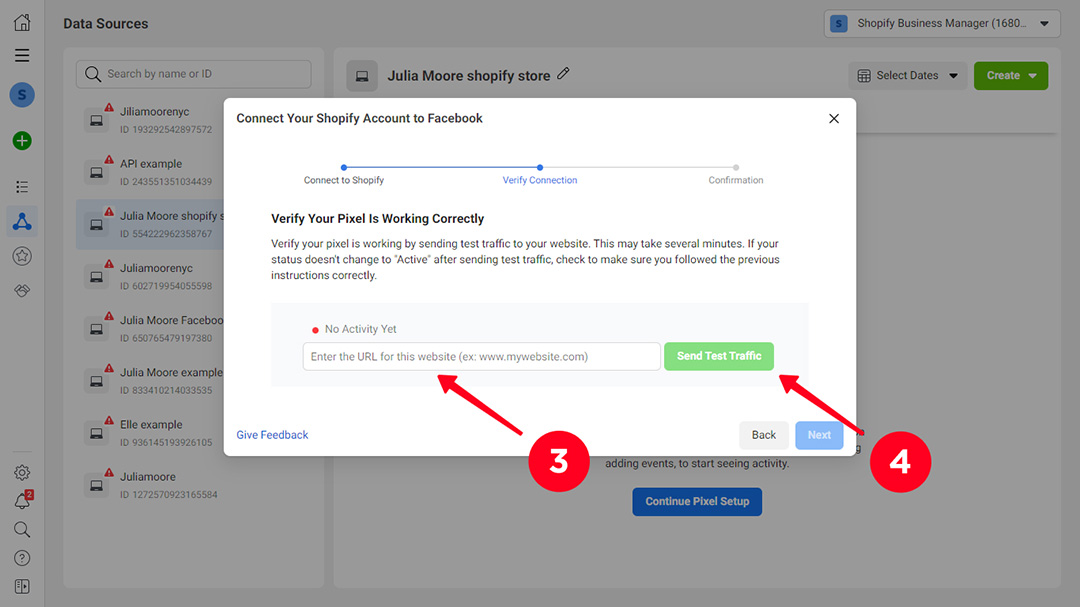
A green round above the address says it works. You can continue.
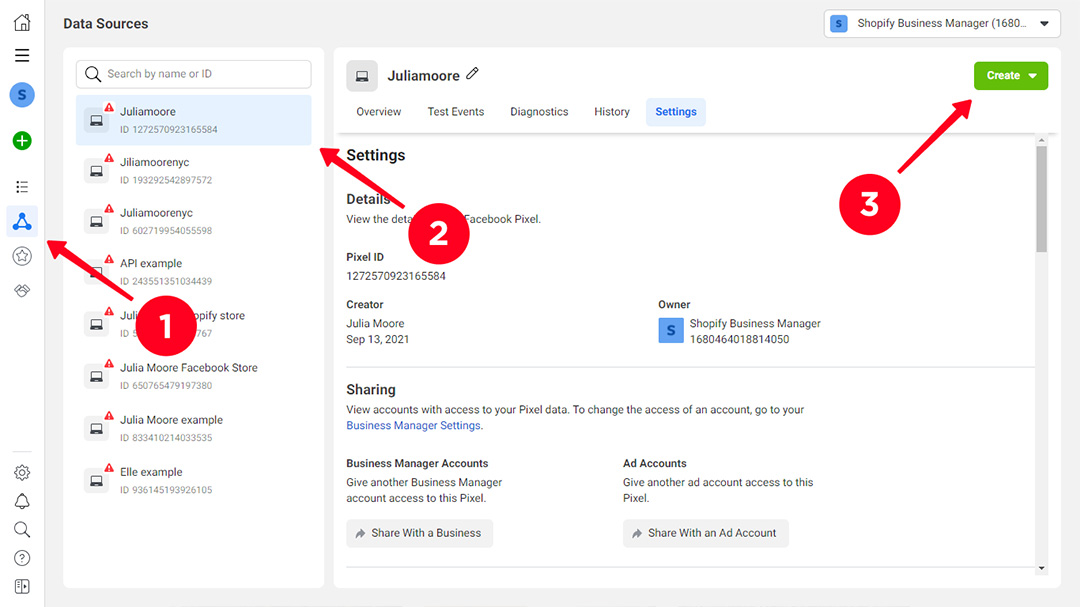
You create an audience based on the data your Facebook pixel has collected. Go to the Event Manager the way we told above.
- Choose the three connected dots menu.
- Then you choose a pixel.
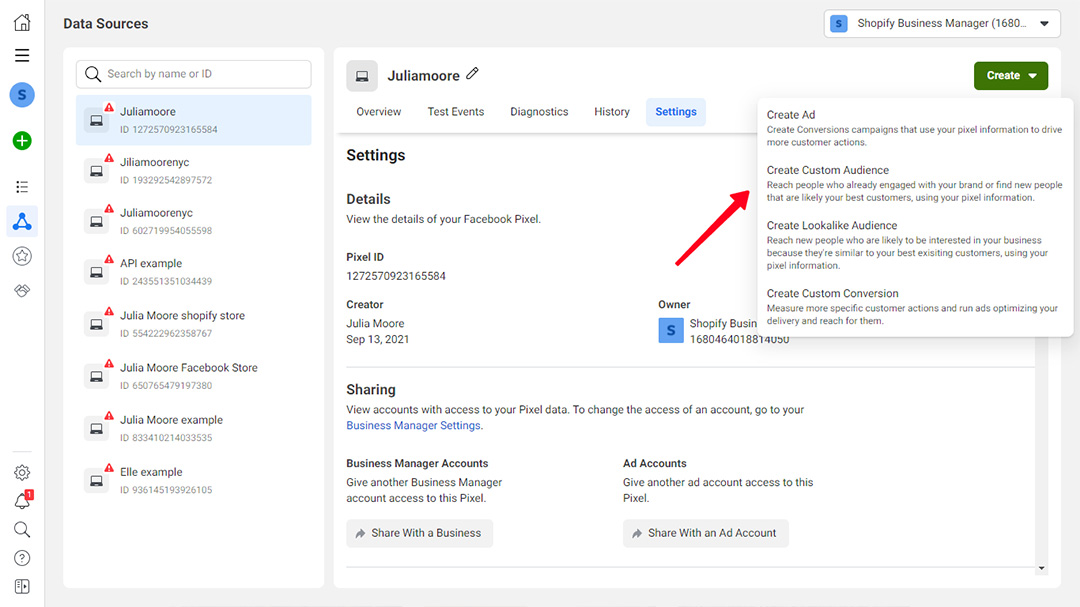
- On the left you disclose a menu by clicking the green button Create.
Here you have options for creating an audience. The first audience you set is Custom audience. You probably want to create several ones. Why you need other types and how to make them are the topics for another article, we will discuss it in the blog later.
Now let's set how Facebook pixel should add users on the list.
- ANY: users who do at least one of the actions you set, or meet at least one of the parameters you set, are added to the group.
- ALL: users should do all the actions and meet all the criteria to get on the list.
If you choose ANY and click Include more people below, the audience will be wider. When you choose ALL and Further Narrow, the audience will be smaller.
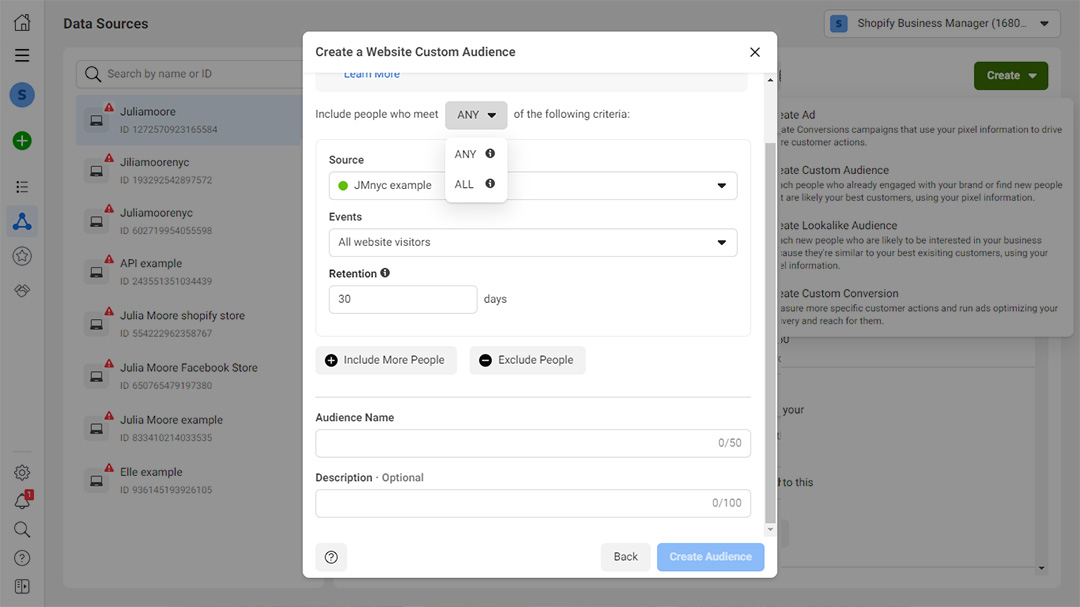
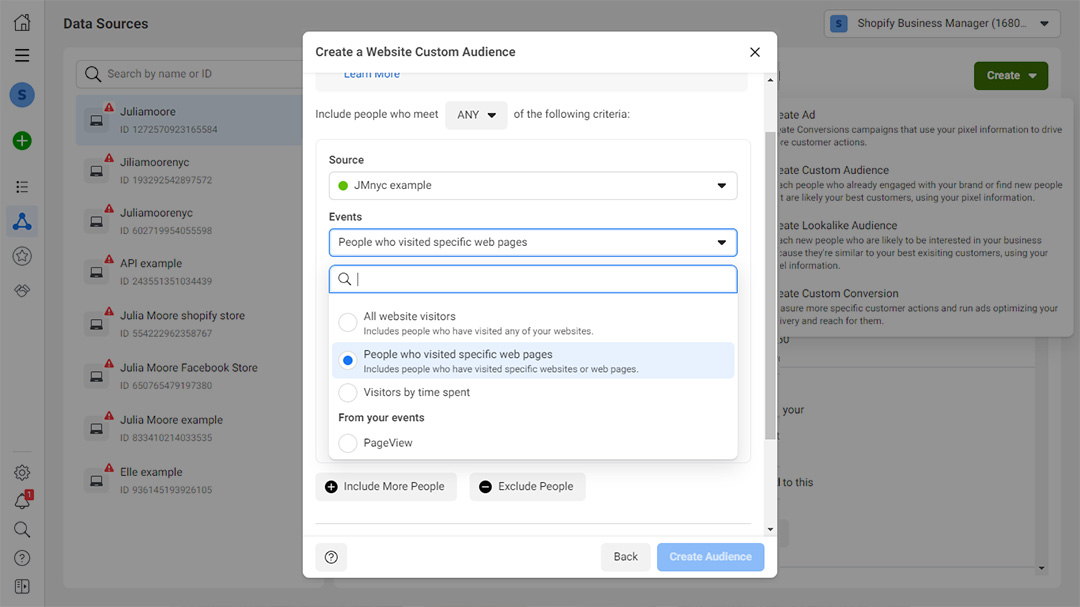
Add the criteria a pixel will use to decide whether to add people or not. First we see the events Pixel suggests.
- All visitors. It gives a wide range of people. But you can narrow it further by adding more criteria. The criteria offered are the same you see at the beginning.
- People who visited specific web pages. It is a more useful criterion. Next, you should state the web address. Besides, you can set Facebook pixel to discern users by Frequency or Device.
- Visitors by time spent. People sorted by the time spent on the website. Here you choose a portion of people who spend most of all time. You do not set a particular period of time. For example, you choose 25% of users who spent more time on the website than others. If you have 1,000 users in general, you have 250 people on the list.
Then there are events from the collected statistics. You should set them in Facebook Pixel. After that they automatically appear in these parameters.
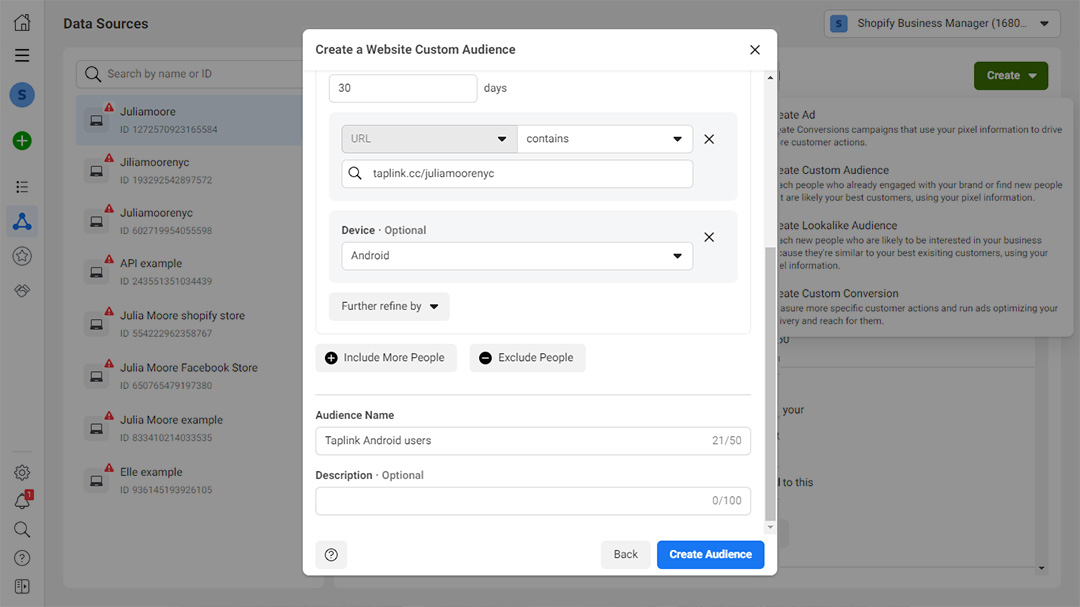
Remember to give your new audience a name. You can also describe it, if you want. When all is set, you click Create Audience.
Now we’re going to learn where to get those events which you use to create an audience in Facebook Pixel settings. There are two ways to set the events.
- Using the Event tool in the Facebook account. This method means you can add an event on your website yourself. But be aware: not all events can be added with the Facebook events tool. You can add and set only general ones, like clicks, contacts, clicking or tapping the button, navigating a link.
- Adding the code on a website manually. Don’t do that if you don’t know how to work with HTML.
There are two ways to set up events in FB Pixel. Let’s look at both so you can choose what’s better for you.
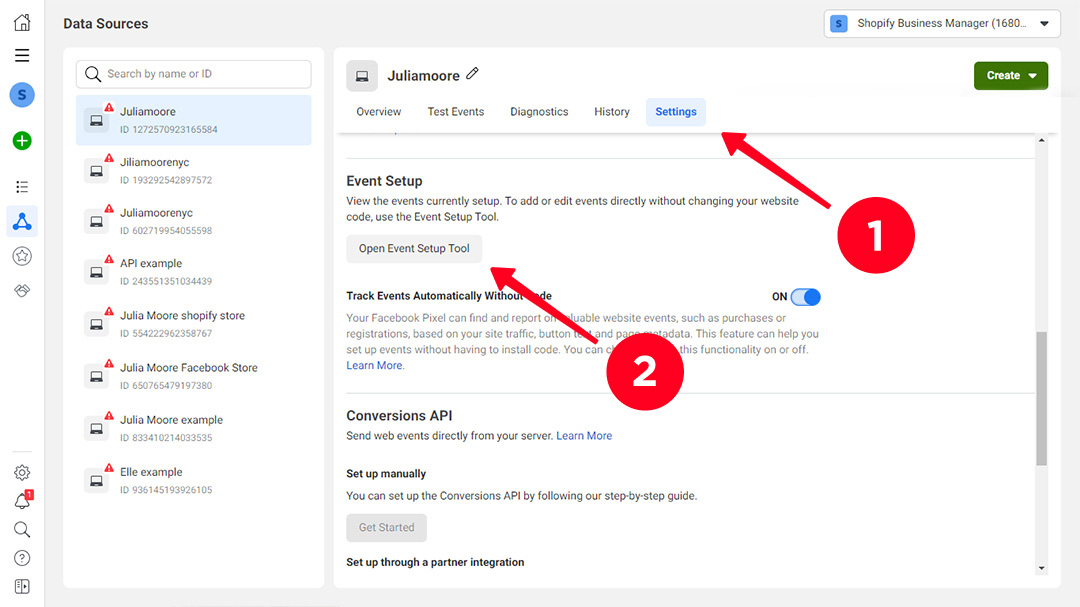
Choose a pixel on the Events Manager page.
- There you open a settings tab. Scroll down the section to find the Event Setup section.
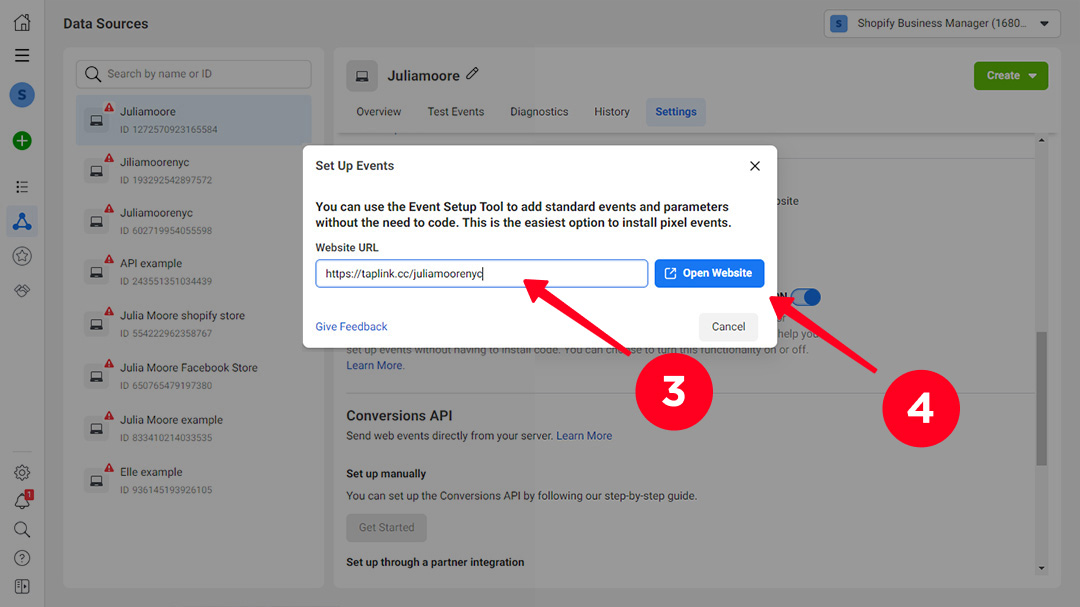
- Click the button Open Event Setup Tool.
- Enter your website in the opened address bar.
- Click Open Website.
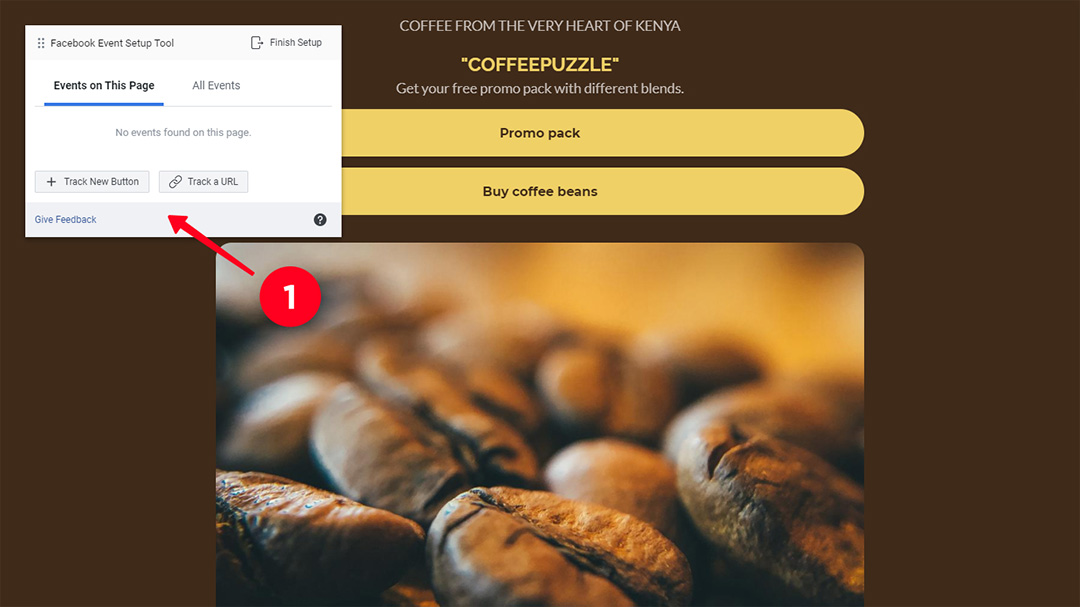
The website will be opened. Now you need to add an event.
- In the new window you can create a new event by clicking Track New Button. Facebook will highlight buttons you can track. Click the one you need. Or click track a URL and type it in the appeared field.
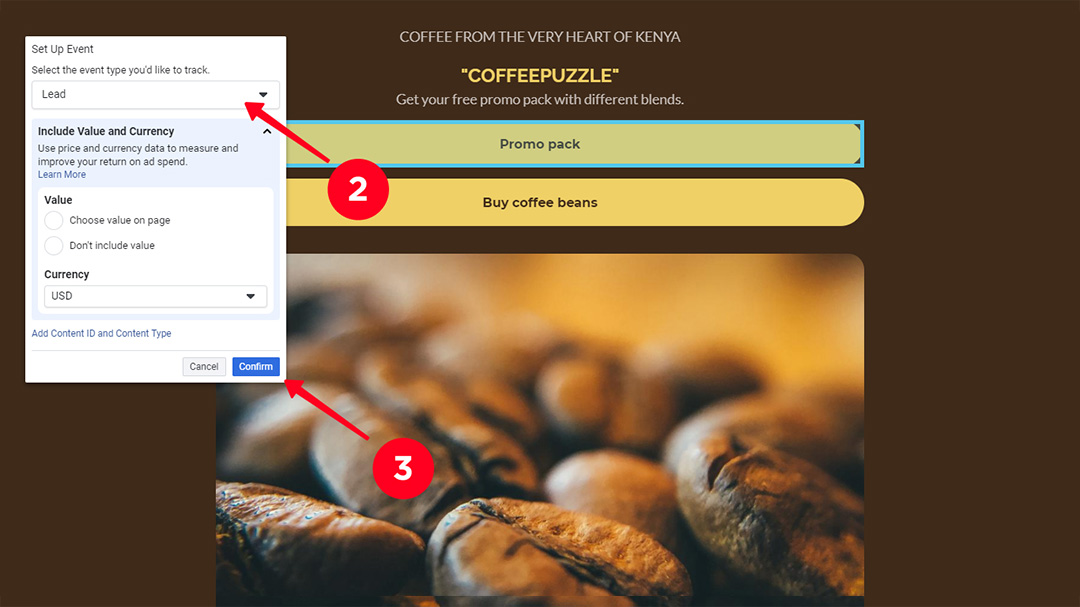
- Then choose an event.
- Confirm your choice.
- If you don’t need more events for the website, click Finish Setup.
You can test the events in the Test Event tab. Open it and Enter the website address in the box on the right. It will be opened. If you go back to the testing tab and you see changes, the settings work.

This method is strictly for those who know programming. Facebook Pixel Helper gives instructions for what and where to add. You can read it here. Before you start, make sure the pixel code has been added to your website.
Why do you need to create a Facebook pixel at all? In the Ads Manager, you can cluster users in audiences according to the collected by the code data. For example, you can discern people of the following categories.
- Were on your website in last 90 days.
- Visited the page of a particular item.
- Added an item, but haven’t paid.
- Clicked company contact info.
- Spent more than 15 seconds on your website.
We already know how to create audiences in Facebook Pixel. Now let's see how to use the formed groups in digital marketing.
Remember, the size of an audience should be sufficient for launching ads. For example, at least 1,000 for Instagram. And even the 20,000 audience quickly burns out, speaking from personal experience. All the users view the advertisement in a short time. And seeing it again, they will react badly.
Set targeted ads to remind "warm" clients about a product or company. In this case you need to target it to the website clients. They already know you and your product. They just delayed the purchase for some reason. Such clients are easier to induce to buy an item or pay for a service.
Target the ads to the audience most interested in it. Don’t offer a toaster to people who searched for laptops, it’s senseless.
But you can combine types of users of similar interests to target an advertisement for all them. For example, you can make an audience of users who viewed phones of different models and brands, but in one price range. Then set ads translated to all them.
These are new users that Facebook pixel finds for you. They will be similar in some way to those you already have in the data. It may be interests, location, actions on the Internet. You make an audience group and set the parameters. Pixel searches for people who might be interested in what you offer.
If you don’t have many visits on your website, less than 20,000 users per month, you better create the initial audience based on users’ actions. For example, buying. Then set forming a lookalike audience. The network will search for people similar to those who already bought something.
Create a Facebook pixel and use its data to avoid ads spendings for people not interested in your product.
Let’s look at an example. You teach people foreign languages. There are articles for both beginners and experienced students in the blog. If you are looking for students for the upper-intermediate group, you need to cluster users who visit pages with the articles for beginners and exclude them from translating your ads.
You can add a Facebook Pixel on the landing pages you create on Taplink. It has a special add-on so that you can easily connect your page and the pixel. No coding or web-design skills required. Set up the data tracking in a couple of clicks.
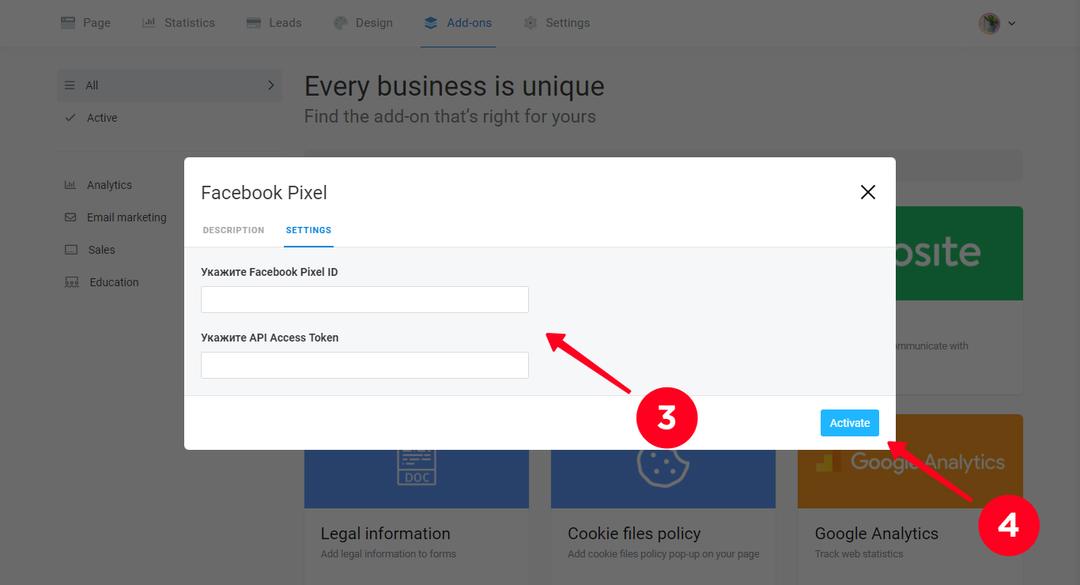
Connect your landing page and a Facebook pixel: all you need is to add a pixel ID and access token there.
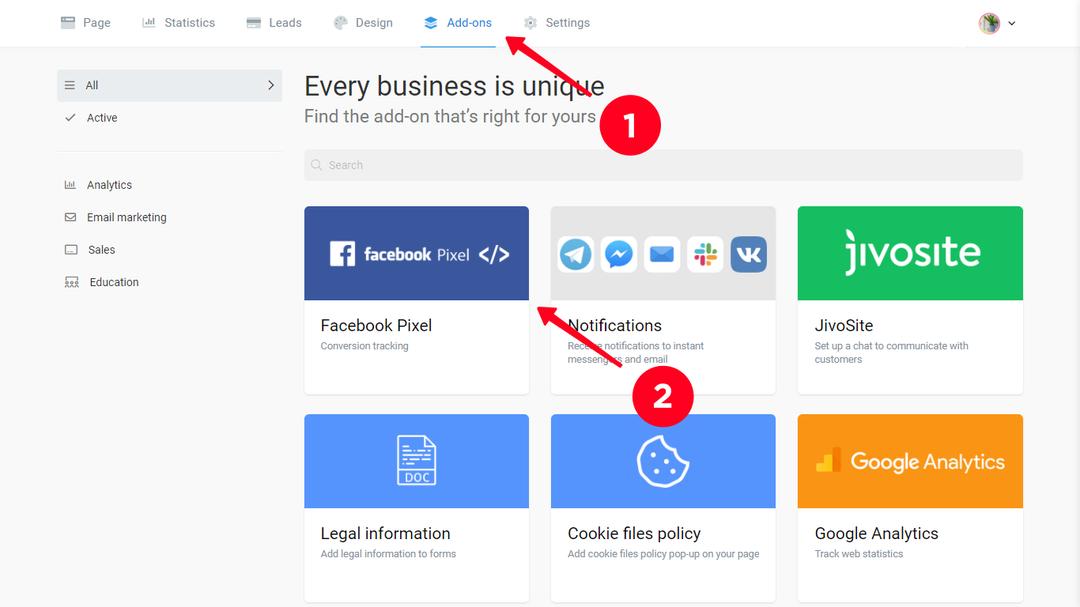
- Go to the Add-ons section.
- Choose Facebook Pixel.
- Put the ID and token from your Facebook Events Manager.
- Click Activate.
Read detailed instructions here.
Start with signing up on Taplink. Read an article on how to create and use multiple link in bio.
It’s not difficult to create a Facebook pixel as it seems. Define what events you want to track and what goals to achieve.
If your audience is less than 20,000 users per month, create a small audience made on the events as a base for creating a lookalike audience.
Use the Partners Integration, if you sell products. If you know how to use HTML code, it may be easier for you to set up a Facebook pixel to your website by copying the code. Those who sell on Instagram, may copy Pixel code and add it as a block on a link in bio page.