Pricing plans
This detailed tutorial explains how to add a Pricing plans block to your Taplink page and set up it. You can read the whole tutorial to learn everything about the block or tap a link below to read a specific section that answers your question:
The Pricing plans block can present such products as memberships, subscriptions, coaching, courses, etc. The block highlights the features of the product plans, making the comparison easy for users.
Look at an example of a Pricing plans block on a Taplink page:
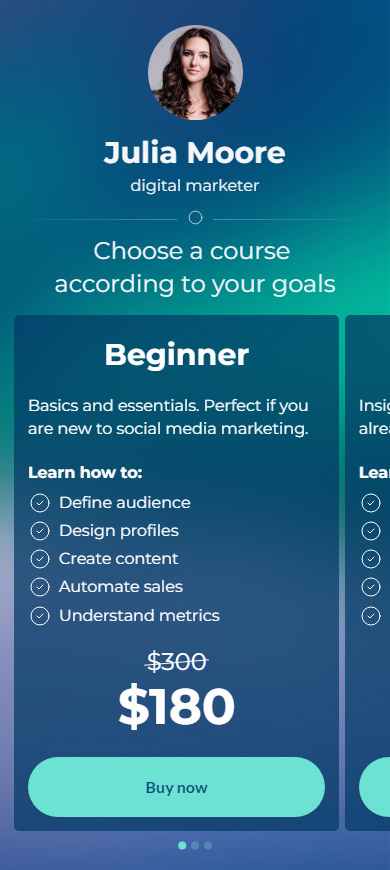
The Pricing plans block is available on the Pro and Business plans. When you have upgraded your Taplink plan, you can add the block in the page editor:
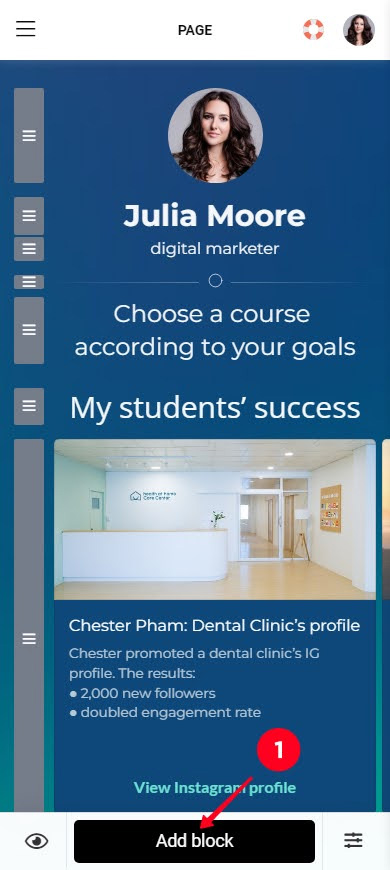
- Tap Add block.
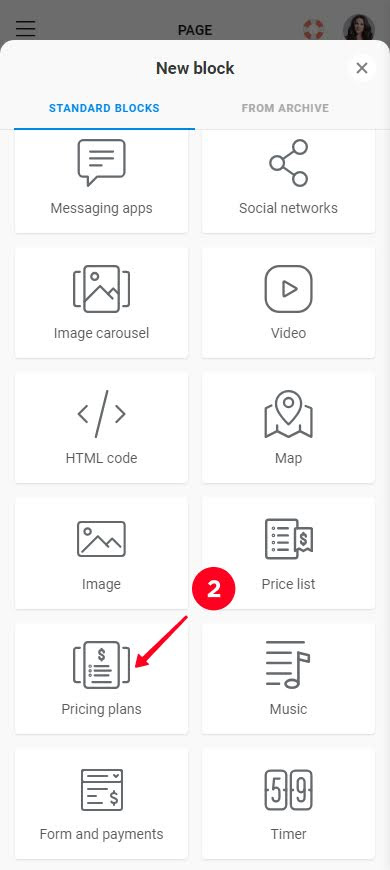
- Choose Pricing plans.
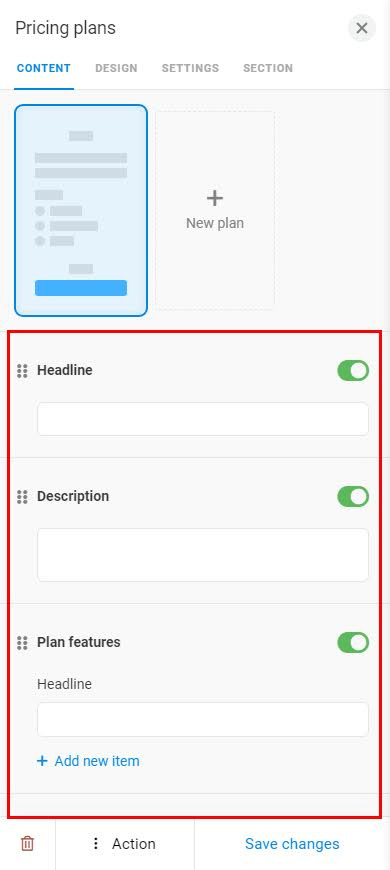
You will see the settings for your first pricing plan. They include empty fields for adding information and the button.
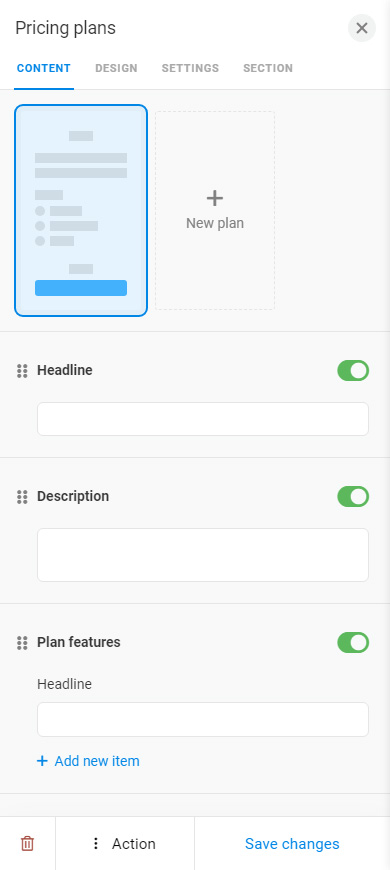
Fill the fields in the settings of a pricing plan to add information about the plan:
- Headline. Name the pricing plan.
- Description. Write general information about the plan.
- Plan features. Set a headline for the plan features. Add a feature, tap + Add new item, and fill the appeared field for this. You can add as many plan features this way as you want.
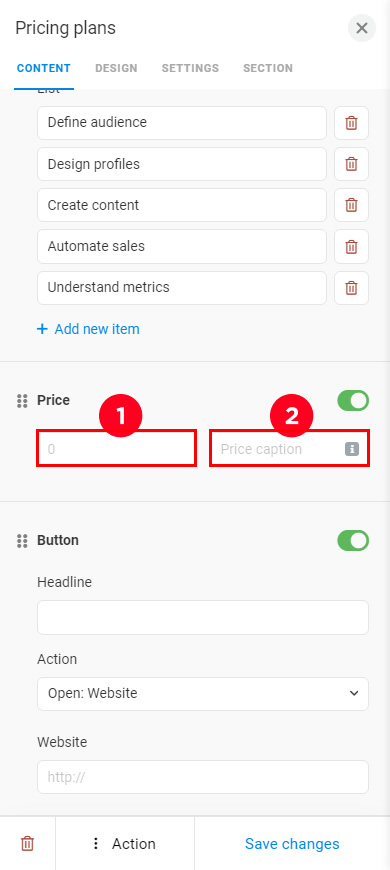
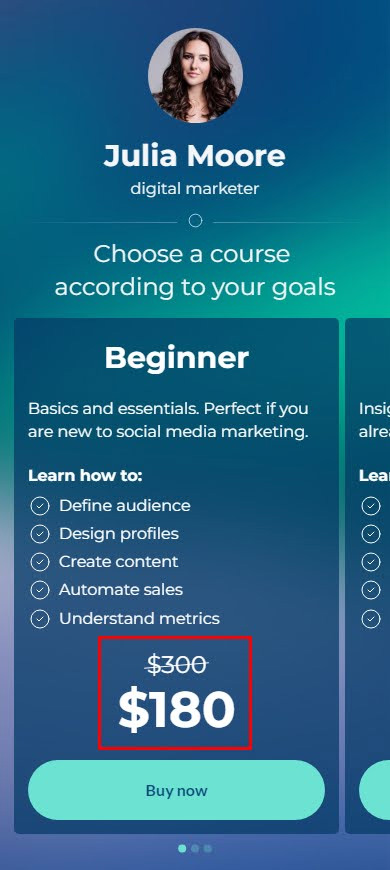
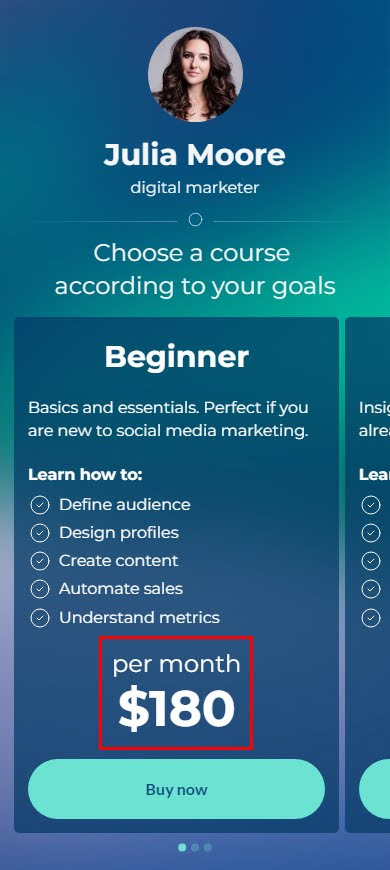
- Price. Add the current price (1) in the first field. Optionally, fill the price caption (2): write a number to add a compare-at-price (see the second screenshot) or words to add a note (see the third screenshot).
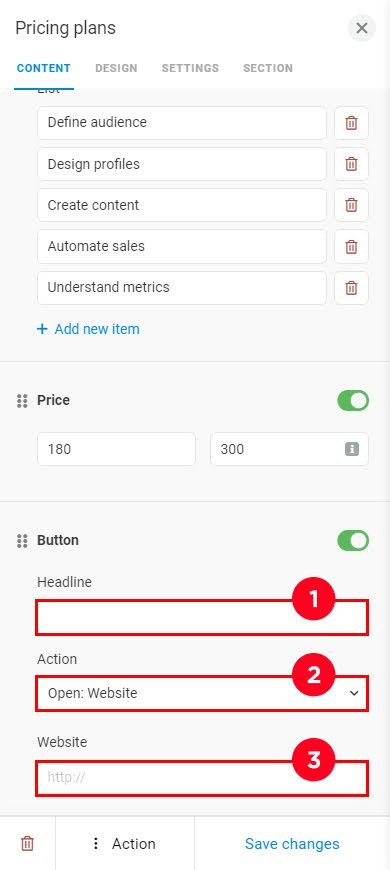
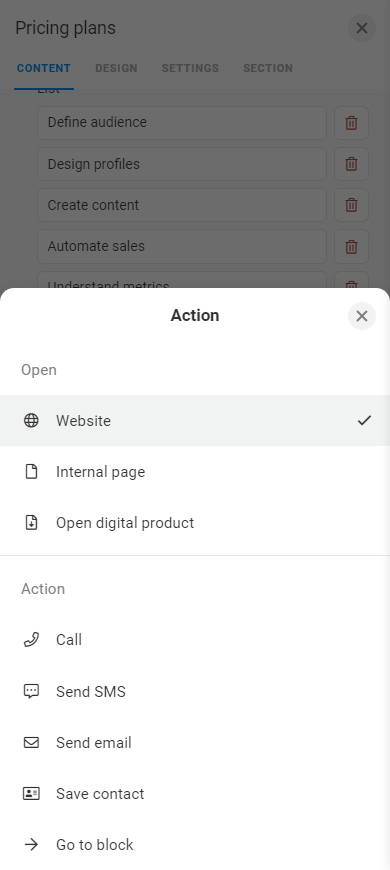
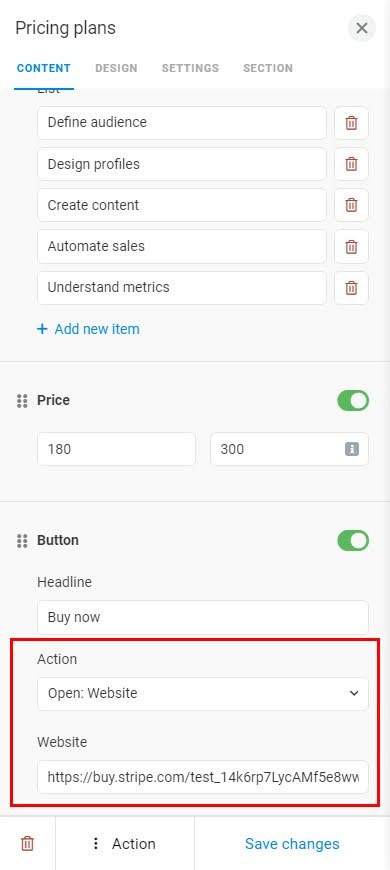
- Button. Add the button text (1). Choose the button action (2), you can see the list of actions in the second screenshot. Add the information (3) that the action requires, this can be an external website link, an internal page on your Taplink, etc. Below are tips on how to set up the button for accepting payments.
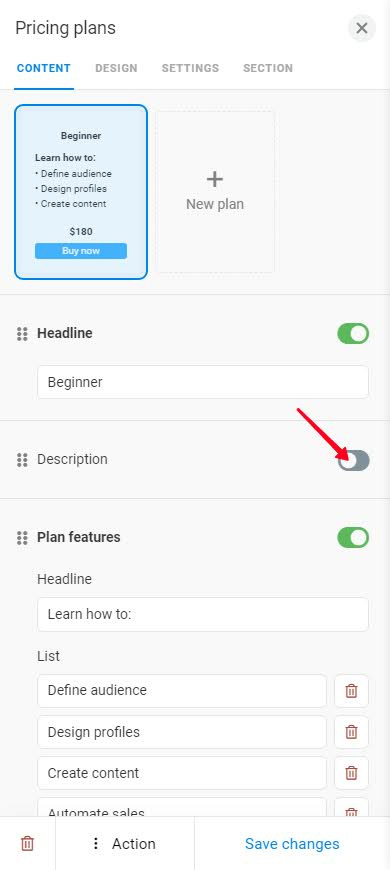
When you need to hide some information about pricing plans or the buttons, disable a relevant section in the settings of one of the plans. Later, you can enable the section again.
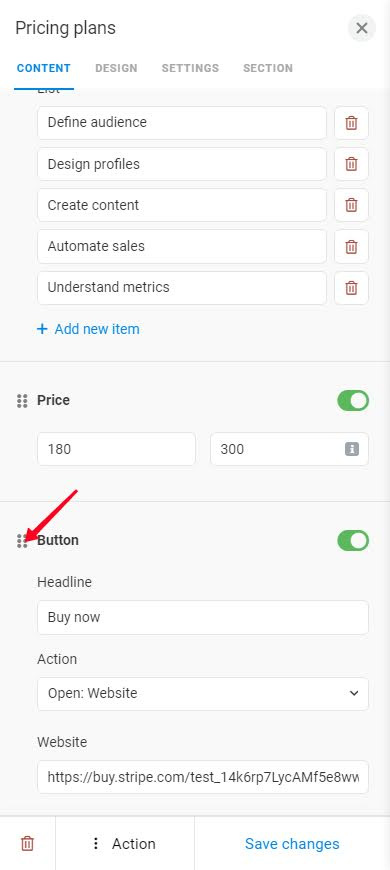
When you need to change the order of the information about the plans or the buttons, tap and hold the 6 dots near a relevant section and move it to where you need to, then release.
There are several ways to accept payments with the Pricing plans block:
- A payment link. For example, you can create and add a Stripe payment link that directs users to a page with pre-filled recipient and transaction sum fields.
- Internal pages. Create internal pages on your Taplink for each of your plans. Add an opt-in form to each of the pages. Set up each opt-in form to charge the sum that equals one of the plans' prices. Then, in the Pricing plan block, choose Internal page in the button settings and choose a relevant internal page. Check the collected leads and the payment status in the Leads tab in your Taplink account.
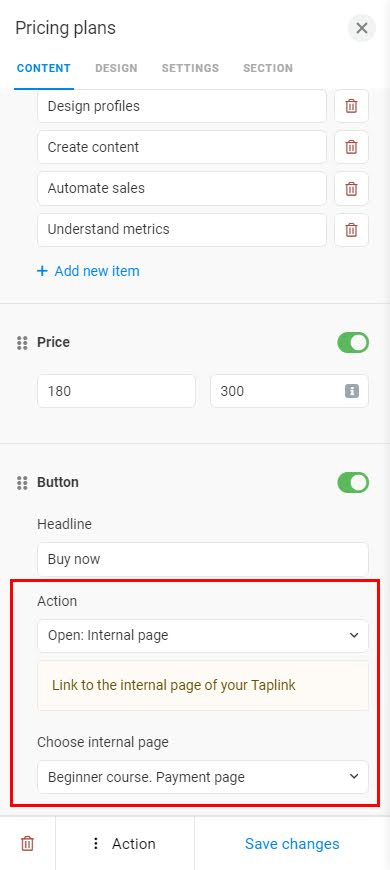

Of course, you can also choose other options in the button settings. For example, you can make it a call or email button, if buying a subscription, membership, course, etc. requires discussing it first.
When you need to add more pricing plans, tap + New plan. Fields for info about a new plan will appear. Fill these fields as described above.
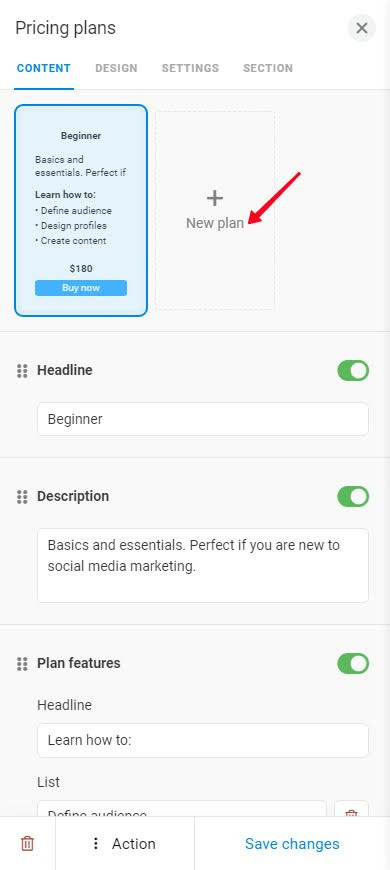
You can switch between pricing plans in the settings, tap a plan at the top to switch to it.
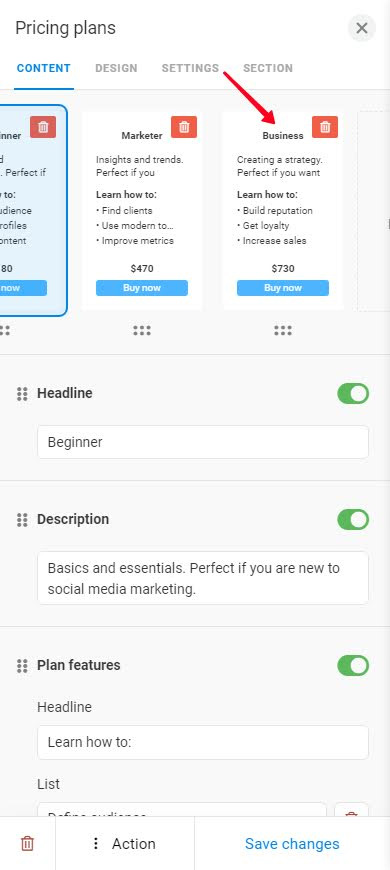
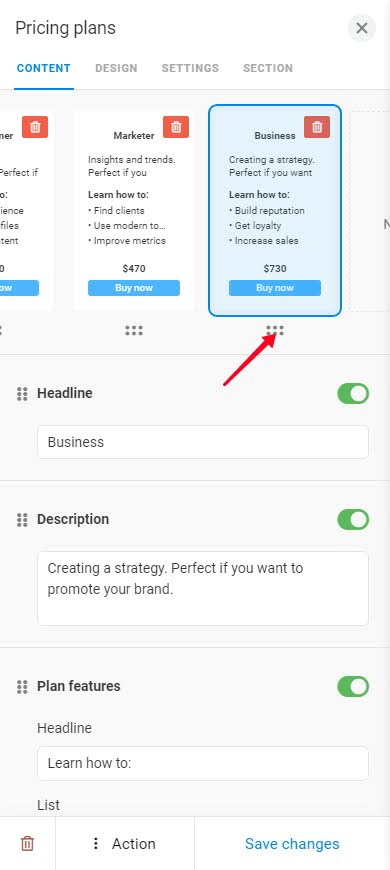
You can change the order of plans. Tap and hold the 6 dots and move the plan to where you need to, then release.
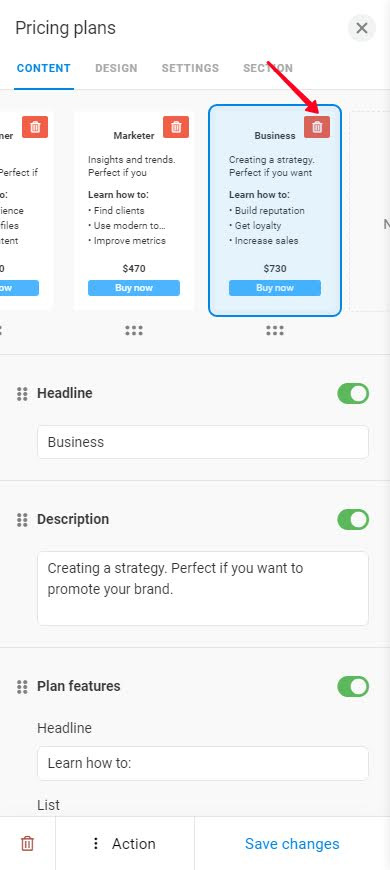
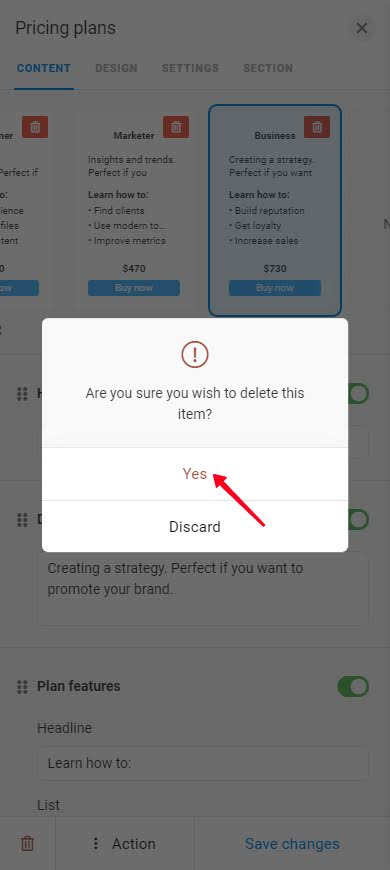
When you need to delete a pricing plan, tap the trash icon in it, and then tap Yes in the pop-up window to confirm the deletion.
You can adjust the appearance of a Pricing plans block in the Design tab:
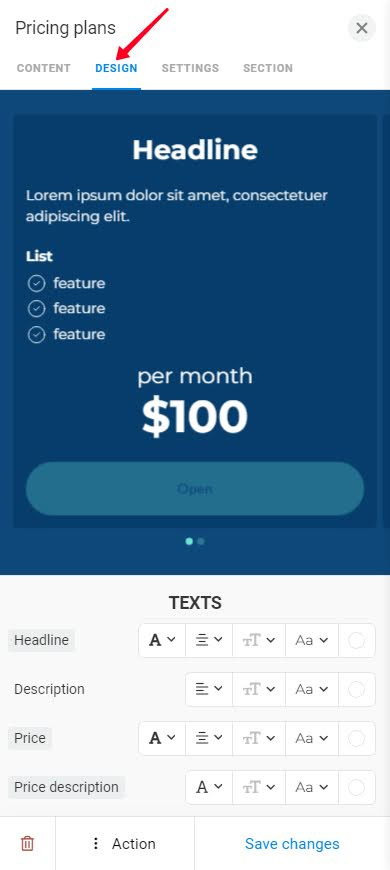
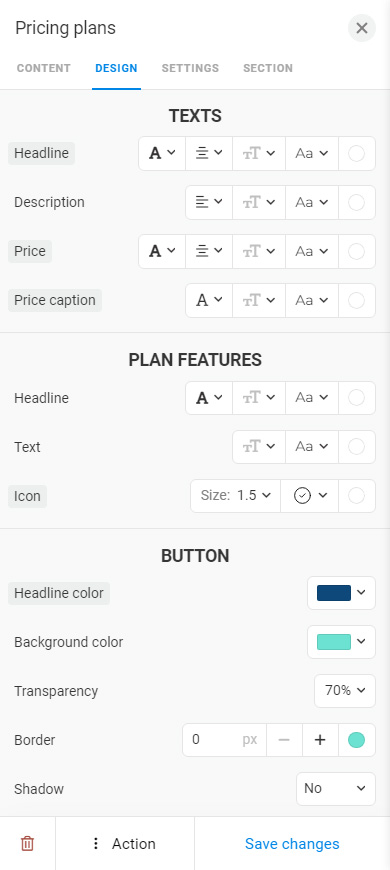
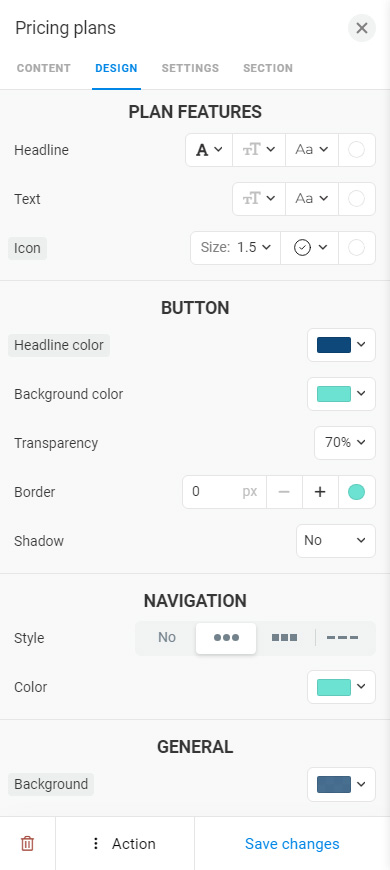
Adjust the settings, they are applied for all the pricing plans:
- Texts. Set how the plans' names, descriptions, and prices will appear.
- Plan features. Set how the heading and the list text and icons will appear.
- Button. Choose the background and text colors. You can also add the button transparency, border, and shadow.
- Navigation. Set the appearance of the navigation elements.
- General. Choose the background color.
You can also apply a Section to the Pricing plans block. Read the guide about Taplink Sections here.
These are optional settings that you can find in the Settings tab:
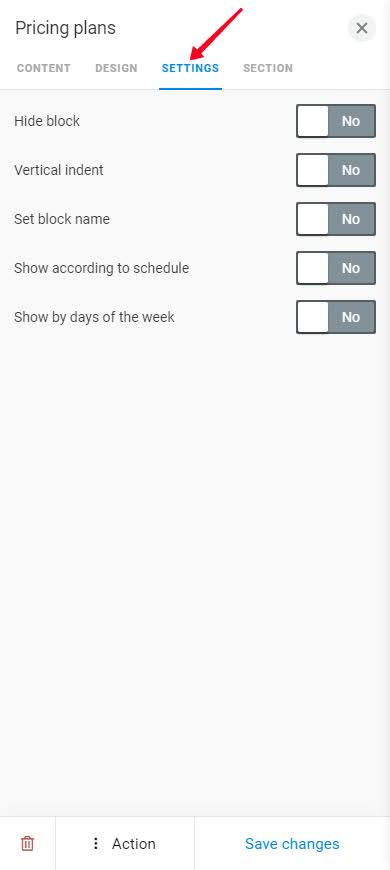
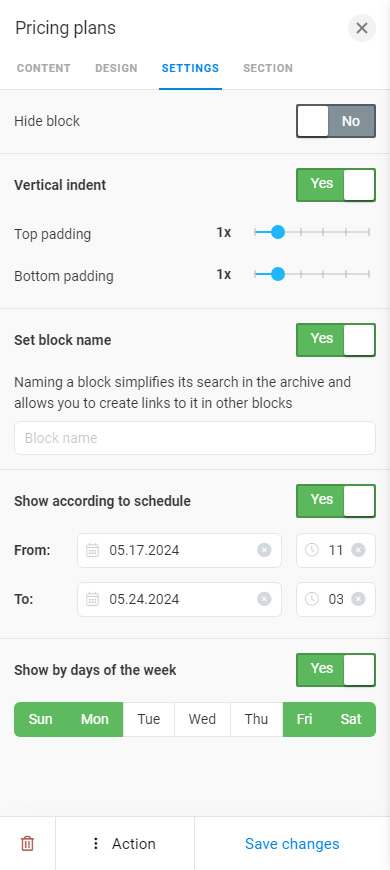
- Hide block. If you need to remove the pricing plans from your Taplink for some time, activate this feature. When you need the plans to appear on your Taplink again, deactivate the feature.
- Vertical indent. Enlarge or shorten the space between the pricing plans and the blocks above and below them. Activate the feature and set the indents. Deactivate the feature to make the indents default.
- Set block name. If you need to link to the pricing plans from a page or menu on your Taplink, you need to activate this feature and add the name in this field first. Then, you can add a link.
- Show according to schedule. If you need the pricing plans to appear on your page on particular days and time, activate the feature and set the days, hours, and minutes. Disable the feature to make the plans appear permanently. Read more here.
- Show by days of the week. You can make the pricing blocks appear on particular weekdays. Activate the feature and tap the days when the block shouldn't appear to make them white. Read more here.
Now you know everything about setting up the Pricing plans block. You can present the plans of your membership, subscription, coaching, courses, etc. If you also want to sell downloadable digital products, add a Digital products block.