How to create a custom location on Instagram + tips

- How to create a new location on Instagram
- Create a custom location on Facebook
- Post with the new location on Instagram
- Share locations on Instagram without Facebook
- How to add custom locations to your Instagram link in bio page
- Tip: explain how Instagram users can get to your location
- Why you can’t create a custom location for Instagram on Facebook
- Wait for the created location to appear on Instagram
- Turn off the location on your phone
- Post something with your custom location tag
- Specify a category for your Instagram location
- What if nothing from above helps to add a custom location on Instagram on Facebook?
- The bottom line
You can add a custom location for Instagram only on Facebook. You have to wait while the Facebook team is verifying your suggested geotag. Unfortunately, they may decide not to add your location tag, this happens when they consider the location doesn't meet the requirements.
If you run a business, you may like the way to add custom locations to your Instagram profile without Facebook — sharing them on your own Instagram bio link. You don't have to wait for verification, you can add locations of all your offices right away. They can be a map with multiple geotags or clickable location links, below we explain how to add them.
You can create a location on Instagram only by using Facebook. Make a custom geotag there, and it becomes available to all users in both social networks.
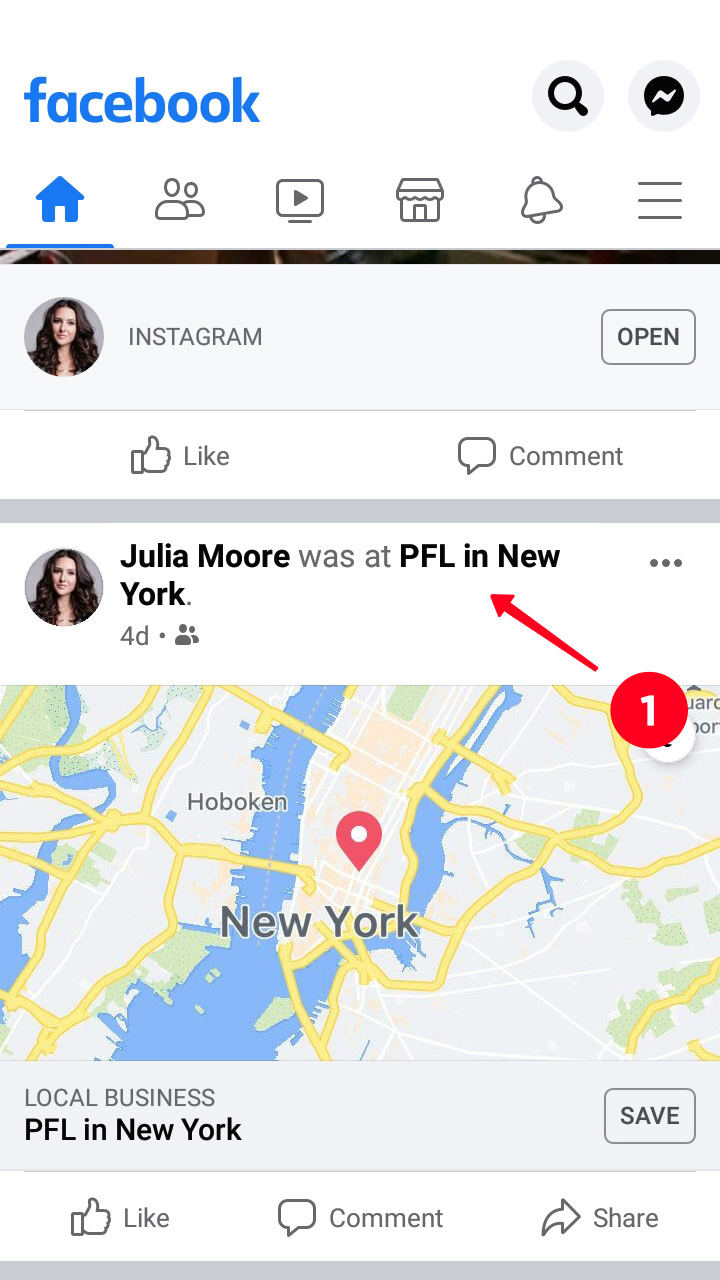
A location for Instagram can be created from your FB profile page. Let’s see an example with a recently opened store, which hasn’t got its location tag on any of these platforms.
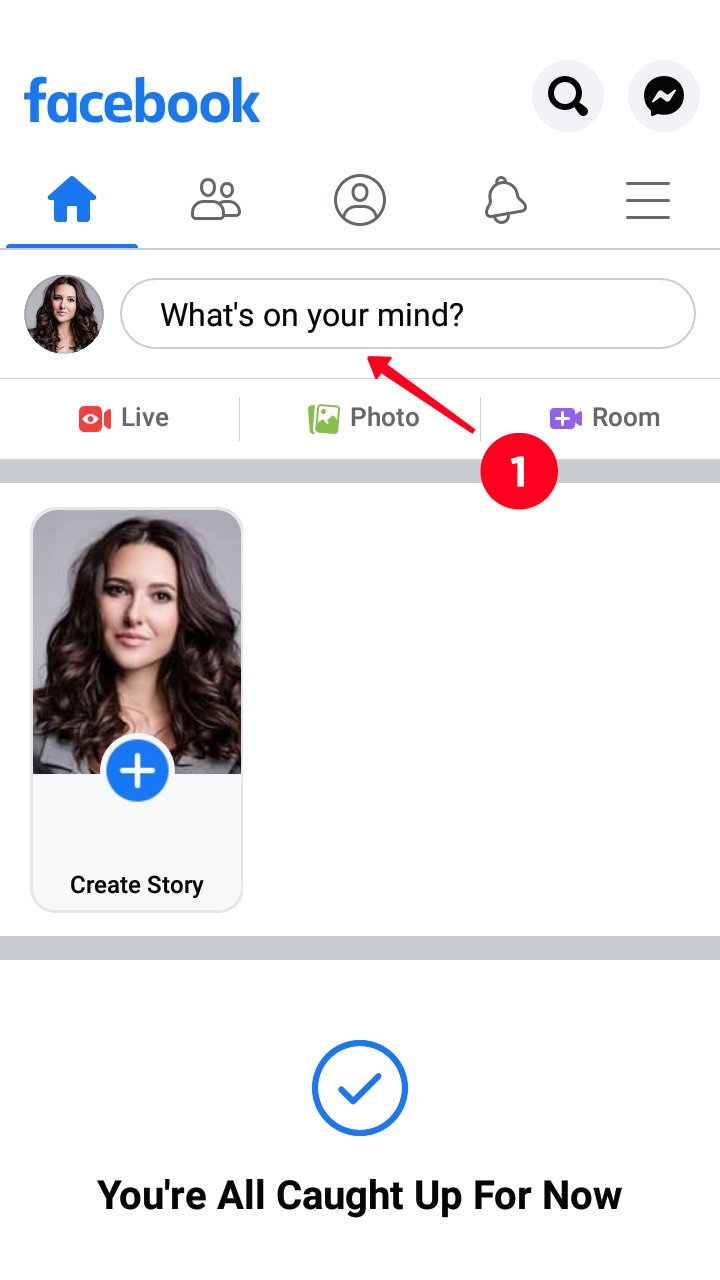
- Tap What’s on your mind?.
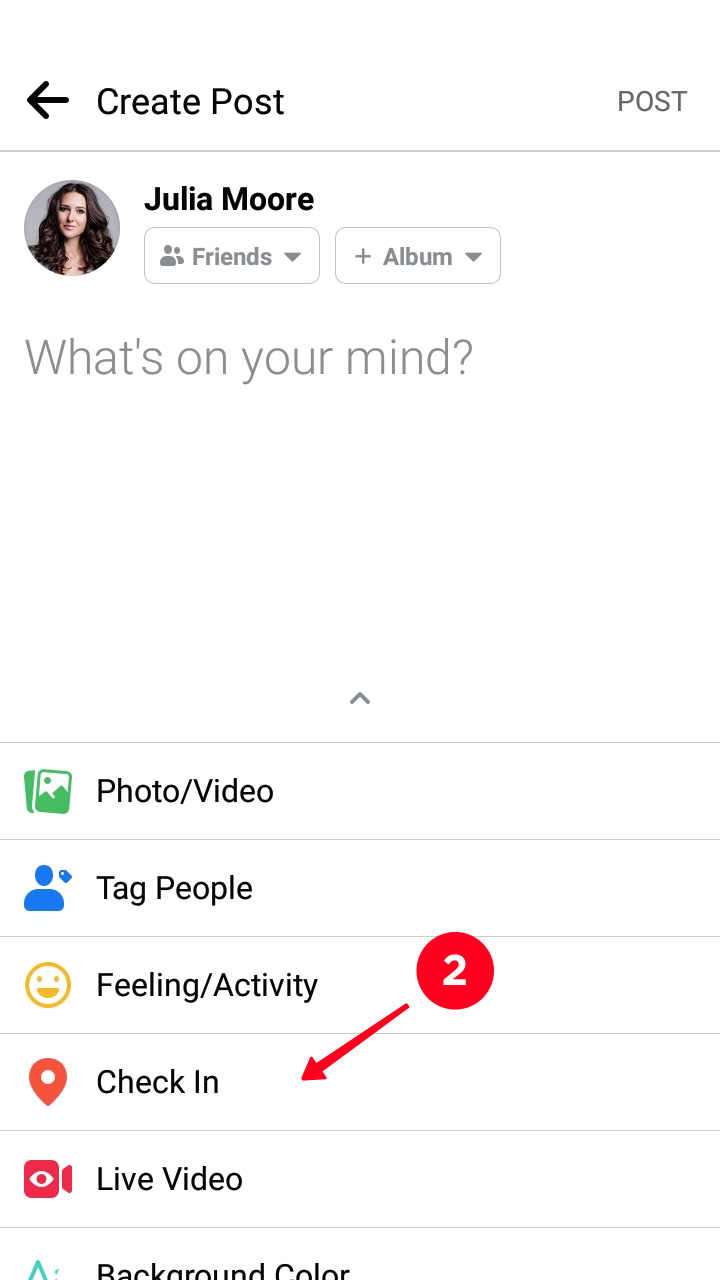
- Choose Check In in the opened window.
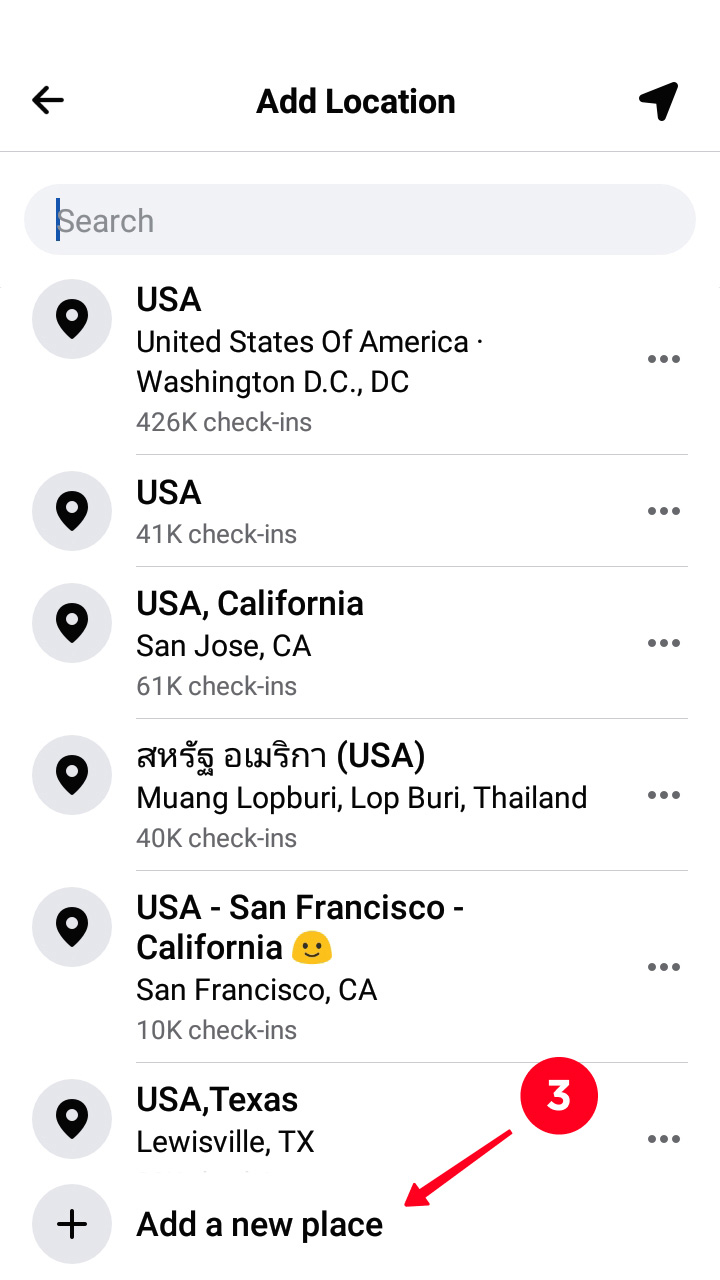
- Choose Add a new place.
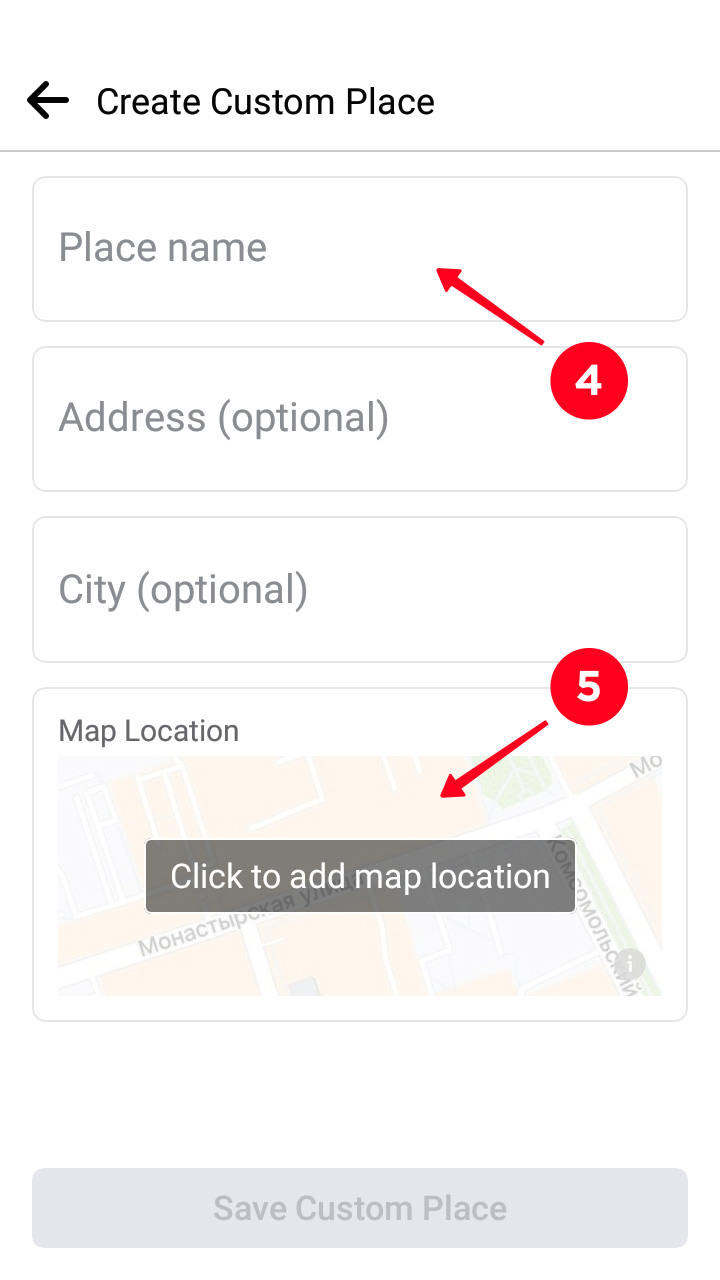
- Fill the Place name field.
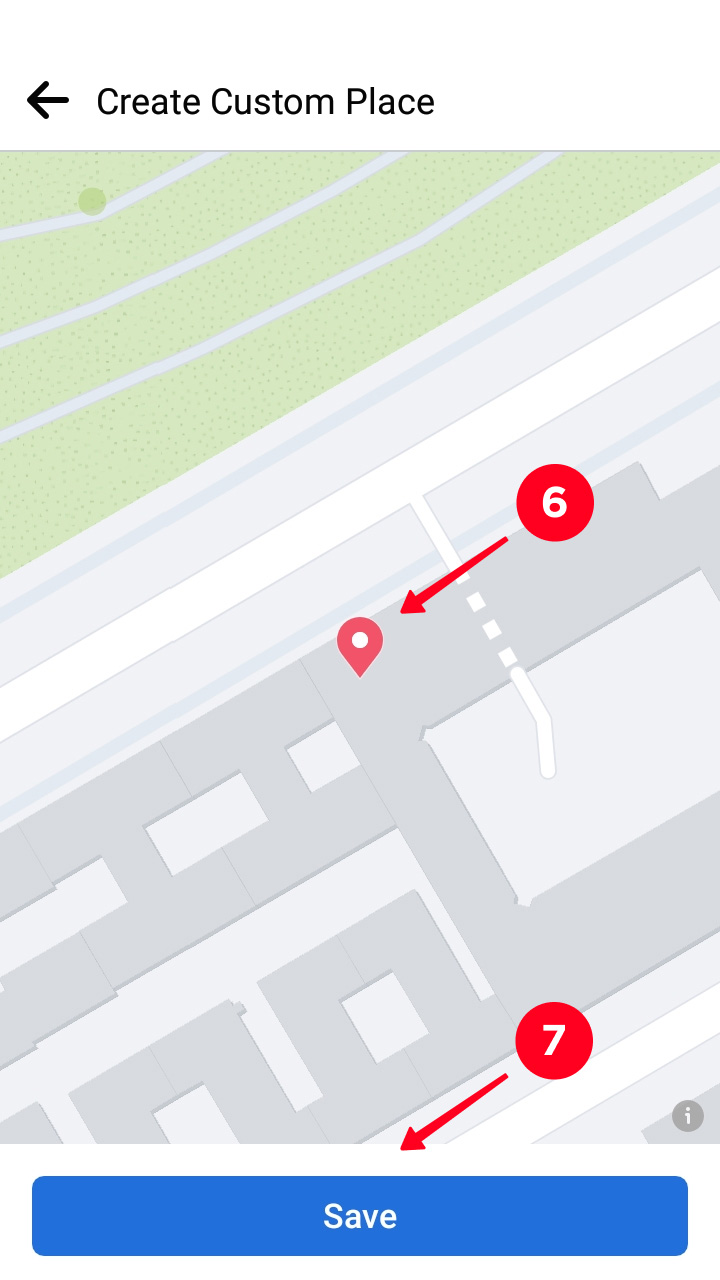
- Tap the map.
- Move the red tag across the map to have it in the right place.
- Tap Save.
- Tap Save Custom Place.

You will see a map widget in the creating post interface. No need to publish it.

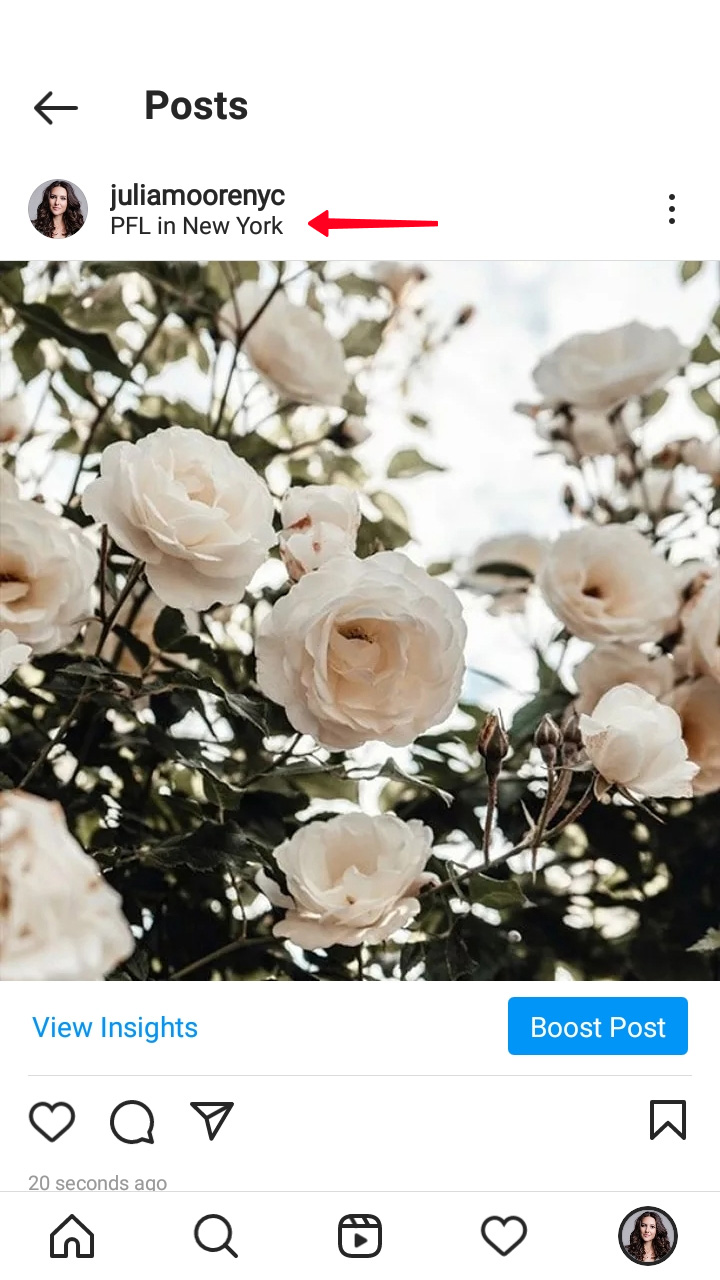
Now you can go to Instagram and post with the location you've just created. One post can have only one location tag.
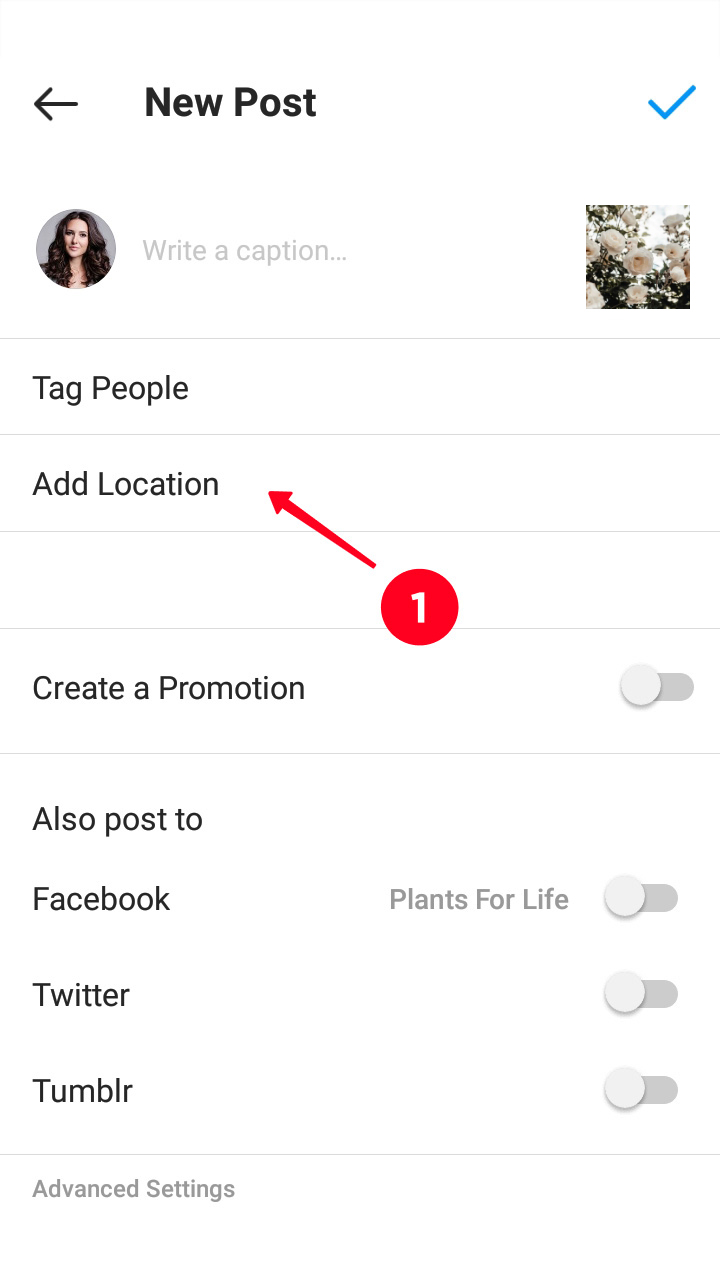
When you create an Instagram post, you tag a location on the last page.
- Tap Add Location.
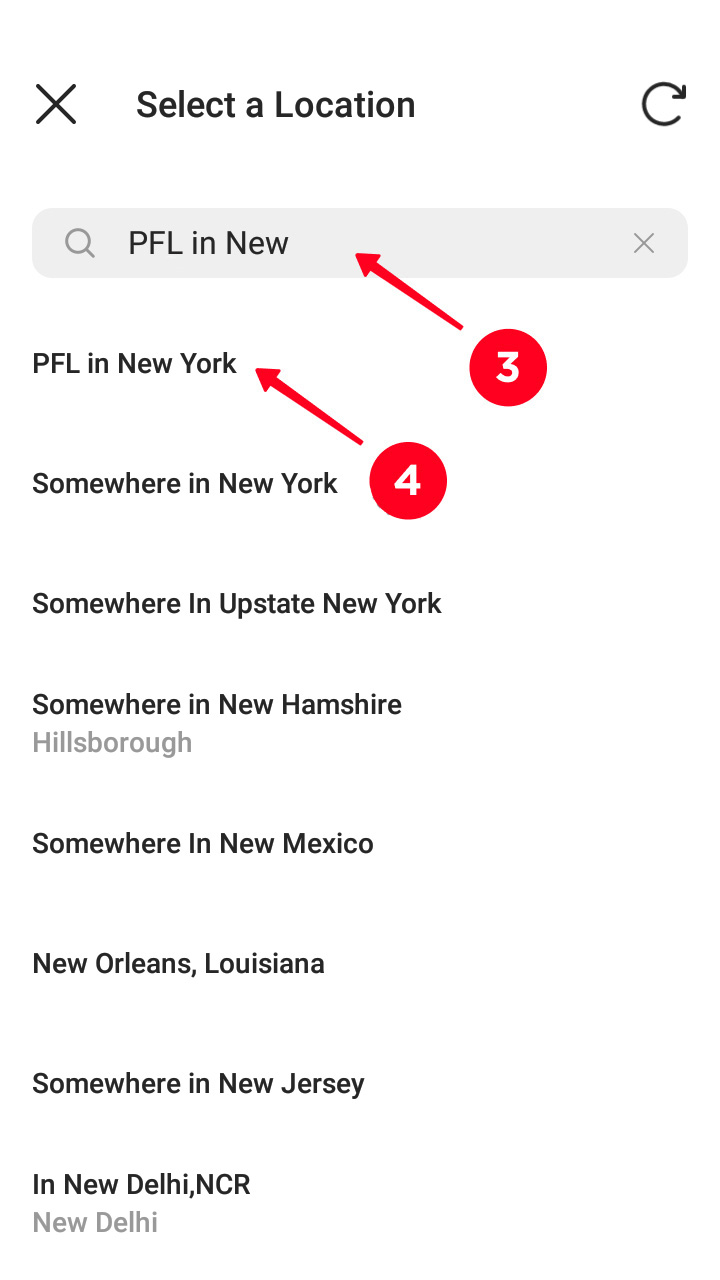
- Type the name of your custom location in the search box.
- Choose the name.
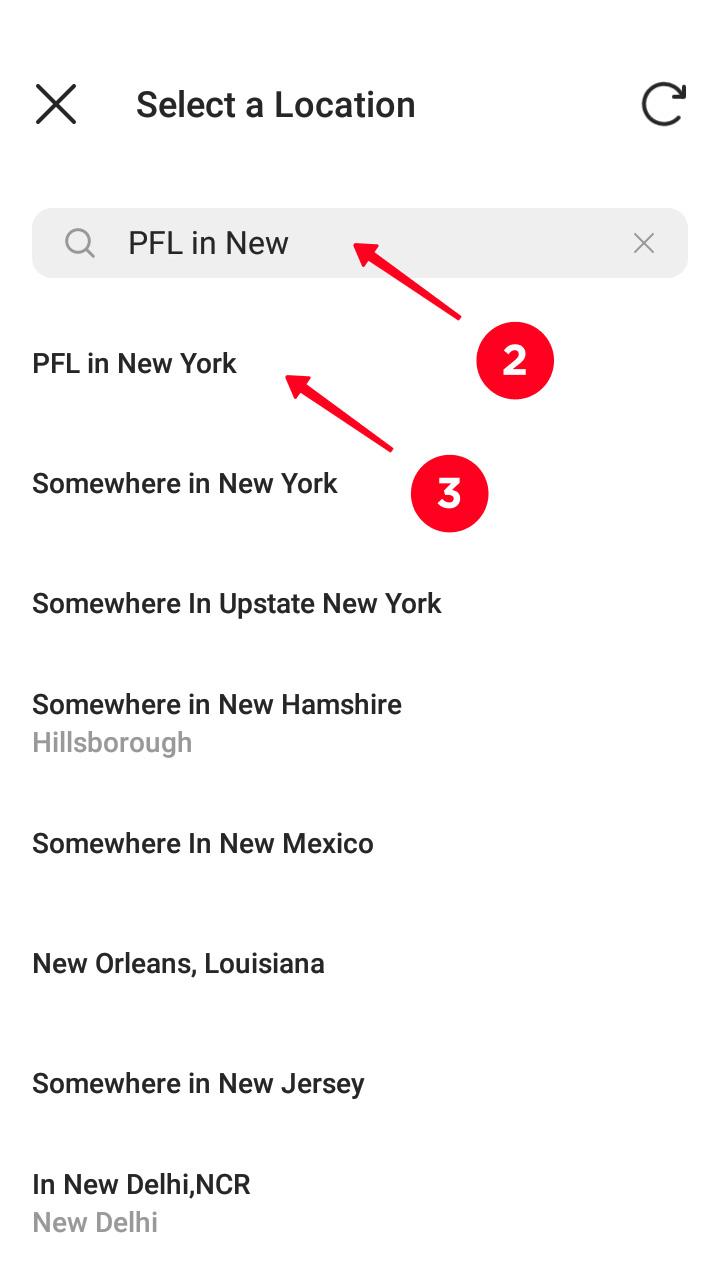
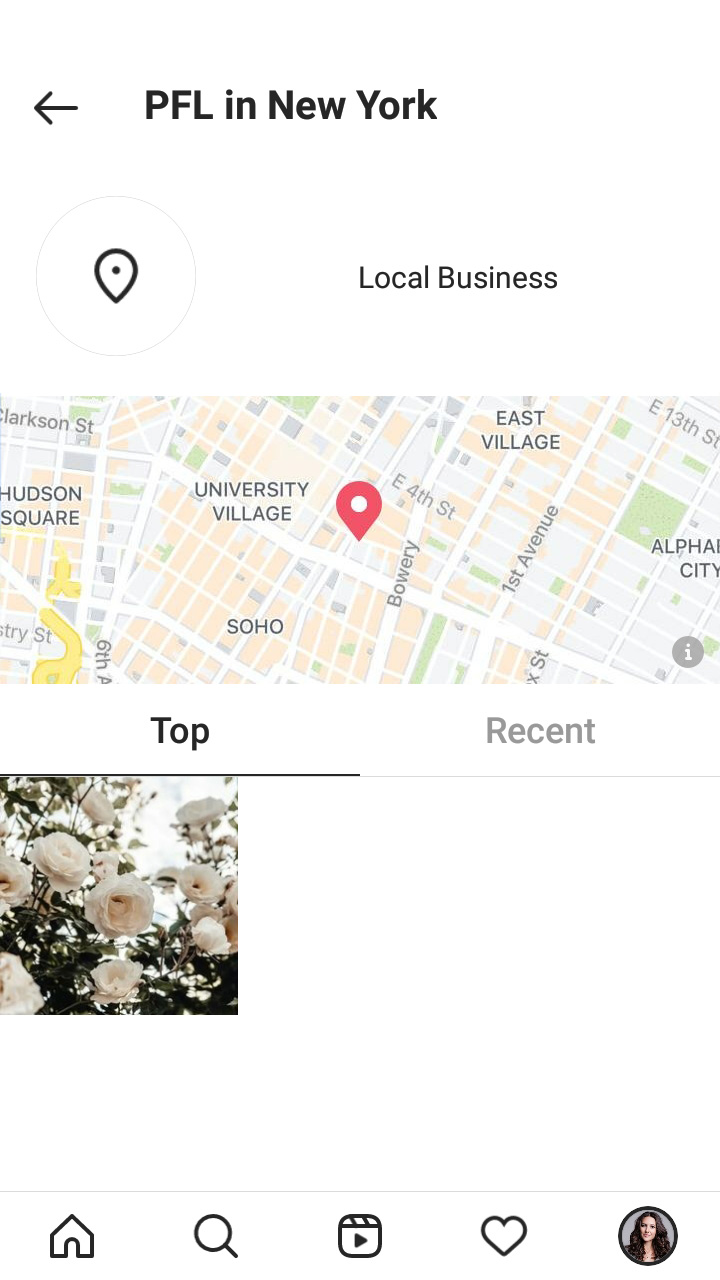
If you write a unique location name when creating it, you find it on Instagram quickly. To make sure you choose the right tag, tap it in the posting menu, or under your username after publishing.
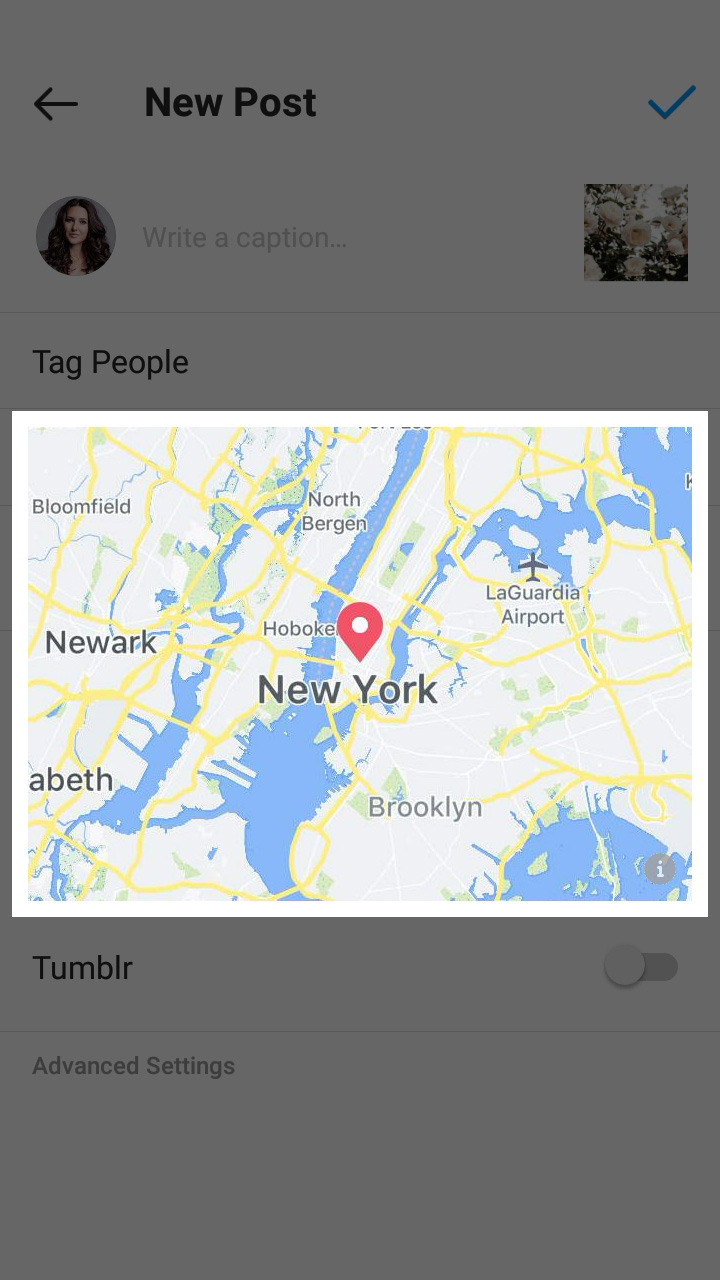
You can see the exact position of the tag in the opened Google Maps. After posting, you can see the location tag on a map too.

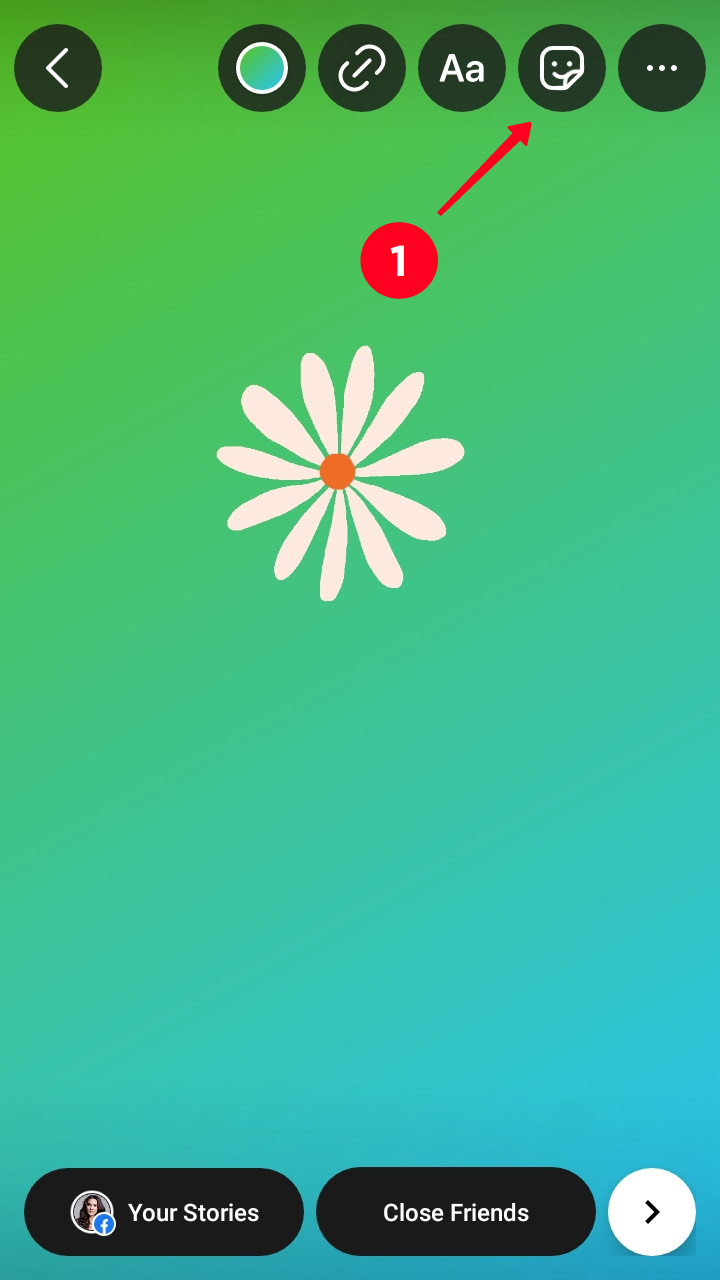
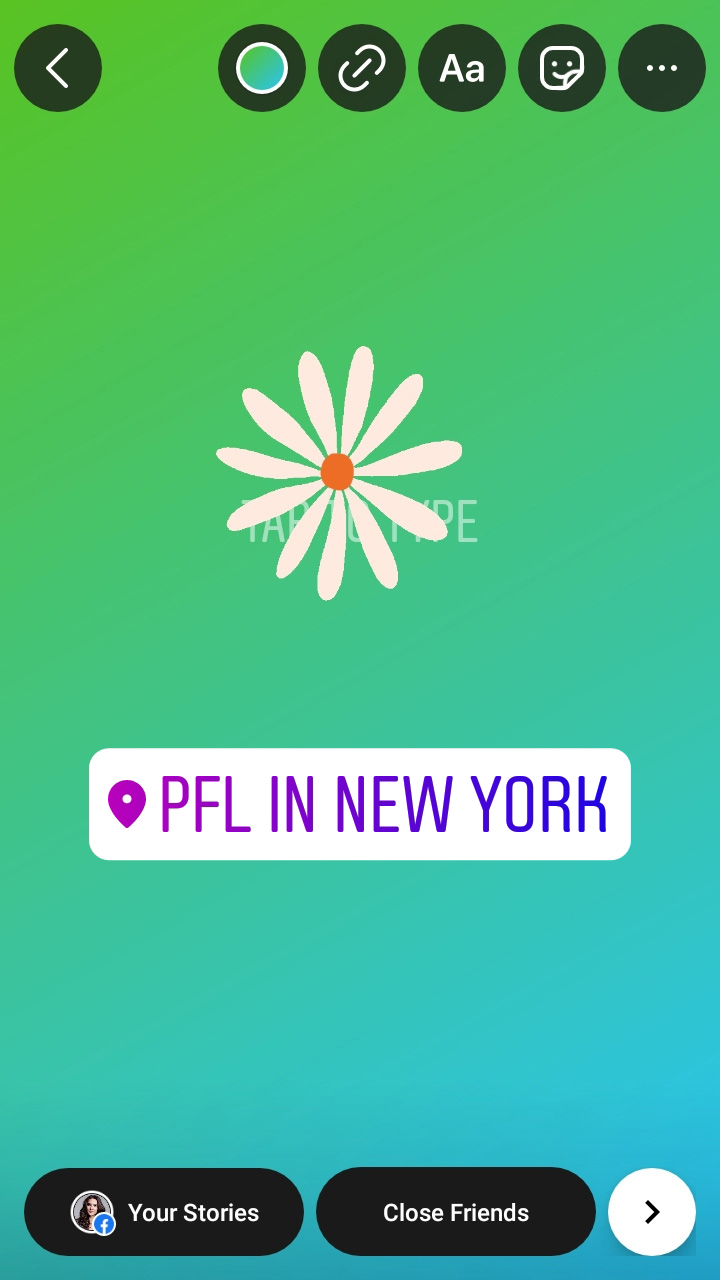
You can put a location sticker on your Instagram story. The list of the available places is the same as you see in posts. You will find your custom address among them.
- Tap the stickers icon.
- Choose the location sticker.
- Type the name of the place in the search box.
- Choose the custom place you created.
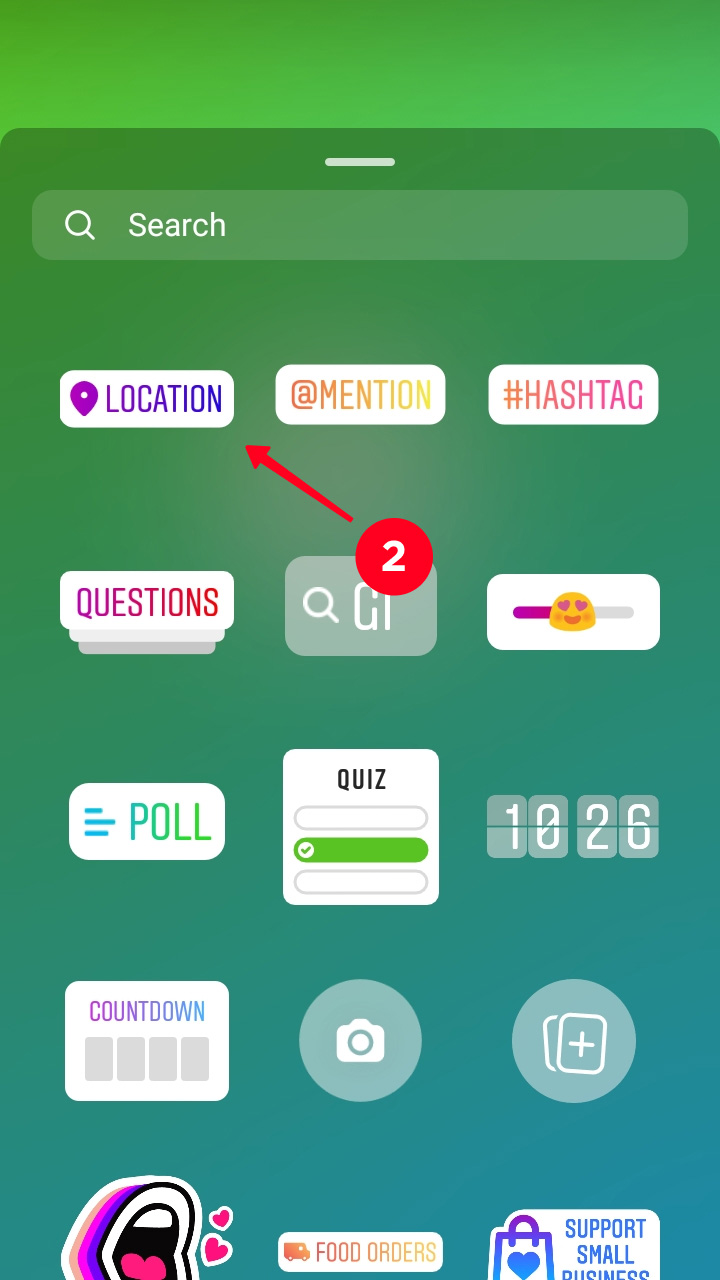
The sticker with your custom location will appear in your Instagram story. You can tap it to change it.
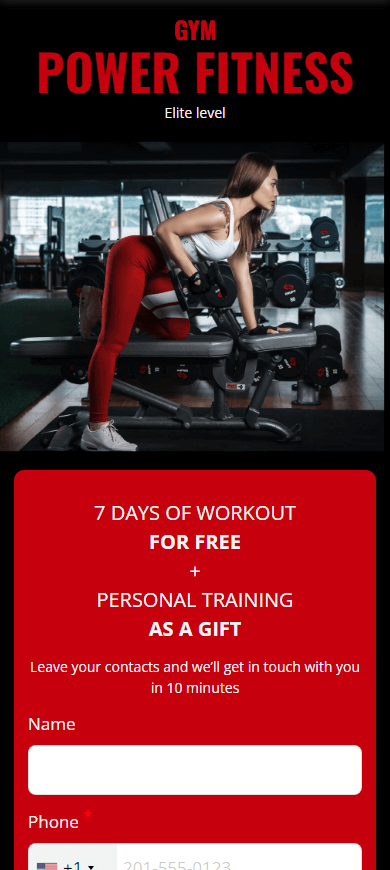
Another way to add custom locations to your Instagram profile is sharing them on your link in bio page. You don't need Facebook for this. Instead, create a page with a map on Taplink.
Direct users to this page with custom locations in your Instagram bio. There they can tap a location tag to know the exact address, working hours, etc., and tap a location link to create a route in a map app.
Look at an example below:

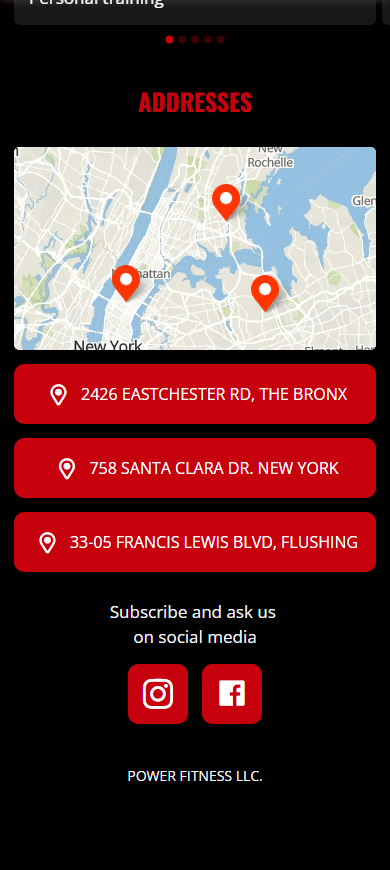
You can create your link in bio page in a matter of minutes if you use templates. Here is the template of the page above. You can choose any other template here as well, there are options for 20 categories. Templates are available after a quick and free sign-up.
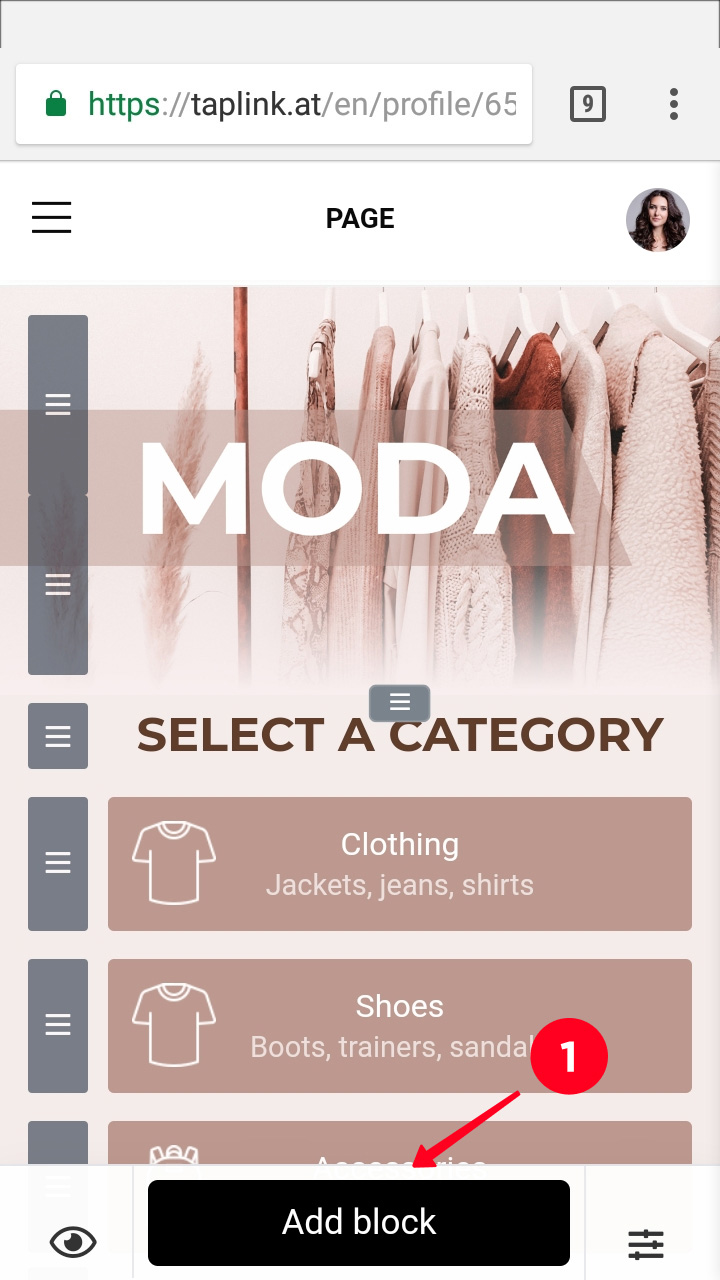
You need the Map block on your Instagram link in bio page to add custom locations on it. Here is how to add and adjust it:
01. Tap Add block to add a map to your page.
02. Choose the Map block.
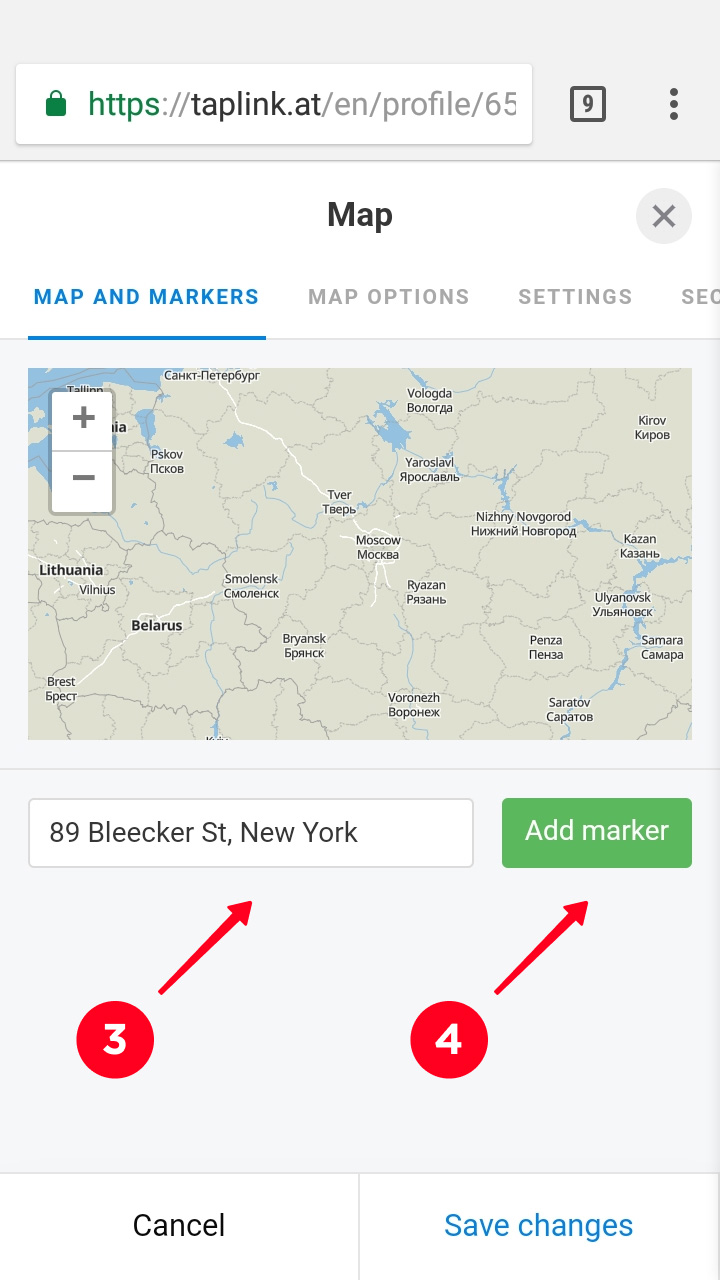
03. Set coordinates, for example "40.741469, -73.988478", or an address for example "89 Bleecker St, New York".
04. Tap Add marker.
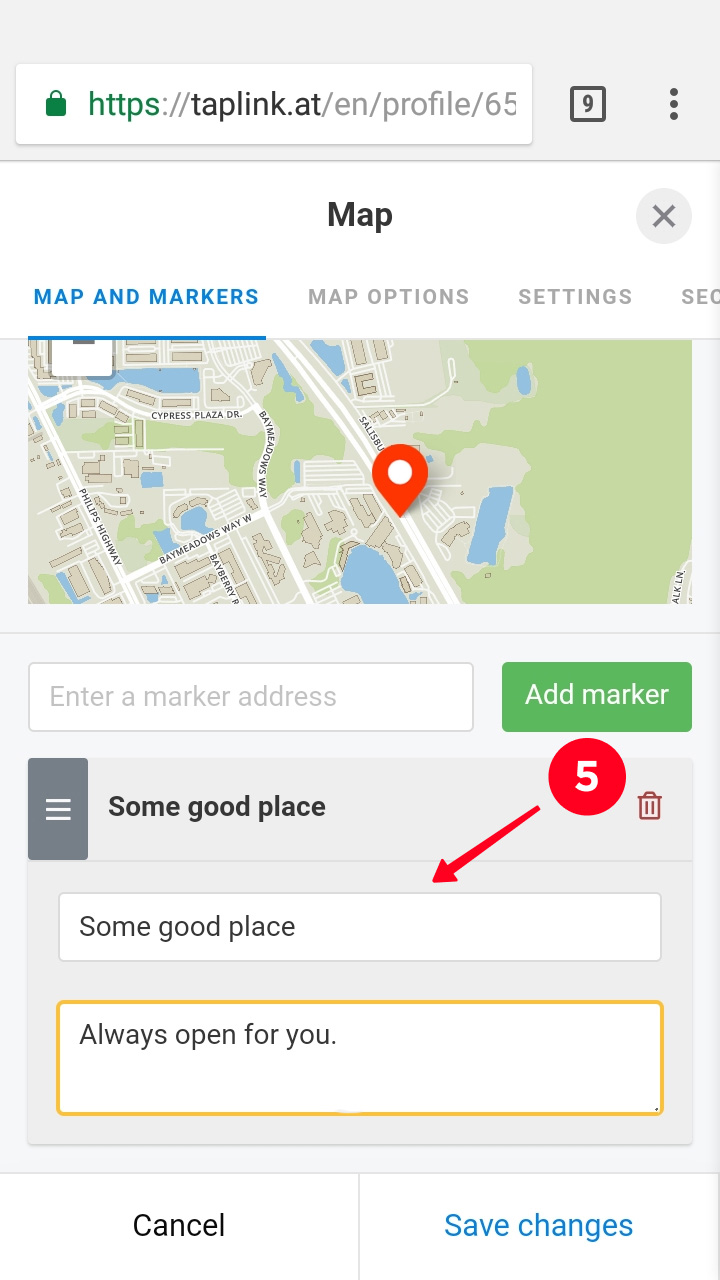
05. Type any name and description you want.
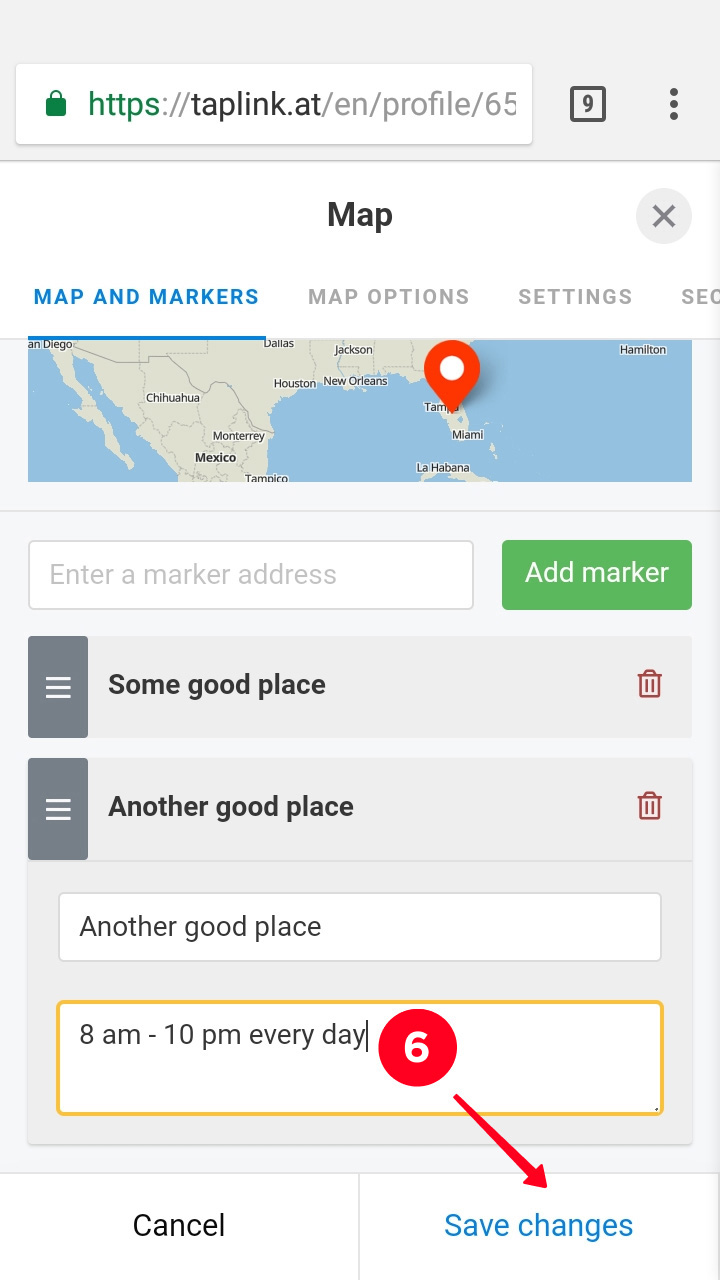
Repeat steps 3-5 if you need more locations on this map.
06. Tap Save changes.

You can add not only custom location geotags and link to your Instagram link in bio page, but also texts, photos, videos, and any links. For example, you can explain how to get to your place or create a qr menu if you run a café. You can also add your social profile links and contact buttons, for example, a WhatsApp link.
Sign up for free to create your page, when it's ready, add it to your Instagram bio.
Sure, once you add a location link to a map app, users can create a route. But there still can be difficulties. For example, the door doesn't have your brand sign, or the building has a complicated planning, so that the way to your door is not so obvious.
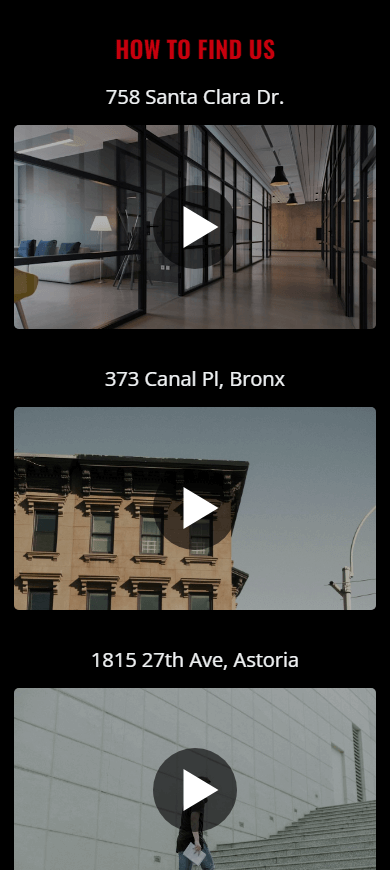
Anyway, the more information about the added custom location you give to Instagram users, the more of them can manage to get to it. So add an image carousel or video about how to get to your place.
Here is an example:
When you create a location, it usually becomes available on Facebook and Instagram right away. But in some cases, it takes a while or never appear on the list. Don't worry! We have several solutions for you.
Sometimes tags appear not so fast. When we wrote this article, we also created a location, and it appeared on Facebook and Instagram in 4 days. Though, it might be not your case, so, if your custom location hasn't appeared on the lists, you can try the solutions below.
Facebook may prohibit creating new location tags for places that are far from your real location. Turn off the location on your phone, if you need to create a tag removed from your current place.
On Instagram, you see locations that are close to you. Turn on location on your phone if you can't see a location near you.
You don't have to post on FB with your custom location to make it available on Instagram's locations list. But it may be a solution if your created geotag doesn't appear on the lists.
You can set a category to your new location when you create or edit it, this may make the tag appear on Instagram. It will also help users to find you. For example, you wrote a shop name "Pinpay" in the tag name, then you better specify that you sell clothes in the category. Thus, a user finds you when searching for clothes.
Geotags without a category are often rejected. To specify a category, first, make a tag and post something with it.
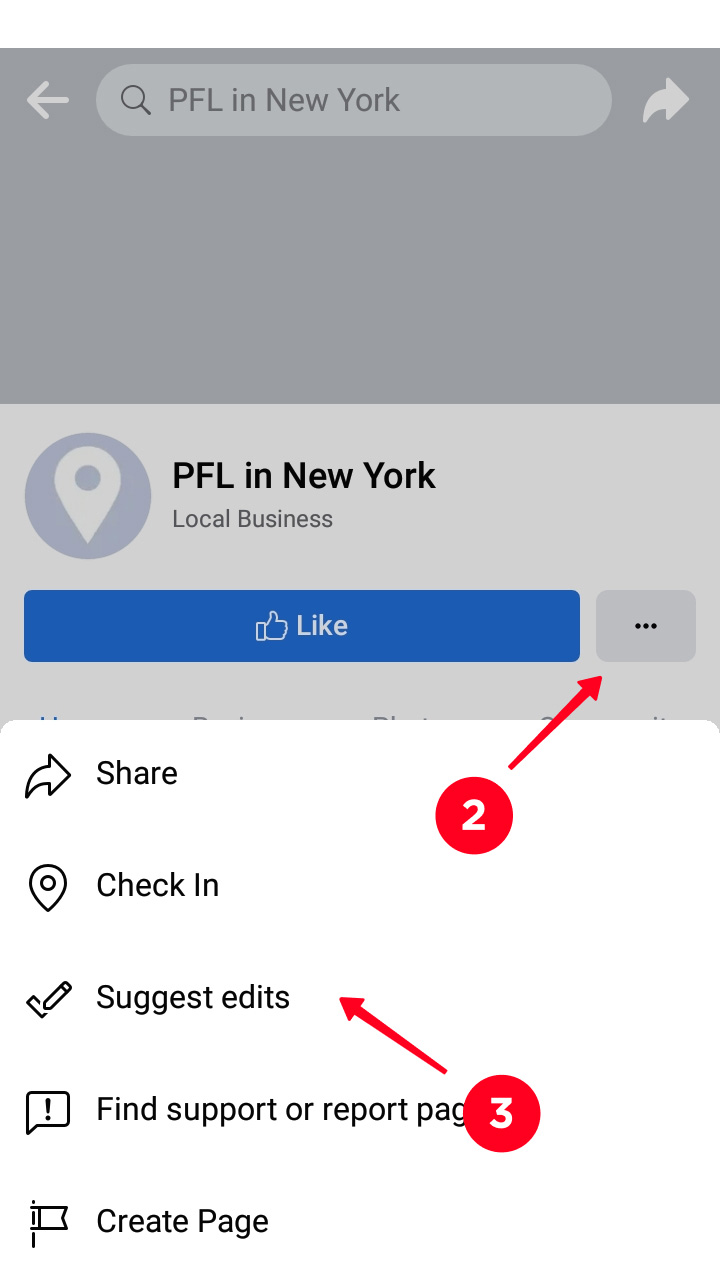
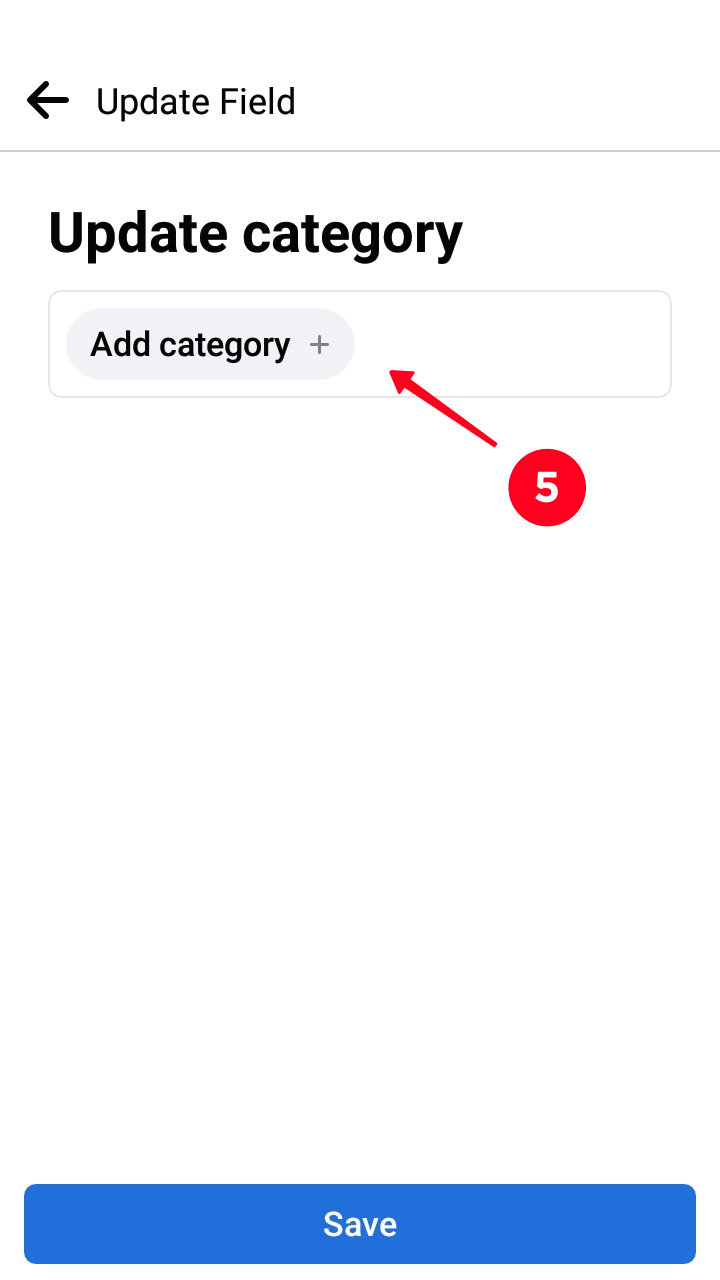
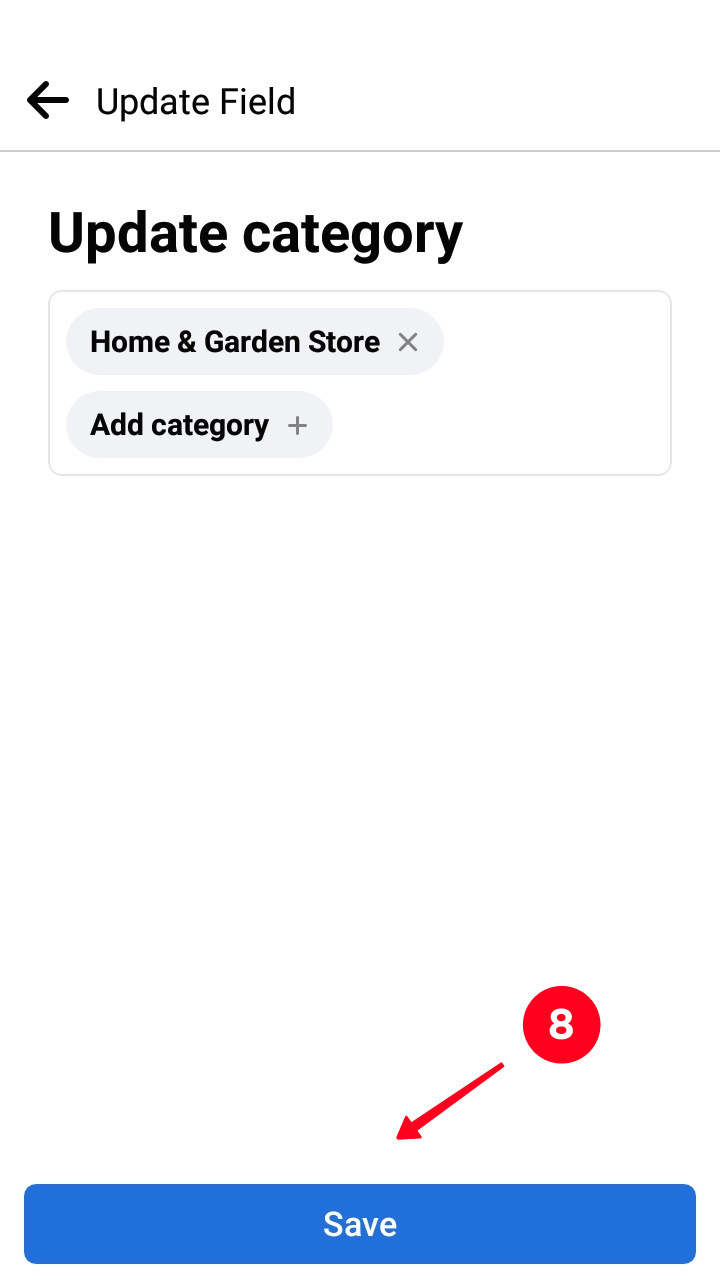
- Tap the created location.
- Disclose the three dots menu.
- Choose Suggest Edits.
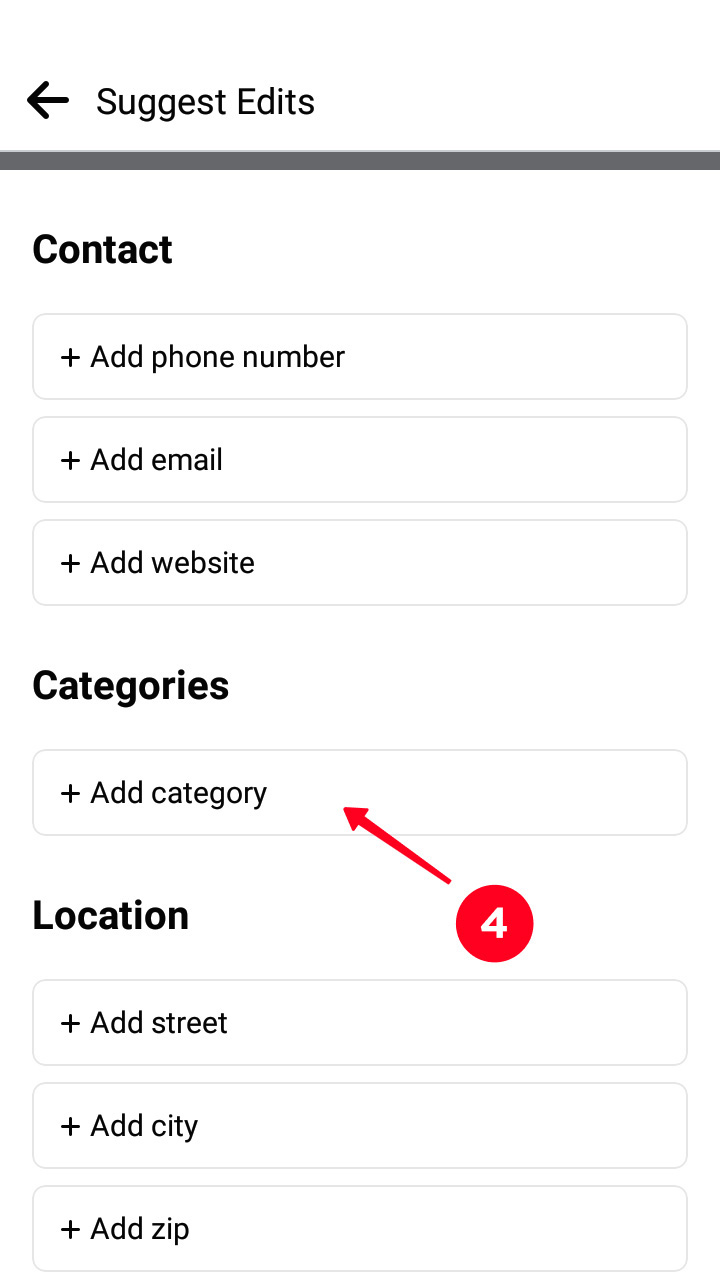
- Tap +Add category in the Category section.
- Tap Add category in the new window.
- Type a word related to your field in the search box.
- Choose a category from the suggested list.
- Tap Save.

Don't worry, you don't need to create a custom location on Facebook to share it on Instagram. You can add locaton tags to your link in bio page. This way has a lot of advantages:
- share any location.
- share any number of locations.
- add interactive maps.
- add clickable links to map apps.
And also present your brand and product! Read how to add custom locations to your Instagram bio above.
The only way to create a location on Instagram is by Facebook. The place will be available for all users on both social networks. But there are more ways to share a precise location with users.
Post a map with a geotag or a video to show your subscribers where a place is. This is a good way if Facebook hasn’t confirmed your location yet.
Create and share multiple custom locations on your Instagram link in bio page. This page makes your bio more than just 150 characters. You share locations, photos, videos, and many more with your followers using it.