How to get verified on Instagram in 2026

Following Instagram accounts, you may have noticed more than once that there is a blue checkmark next to the usernames. A verified badge indicates that this account is a true profile of a brand, celebrity or an influencer.
For instance, fans often create fan pages and give them similar usernames. The blue checkmark helps people to identify a real account to avoid mixing it up with fake ones.
Moreover, if an Instagram account has the verification badge, users will trust it more. The administration of the social platform doesn't give it to everyone, but only to those profiles that meet certain criteria.
Previously, Instagram used to independently select profiles that were assigned the blue checkmark. Then from August 28, 2018, users can send a request to confirm their profiles. The blue checkmarks are given to those accounts that the Instagram administration considers meeting several criteria:
- Authenticity. An Instagram account must belong to a real person, organization or brand to be verified.
- Uniqueness. One person can get only one Instagram account verified. It should be dedicated to something that distinguishes this person or brand from others. For instance, the platform won't give you the badge if you promote a page with cat memes.
- Completeness. Before applying for account verification, work on its visual part and bio. Make sure that you have a profile photo, a complete bio and enough posts. Also be active while waiting for the blue badge so that Instagram sees that your account isn't abandoned, and you have a high percentage of coverage and the level of audience engagement. Do not forget that the profile must be public.
- Notability. Work on your other social networks, as they also can influence on getting the verification badge on Instagram. Your mention in different sources is a key player, as this indicates your popularity.
If you are convinced that your account meets the requirements, then you can get to business and send a request for your Instagram page verification.
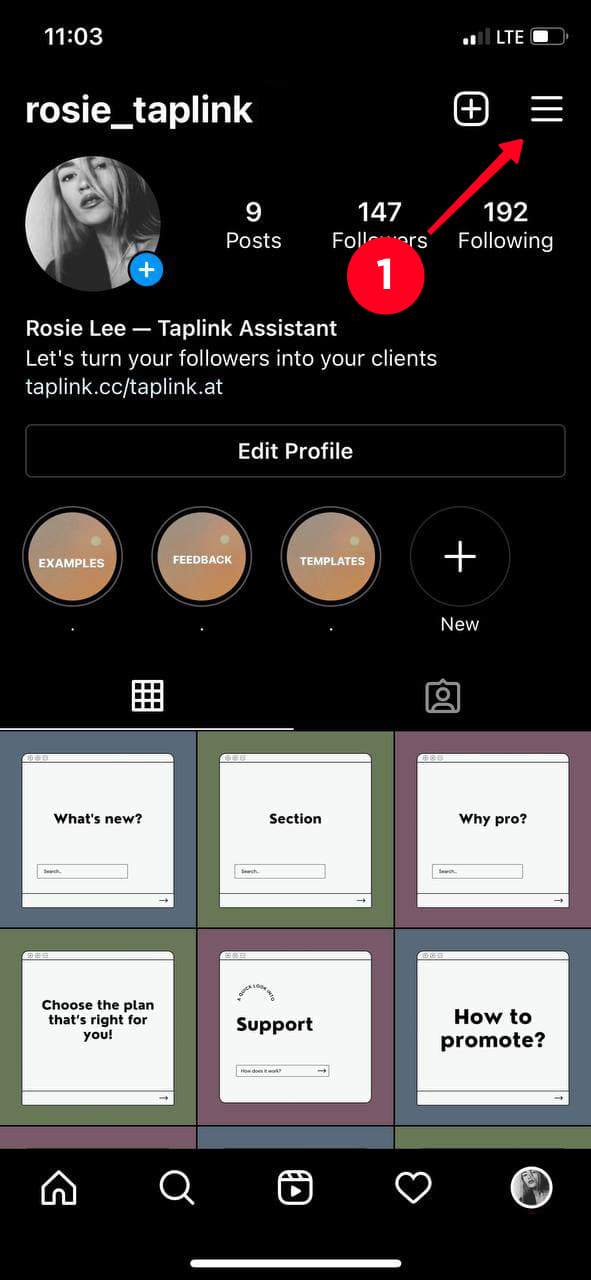
01. Open Instagram and go to your profile. Tap on the three horizontal bars in the upper-right corner of the screen.
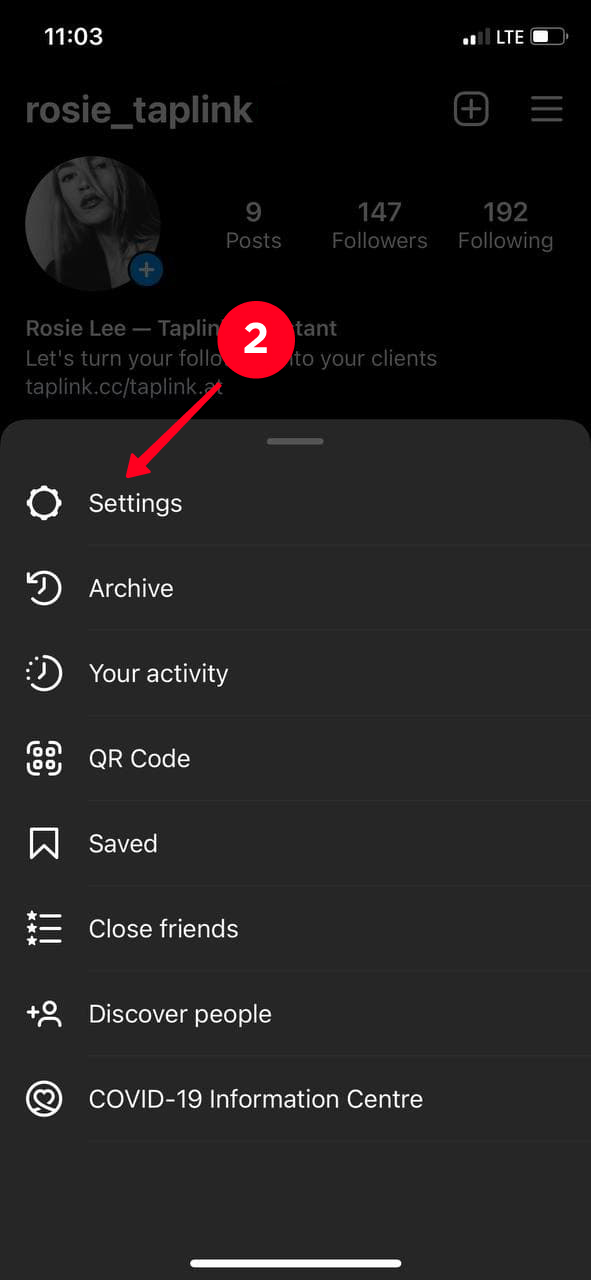
02. Go to Settings.
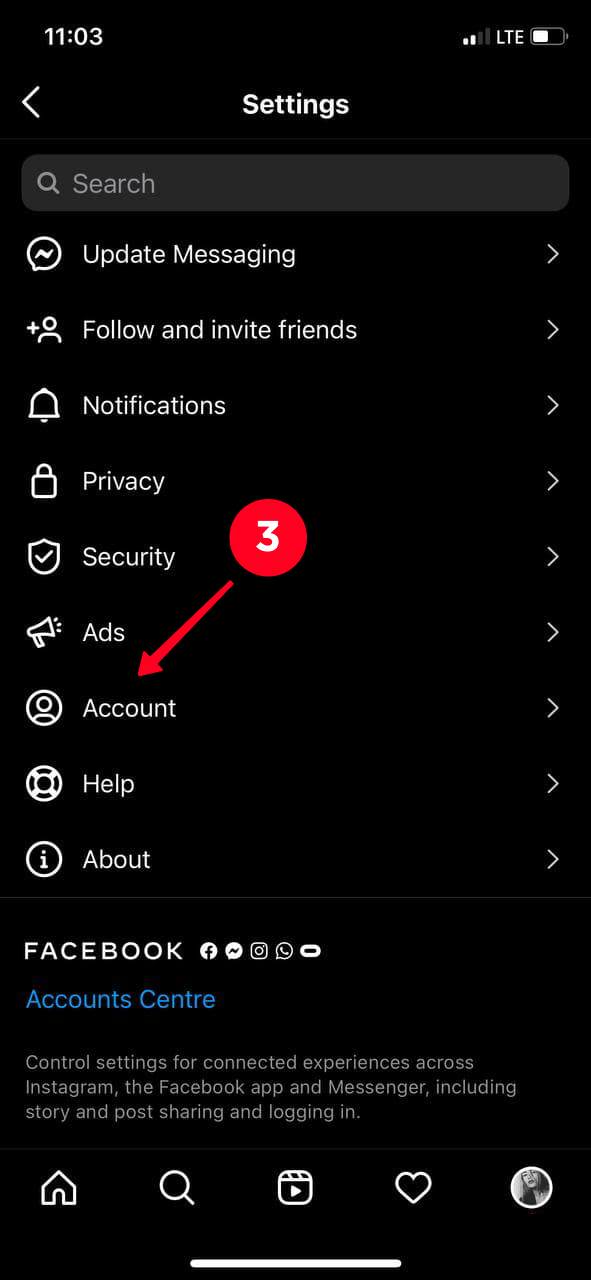
03. Find Account and tap on it.
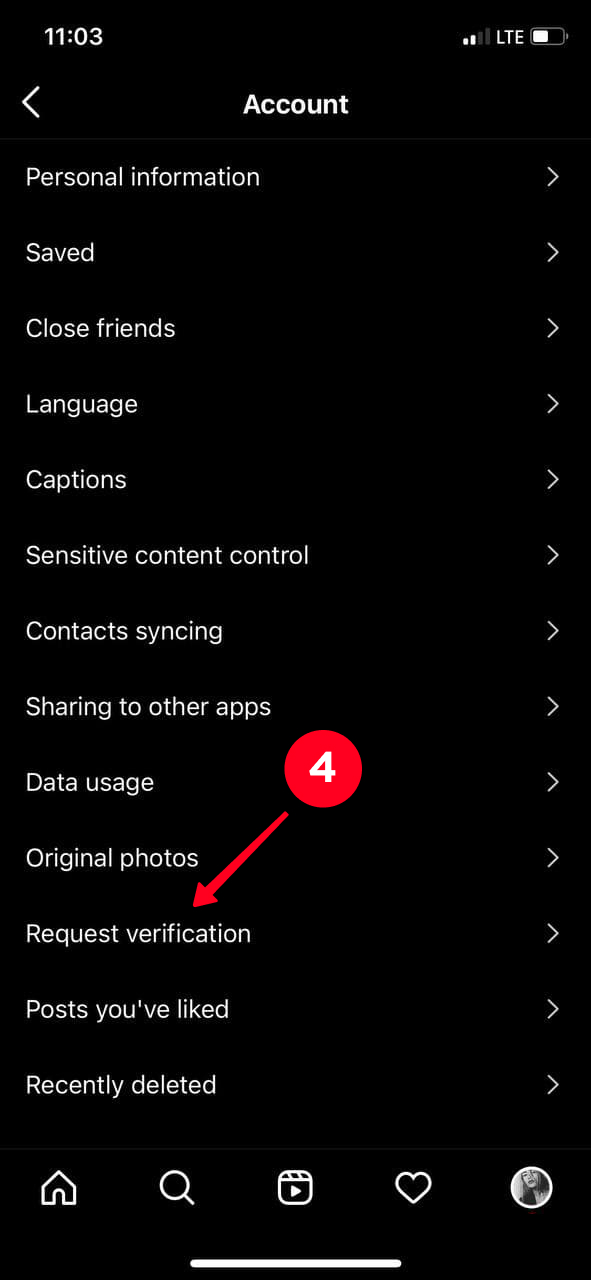
04. Then hit Request verification.
05. Fill out the form. In Document type, select a document that confirms your identity.
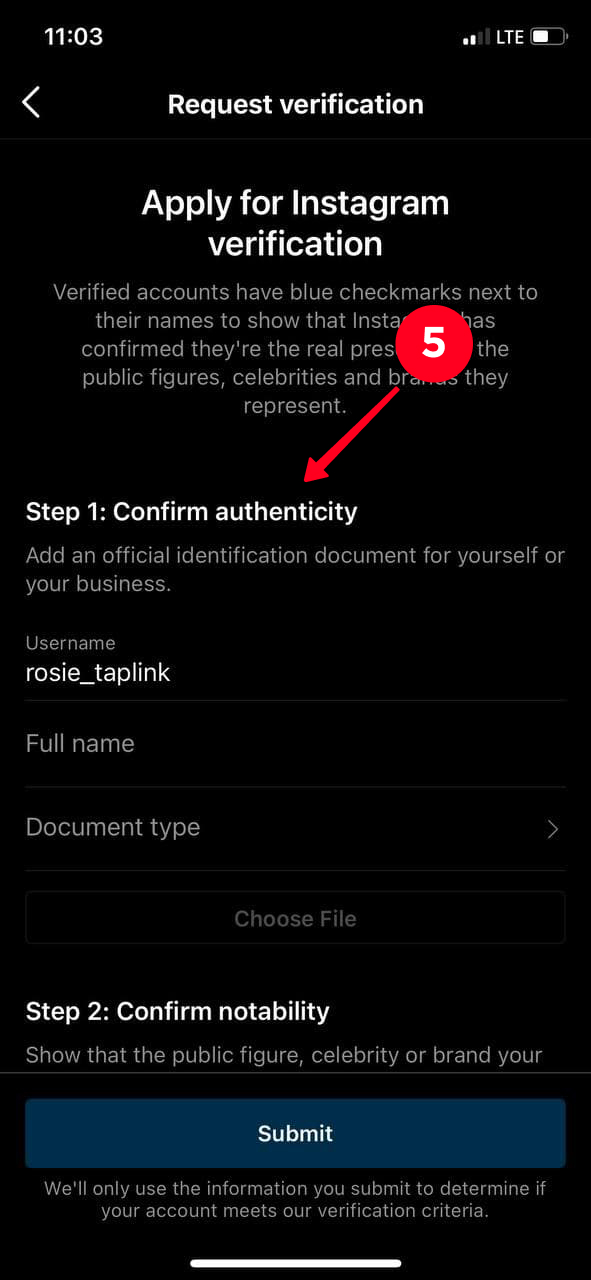
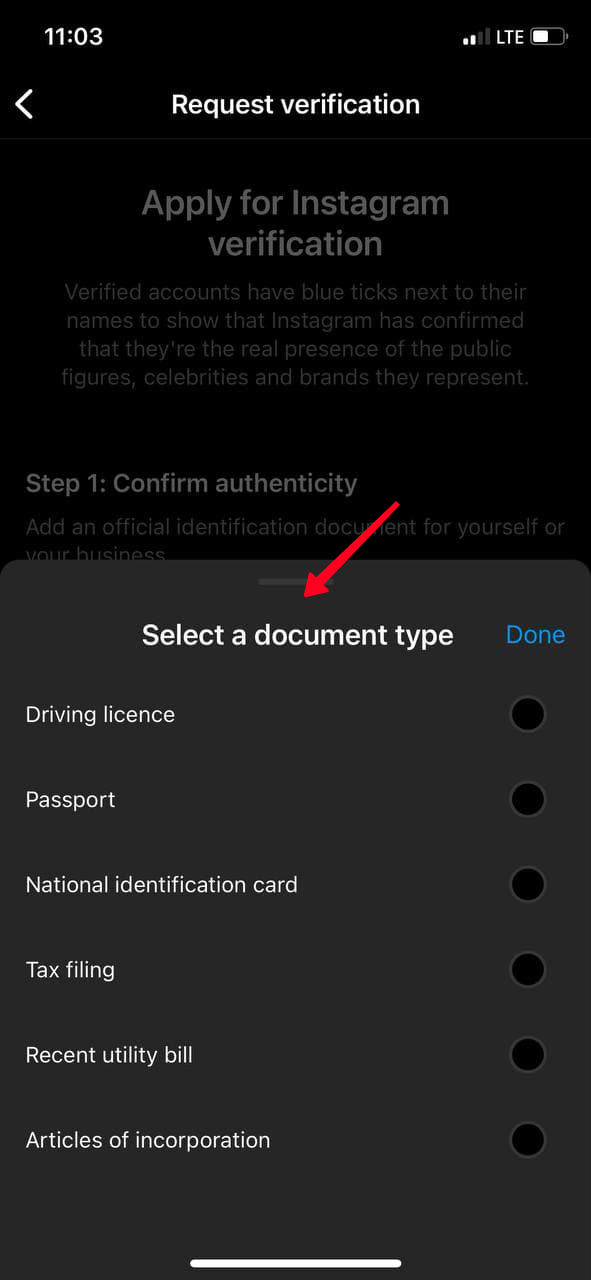
There is a tip for filling the Full name field when request the verification on Instagram. If your account is a page of a famous person, then just enter your first and second names. If you maintain a brand or organization account, then specify the full name of the owner to whom this business is registered.
When choosing a document that confirms your identity, specify your driving license, passport or national identification card if you have a personal account. For the profile of the organization, attach extracts from the tax filing, recent utility bill or articles of incorporation.
In addition to the criteria prescribed by Instagram itself, we want to share a few of our tips on how to get the verified badge.
- Don't put links to other socials (Twitter, YouTube). Instagram won't verify your account. You can add a link to your personal website or landing page.
- Increase your audience in an honest way when. You should post content that would appeal to Instagram users, and they would follow you. Choose only the honest way. Avoid using special programs to increase the number of followers.
- Don't try to buy the verification on Instagram. If someone writes to you that they work in the Instagram administration and can give you verification if you pay, don't fall for it.
- If it happens that Instagram didn't approve the verification and didn't give you the blue badge, don't give up! Work on recognition, on the quality and uniqueness of the content and request it again. Re-submission is possible in a month.
- Use hashtags. A useful feature on Instagram is hashtags. They make your posts visible to more users. Thereby improving the statistics of your page and increasing the number of followers. As your Instagram account grows, it has higher chances to get verified.
Once you decide to get verified on Instagram, then you need to take the way you present yourself on social media seriously. Use a link in bio tool to put your best feet forward.
Create a landing page on Taplink so that you can add more than 150 characters and a single link to your Instagram bio. Thus, you can tell your followers everything about your brand, share contact and social profile links. Read here how to add multiple links to your Instagram bio using the page.
Put a link to your micro landing page in your Instagram bio and other social profiles. Then, people can tap it and see the info, follow your social links. So they can know about your accounts and subscribe. And you become a bigger influencer! This makes your chances to get the Instagram verification badge higher.
Use templates to create a page quickly. Below you can see the examples. The templates are available after a quick sign-up.
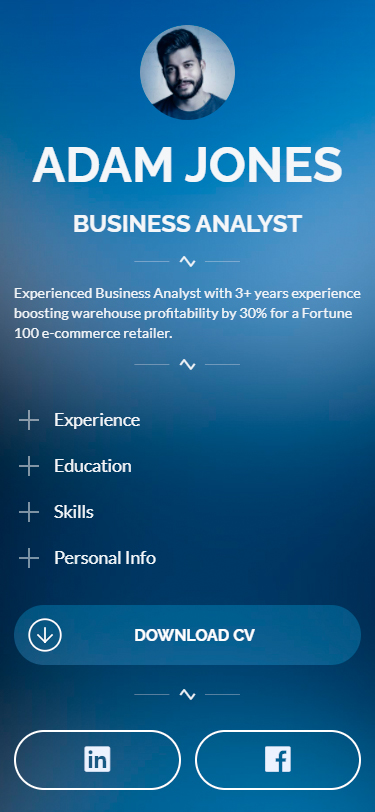
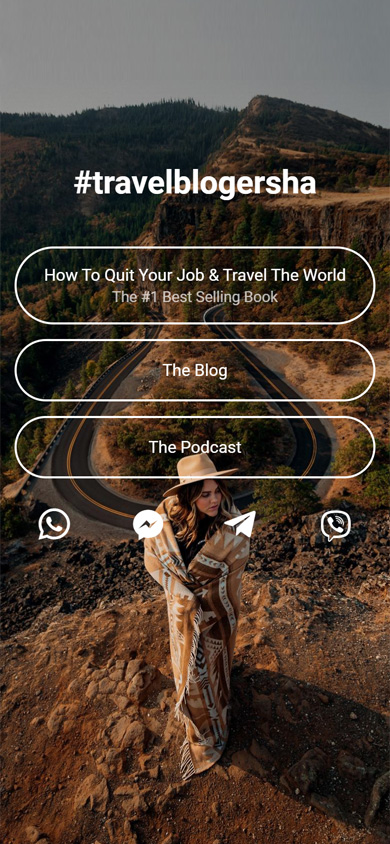
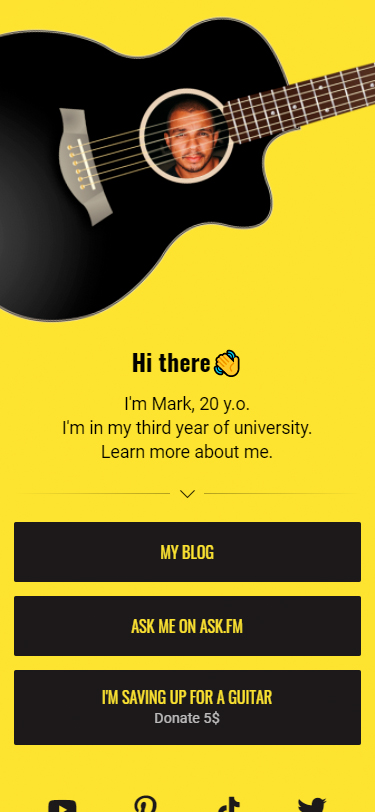
Once you've got the blue checkmark, don't stop on it. Verification on Instagram isn't the destination point. This is the beginning of new opportunities to become a big social media influencer and make money on your brand.
From the moment when you become an owner of a verified badge, work even more on the quality of the content so that Instagram users don't question why you've got verification. For instance, don't post photos with emojis, but write texts so that the profile doesn't look amateur. Also pay attention to the design of your Instagram business bio.
If you want to draw client attention and increase the traffic to your Instagram page, tell followers more about yourself. To do this, create a page on Taplink and add it to your bio.
Nobody knows the exact time of getting verified, Instagram doesn't tell it. Some users wait a month, others can be in a limbo for a couple of hours.
Please remember to be active on Instagram while you are waiting to the verification. And also try not to get into situations that can make the audience's attitude to you worse. And one more — don't use third-party services that can affect your account statistics.