How to edit photos for Instagram like a pro

We have compiled for you a list of the 5 most significant, in our opinion, tips that we ourselves often use when editing photos. Let's not hesitate and get right to the point.
Before you upload photos to Instagram to use the apps editing tools, you can try the default apps each smartphone has. They significantly improve the snapshot.
On the iPhone, to access the image adjustments, open a photo for Instagram and tap on "Edit" in the upper right corner.
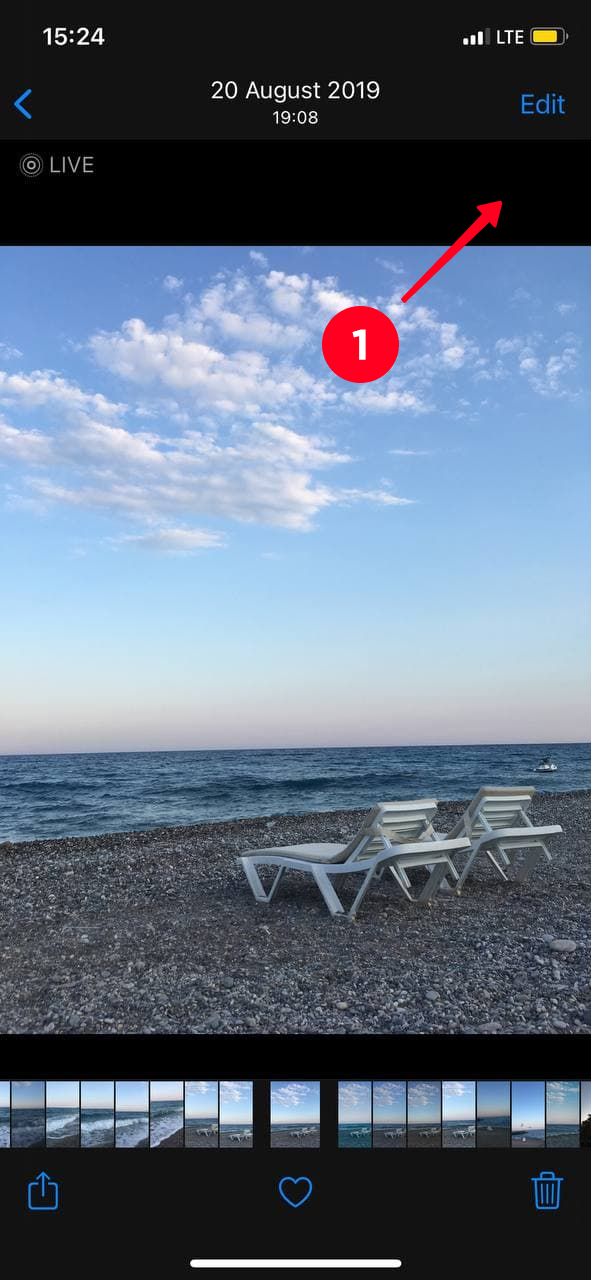
All available photo editing features are divided into 3 groups.
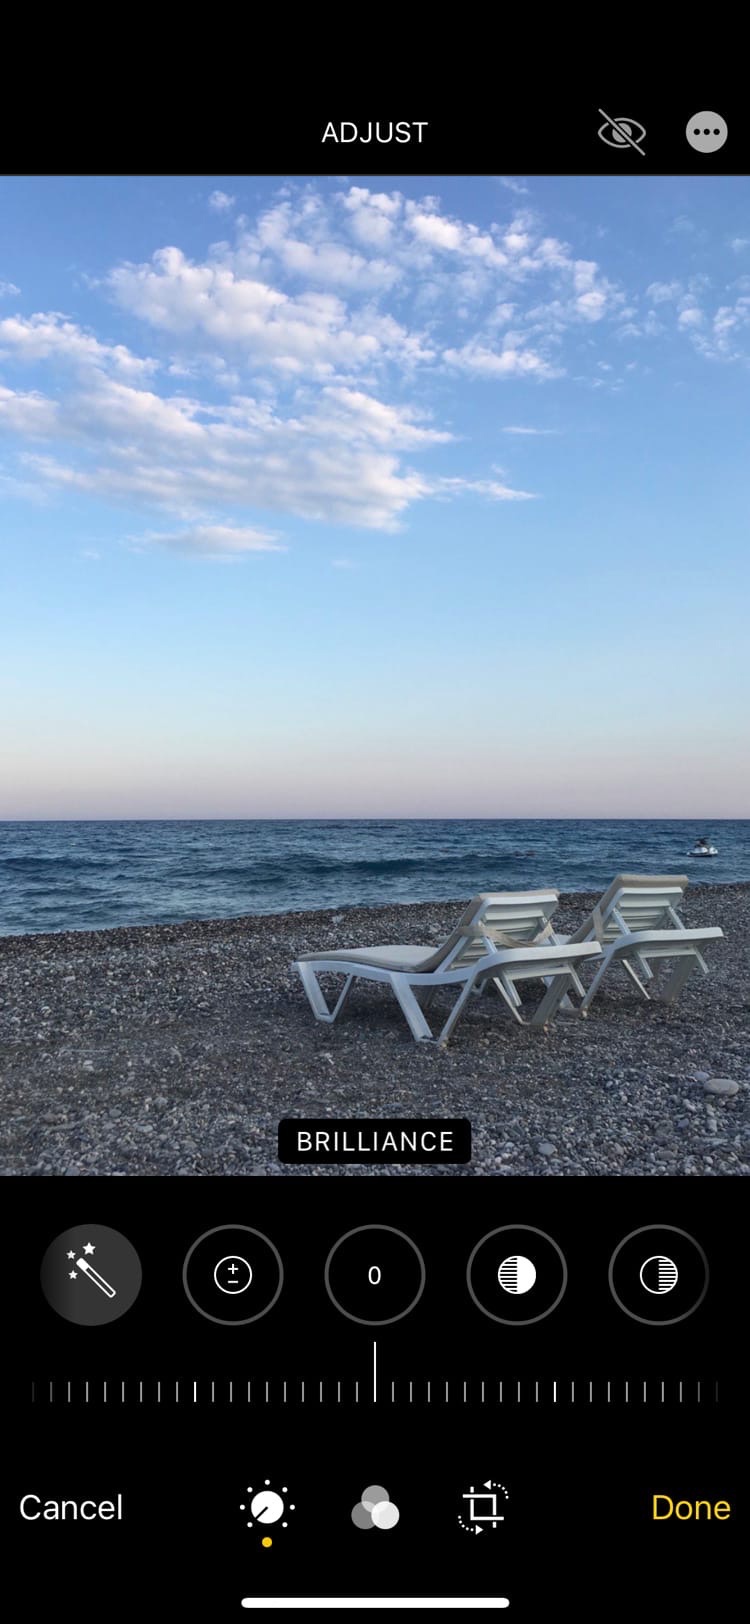
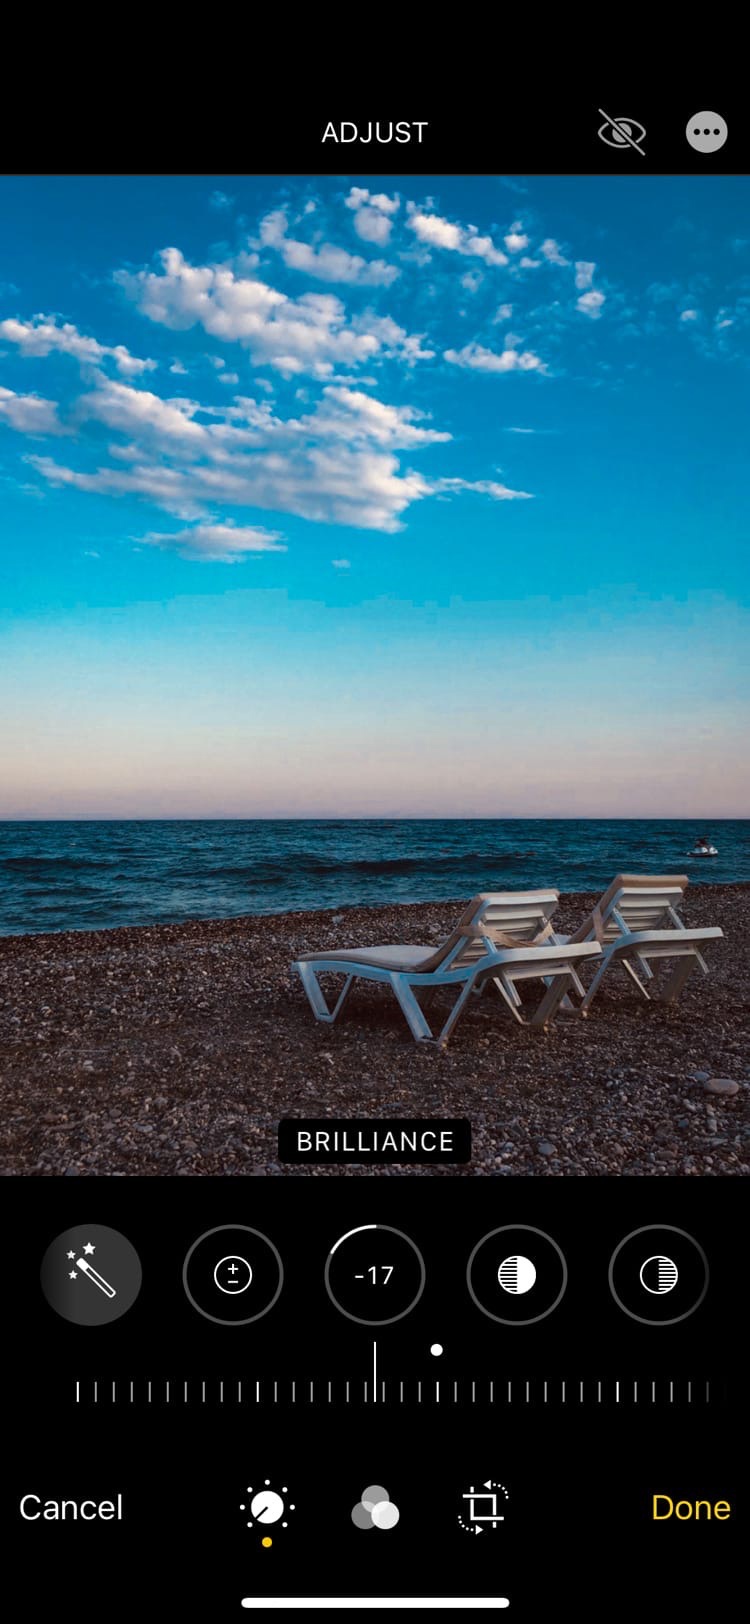
- Adjust. Work with the colors of the picture, adjust the exposure, brilliance, highlights, shadows, contrast, brightness, sharpness, etc.
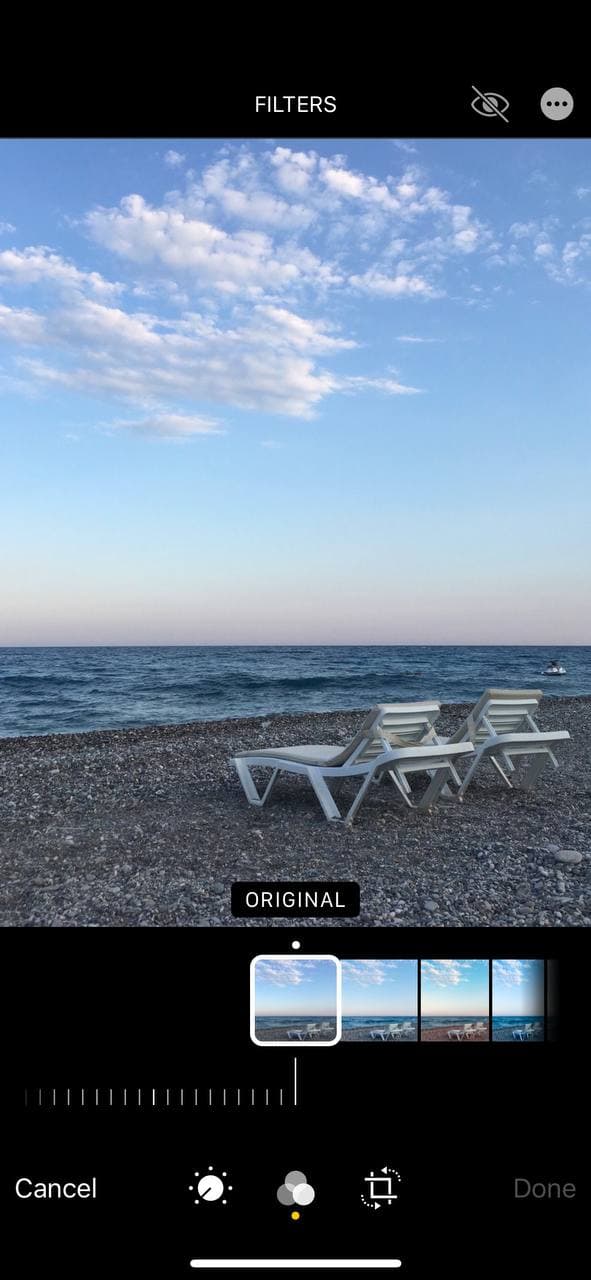
- Filters. Apply one of the 9 system filters to automatically change the colors of the photo.
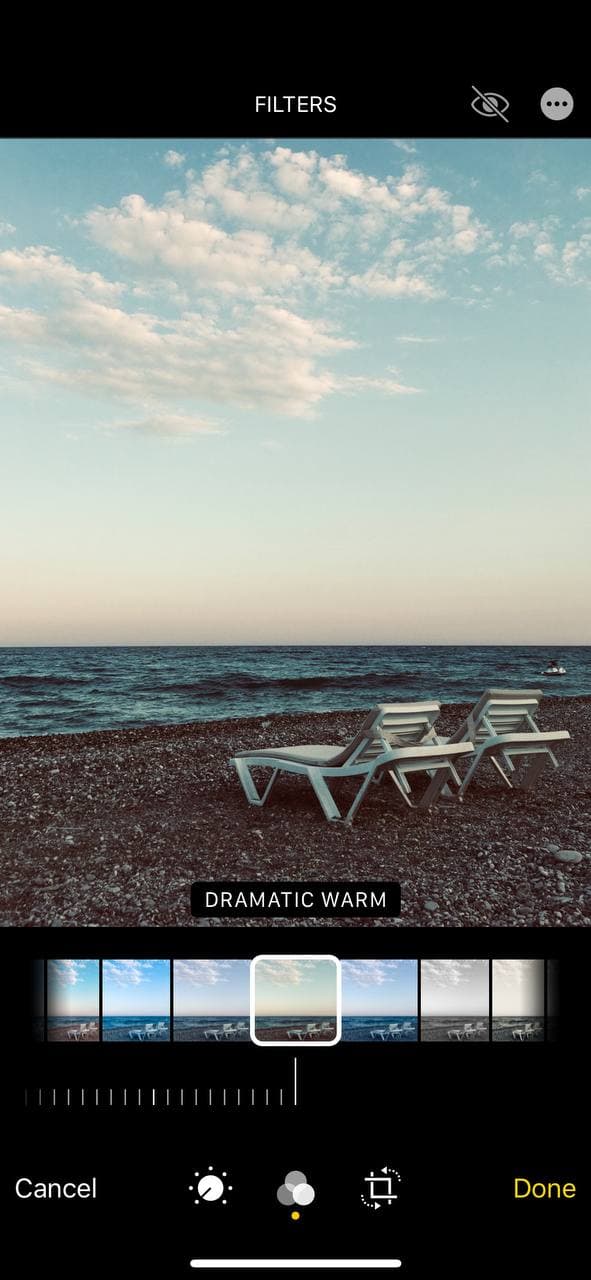
- Alignment and cropping. Crop the picture to the Instagram size, align, adjust the vertical or horizontal perspective.


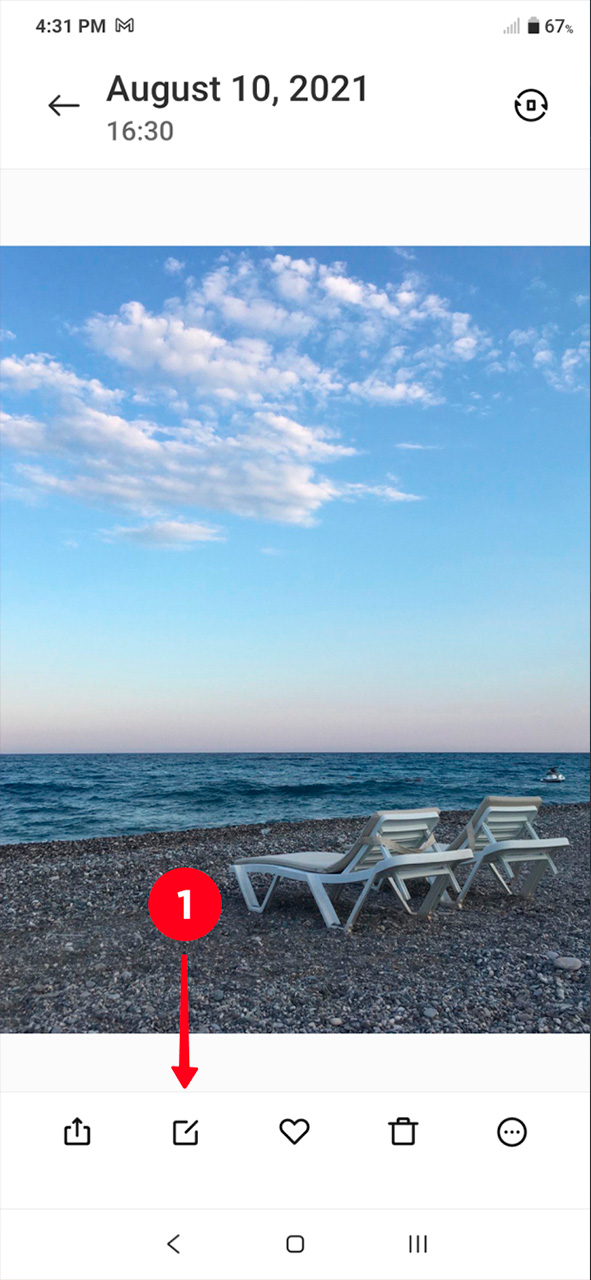
On Android, you can use similar features. To do this, select the needed snapshot and click on the "edit" button.

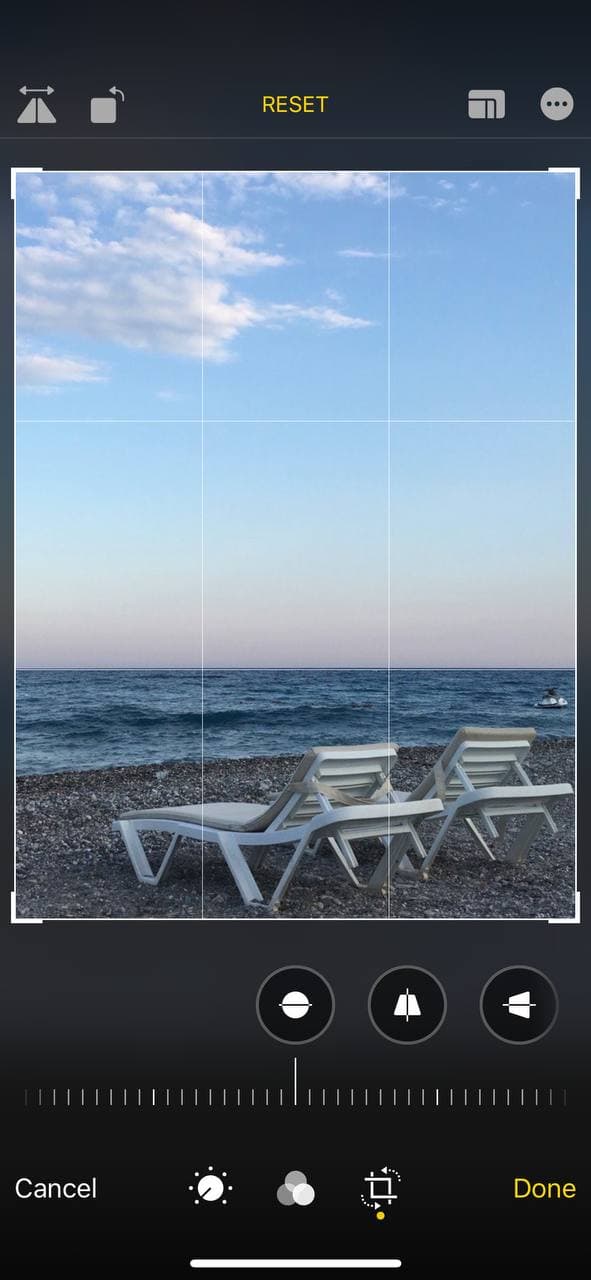
Use the rule of thirds when editing a photo for Instagram. The grid — another feature on a smartphone — will help you to crop and align it right. It will divide the image with two horizontal and two vertical lines. Place the image so that the important elements of the pic are located at the points where the lines intersect.
For instance, if you want to edit an Insta photo of the sunset, the main role in the picture will be played by the sky. Position the image so that the lower horizontal line is clearly located at the horizon level. To do this, use the alignment function. Thus, two-thirds of the pic will be devoted to the sunset sky.
When you are making a photo for Instagram from the phone camera, enable the default grid to make the shooting process even easier. On the iPhone, go to "settings", find "camera" section and click on the "grid" button. On Android, launch the camera app, open its settings, scroll down and turn on the grid.
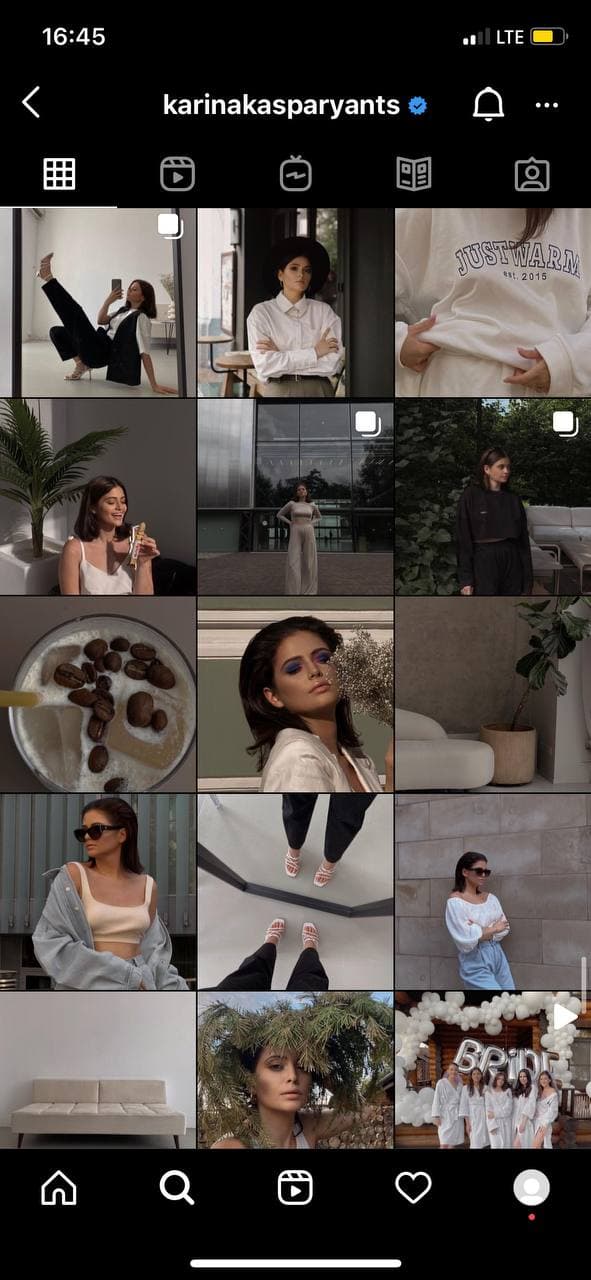
Photography, like fashion, has its own trends. Today, the main position in the world of photos, which is incorporated on Instagram too, is editing "without editing", i.e. live emotions, slightly or not at all retouched faces, natural colors.

Black and white photos are an eternal classic; don't be afraid to use such a palette in your Instagram account.
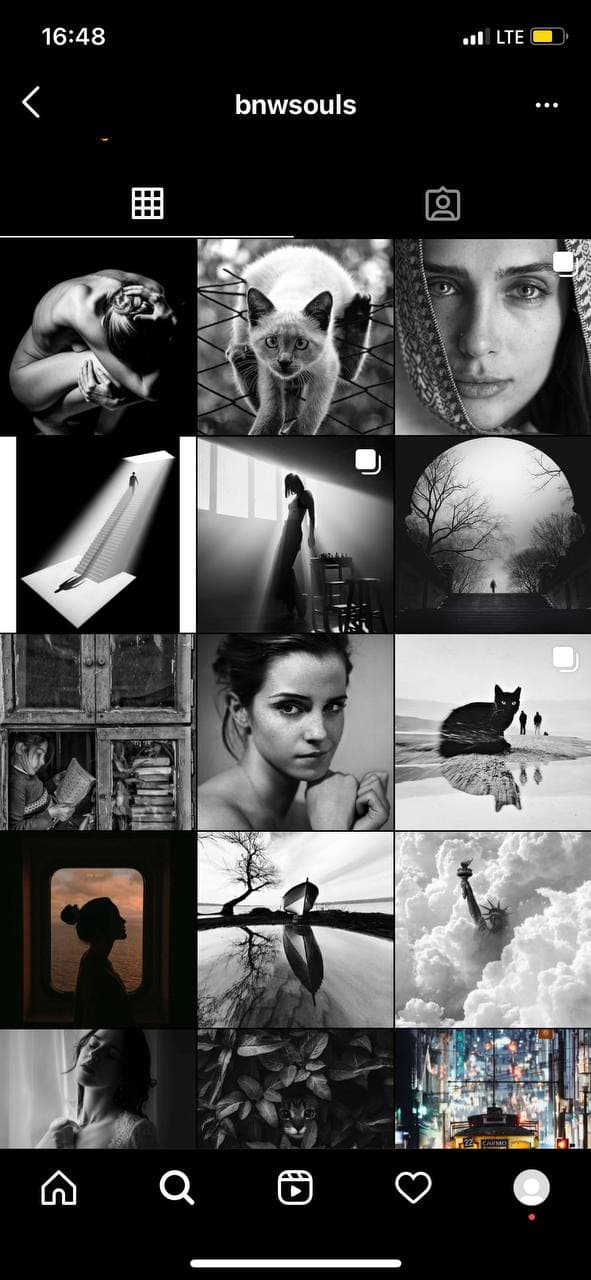
If you don't know which style of photo editing you like to use on Instagram, follow the bloggers whose visuals you like. Pay attention to these profiles: @muradosmann, @hannes_becker, @hirozzzz. Don't hesitate to ask the owners of these accounts about their editing techniques. They like it when other users show interest in their creativity.
On smartphones, the night mode reduces the load on the eyes when you spend a lot of time on your phone. Scientists have proven that blue and purple colors affect the retina much more strongly, which leads to vision impairment and insomnia. To neutralize the negative impact on our health, the Night Mode function automatically shifts colors to the warmer edge of the spectrum, thereby making the image muted.
We recommend turning off this function when you edit photos for Instagram. When working with colors, it is important to see the actual color reproduction, and not those colors that have already been filtered.
On iOS, this feature is called "Night Shift". To check whether it is enabled or not, go to settings, select "Display & Brightness" and click on "Night Shift". If you are going to edit an Instagram photo at the time for which you have this filter configured, then turn it off for the duration of operation.
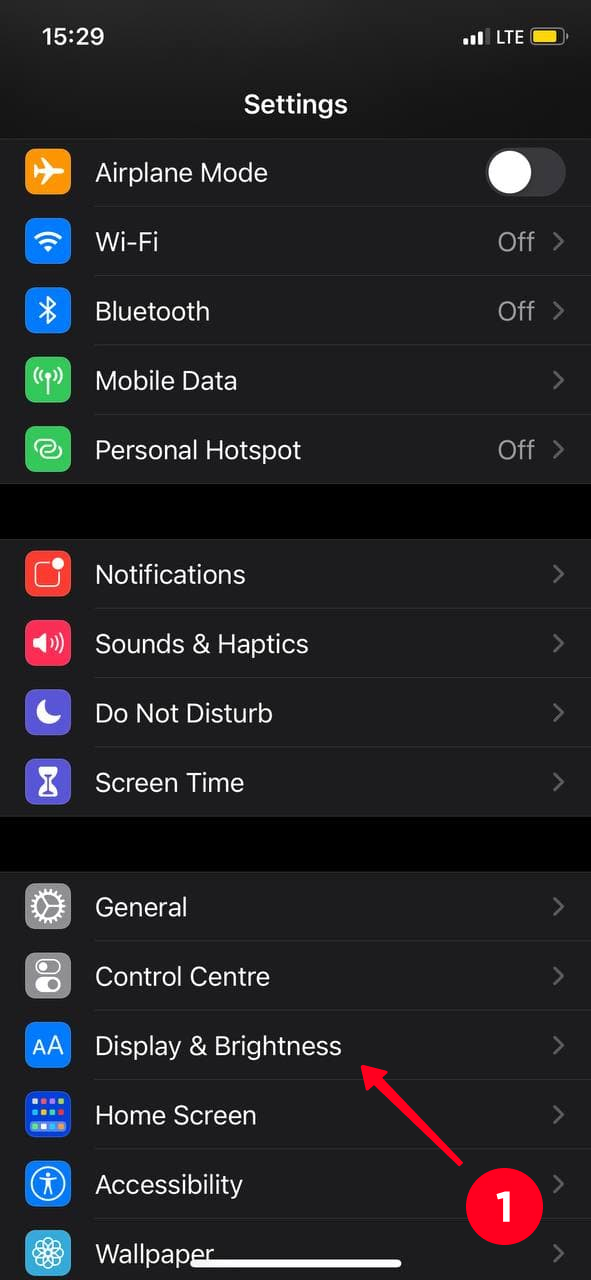
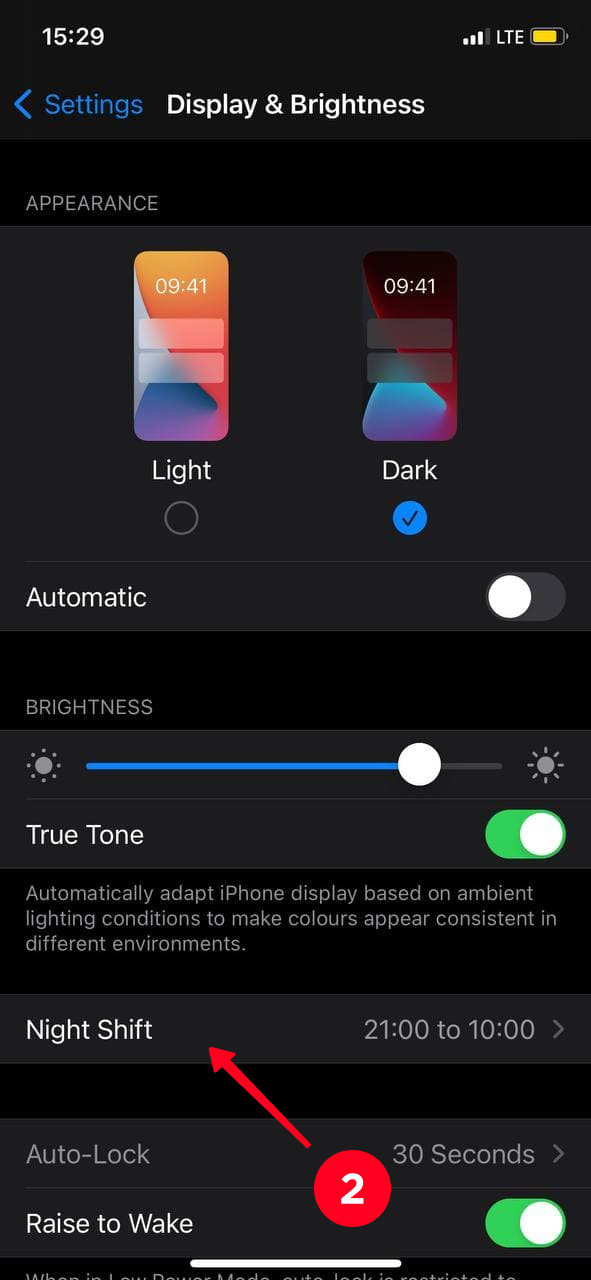
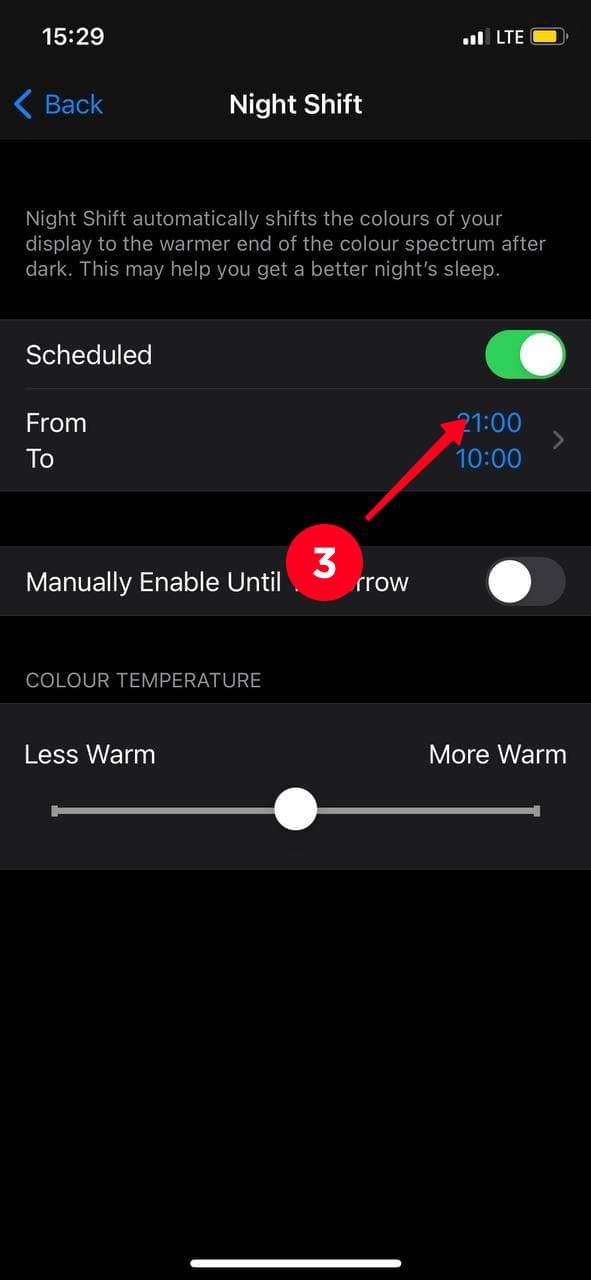
A similar feature
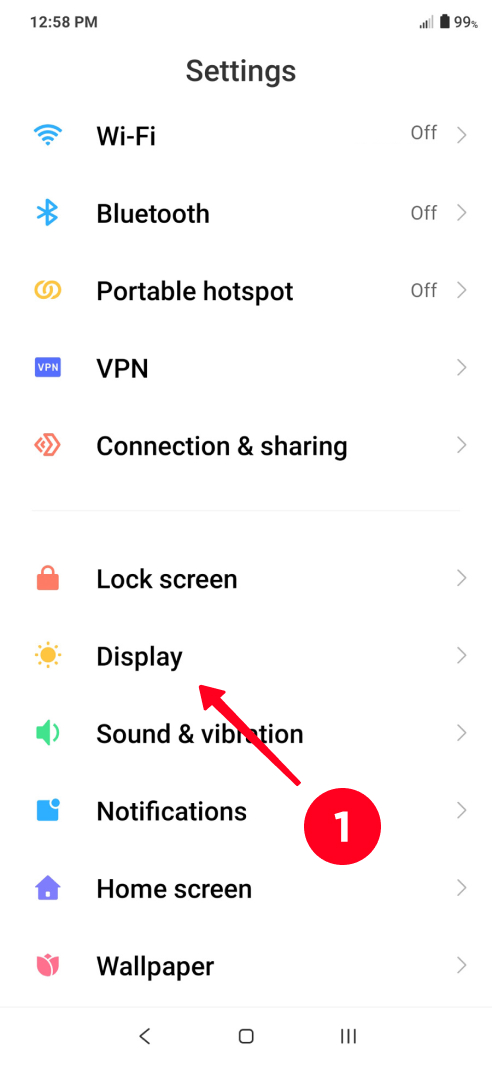
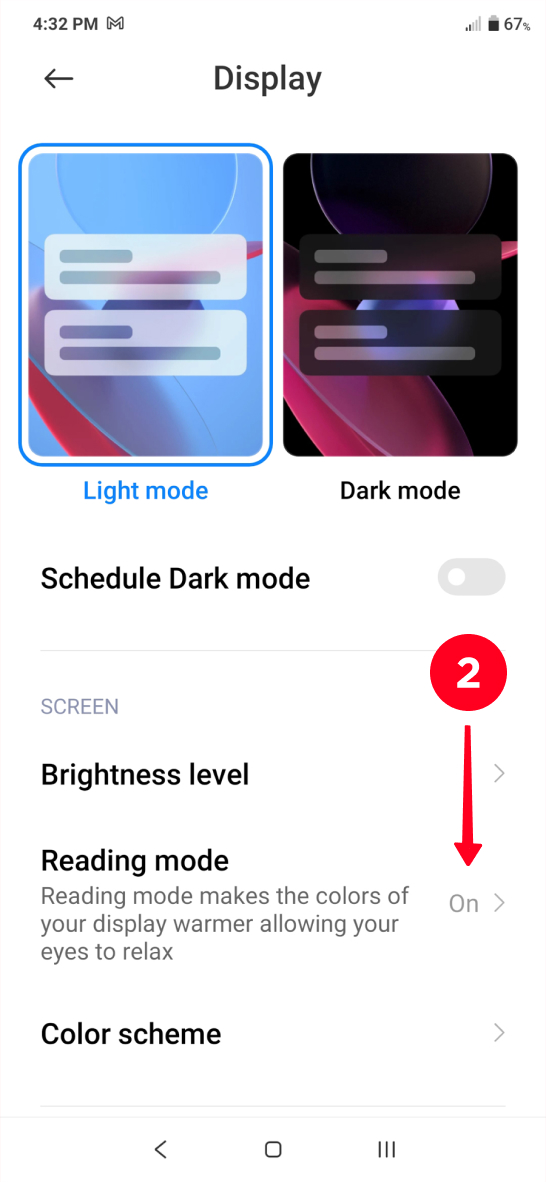
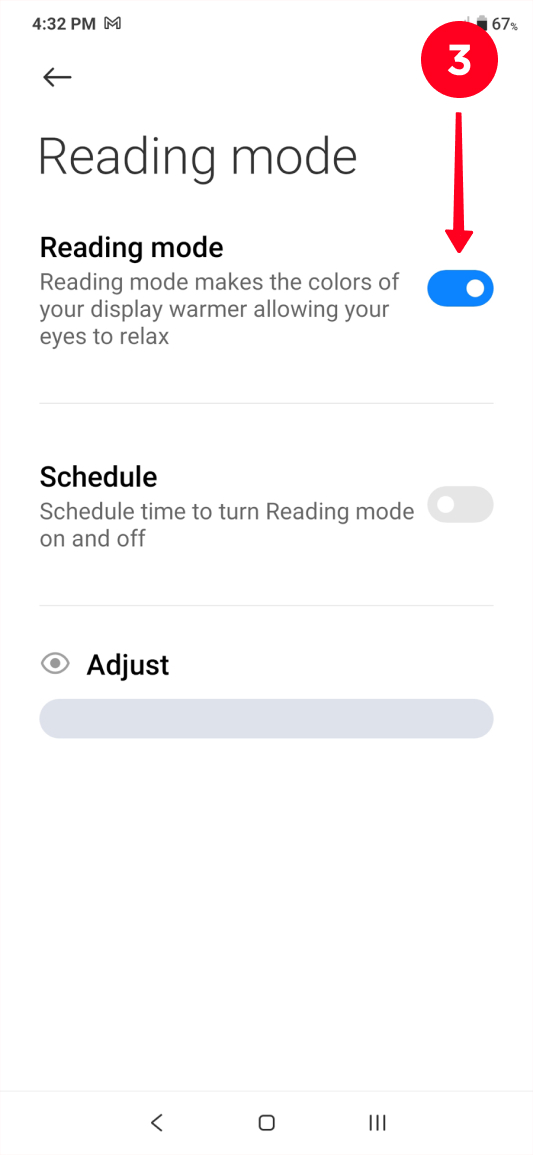
on Android can be called "Blue Light Filter", "Reading mode", etc. For instance, to temporarily switch it
off, go to "Settings", find "Display" and select "Reading Mode".
If you go to the App Store or Play Market, you will find more than 100 apps you can use for Instagram photos. We have checked the most popular ones and are ready to tell you about them. These are collage apps, and below you can see editing apps.
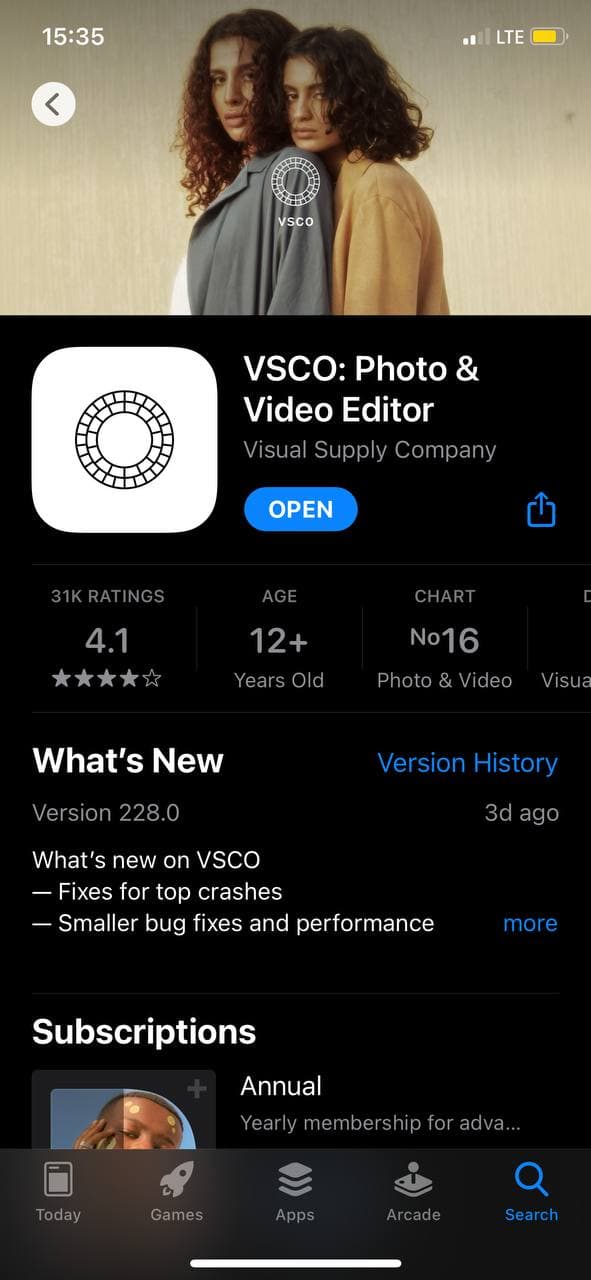
VSCO: Photo & Video Editor is a repository of more than 200 filters, but a little more than 10 are available in the free version. However, they are "one-size-fits-all". VSCO filters help to edit Instagram photos taking them to the next level, enhance the advantages and hide the disadvantages.
For those who like to drag toggles rather than to apply filters, a settings panel has been added. Use these adjustments to change the exposure, add grain, vibrancy, vignette, work with noise reduction, etc. In addition, you can adjust the application of the intensity of each filter by clicking on the selected filter again.

Fans of the VSCO photo editor create special "VSCO Recipes" — ready-made presets — where the desired filter is selected and the settings are tweaked. All that remains to be done is to set the same parameters for your Instagram photos. Recipes can be found on the Internet both in free and paid access.
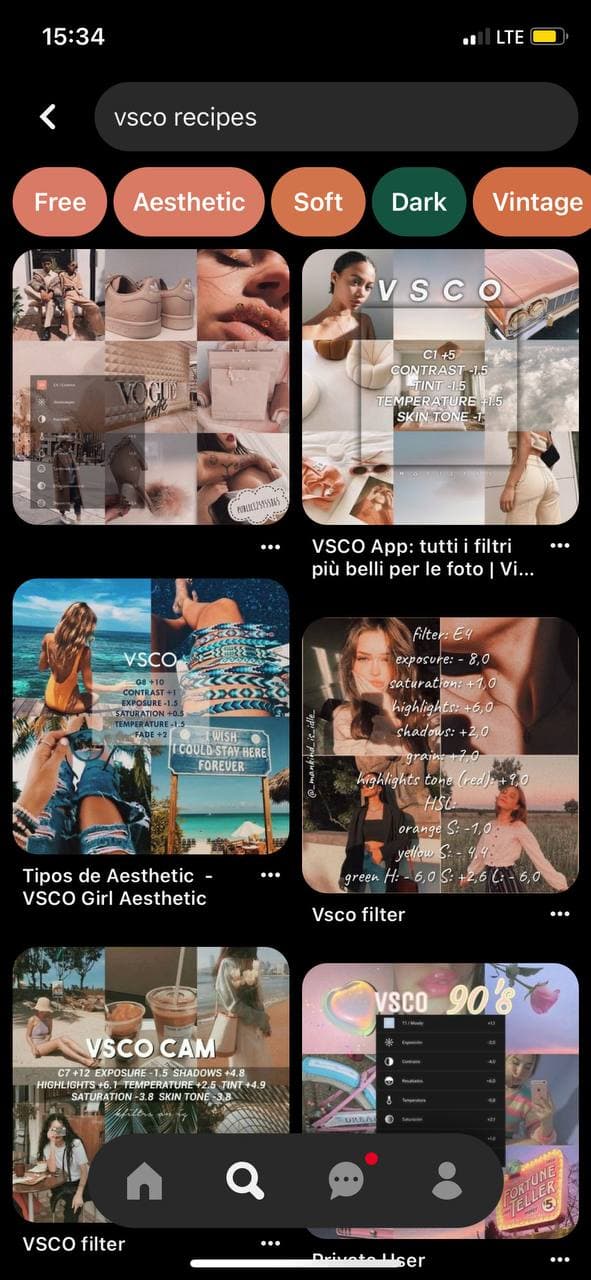
We have to note that VSCO isn't only an app for Instagram photo editing, but also a platform where users share their works. Read how to link your VSCO and Instagram accounts.
Picsart includes a whole set of tools: from various effects with contrast settings, clarity, etc. to the ability to make a real picture out of a photo by adding stickers and drawing. If you want to change a portrait photo, then a special section "retouching" is included here with a wide range of functions: smoothing, wrinkles, defects, face fix, hair color, whitening, eye color, etc.
There is also a platform for publishing works. So you can not only edit photos for Instagram, but also to share your editing experience with others and draw it from others.
The drawback of the application is constantly pop-up ads on the free plan.

Adobe Lightroom: Photo Editor is a mobile version of the Adobe Photoshop Lightroom computer program popular among professional photographers. The functionality of the app is complex and is aimed at detailed work with colors. Therefore, every "beginner" asks the question "How to use Lightroom?".
At the same time, advanced settings is what allows you to edit photos for Instagram and make them exactly what you want!
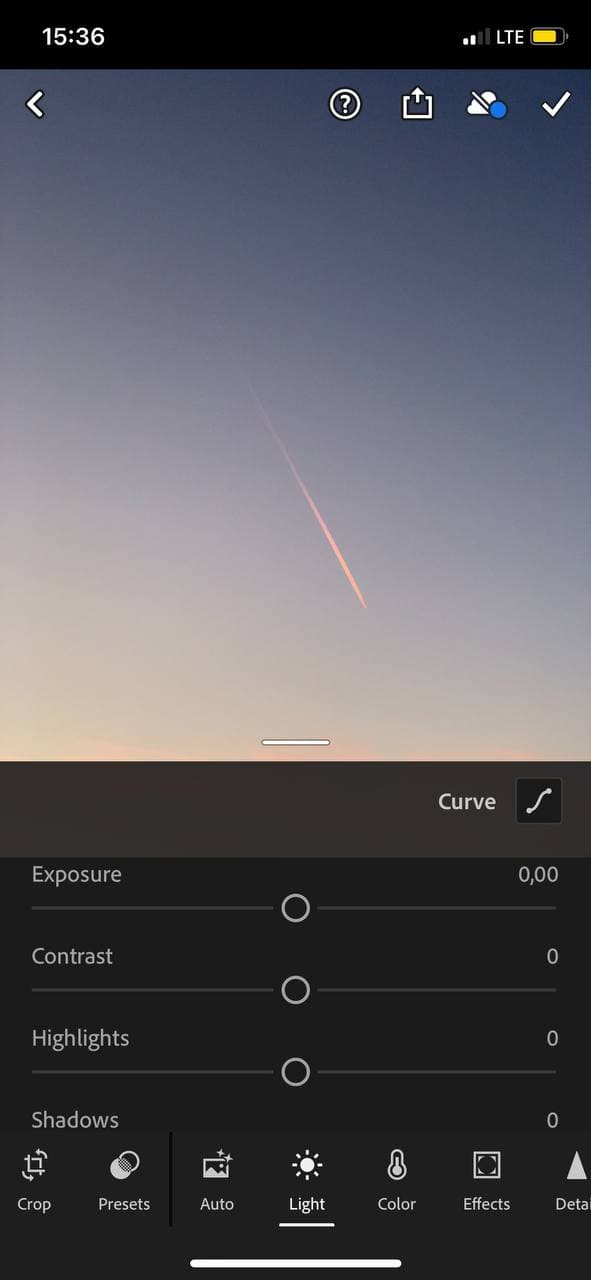
There is the already familiar functions — contrast, exposure, saturation, etc. — are also presented here. In addition to them, there are special tools that are understandable to those who already understand the processing of Instagram photos — chromatic aberration, distortion correction.
A convenient feature of Lightroom is the creation of presets that can later be applied to several pictures at once. In addition, the ability to process files in RAW format preserves high image quality.
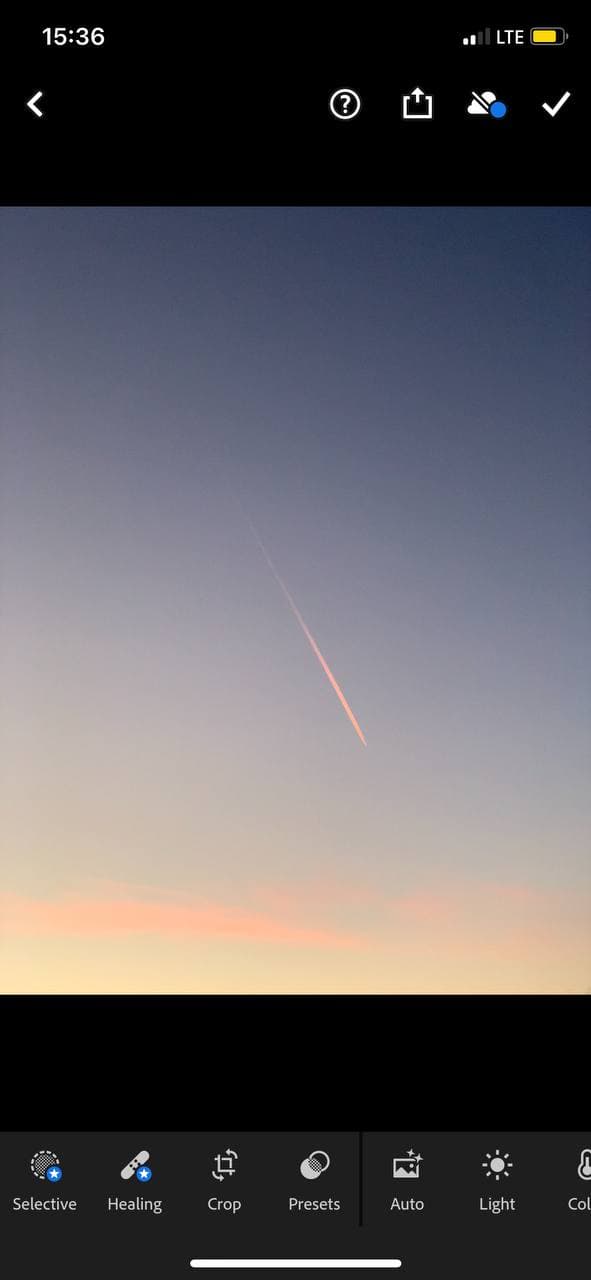
- Before you start processing a picture for your IG profile, remember that it must be in an acceptable quality. Editing is not a panacea for the creation of an inept photographer. Editing is able to mask the flaws in the photo, but not to fix them radically.
- Be open for experiments. Through trial and error, new features are learned and qualitatively processed images are created. Experiment to find your own style and design, and develop photo editing skills. All these will make your Instagram pictures look good!
- Don't delete the original photo, so that you can later either make changes or edit this file differently.
These basic tips will help you start your journey in the world of Instagram photo editing. Don't be afraid to try new things and move away from the standard presets to find your own style in photo editing.
If you want to become a professional photographer and make money on photo shoots, you can start your way on Instagram. Add a bio for photographers and your photography portfolio to your Instagram profile and you will get your first clients.
Don't forget about the photo quality. Because even a pro can't help a photo that is initially small and pixelated. Know the right size for Instagram Stories and size of post.