How to build an email list without a website: a beginner’s guide

- A way to build an email list without a website
- How to build an email list without a website
- Step 1: Define your lead magnet and the data to collect
- Step 2: Choose a landing page builder
- Step 3: Sign up on Taplink
- Step 4: Select an email-collection page template
- Step 5: Set up the opt-in form
- Step 6: Customize your page for list-building
- Step 7: Publish the landing page
- How to export emails from Taplink
- Advanced feature: How to send an email to all your subscribers at once
- How to connect Mailchimp to Taplink
- How to view contacts in Mailchimp
- How to send an email to all your subscribers at once
- How to promote your page for building an email list
- Add the link to your social media bios
- Create posts with your landing page link
- Launch online ads
- FAQ
- Do I need to inform subscribers about my terms of use?
- What template for an email-collection page should I choose?
- Does Taplink protect the data of visitors who enter their email?
- Can I use my own domain as my landing page link?
- What is the ideal frequency for sending regular emails?
- The bottom line
To collect emails without a website, you need an online page with an opt-in form. Such a page is called a landing page. You can share a link to this email-collection landing page online, for example, on social media or in messengers. By tapping the link, people will see your form and be able to fill it out.
Here’s what an email-collection landing page might look like:

Creating a page for email list building is simple. With landing page builders, you can do this without any technical skills. Below, we’ll help you choose a landing page builder to create such a page.
In this section, we’ll first talk about what you can offer visitors in exchange for their emails.
Then, we’ll guide you on how to create an opt-in landing page for email list building with no website. This includes:
- How to choose a builder to create an email-collection landing page.
- How to set up an opt-in form.
- What you should add to your landing page.
- How to customize your landing page.
- How to publish your page.
Let’s start learning how to collect emails at the very beginning — deciding what you’ll offer visitors for their emails.
Visitors are often hesitant to share their emails — they may be worried about spam or unwanted messages. To encourage them to submit their email addresses, offer something valuable in return, a lead magnet.
A lead magnet is a free product that visitors get in exchange for their emails. It’s typically sent to their inbox, giving them a reason to share their emails.
Examples of lead magnets include:
- A checklist.
- A digital guide.
- A set of digital assets.
- A discount promo code.
- A webinar.
- Informative articles.
- A quiz or test.
In addition to the lead magnet, decide what data you want to request from visitors in the opt-in form. Actually, the fewer fields visitors need to fill out, the higher your conversion rate. The number of fields depends on your goals:
- Email only: Use this, when you want to collect as many emails as possible. This ensures the best conversions from the opt-in form.
- Email + name: Use this, when you want to address subscribers personally in your future email marketing. Using names helps build stronger, more personal relationships.
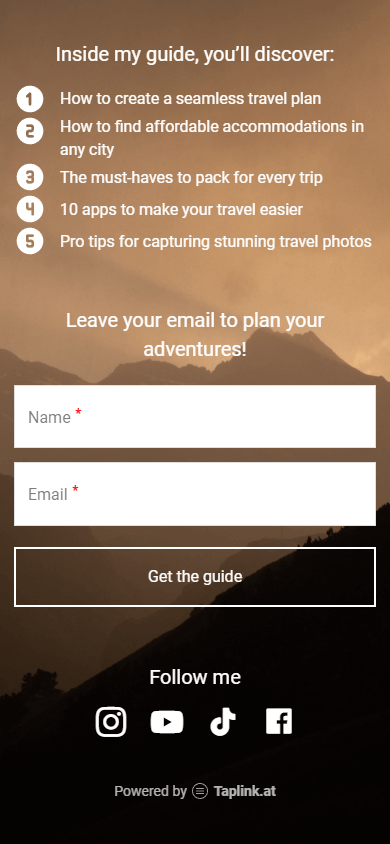
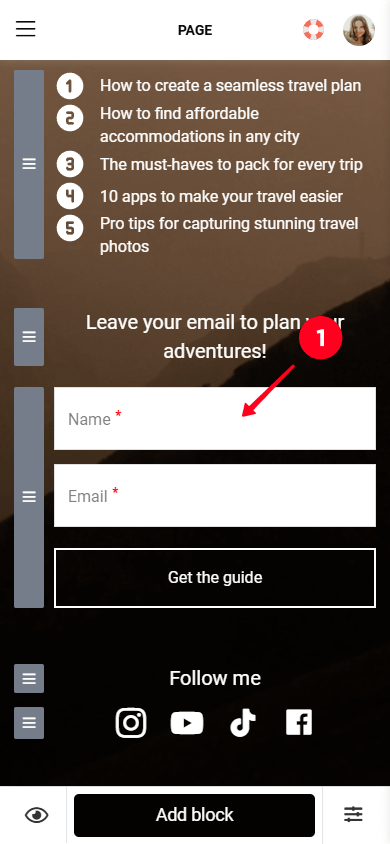
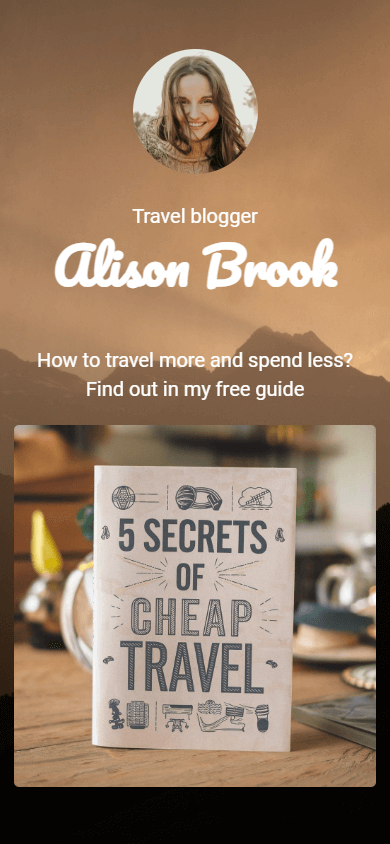
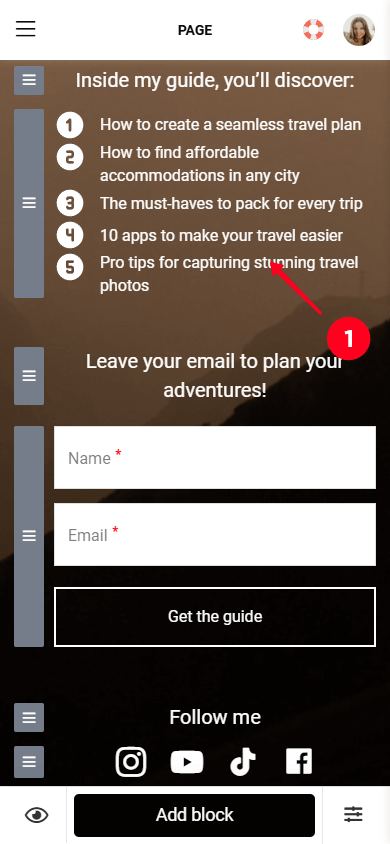
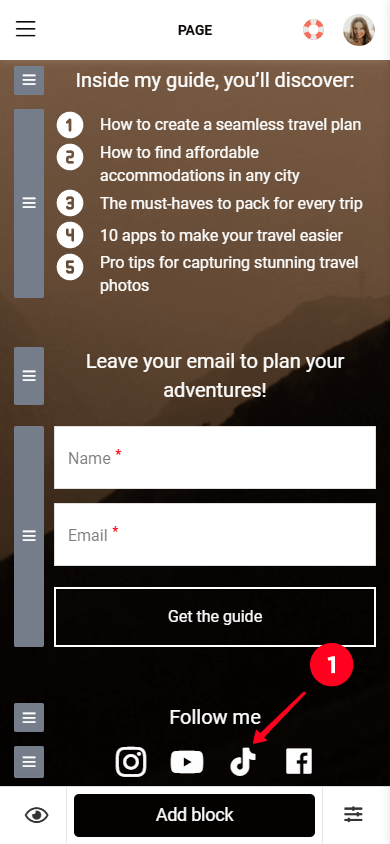
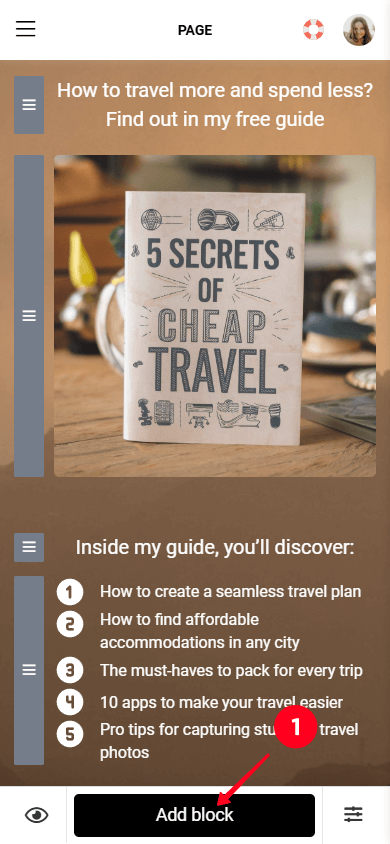
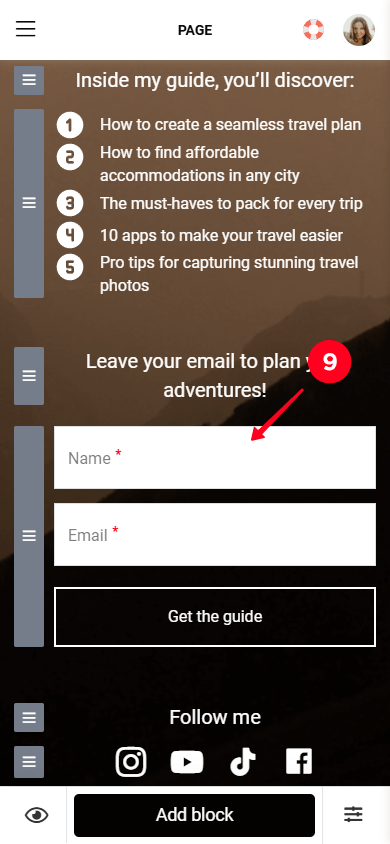
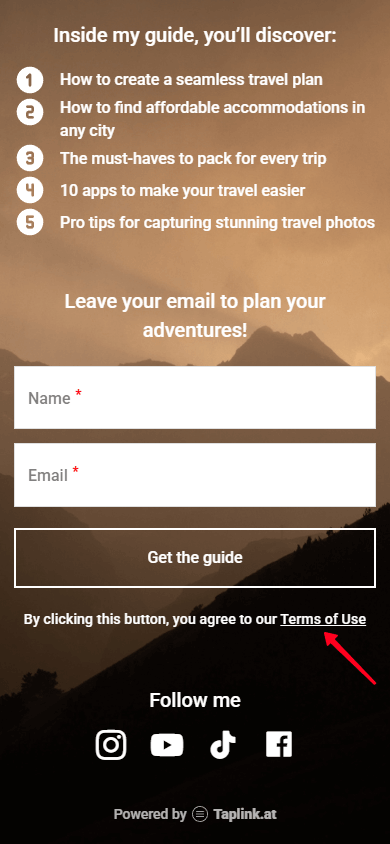
Below is an example of a landing page for building an email list that we’ve created specifically for this article.


At the top of the page, the author introduces herself. Then, she presents her lead magnet, showing its title and what her product can give to her audience. At the bottom, the author includes an opt-in form where visitors can leave their emails to get her free guide.
Check out the live version of the email-collection landing page here.
In this article, we’ll teach you how to create such a landing page with an opt-in form. Let’s start with choosing a builder for your page.
As mentioned earlier, creating a landing page with an opt-in form is easy using a landing page builder. There are many builders available, but here, we’ll focus on Taplink.
Taplink stands out among others because of the following:
- Fast creation: Building a page for your future email marketing takes 10 to 15 minutes with ready-made templates.
- No-code building: You can create a page even if you’ve never been involved in development or web design.
- Fast loading: Pages built with Taplink have a mobile-first design and load instantly on any device.
- Flexible form customization: You can add many fields, such as name, email, phone, country, date, or even create your own custom fields. Taplink also allows adjusting the form’s style, changing the text of the email submission button, or setting up a welcome message for subscribers.
- Flexible page customization: You can modify larger elements, like the overall page design, as well as smaller details, such as spacing between blocks, line spacing, and more.
Let’s start by signing up on Taplink to create a landing page for email list building.
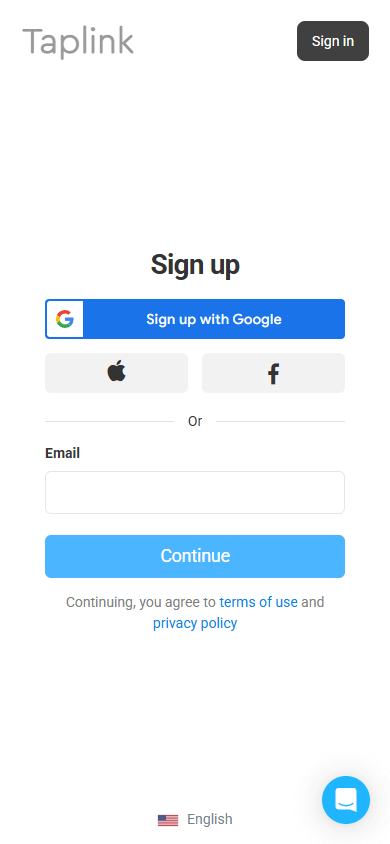
To start creating your page, you need to sign up on Taplink. You can sign up using:
- Your Google account.
- Your Apple account.
- Your Facebook account.
- Your email.
After signing up, Taplink will prompt you to select a plan. Adding an opt-in form to your page is available with the Business plan.
Now, let’s move on to building your landing page.
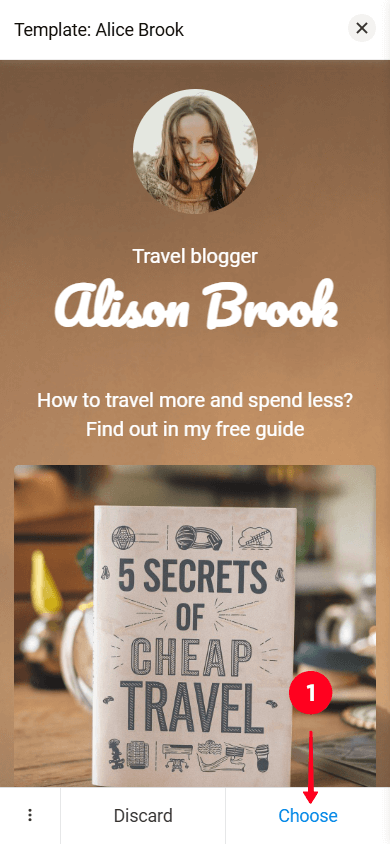
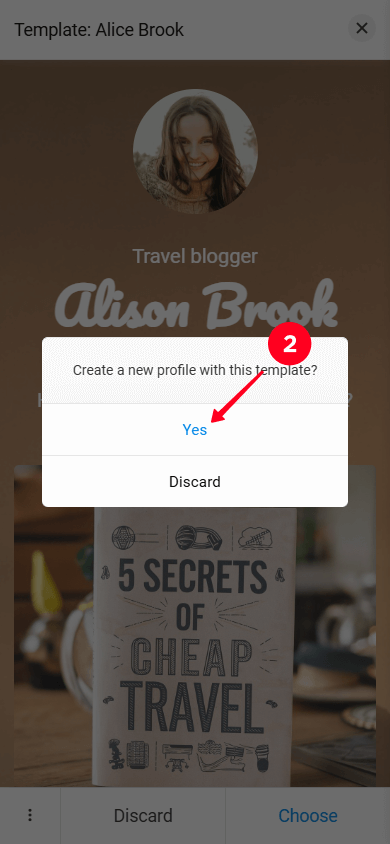
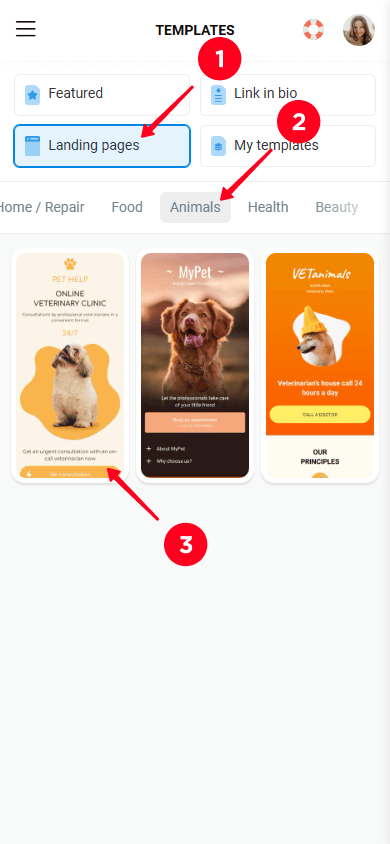
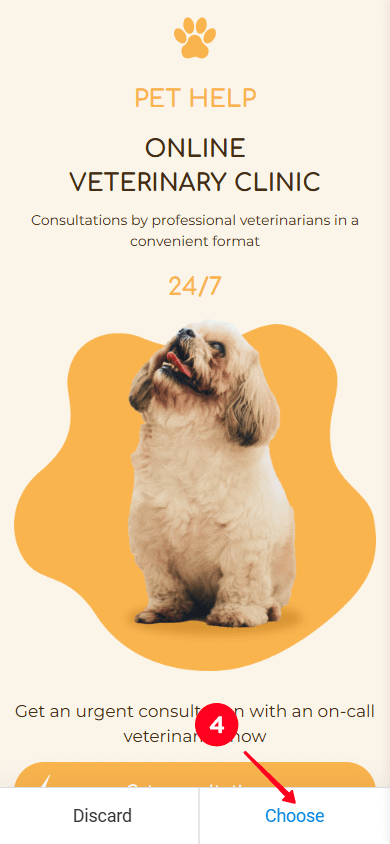
To create a landing page quickly, Taplink offers more than 100 ready-made templates. For this article, we used this template. To use the same one, follow the link and do the following:
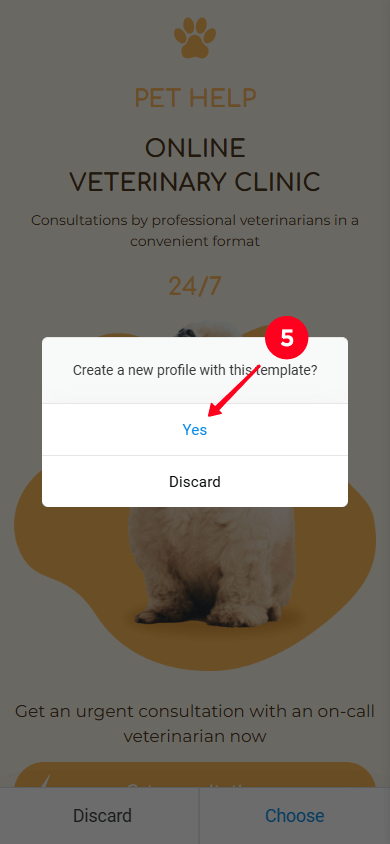
- Tap Choose.
- Select Yes.
You can also select any other template you like from the Taplink library. To do so:
- Go to the Landing pages tab.
- Choose the category that fits your business.
- Pick a template.
- Tap Choose.
- Tap Yes.
Once you’ve selected a template, you’ll see pre-made blocks with text, images, a form, and other elements. All you need to do is replace the content with your own.
Let’s start customizing the most important block, the form.
In Taplink’s opt-in form, you can:
- Add, remove, or modify fields.
- Change the text of the email submission button.
- Set up a post-submission action.
- Customize the email that will be sent to visitors after filling out the form.
Read on to learn how to do all of this.
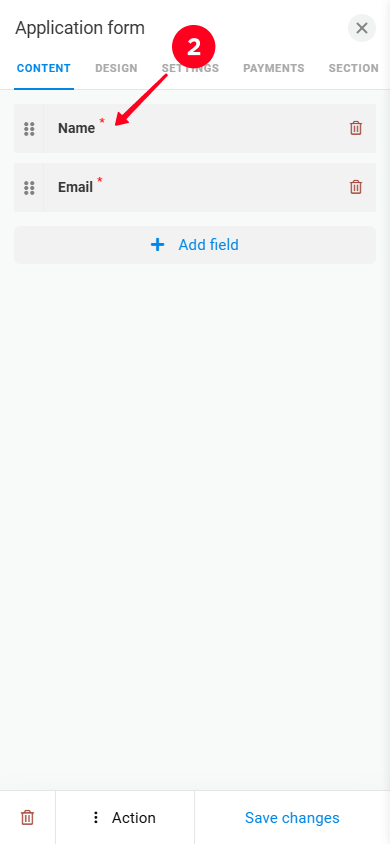
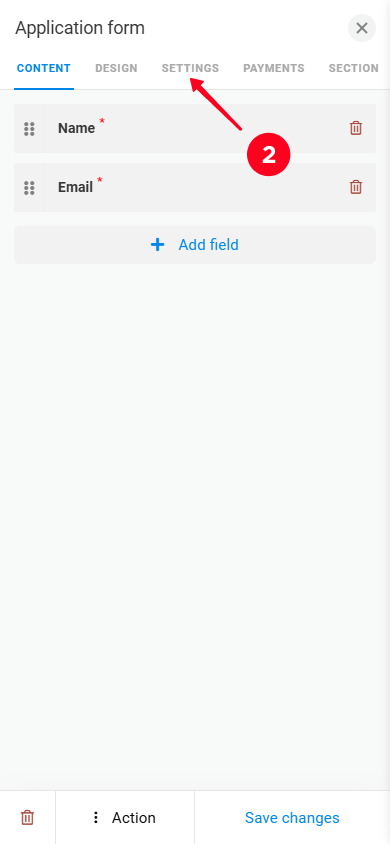
The template we recommend using has a form with two fields: Name and Email. You can edit these fields, add new ones, or delete unwanted ones.
To edit form fields:
- Tap the form block.
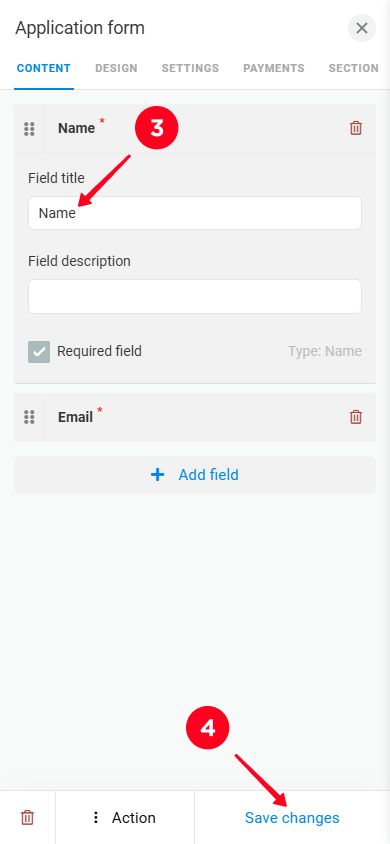
- Select the field you want to edit.
- Delete the text in Field title and type your own text.
- Tap Save changes.
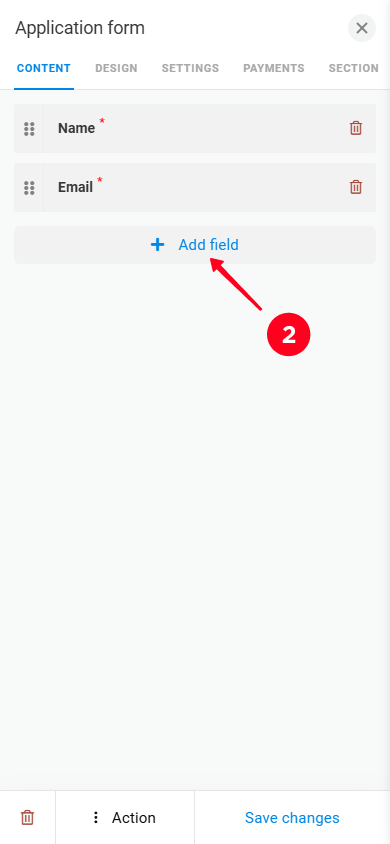
To add new fields in the form:
01. Tap the form block.
02. Tap the Add field button.

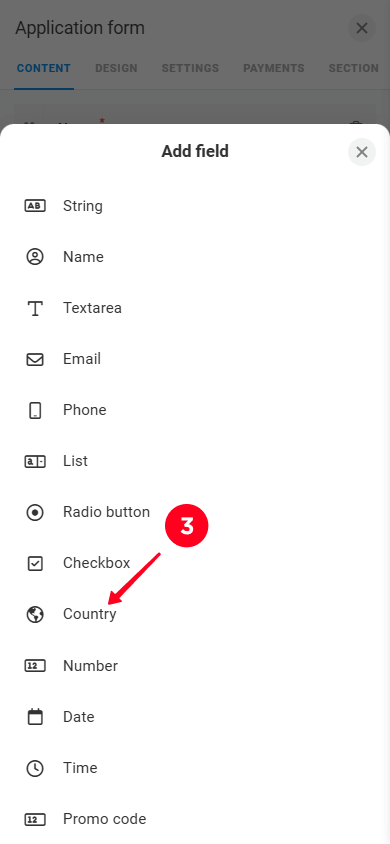
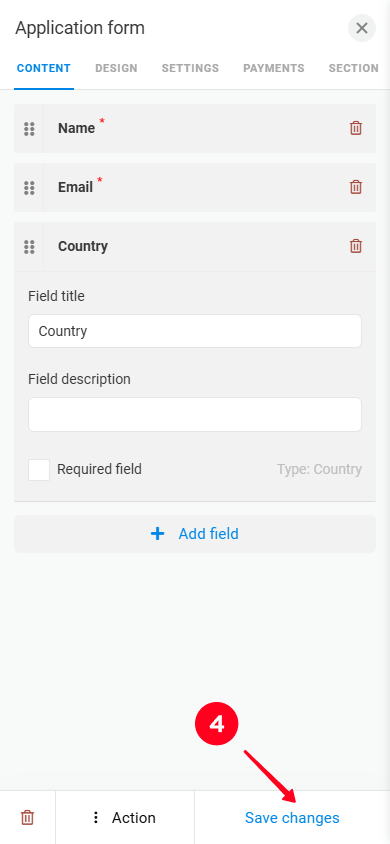
03. Select the type of data you want to collect. Taplink lets you add fields such as Phone, Country, Date, add a Checkbox, or create custom fields using String or Textarea. In the screenshot below, we’ve added a Country field.
04. Tap Save changes.
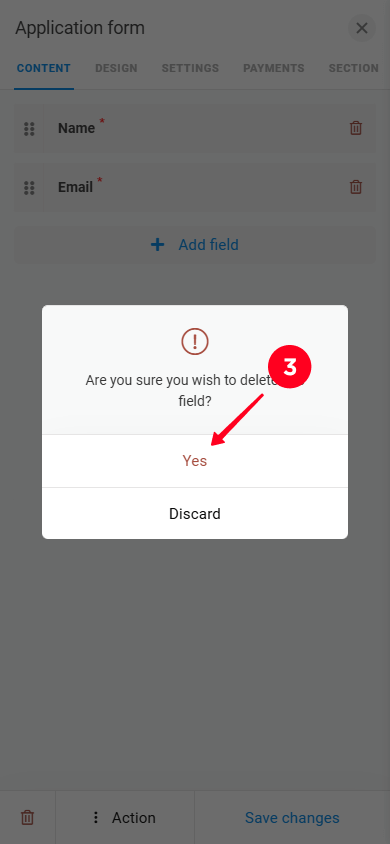
You can also delete individual fields. Here’s how to do it:
01. Tap the form block.
02. Tap the trash icon.

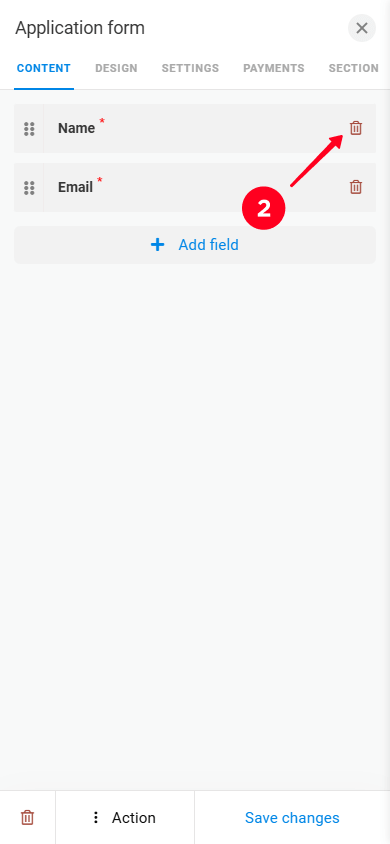
03. Confirm by selecting Yes.
04. Tap Save changes.

Now let’s see how to edit the text of the email-submission button.
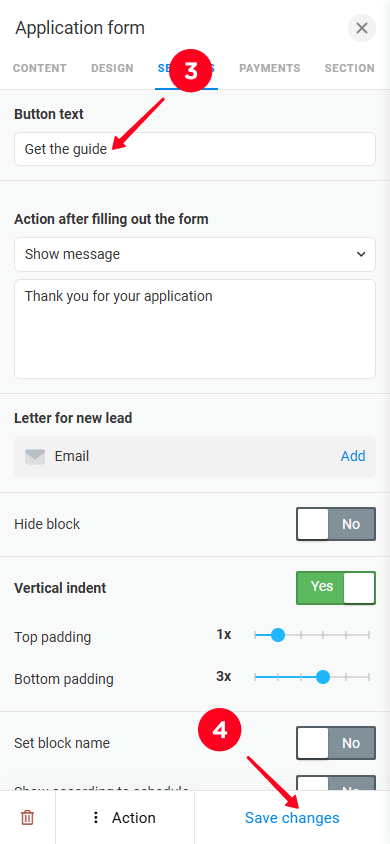
In our template, we’ve used “Get the guide” text since we’re offering a digital guide. You can change the text to fit your specific needs.
To change the button text:
- Tap the form block.
- Go to the Settings tab.
- In the Button text field, remove the text and type your own.
- Tap Save changes.


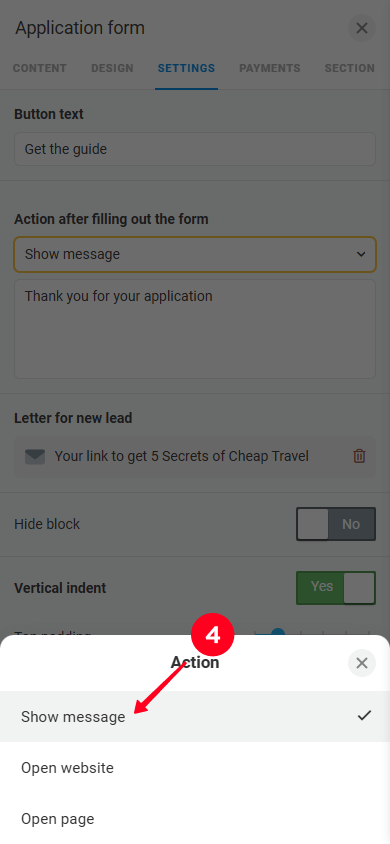
Taplink enables you to set specific actions after a visitor submits your form. The options include:
- Show message: Display a custom message to the visitor.
- Open website: Redirect the visitor to an external website.
- Open page: Redirect the visitor to an internal page created in Taplink.
To set a post-submission action:
01. Tap the form block.
02. Go to the Settings tab.
03. Open the dropdown menu in the Action after filling out the form field.

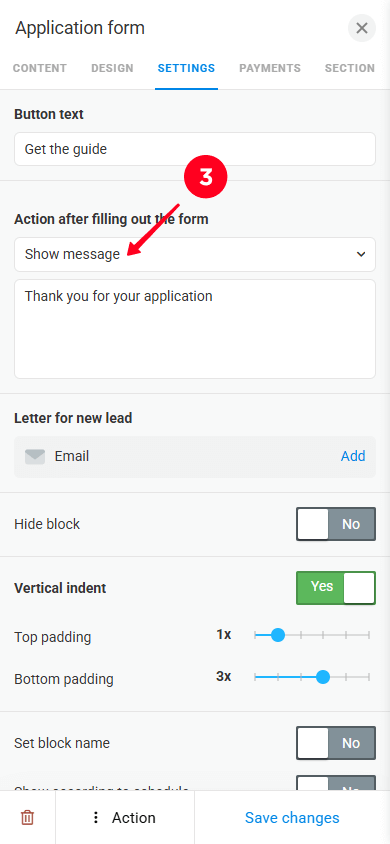
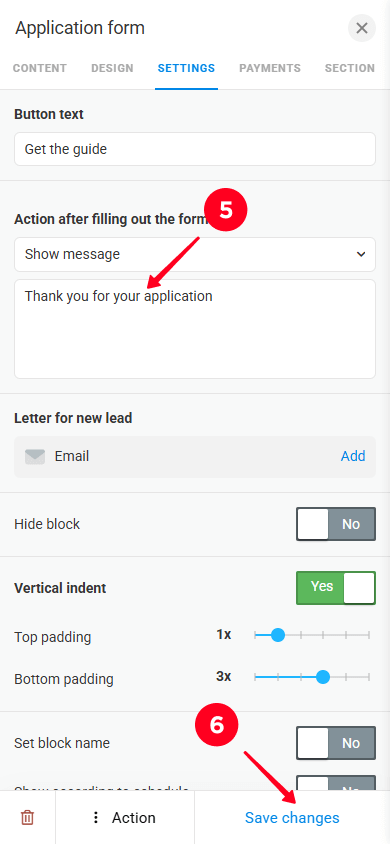
04. Select a post-submission action. We’ve chosen Show message.
05. Below the dropdown menu, type the message you want to display to the subscriber.
06. Tap Save changes.
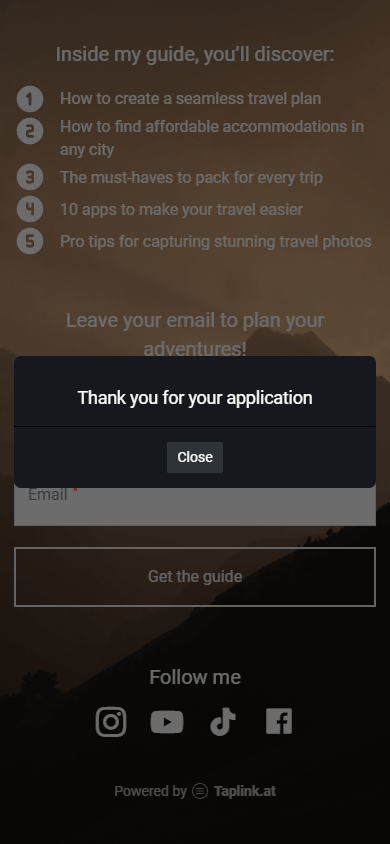
Here’s an example of how our message appears to the subscriber after submitting the form.
Now let’s check out how to set up a post-submission email.
In Taplink, you can set up an email that is automatically sent to the subscriber’s inbox after they submit your form. This email can include the lead magnet you promised in exchange for their email.
Taplink provides a pre-designed email template or allows you to create your email from scratch.
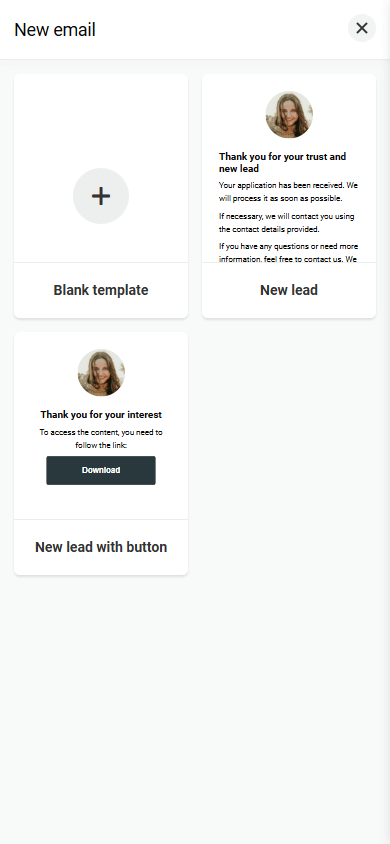
Let’s try to set up an email using a template.
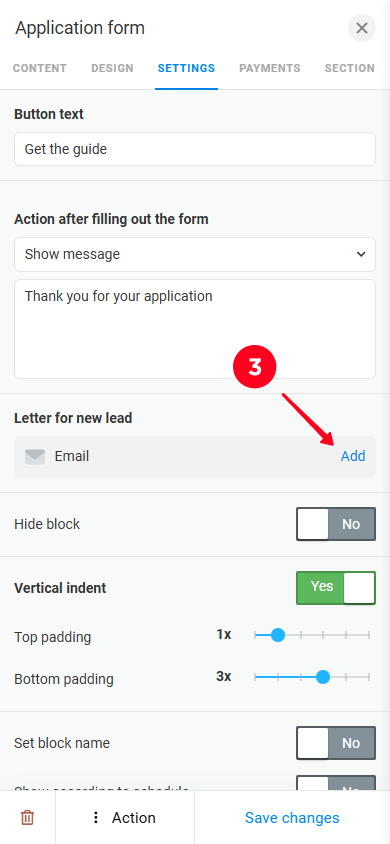
01. Tap the form block.
02. Go to the Settings tab.
03. Tap Add in the Letter for new lead field to create a new email.


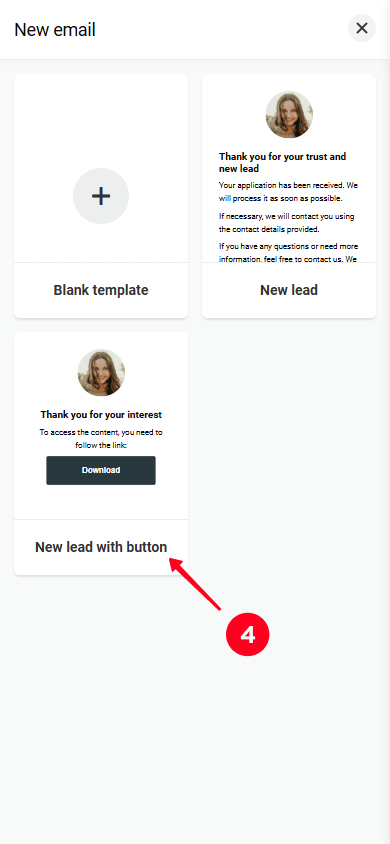
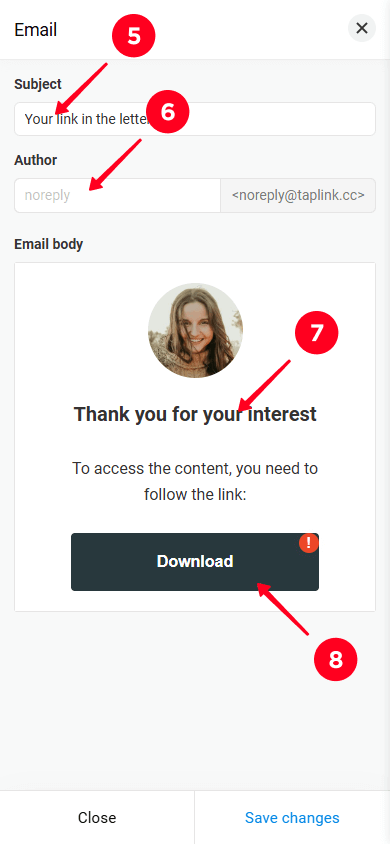
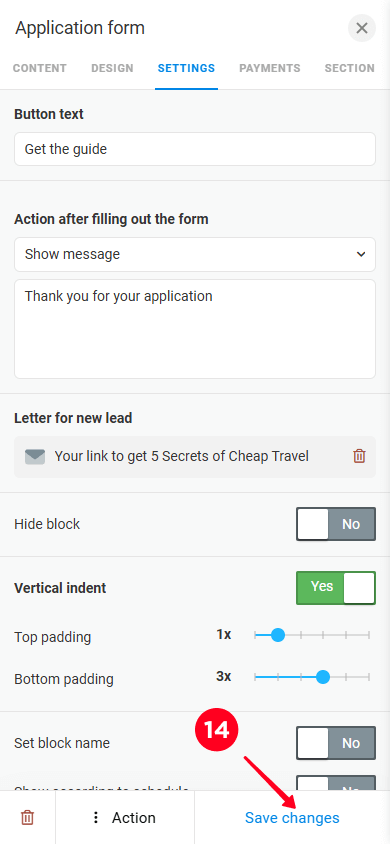
04. Select a template: text-only or text with a button for getting a lead magnet. In the screenshot below, we’ve chosen the text-and-button template.
05. Type the subject line in the Subject field.
06. Specify the author in the Author field.
07. Delete the text in the Email body field and write your email content.
08. Tap the button in the Email body to access button settings.
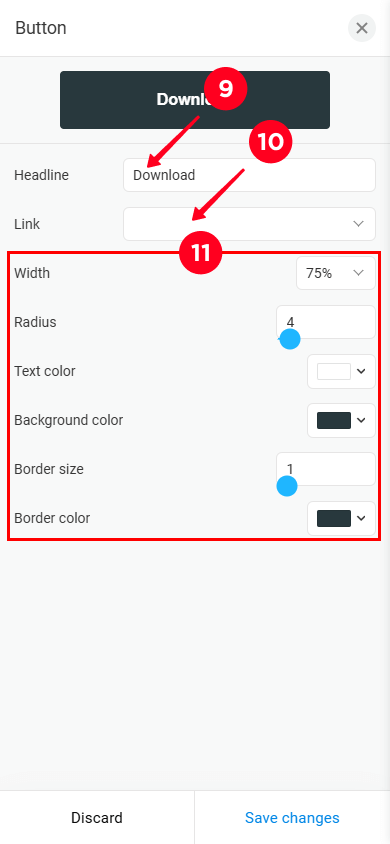
09. Type the button text in the Headline field. You can use the default text or customize it.
10. Add the link to your lead magnet in the Link field. For example, if you are offering a guide, the link could direct visitors to a PDF file hosted on Google Drive or another file-sharing platform.
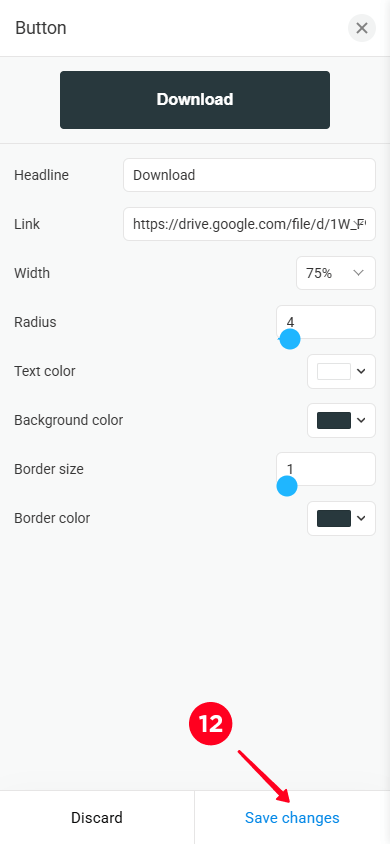
11. Optionally, customize button settings, such as width, radius, text color, background color, border size, and border color.
12. Tap Save changes to apply button changes.
13. Tap Save changes to save the settings for the email for a subscriber.
14. Tap Save changes to apply the settings for the form block.
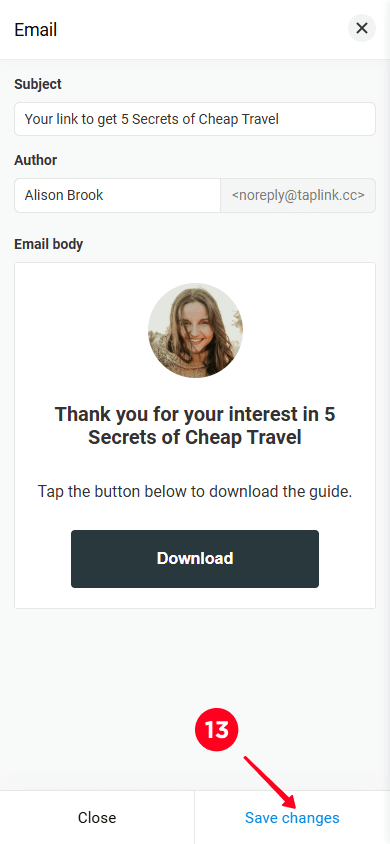
Now, subscribers will receive the customized email after submitting your form.
We’ll explain below how to access the contacts submitted to you by visitors.
Please note that in some countries, laws require informing subscribers about how their submitted data will be processed. Read more about how to inform your subscribers below.
We’ve finished customizing the form on your page for building an email list. It’s time to customize the rest of the page.
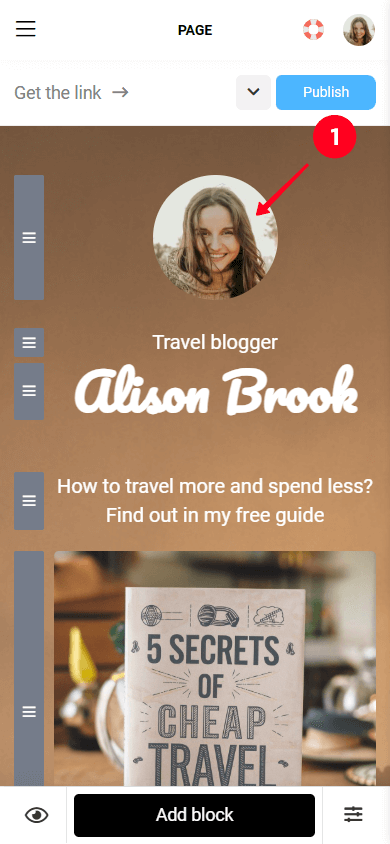
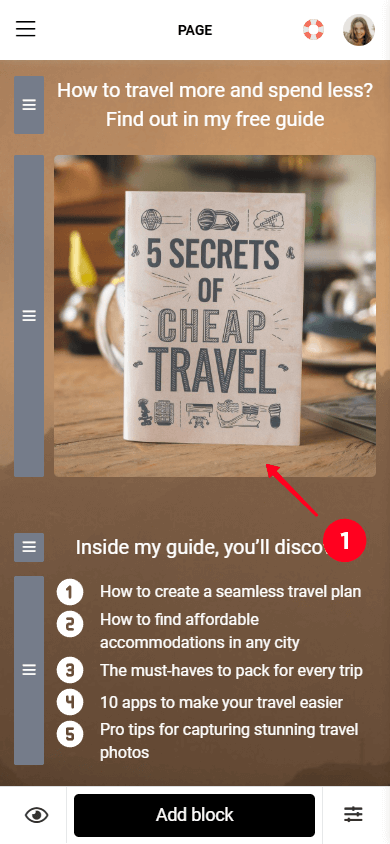
For this article, we’ve created the following template:

The template has all the key components to collect emails and showcase your free product:
- Your avatar.
- A headline.
- An image of your lead magnet.
- The benefits visitors will gain from your lead magnet
- An opt-in form.
- Links to your social media.
You already know how to customize the form. So in this section, we’ll show you how to customize the rest.
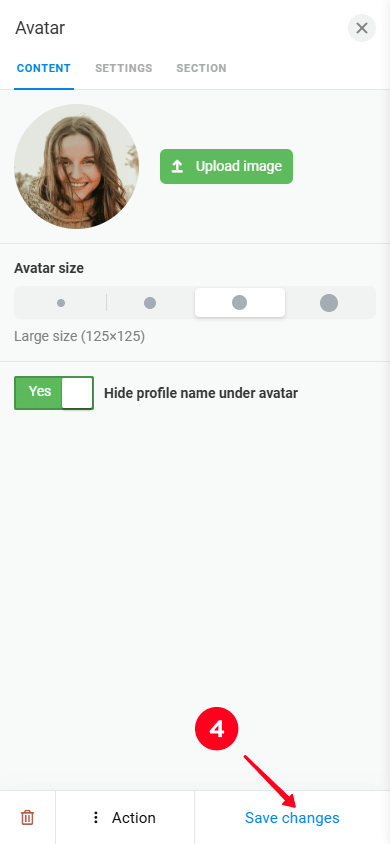
As an avatar, you can use your photo or your business logo. To change the avatar:
01. Tap the avatar block.
02. Tap Upload image and add an image from your device.
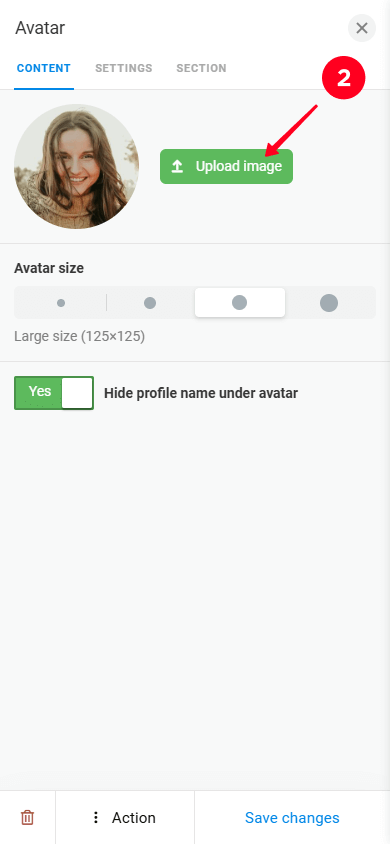
03. Tap Upload.
04. Tap Save changes.
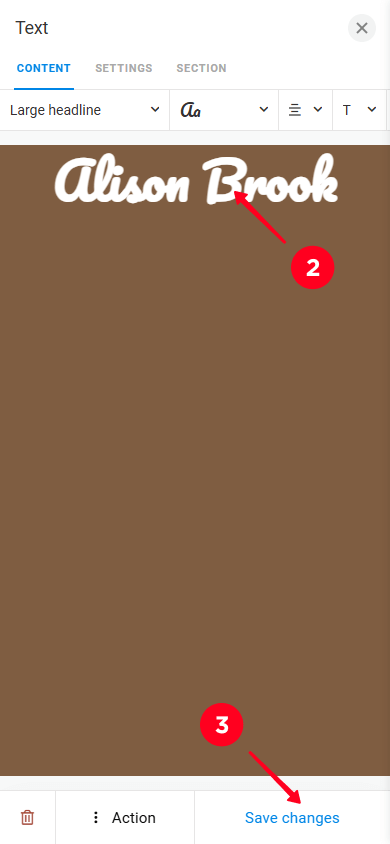
Now let’s change the headline.
Your headline can feature your name, nickname, business, or lead magnet name. To change the headline:
- Tap the headline block.
- Delete the text and type your own.
- Tap Save changes.

You can modify other headlines or texts on the landing page in the same way.
Now it’s time to add your lead magnet to the page.
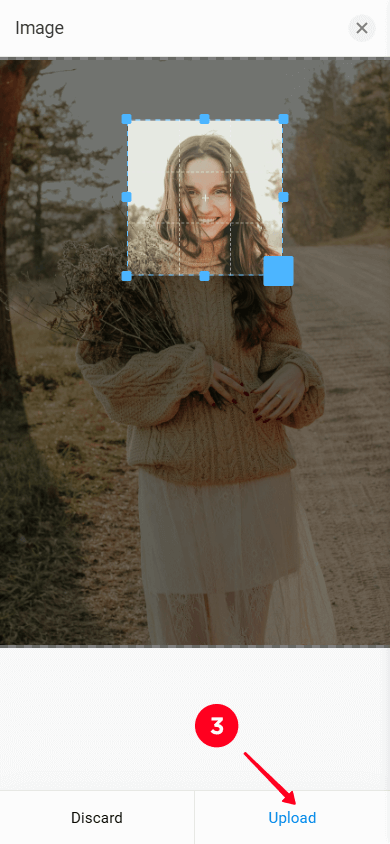
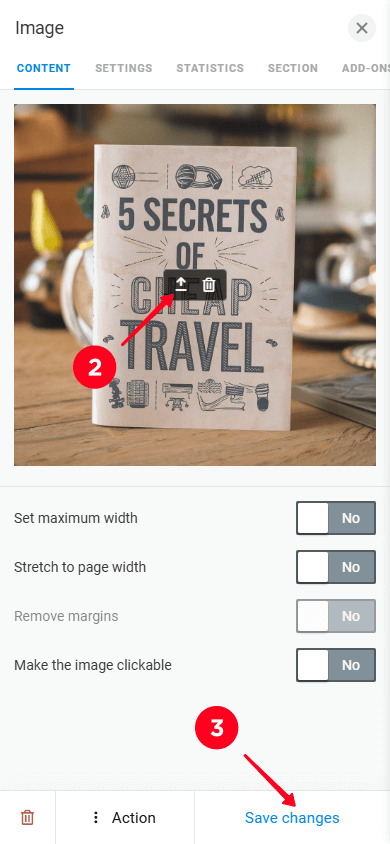
To change the image of your lead magnet, follow these steps:
- Tap the image block.
- Tap the upload icon and upload an image from your device.
- Tap Save changes.
Now let’s tell visitors about the benefits they’ll get from your lead magnet.
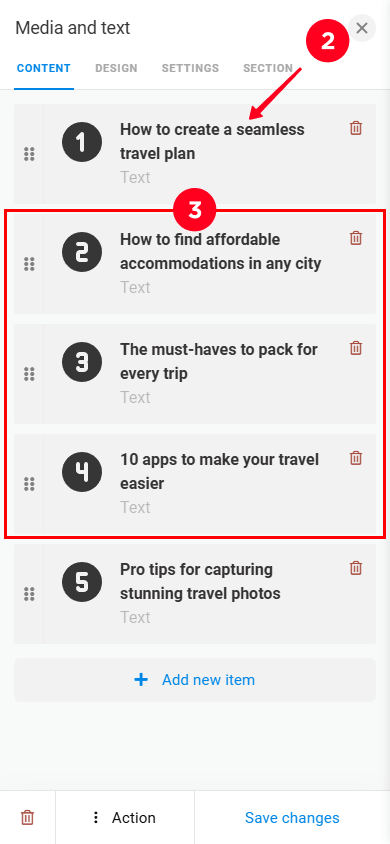
To change the text listing the benefits of your lead magnet:
- Tap the block with the list of benefits. The list is created using the Media and text block.
- Delete the text in the first list item and add your own text.
- Repeat the same for the other items in the list.
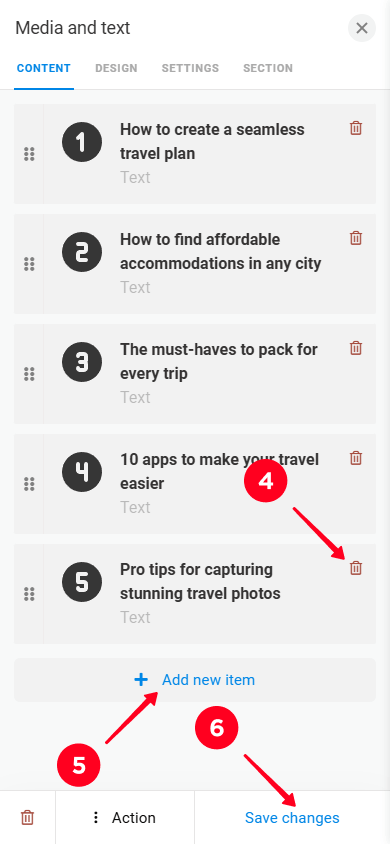
- Tap the trash icon to delete a specific item.
- Tap Add new item to add a new item.
- Tap Save changes.
Finally, we need to add links to your social media.
You can change the social media links by following the steps below.
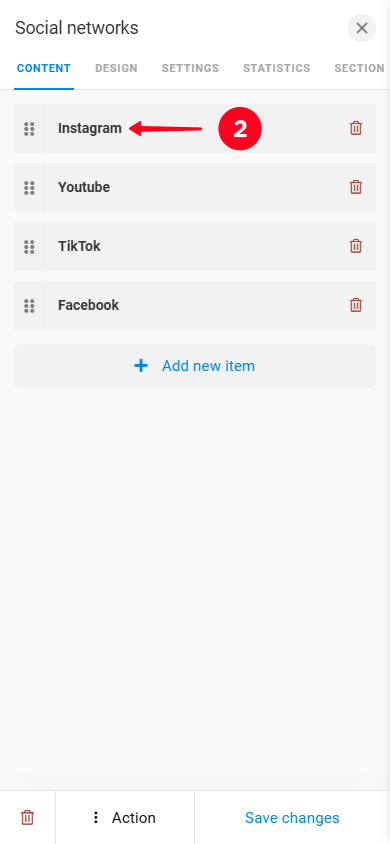
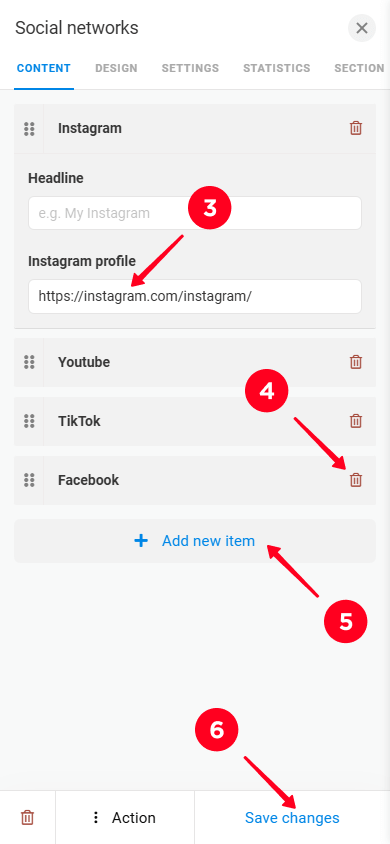
- Tap the social media block.
- Select the social media field you want to edit.
- Delete the current link and add the link to your profile.
- Tap the trash icon to remove a certain social media.
- Tap Add new item to add a social media.
- Tap Save changes.
We’ve finished changing the blocks on your Taplink landing page. But you can also add new blocks. Let’s learn how to do that.
Taplink allows you to add as many blocks as you like to your landing page. Its block library includes over 20 blocks to choose from.
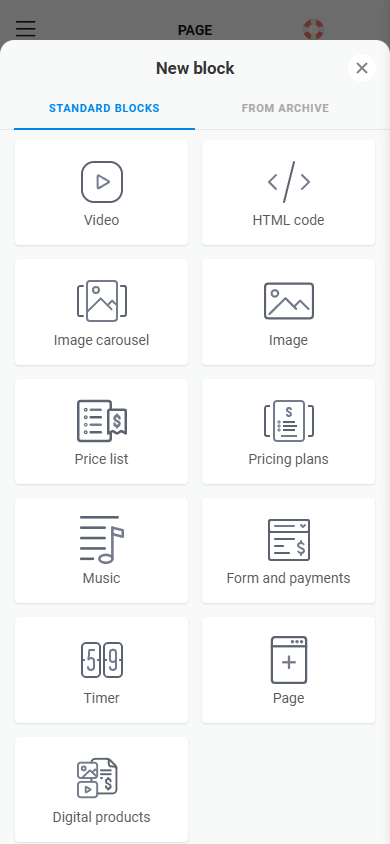
For example, you can add a Timer block to encourage visitors to fill out your form as soon as possible.
Or you can add an FAQ block to answer visitors’ most common questions.
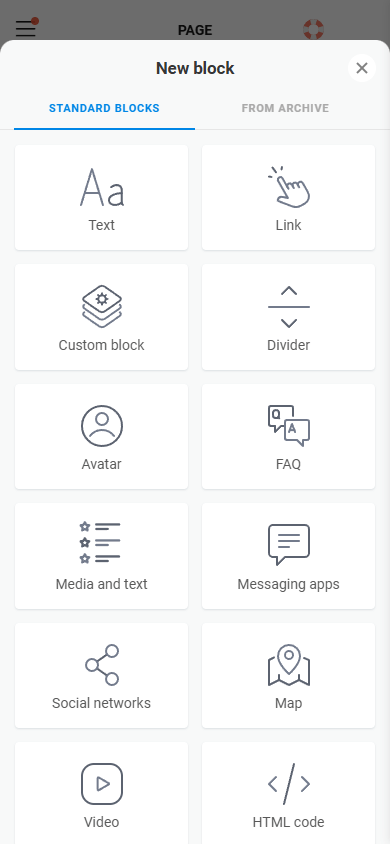
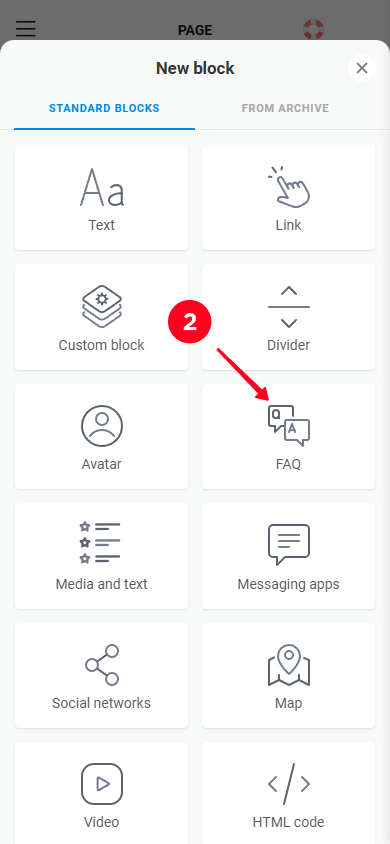
To add a new block:
- Tap the Add block button.
- Select the block you want to add. In the screenshot below, we selected the FAQ block.
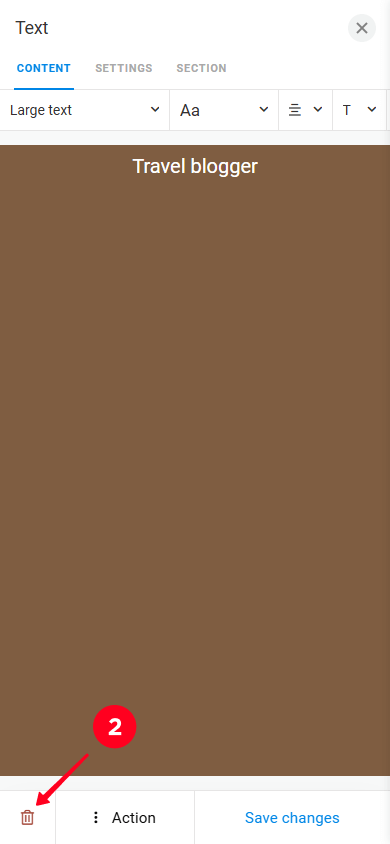
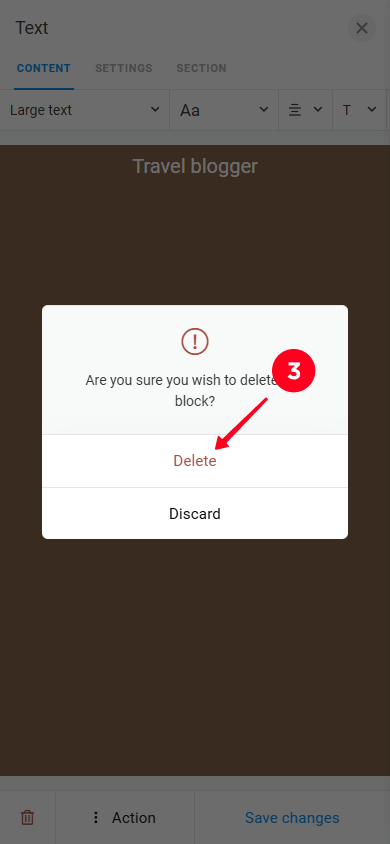
You can also delete specific blocks.
If you need to remove certain blocks, follow these steps:
- Tap the block you want to delete.
- Tap the trash icon.
- Confirm by selecting Delete.

That’s it. Now you know how to fully customize your landing page with a form. The last step is to publish it.
Your landing page is now ready to go live. Let’s publish it.
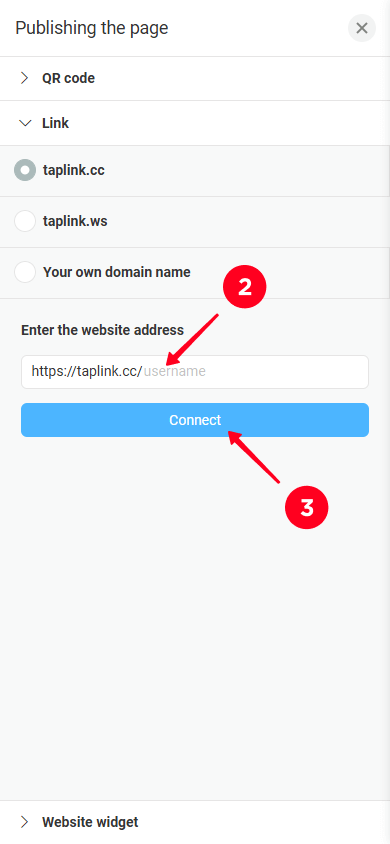
- Tap the Publish button.
- Type a username in the Enter the website address field. You can use the same username you use on social media, for example.
- Tap Connect.
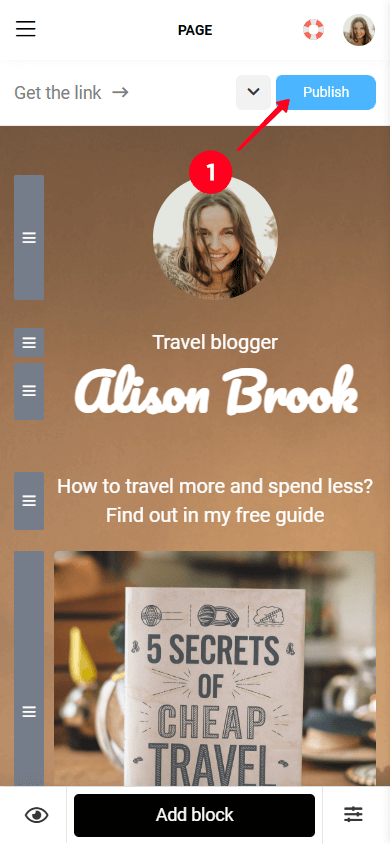
Now you have a link to your page for collecting emails that you can add to your social media profiles or share in messengers.
Next, we’ll tell you how to view and download the data that visitors left in your form.
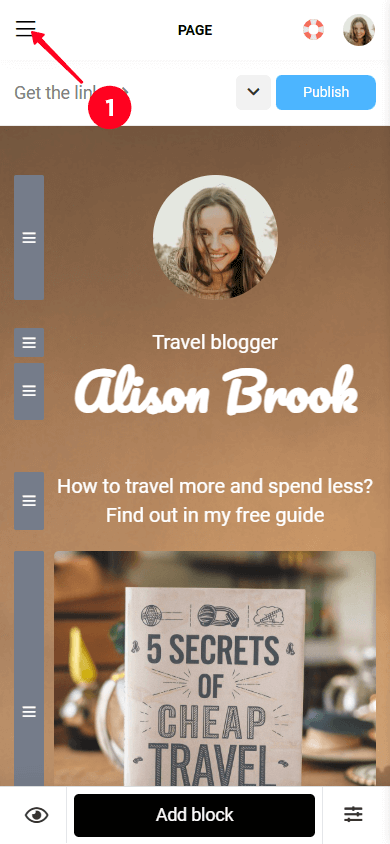
All the emails visitors send you are stored in Taplink. To access them:
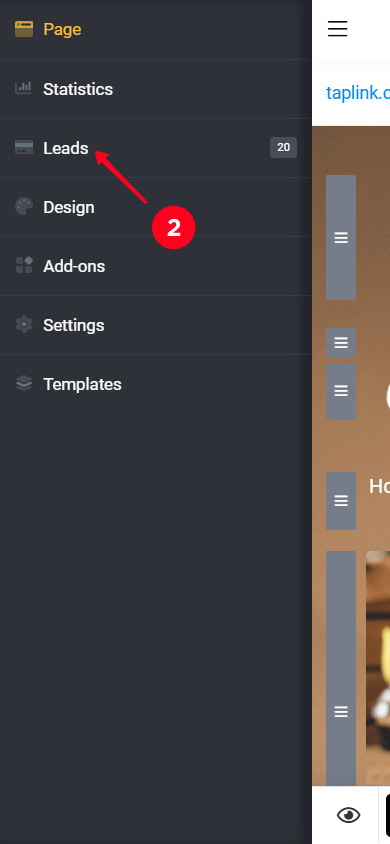
- Tap the hamburger menu.
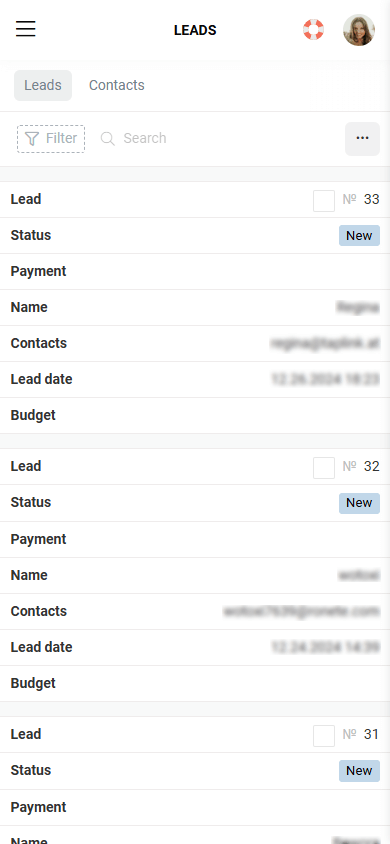
- Go to the Leads tab to open the list of your subscribers and their data.
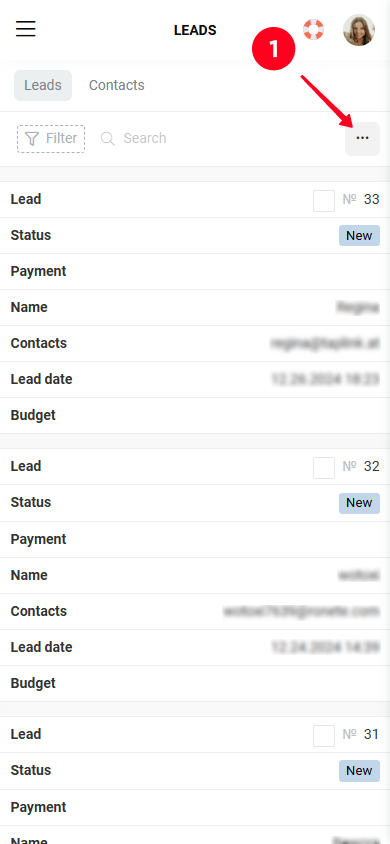
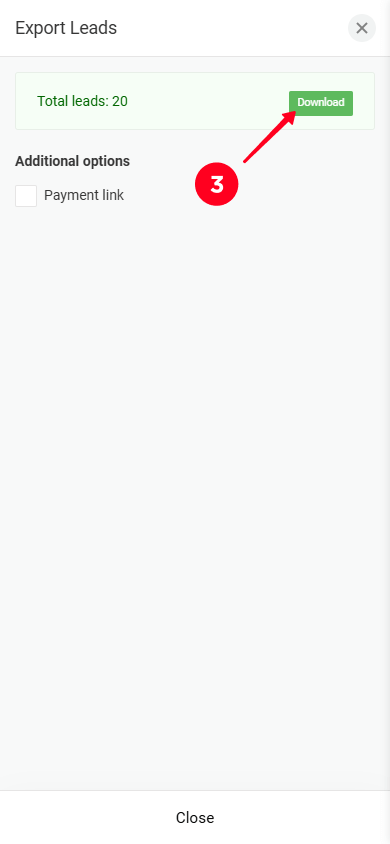
You can export all the data in CSV format on your device. To export the list:
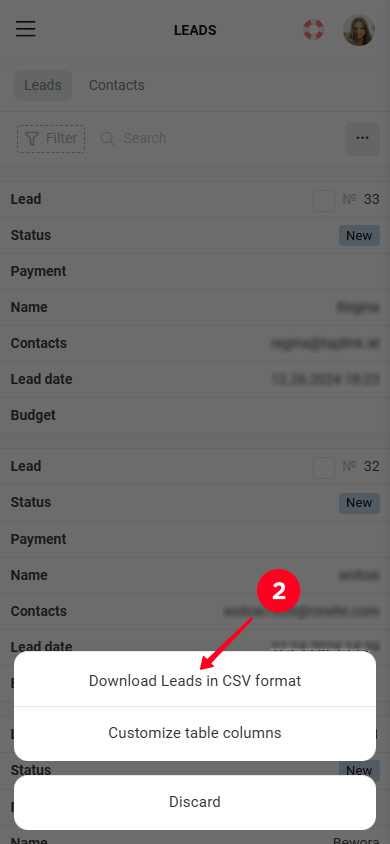
- Tap the meatballs menu in the Leads tab.
- Select Download Leads in CSV format.
- Tap Download.
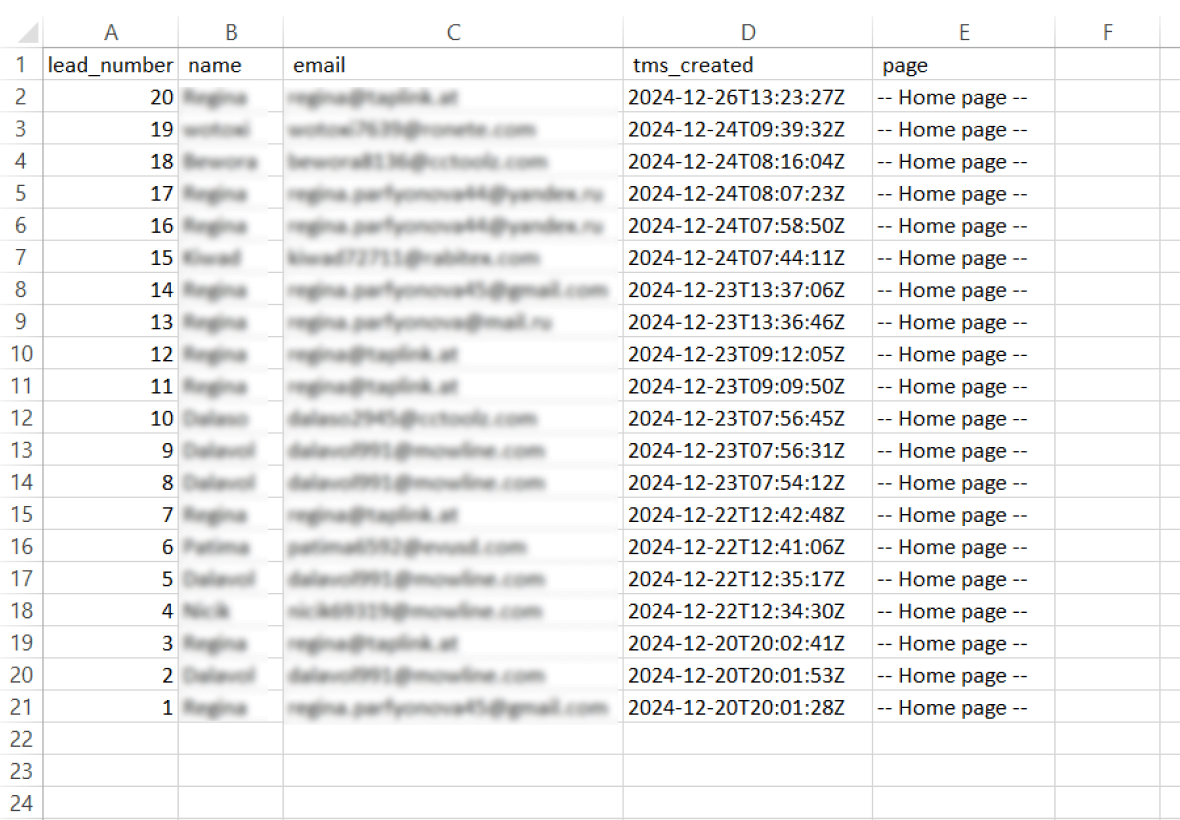
Done, the subscriber data is saved to your device. Here’s what the downloaded data looks like in a CSV file.
If you want to get notifications about new subscribers, enable alerts via messenger or email. Check out our guide on setting up notifications in Taplink for more details.
Now, if you don’t plan to send bulk campaigns to your subscribers in the future, you can learn how to promote your page for building an email list.
But if bulk emailing your subscribers is something you’d like to do, take a look at the next section. It explains Taplink’s advanced feature for sending emails to your whole audience with one click.
Once you’ve built a subscriber base, you can send them various types of emails, such as:
- Announcements about new products.
- Special offers or promotions.
- Articles useful for your subscribers.
Taplink’s advanced features let you send emails to your entire audience at once. To do that, you need to connect add-ons to your landing page. They include email-automation platforms, such as Mailchimp, GetResponse, Automizy, Moosend, MailerLite, Pabbly, Brevo, and Klaviyo.
Next, we’ll show how to automate email marketing with Mailchimp. This platform enables you to:
- Gather subscriber data from Taplink.
- Use built-in email templates for quick setup.
- Send emails to all your contacts in one click.
- Set up email sequences.
- Segment your audience, for example, by country.
Let’s start by connecting Mailchimp to your landing page for email list building.
To connect Mailchimp to your Taplink landing page, you need to sign up in Mailchimp and obtain an API key.
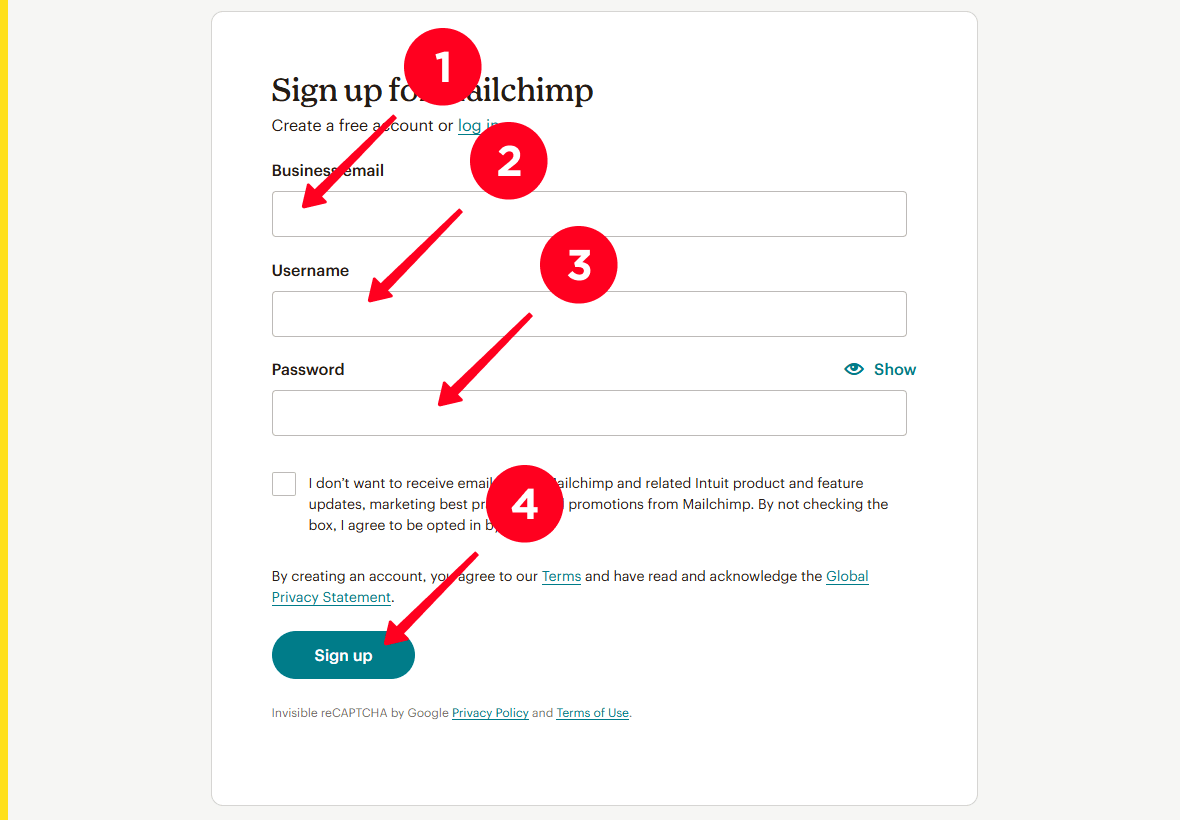
Go to the Mailchimp signup page and follow the steps below.
01. Enter your business email in the Business email field. If you don’t have a business email, sign up with a personal one.
02. Enter a username in the Username field.
03. Create a password and type it in the Password field.
04. Click the Sign up button.
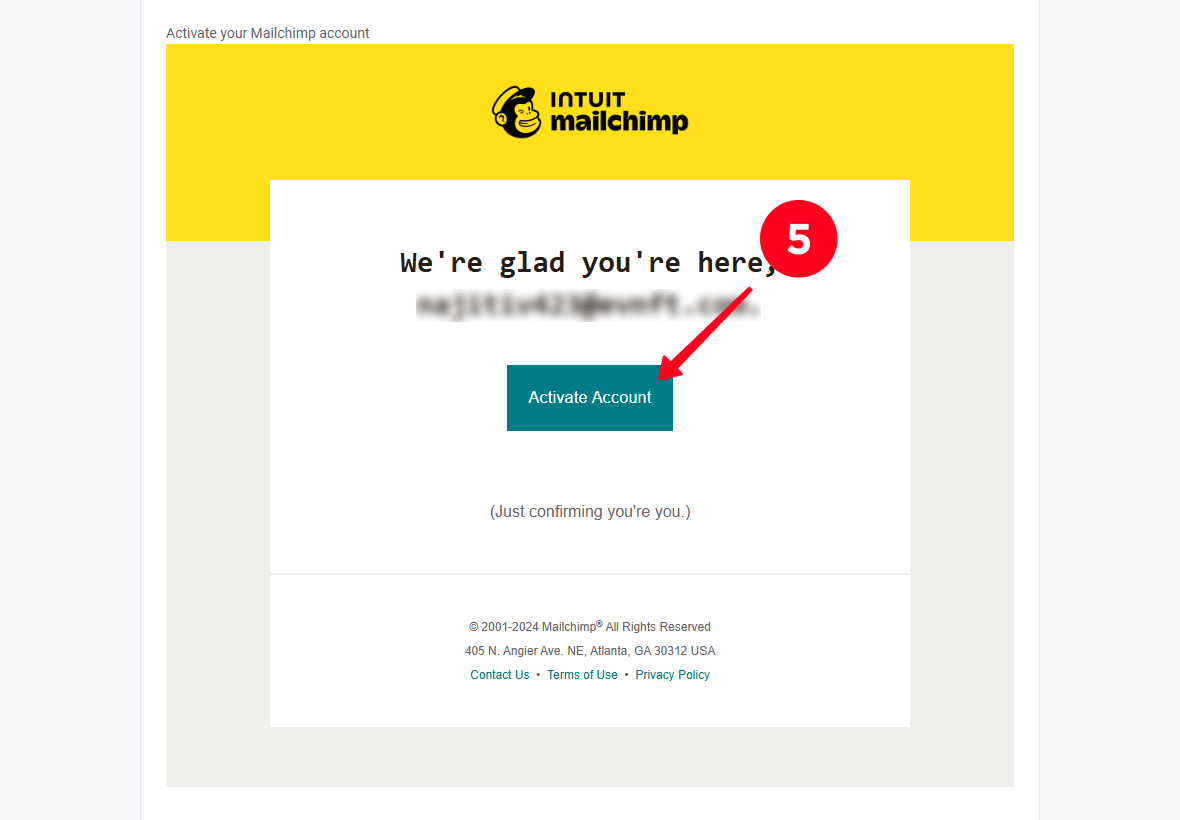
05. After filling out the form, Mailchimp will send an activation link to the email address you provided. Activate your account by clicking on the activation button in the email you received.
06. In the window that opens fill in the First name field.
07. Fill in the Last name field.
08. Specify your business name in the Business name field.
09. Click Next.

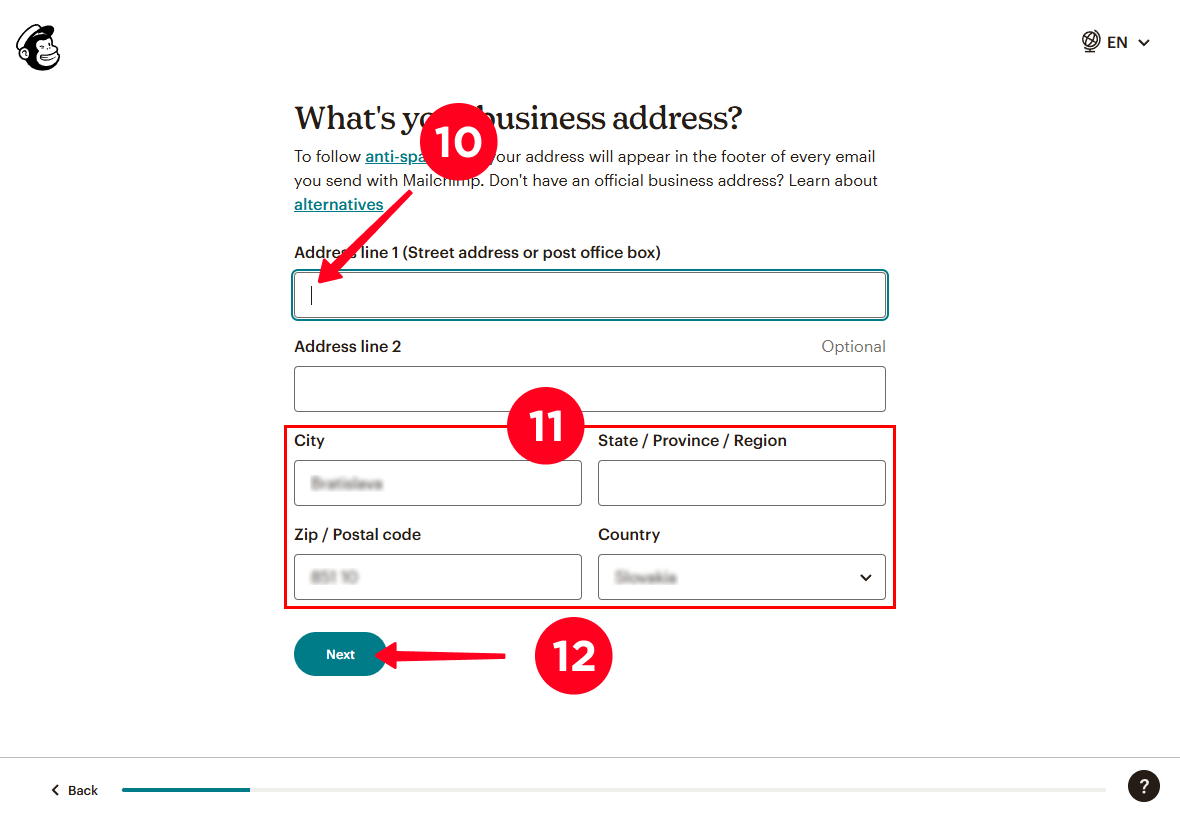
10. Enter your business address in the Address line (Street address or post office box) field.
11. The City, State / Province / Region, Zip / Postal code, and Country fields are filled in automatically. If they aren’t filled in automatically, do it manually.
12. Click Next.
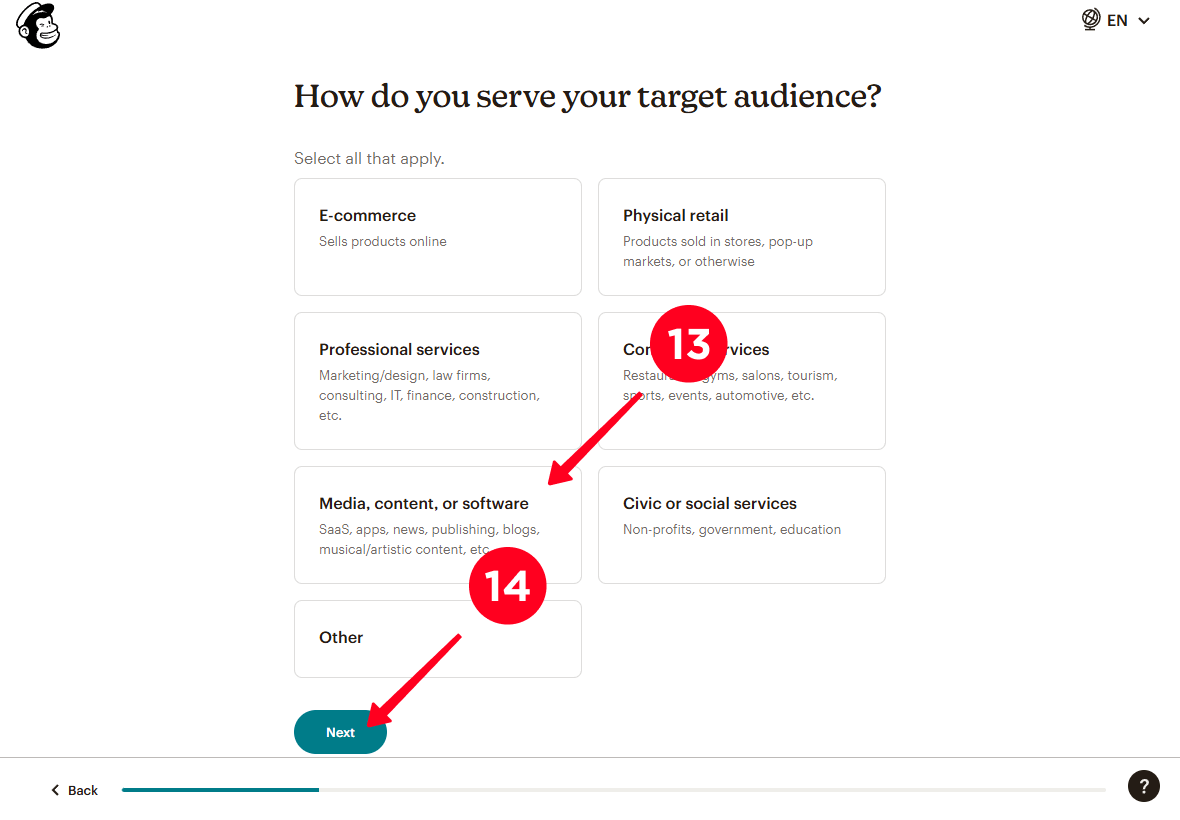
13. Select your business area. We’ve chosen Media, content, or software.
14. Click Next.
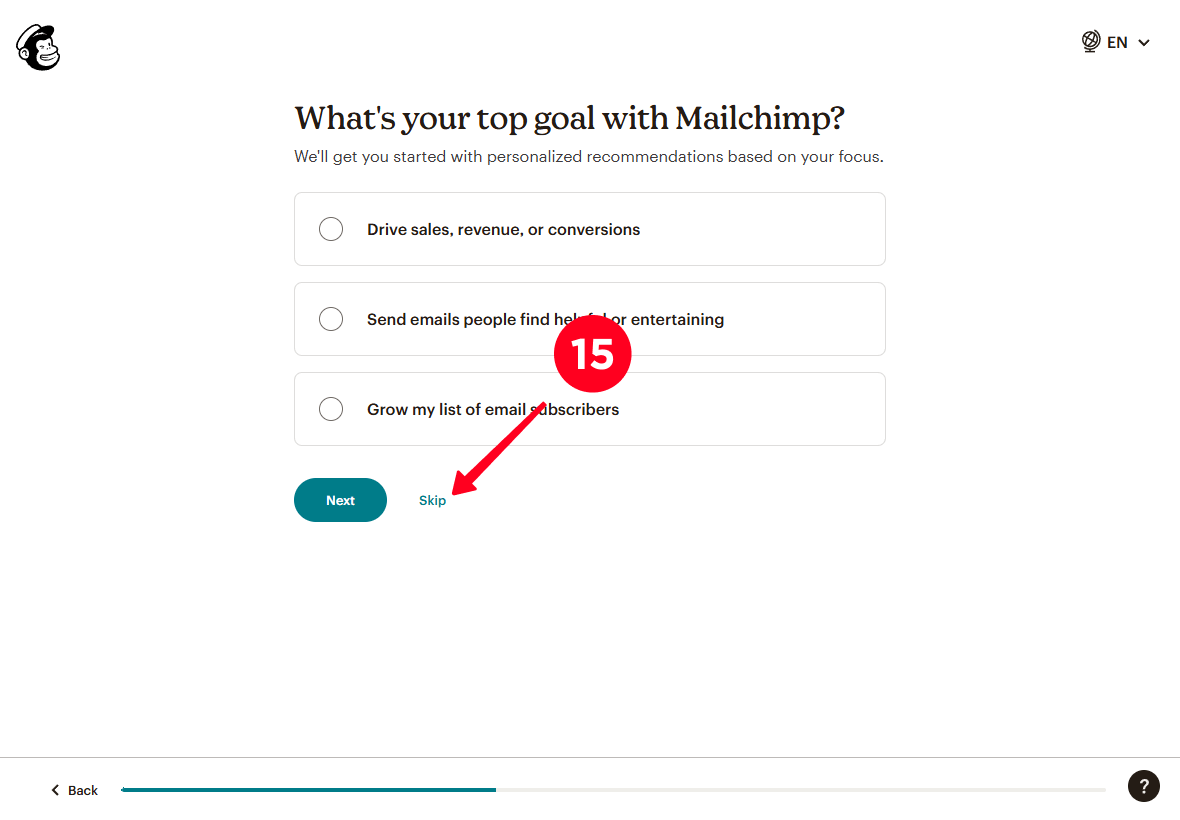
15. Optionally, fill in the additional information or skip these steps. We’ve clicked Skip.
16. Choose a plan. For starters, we selected the Continue Free.
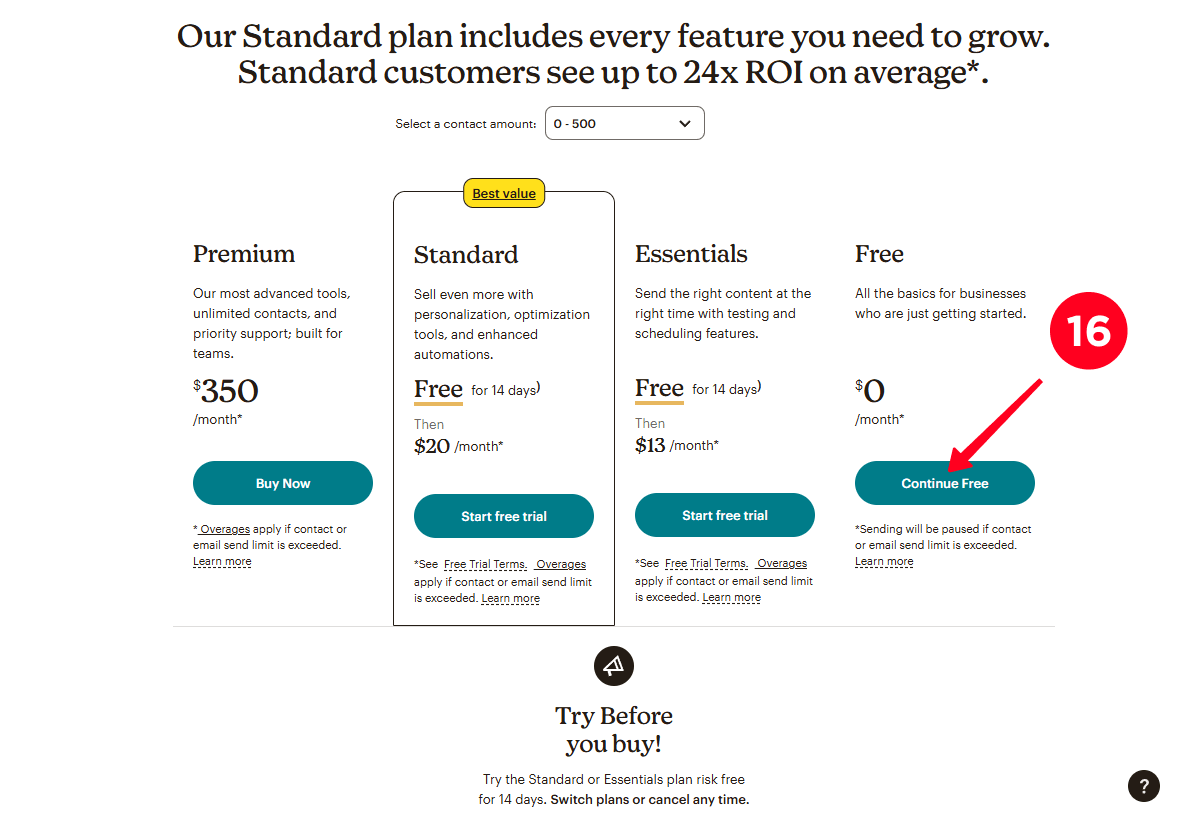
17. Wait for the account setup to complete.
Your Mailchimp account is now created. Now you need to connect Mailchimp to your Taplink landing page.
To connect Mailchimp to Taplink, you first need to generate an API key in Mailchimp. Here’s how to do that:
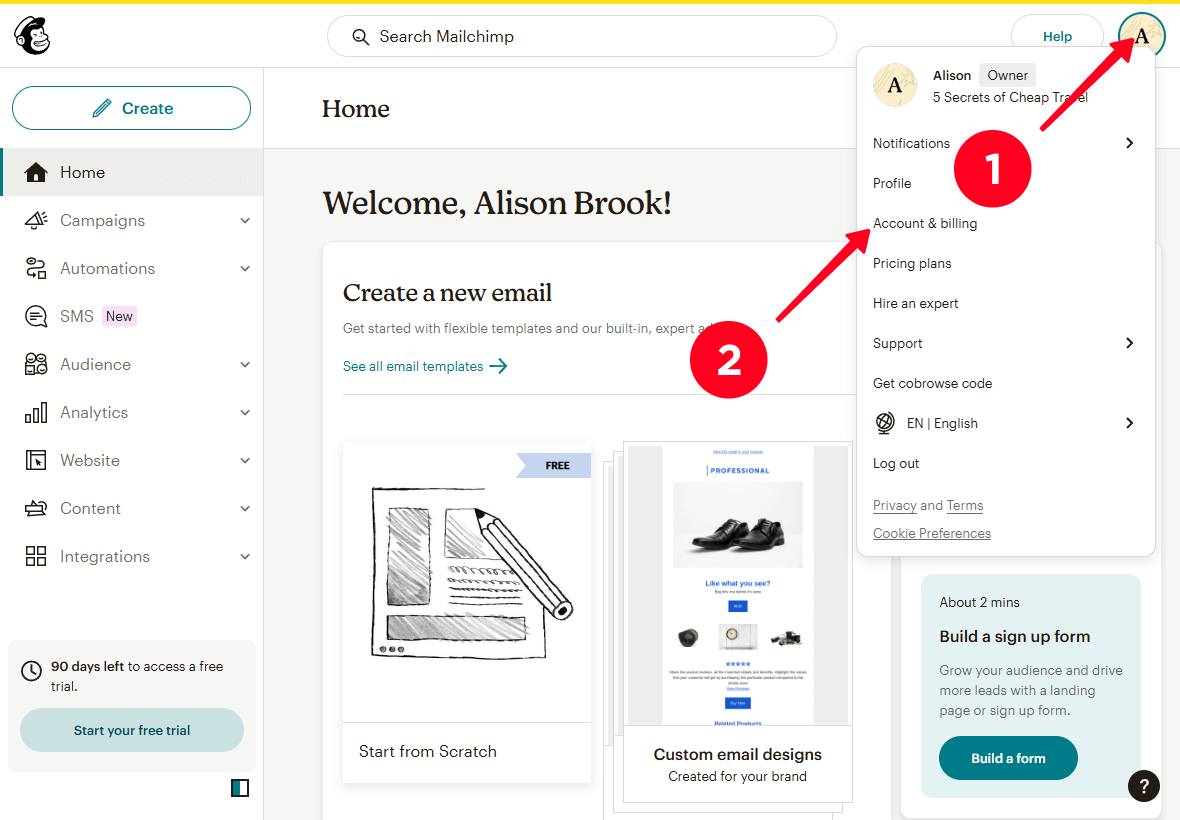
01. In Mailchimp, click on your profile icon.
02. Go to the Account & billing tab.
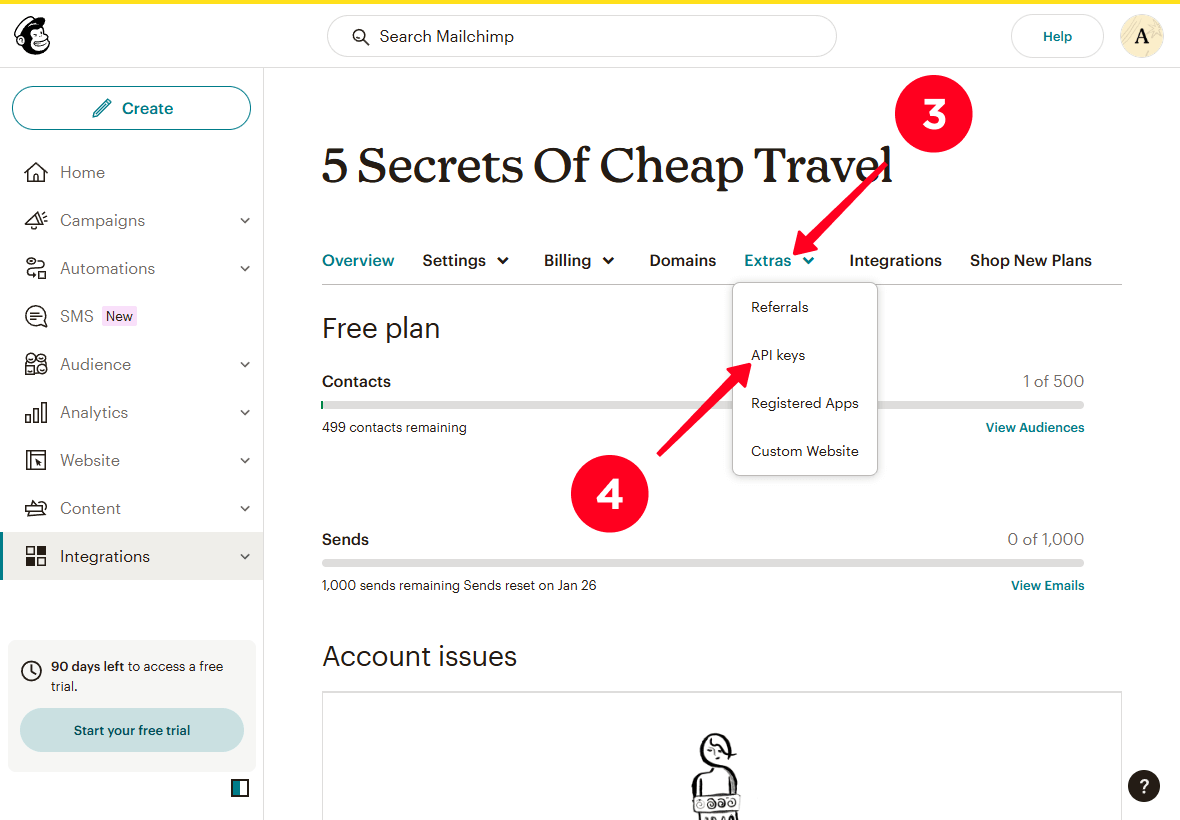
03. Open the dropdown menu in the Extras tab.
04. Select API keys.
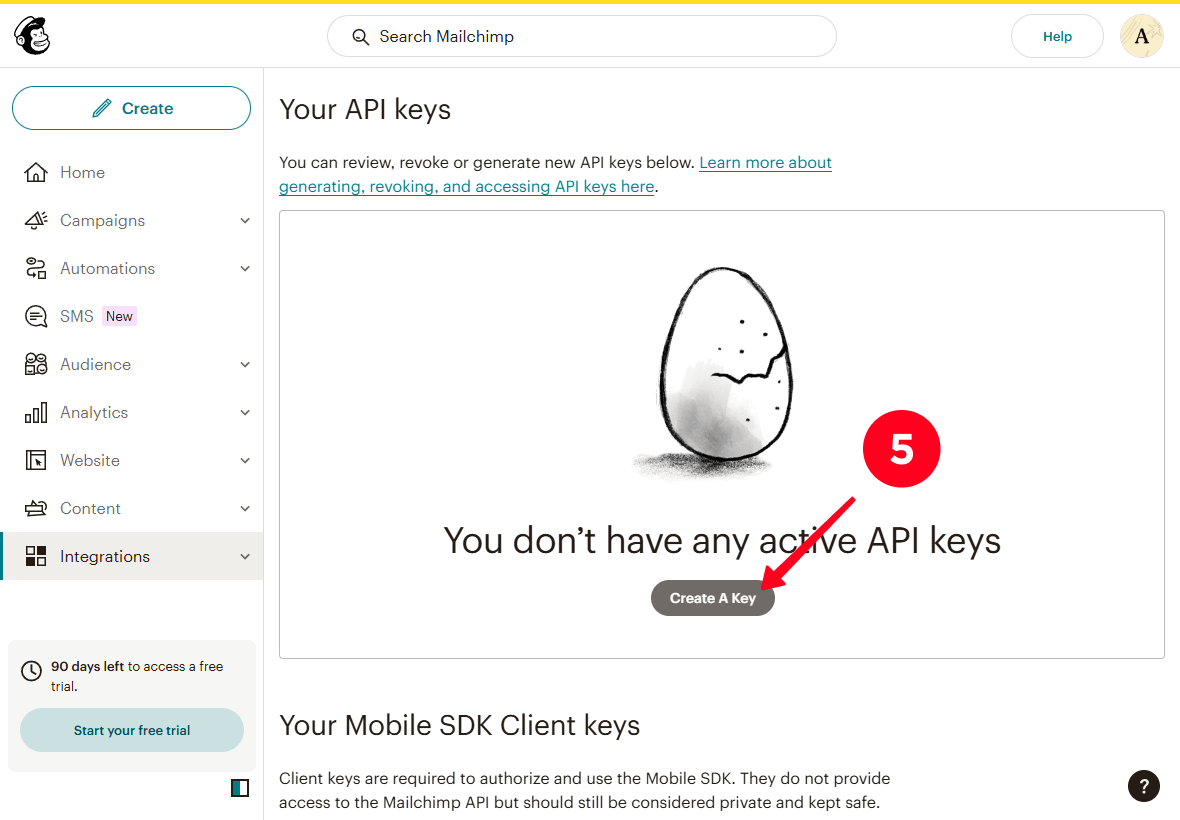
05. Scroll down and click the Create A Key button.
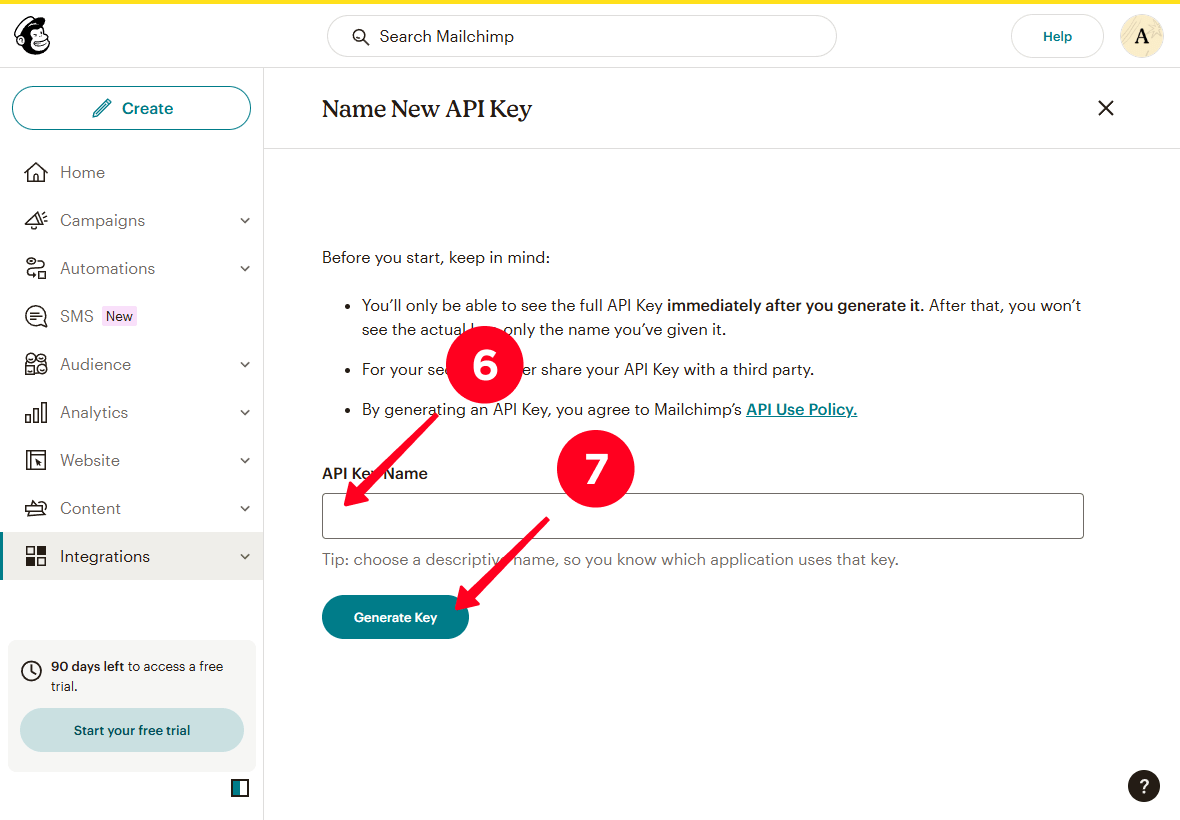
06. Create a key name and enter it in the API Key Name field.
07. Click Generate Key.
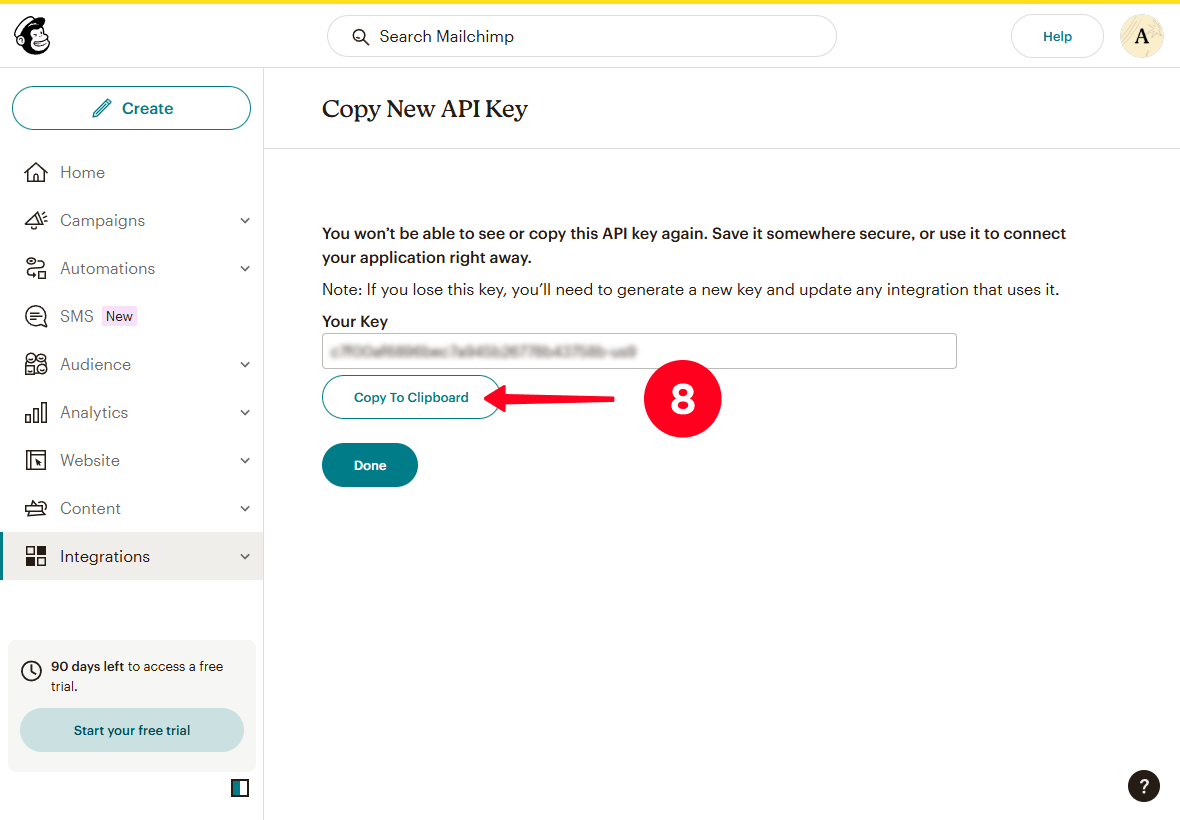
08. Copy the key by clicking Copy To Clipboard.
Now you need to add this key to Taplink. To do this, go to Taplink and:
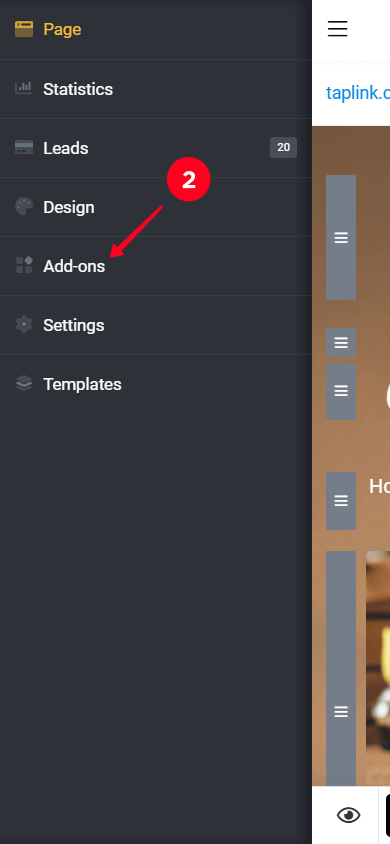
01. Tap the hamburger menu.
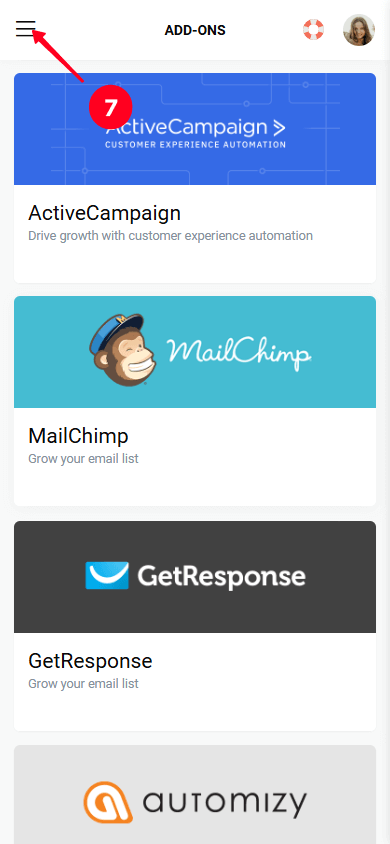
02. Open the Add-ons tab.
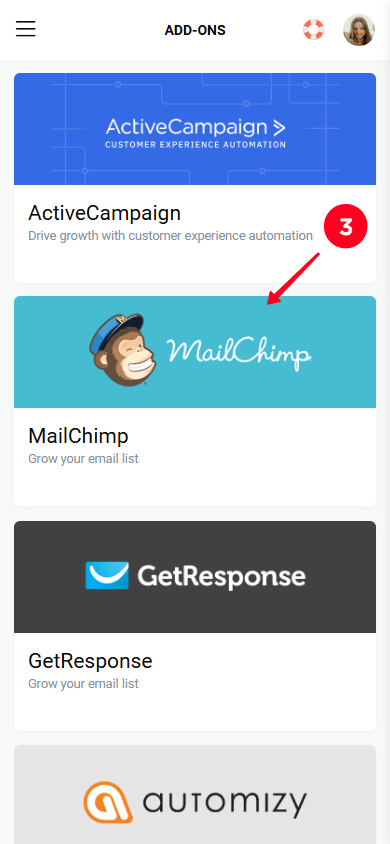
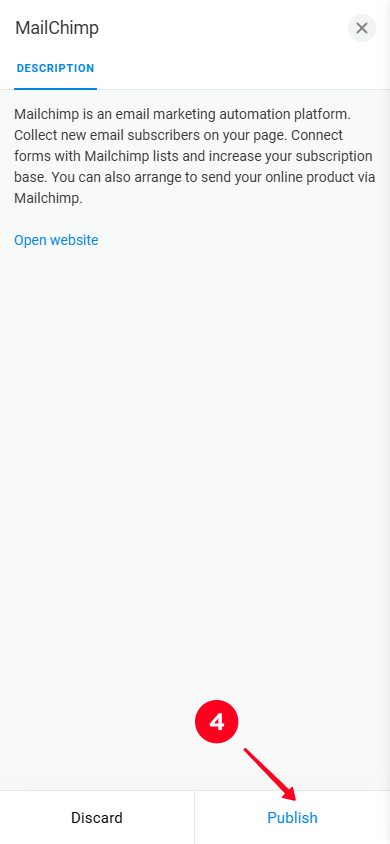
03. Scroll down the page and select Mailchimp.

04. Click Publish.
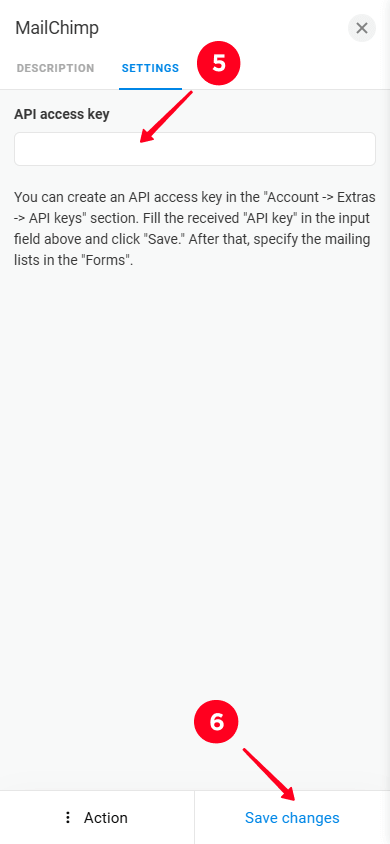
05. Enter the API key you generated in Mailchimp in the API access key field.
06. Click Activate.
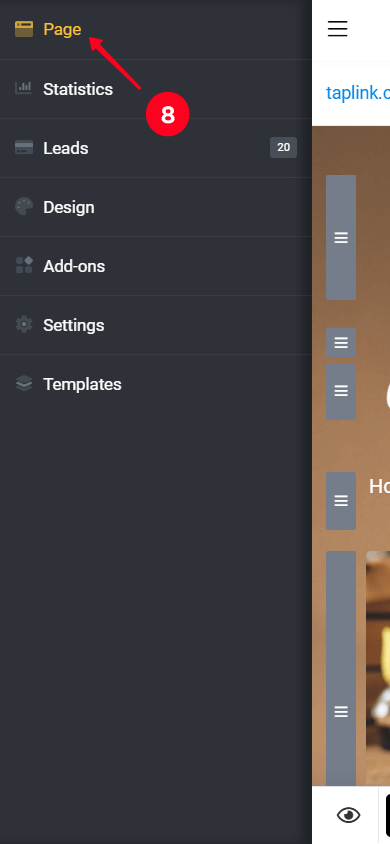
07. Click the hamburger menu.
08. Go to the Page tab.
09. Scroll down and click on the form block.
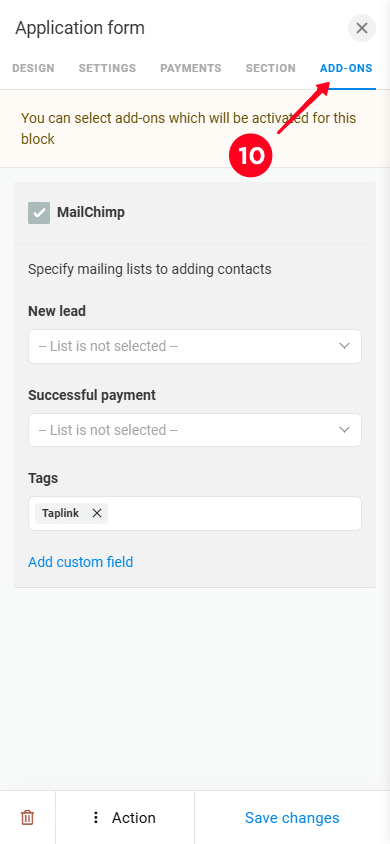
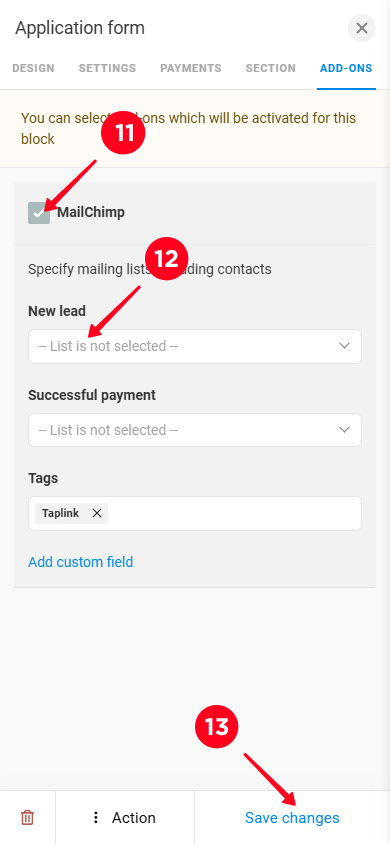
10. Go to the Add-ons tab.
11. Check the box next to Mailchimp.
12. In the dropdown in the New lead field, tap the audience name. If you followed our guide, there will be only one audience on the list. Mailchimp generates it automatically when you sign up.
13. Click Save changes.
Done! Mailchimp is now synchronized with your Taplink page.
Next, let’s find out in Mailchimp how to view the data of visitors who filled out your form.
Each time a new visitor fills out your form on the landing page, their data will automatically be shared with your Mailchimp account.
To view the collected contacts in Mailchimp:
- In the main menu, click on Audience to open the dropdown menu.
- Click All contacts.
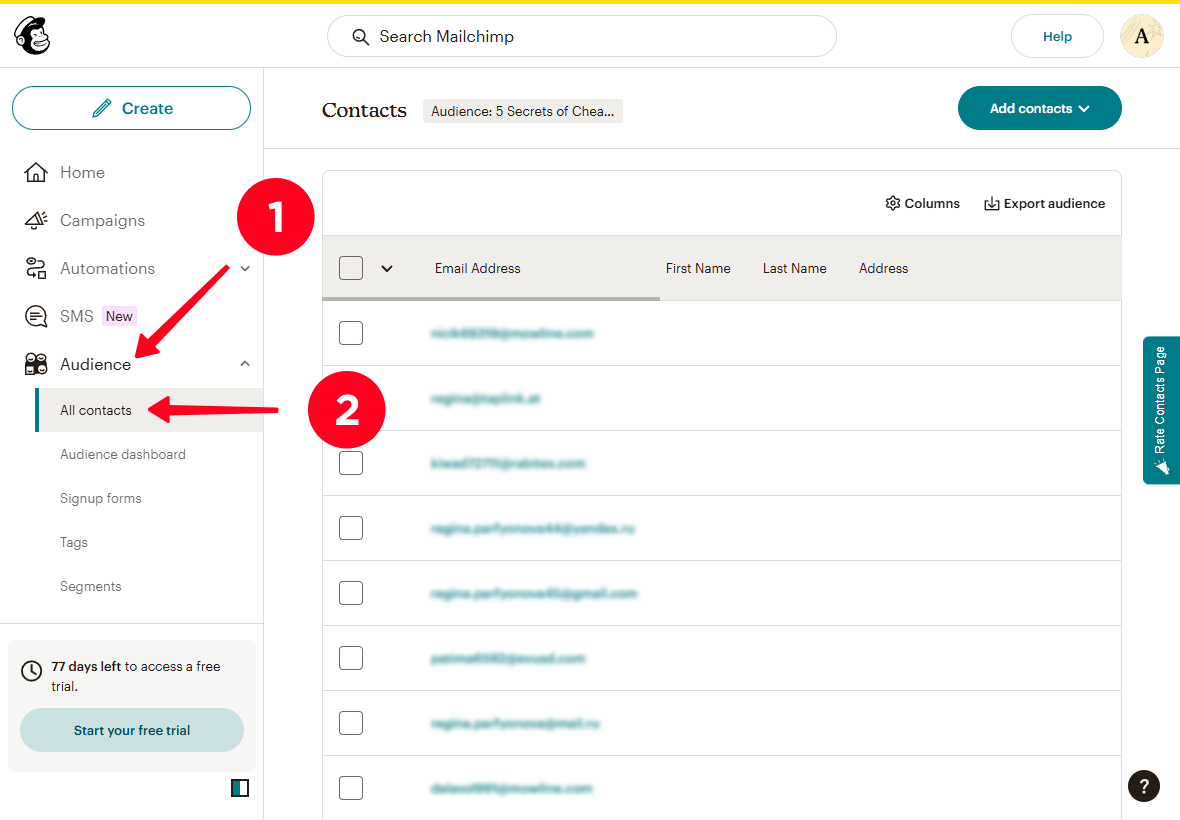
Here, you’ll see all the data that visitors left in your opt-in form.
Now it’s time to create an email campaign for your contacts.
Mailchimp allows you to design emails and send them to all your contacts at once. Say you’re a travel blogger — you could send an email to your subscribers offering them a consultation to help plan their trip.
Below, we’ll explain how to design an email using this example. But before doing so, you might want to verify the email address to prevent issues when sending your emails to subscribers.
Let’s start at the very beginning — open the email editor. To do this:
01. Click the Create button.
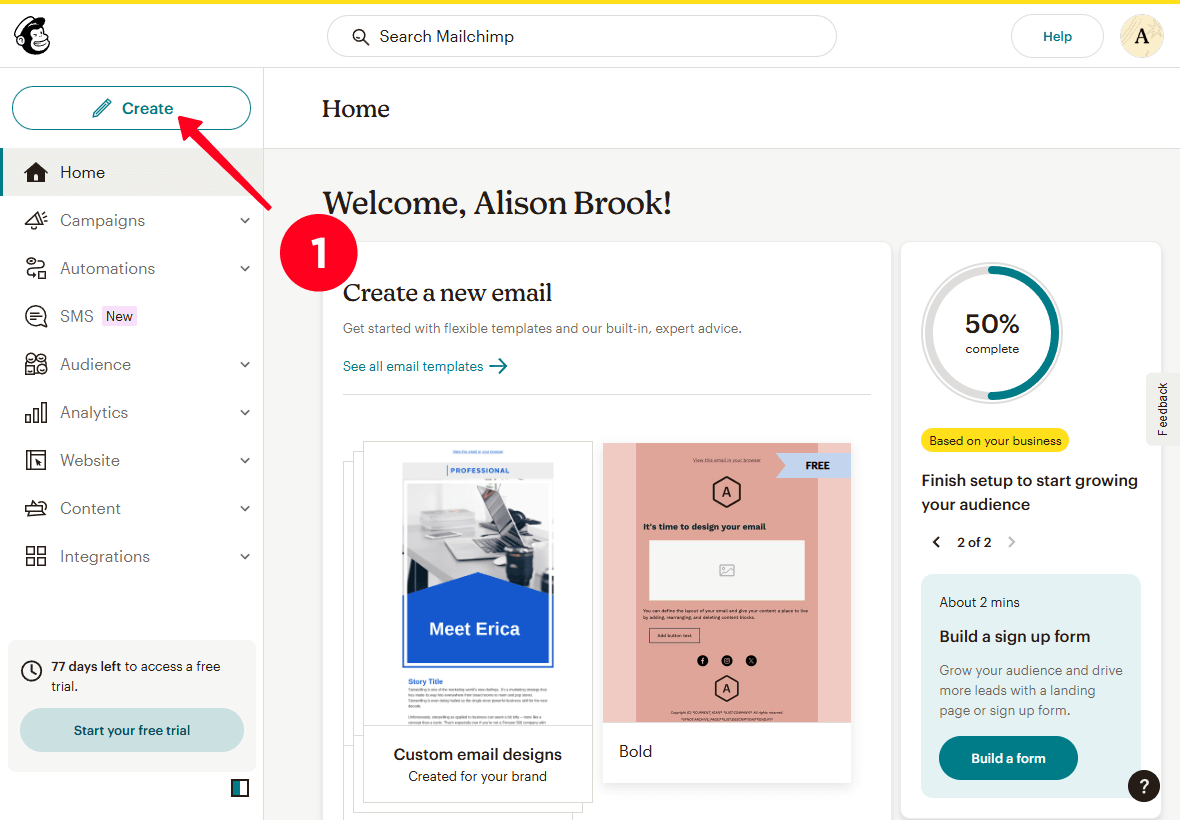
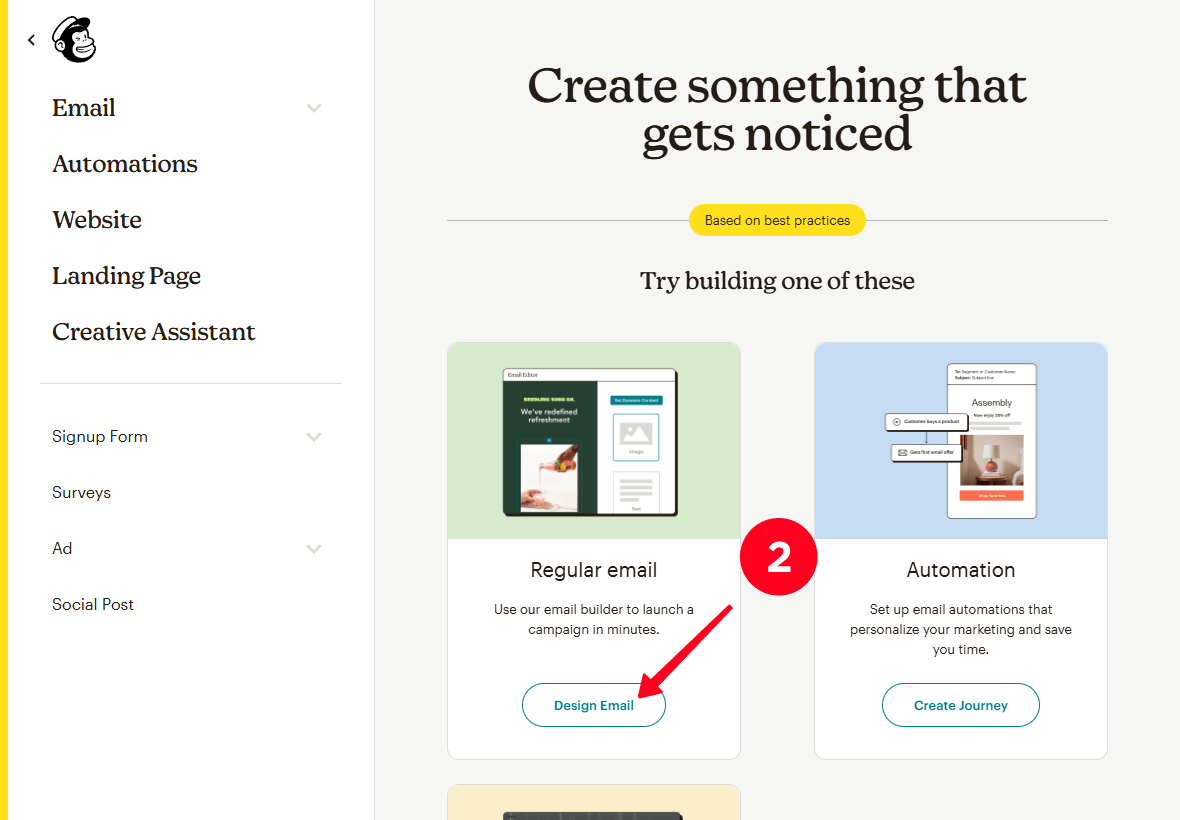
02. Click Design Email in the Regular email field.
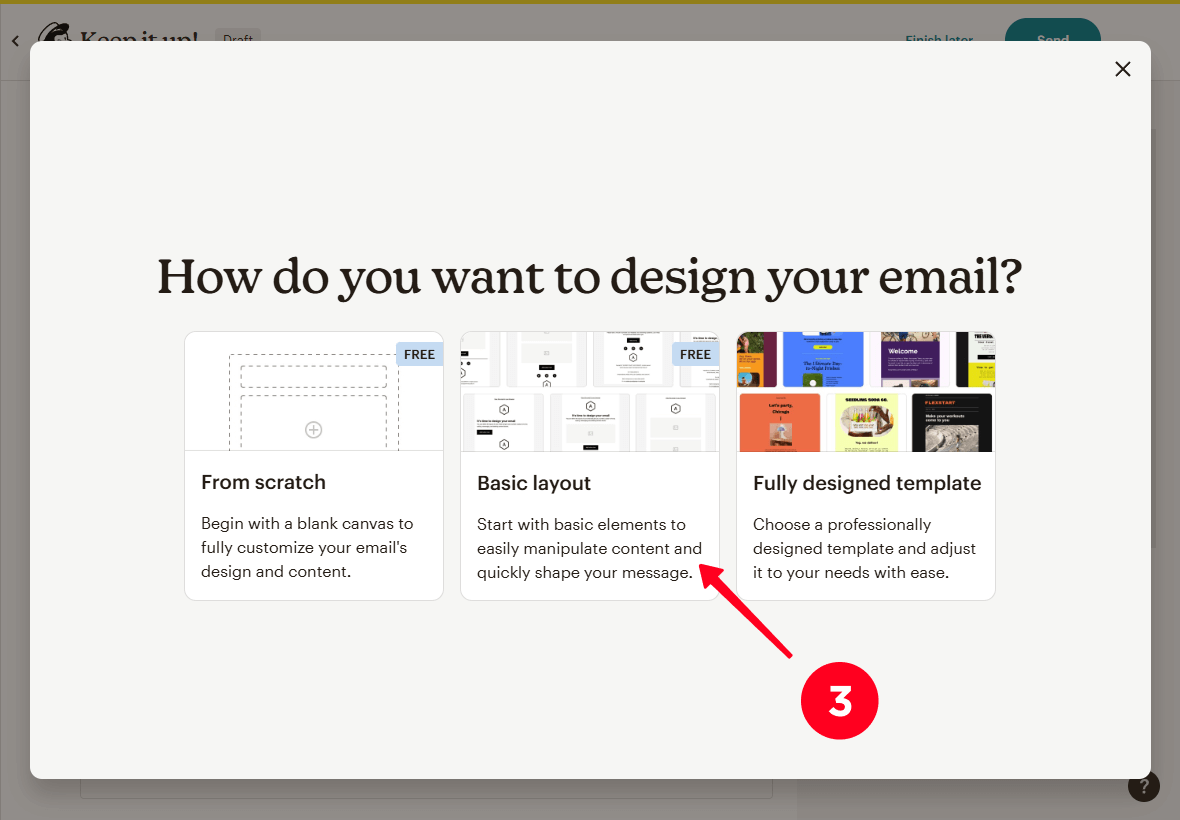
03. Choose the template completeness or create an email from scratch. We’ve chosen the Basic layout.
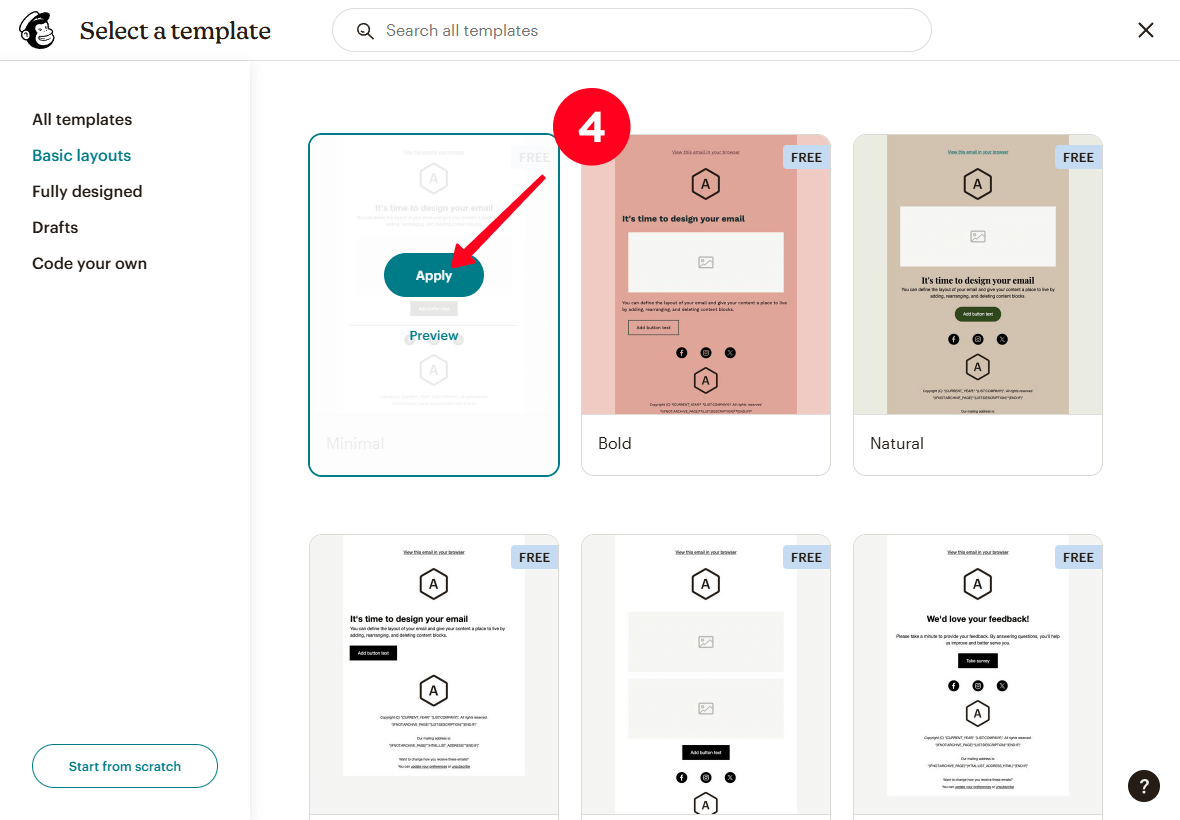
04. Select a template from the list, hover over the template, and click Apply. We’ve decided to use the Minimal template.
Great, you’ve opened the email editor. Below we’ll explain how to customize:
- A logo.
- Text.
- An image.
- A button.
- Social media links.
- Background.
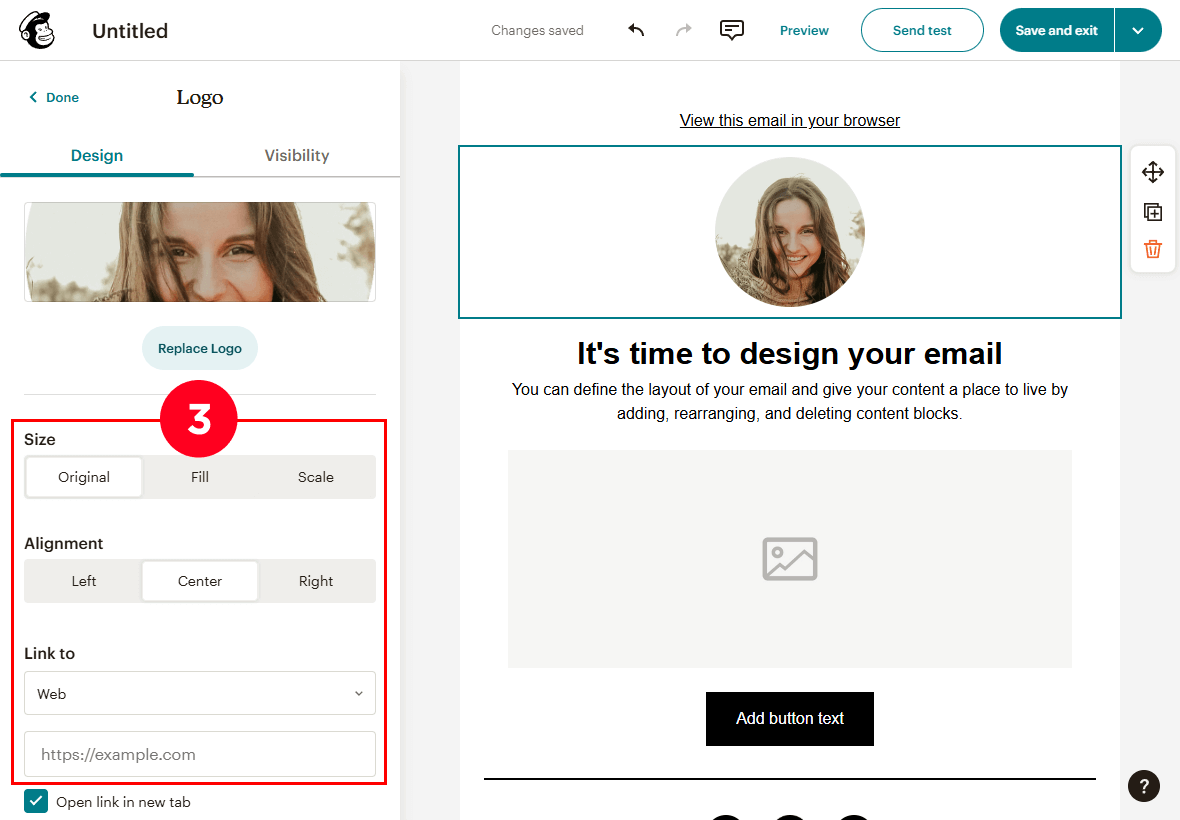
Let’s start with a logo. For this, you can use your business logo or your photo.
To set set it up:
01. Click on the logo to open the logo settings.
02. Click Set logo to upload an image.
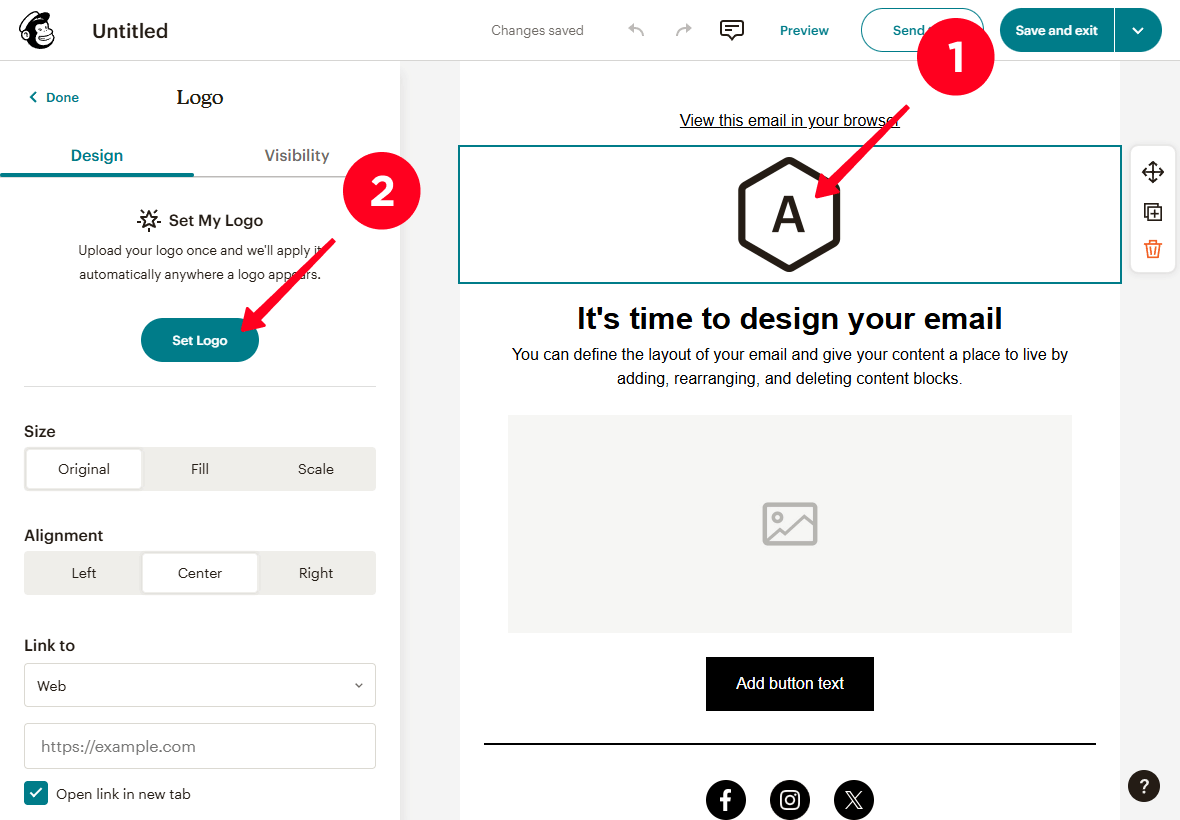
03. Optionally, adjust parameters like Size, Alignment, Link to, and others.
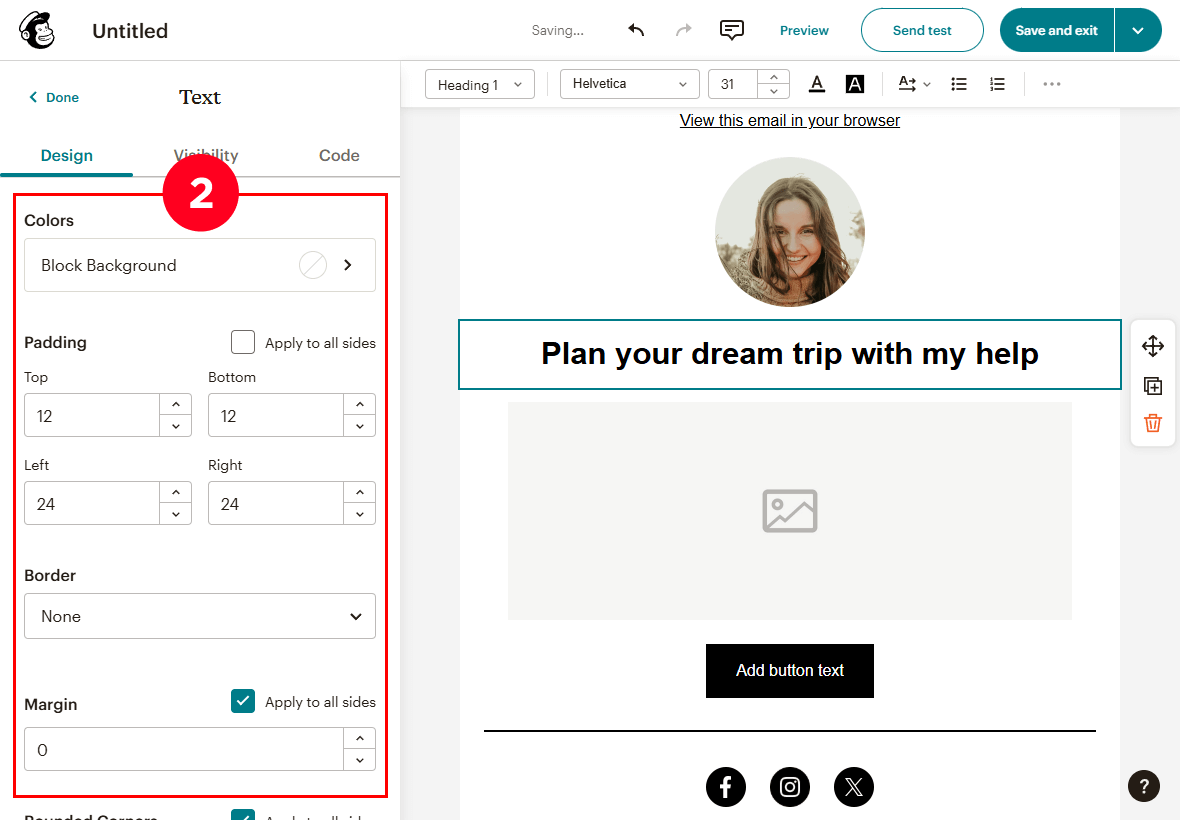
Now, let’s edit the text in your email.
01. Delete the placeholder text and write your own headline and email body.
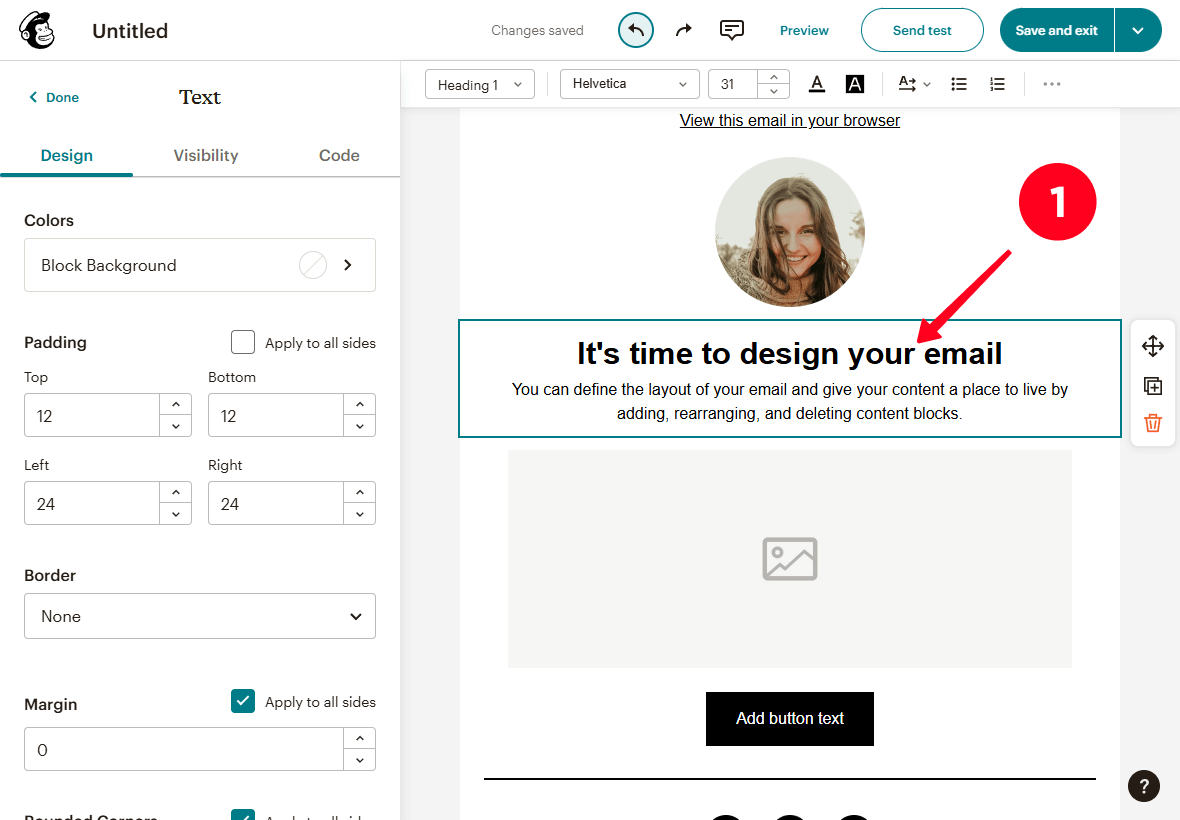
02. Optionally, adjust text settings such as Colors, Padding, Border, Margin, and more in the settings menu on the left. You can also modify Header Type, Font, Text Size, Text Color, and other parameters in the top settings menu.
Now for the image. Here’s how to add it:
01. Click on the image to open its settings.
02. Click Add to open the drop-down menu to add an image.
03. Select Upload Image and upload an image from your device.
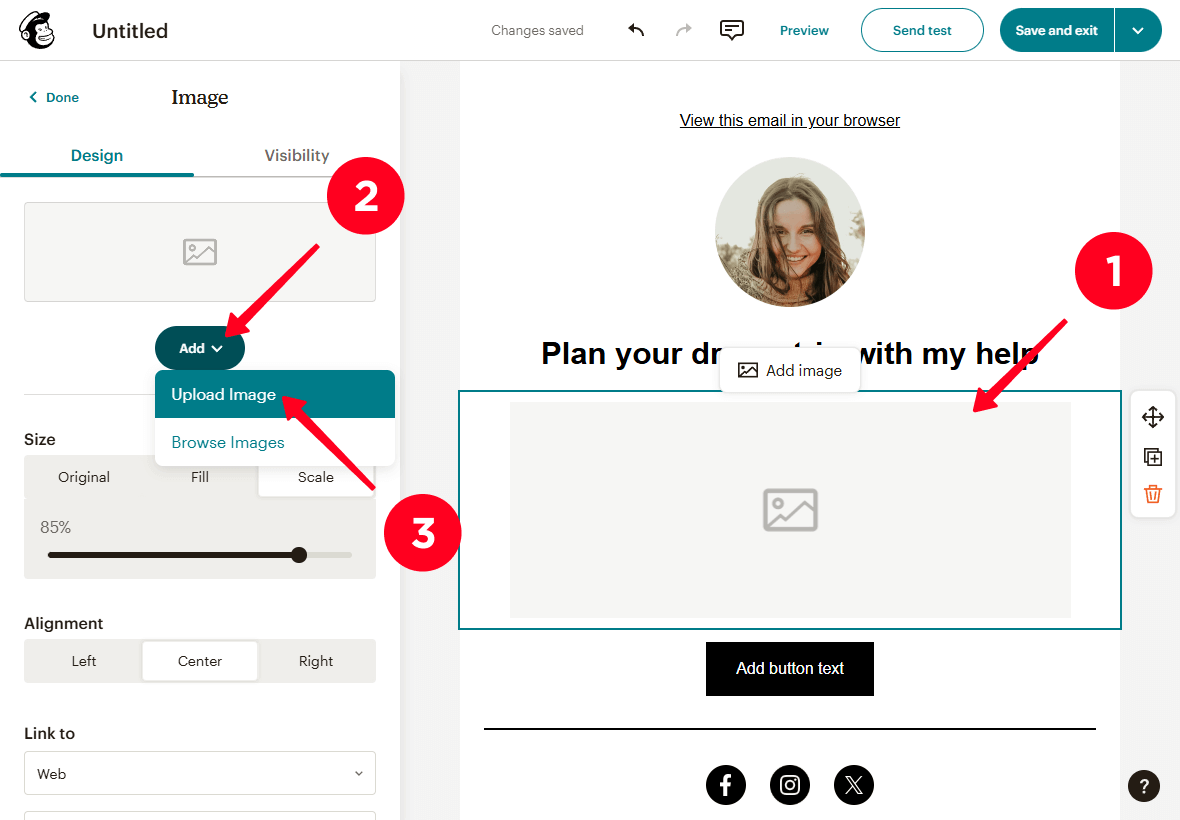
04. Optionally, adjust image settings such as Size, Alignment, Link to, and others.

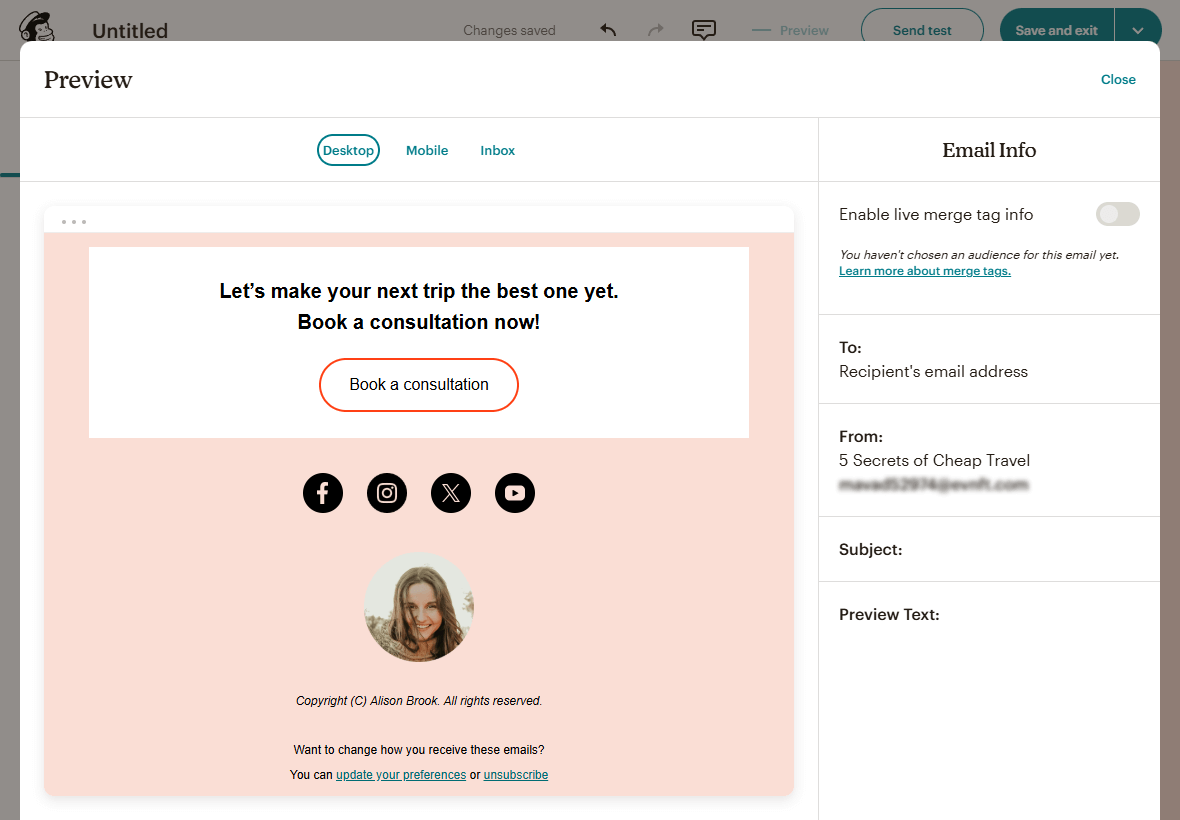
Let’s set up the key feature — the button to book a consultation.
01. Click the button and update the text.
02. In the drop-down menu under the Link to field, choose how you want subscribers to book a consultation. For example, if you select Phone, your subscribers will be able to call you.
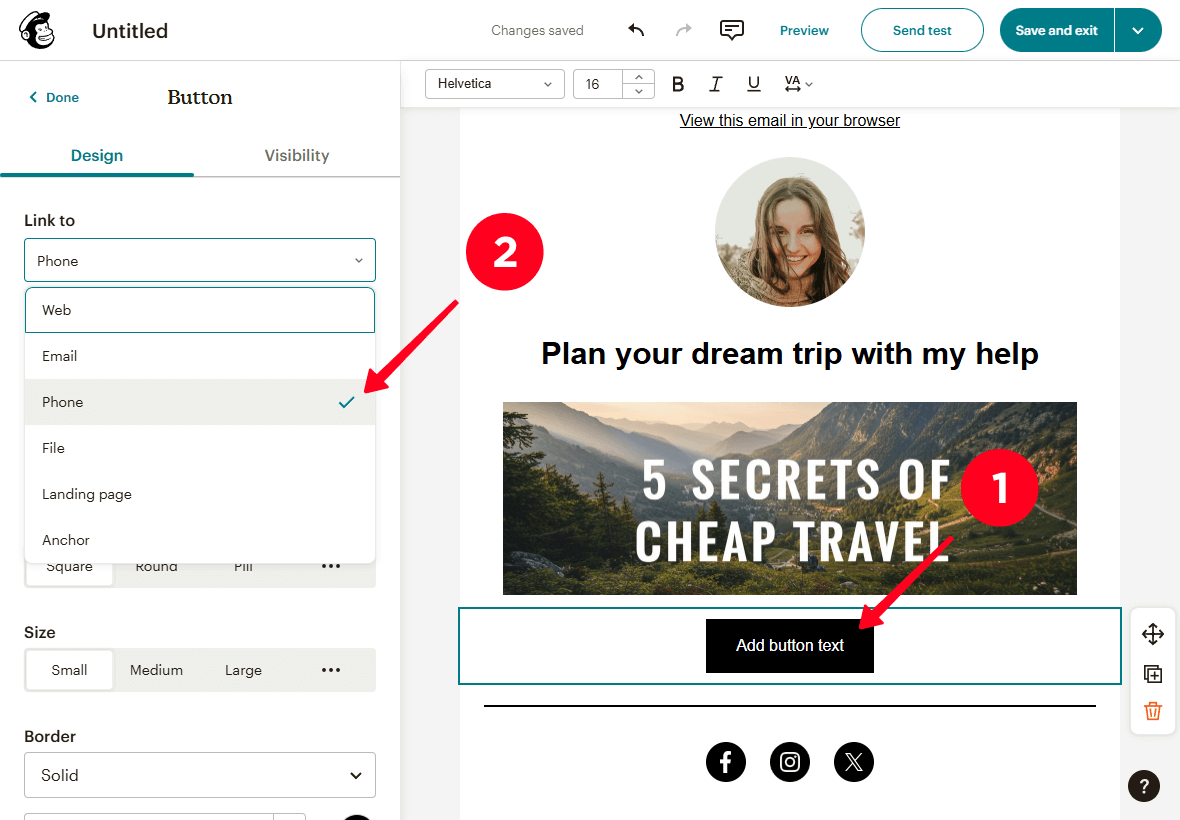
03. Enter your phone number.
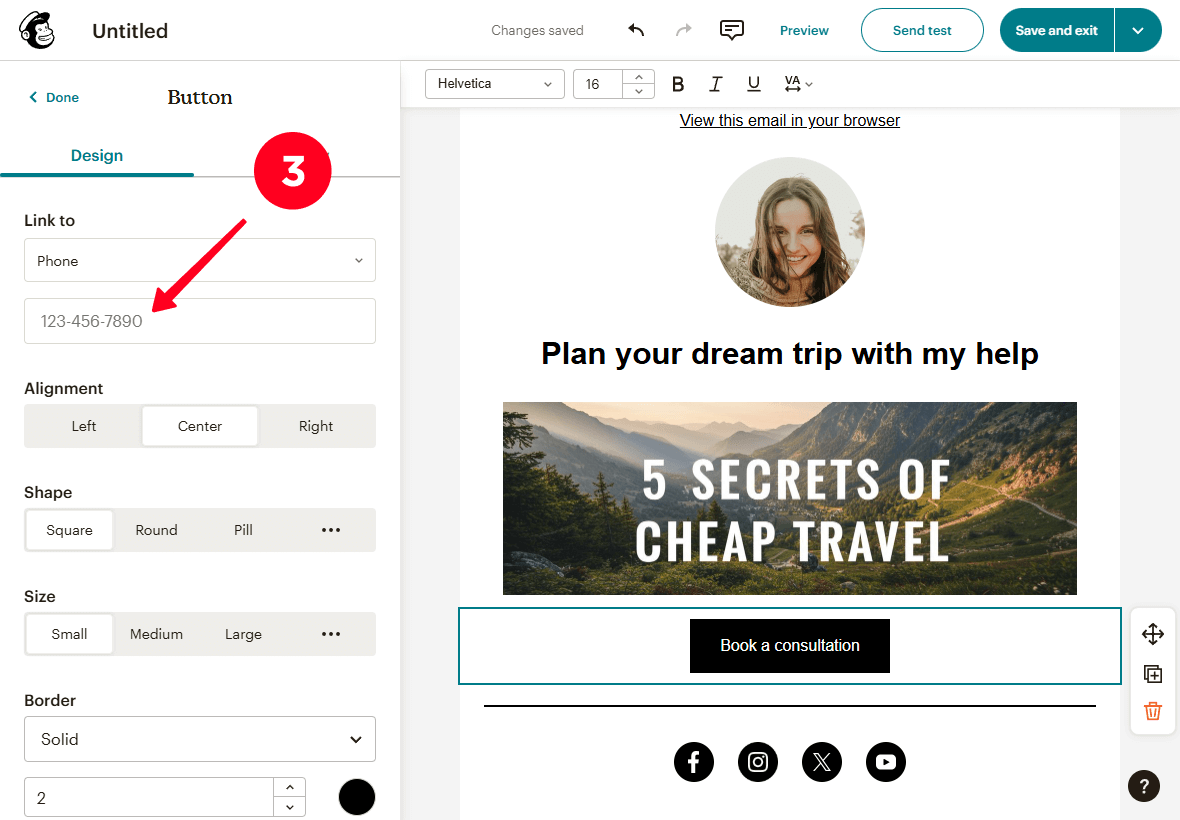
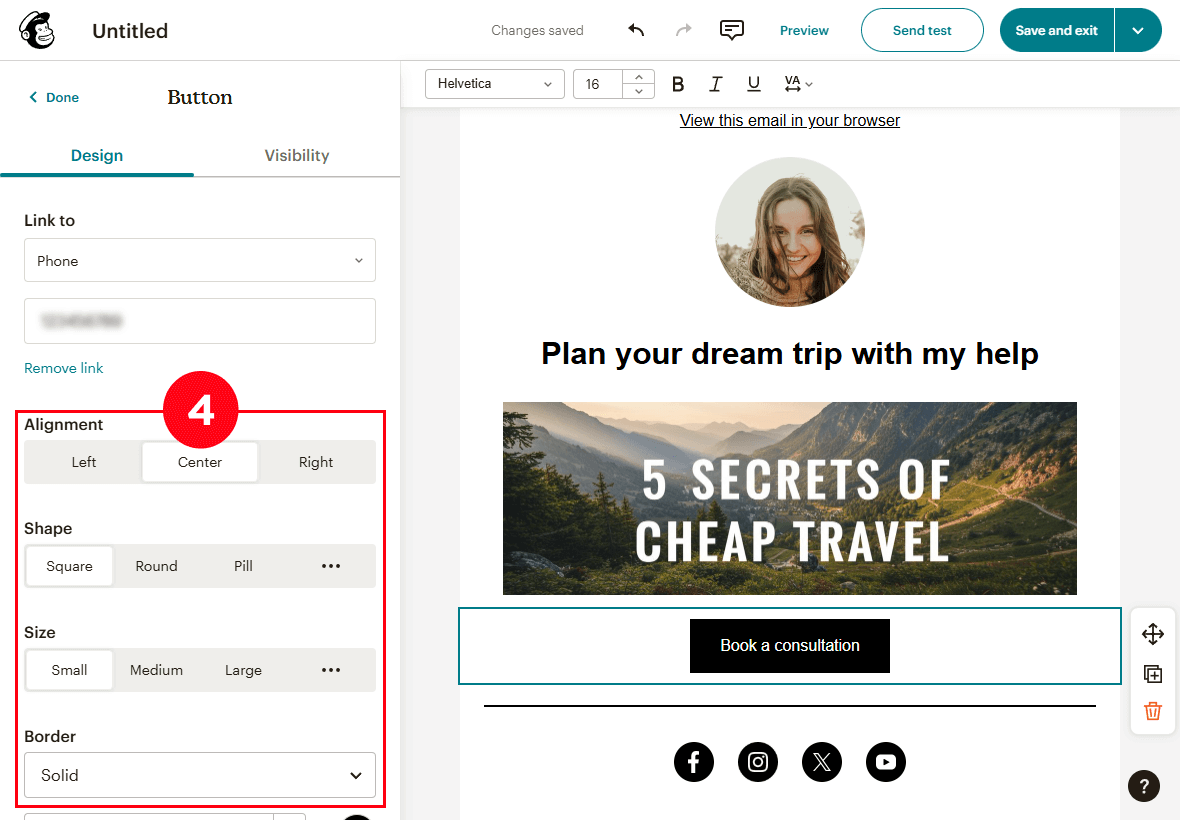
04. Optionally, customize button settings such as Alignment, Shape, Size, Border, and others.
At the end of the email, you can also add links to your social media profiles. This way, subscribers can quickly access them to ask you a question or learn more about you.
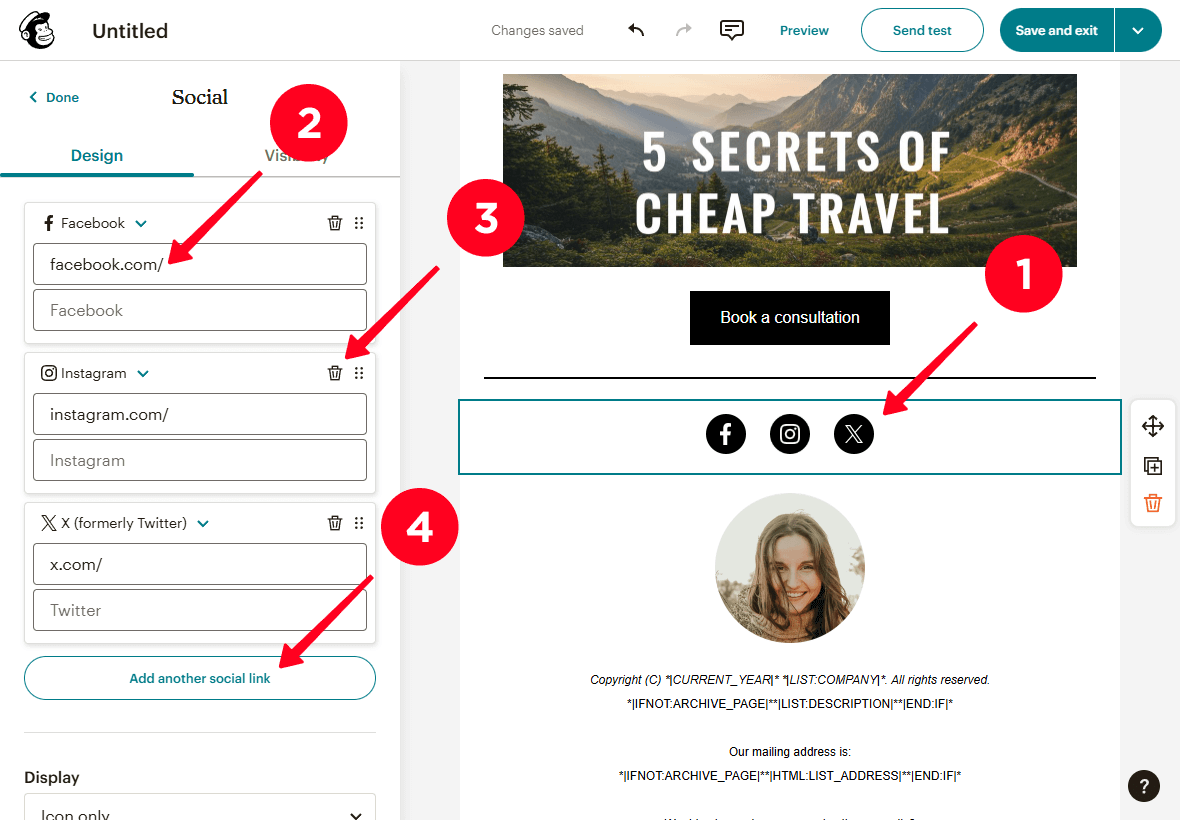
Here’s how to set up social media links:
01. Click on the social media icons to edit them.
02. Add your social media usernames in the corresponding fields.
03. Click the trash icon to delete an unnecessary social media link.
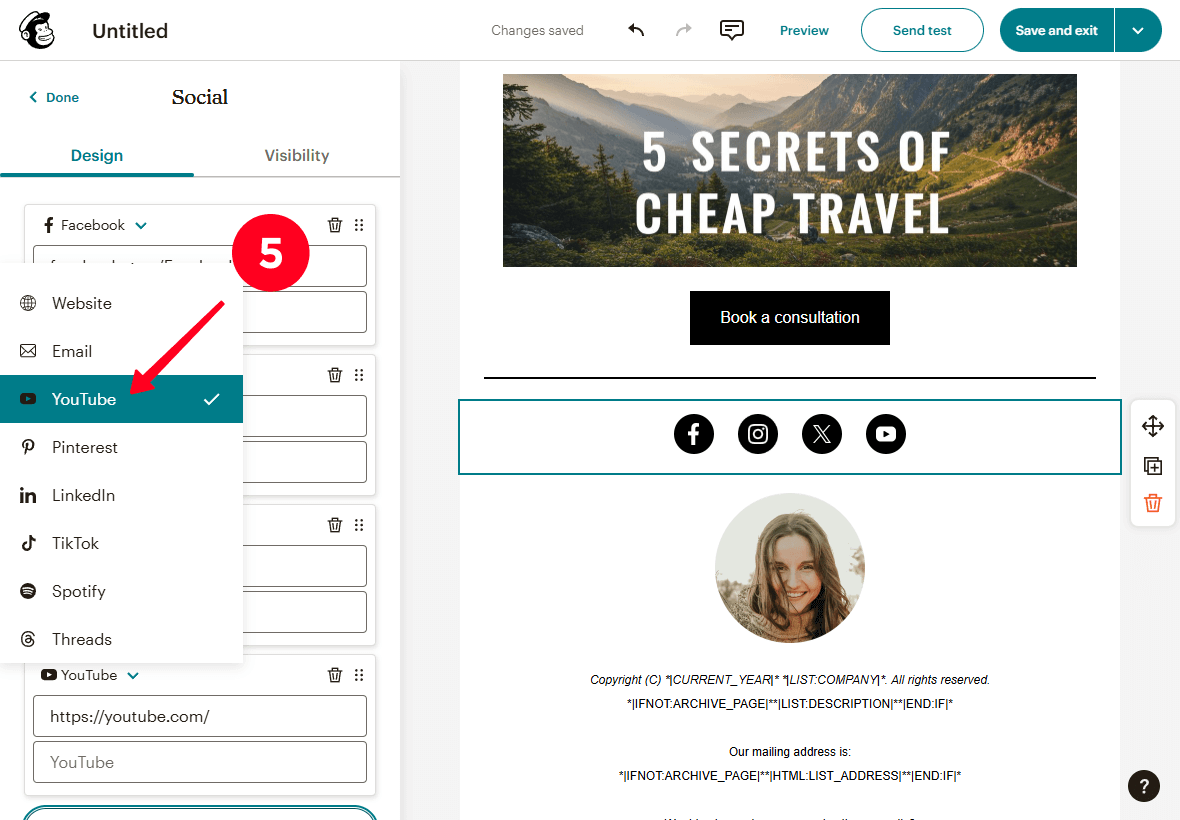
04. Click Add another social link to add another social media profile.
05. From the drop-down menu in the added field, select the desired social media. For example, YouTube.
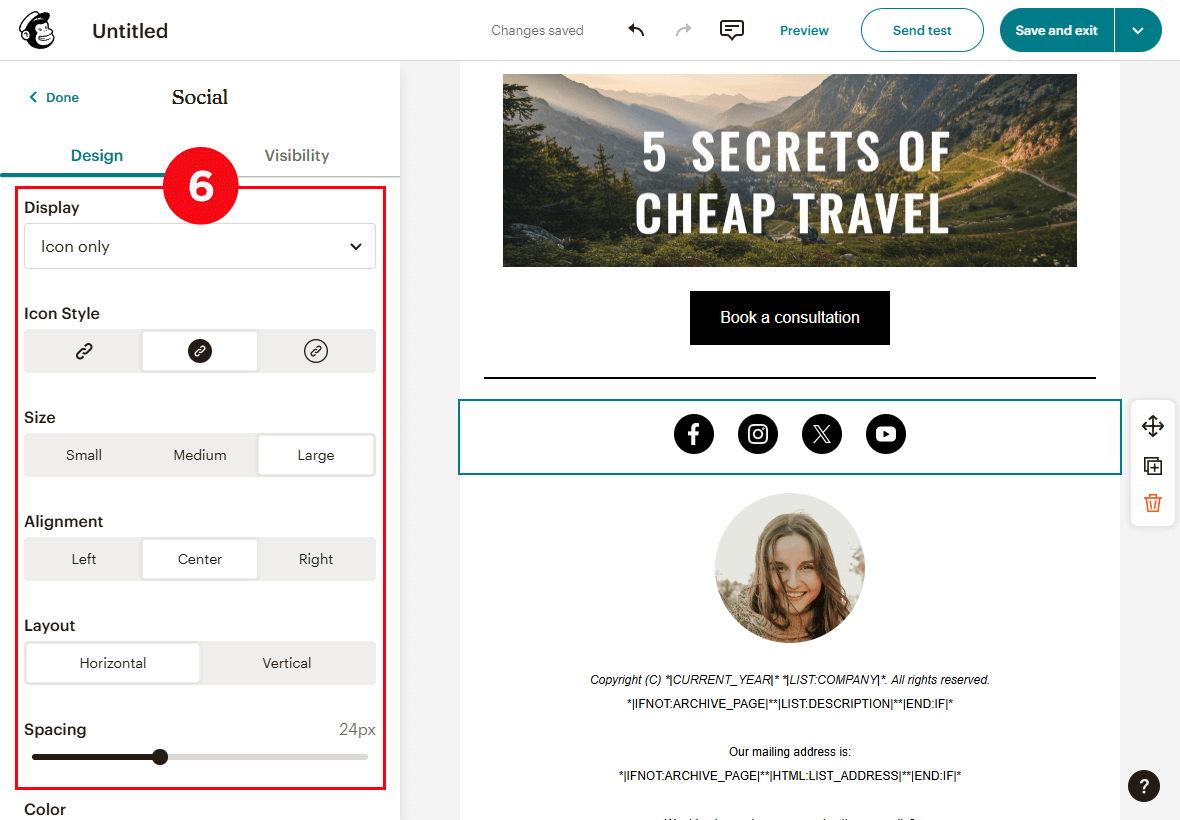
06. Optionally, adjust settings such as Display, Icon Style, Size, Alignment, Layout, Spacing, etc.
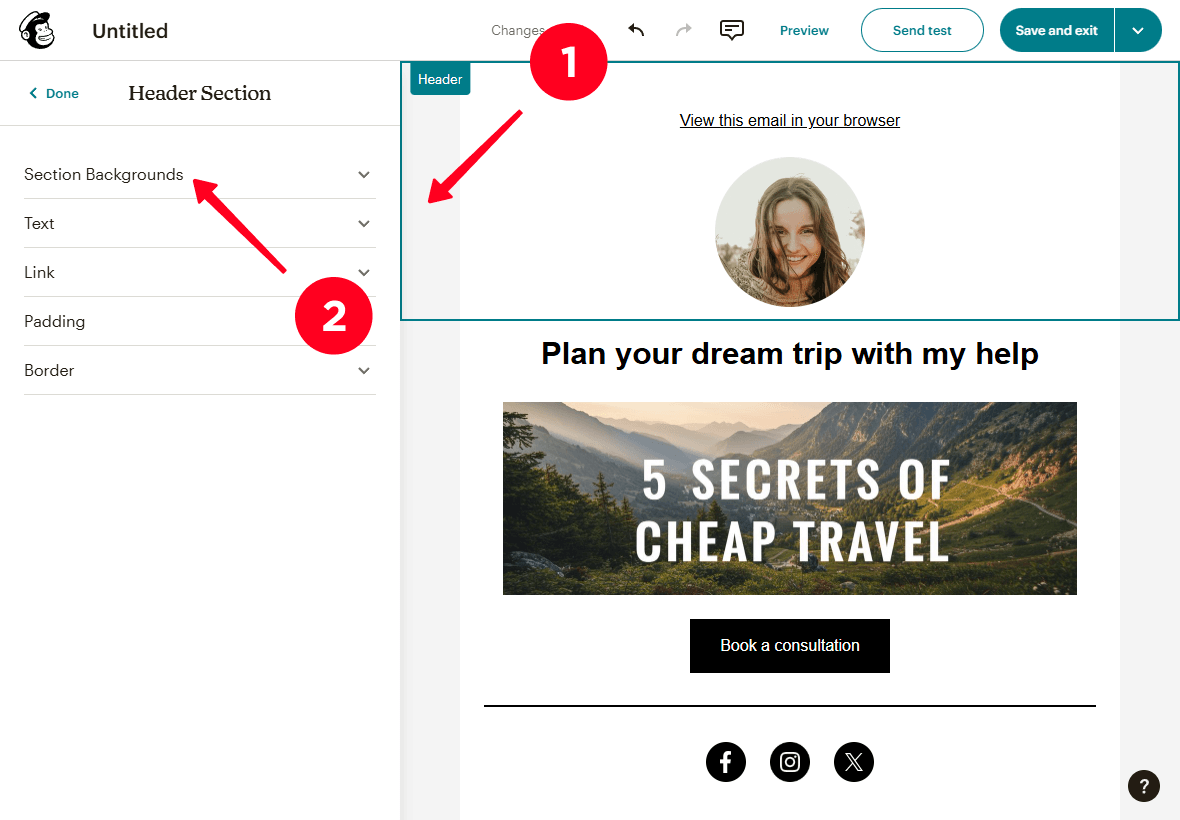
With Mailchimp, you can customize the background of sections like a header, a body, and a footer.
To change the section background:
01. Double-click the background area beside the email content.
02. Open the Section Backgrounds dropdown menu.
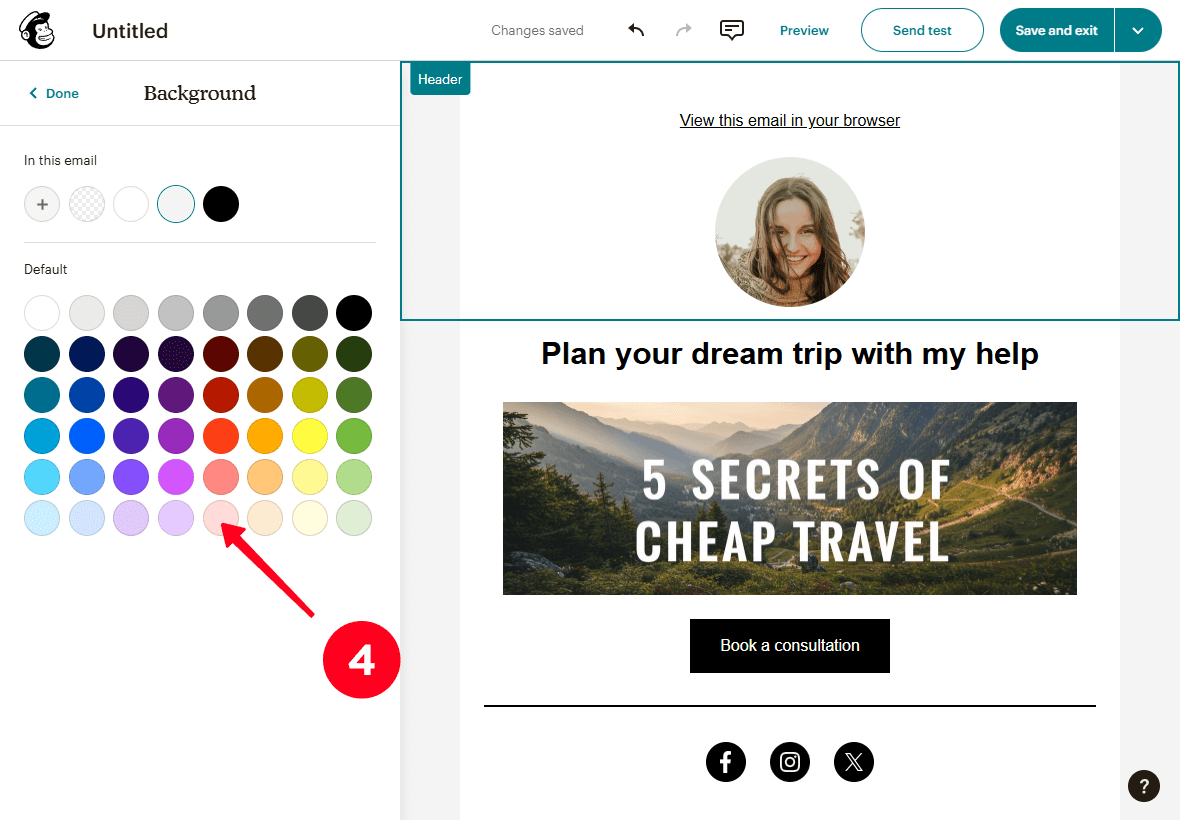
03. Click the color icon in the Background color field.
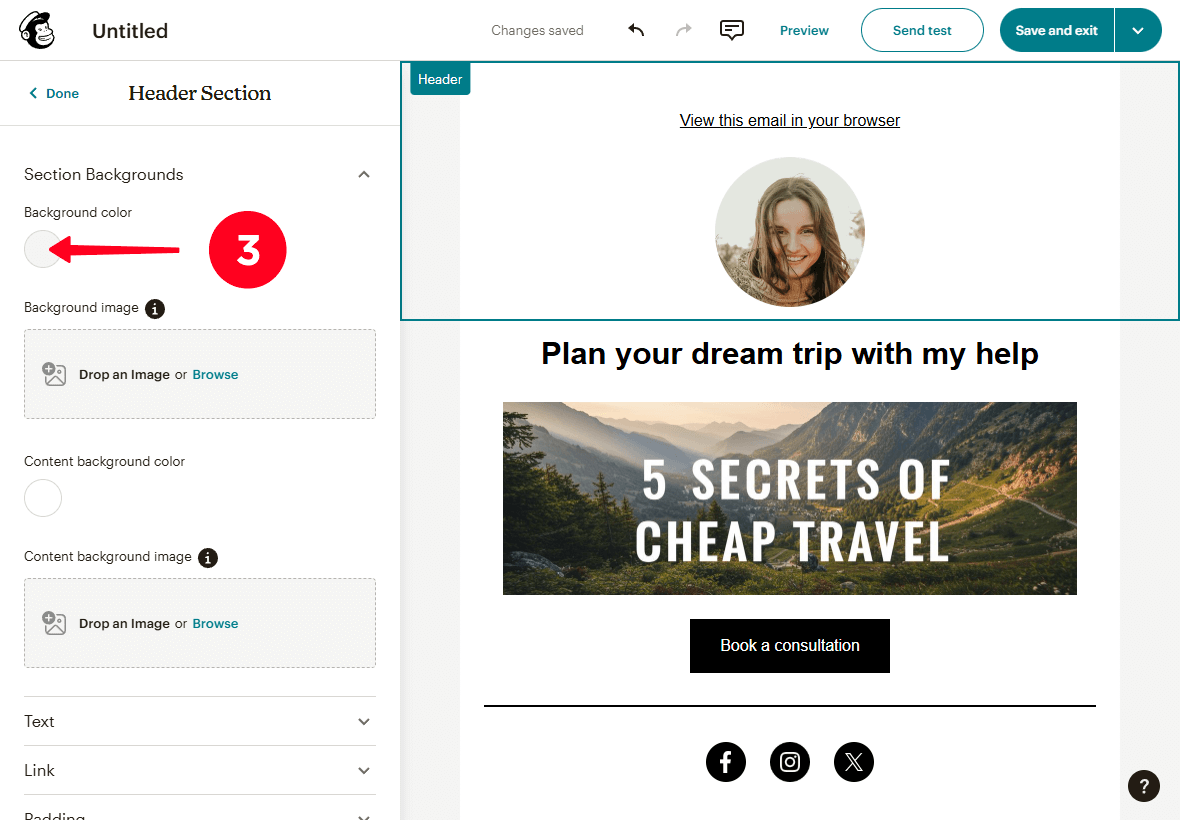
04. Choose a fill color for the background.
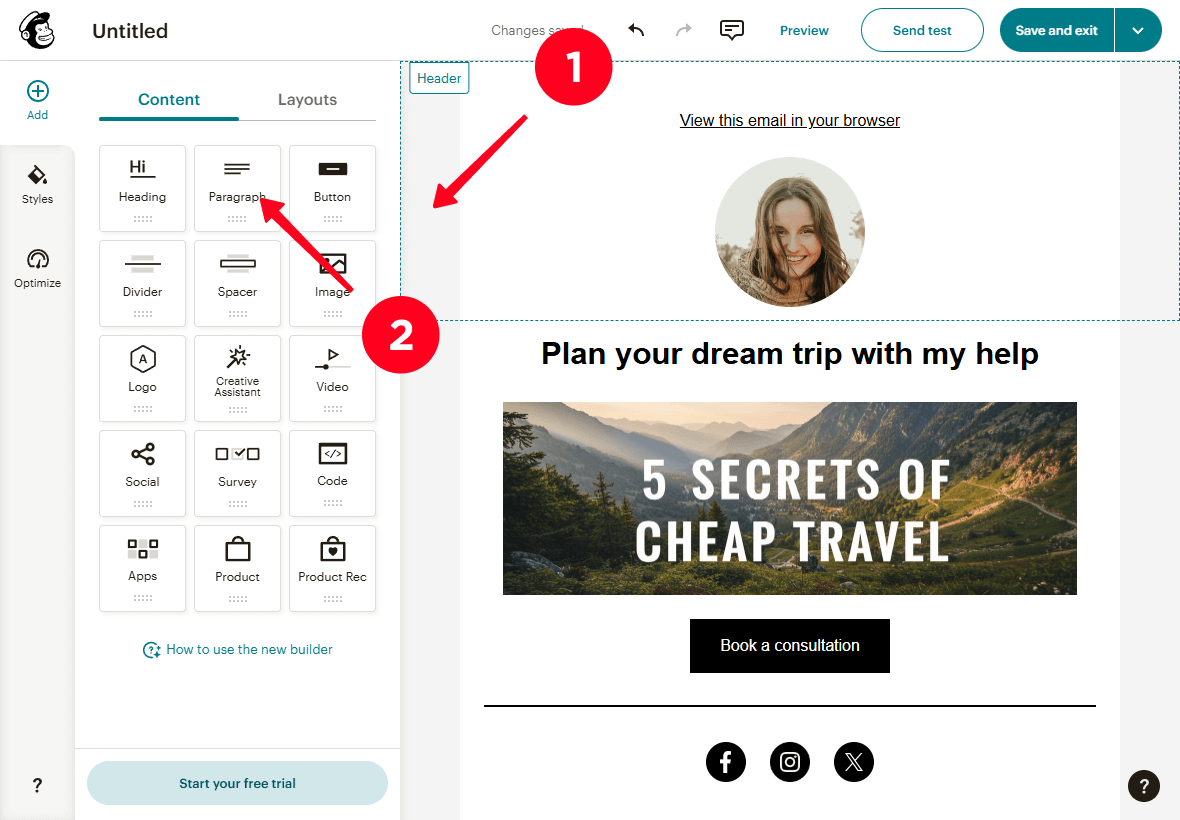
If you feel that the Mailchimp template has too few or too many elements, you can delete or add blocks.
To add a new block:
01. Click on the background next to the email content.
02. Select a block and drag it to the desired position in the email. We've selected the Paragraph block.
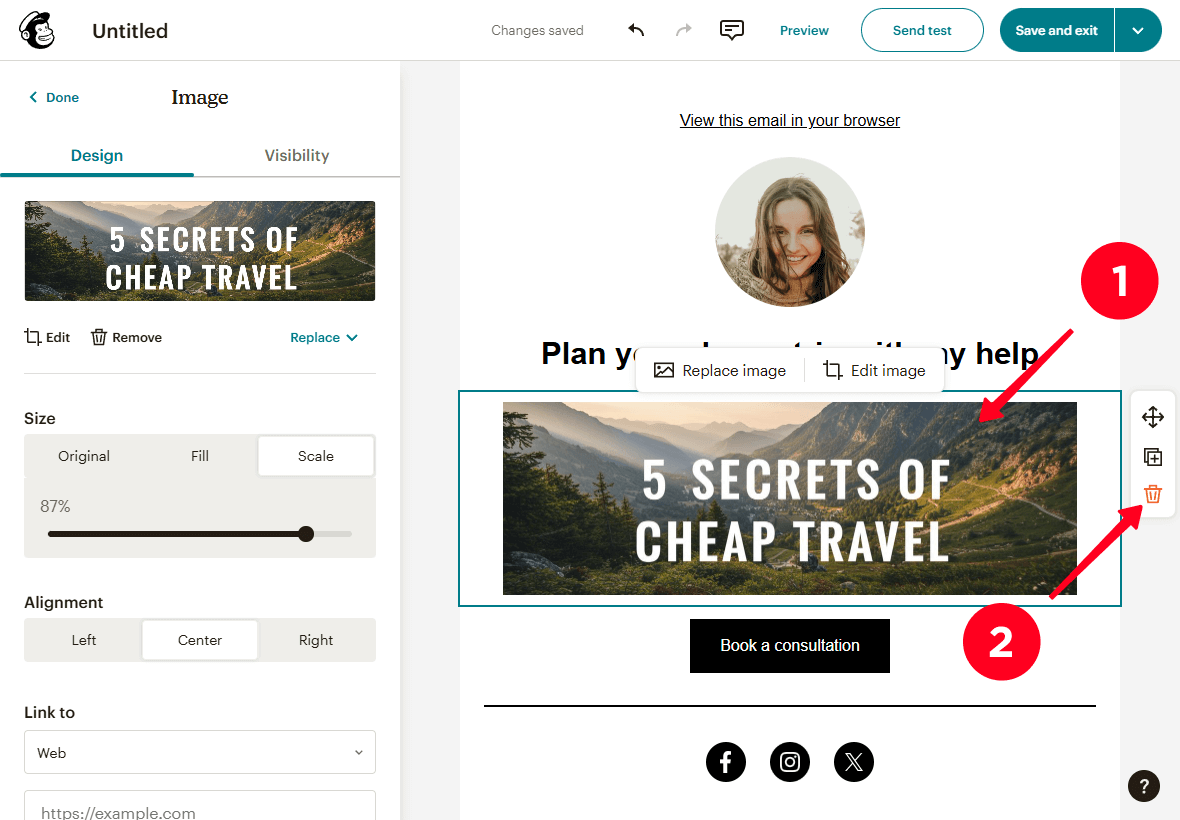
To delete a block:
01. Click on the block.
02. Click the trash icon.
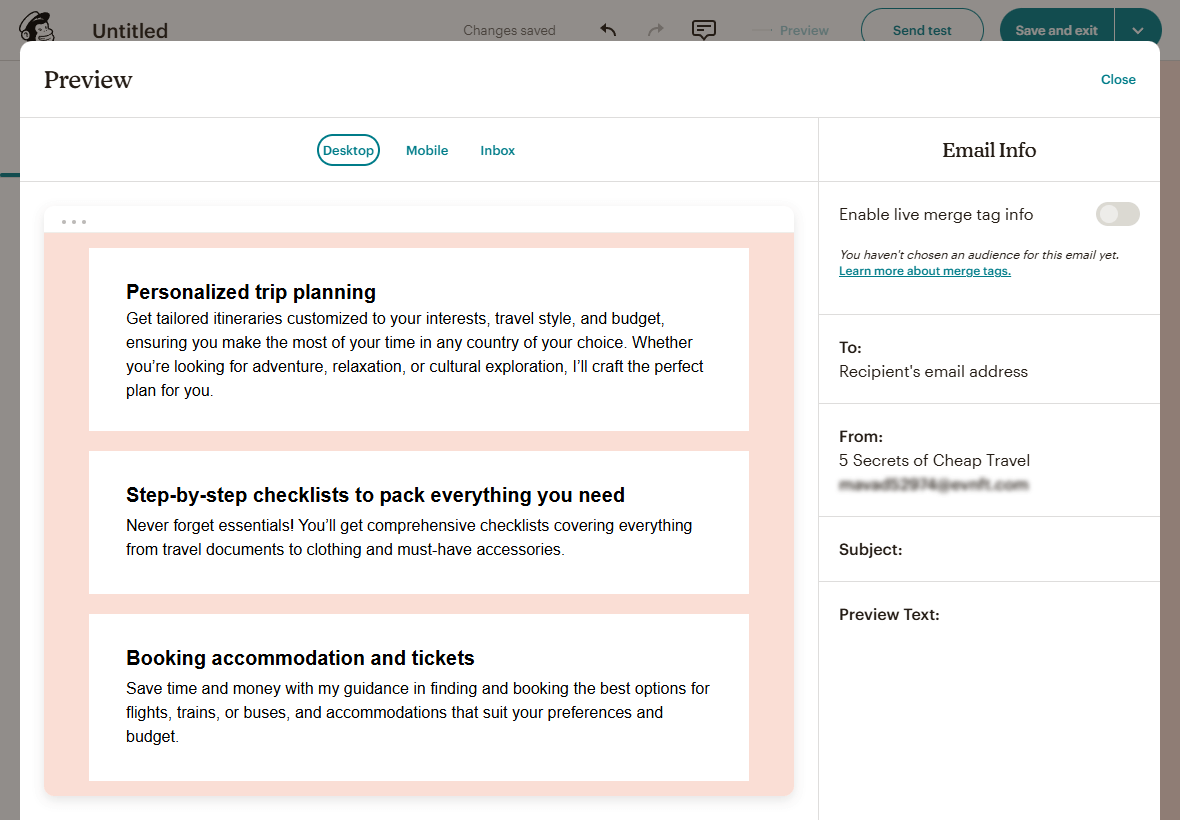
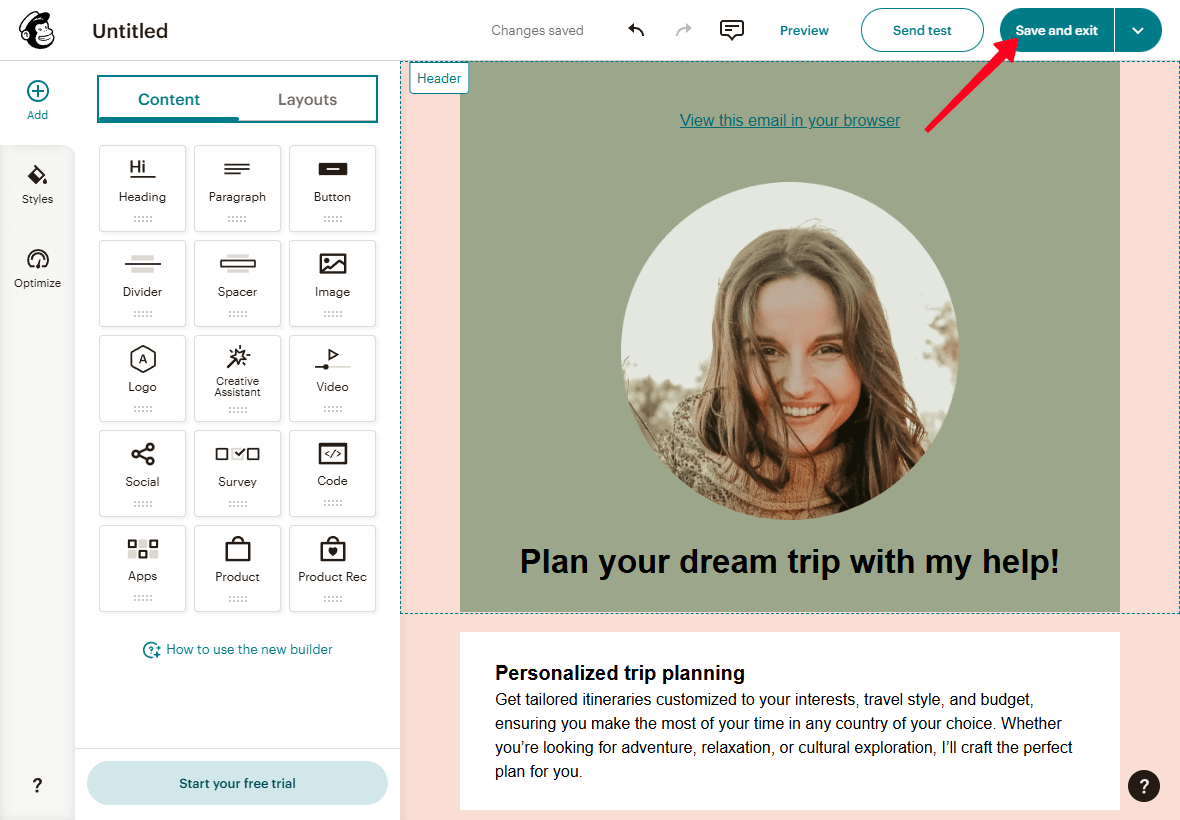
Following the instructions, we’ve created the email design below.
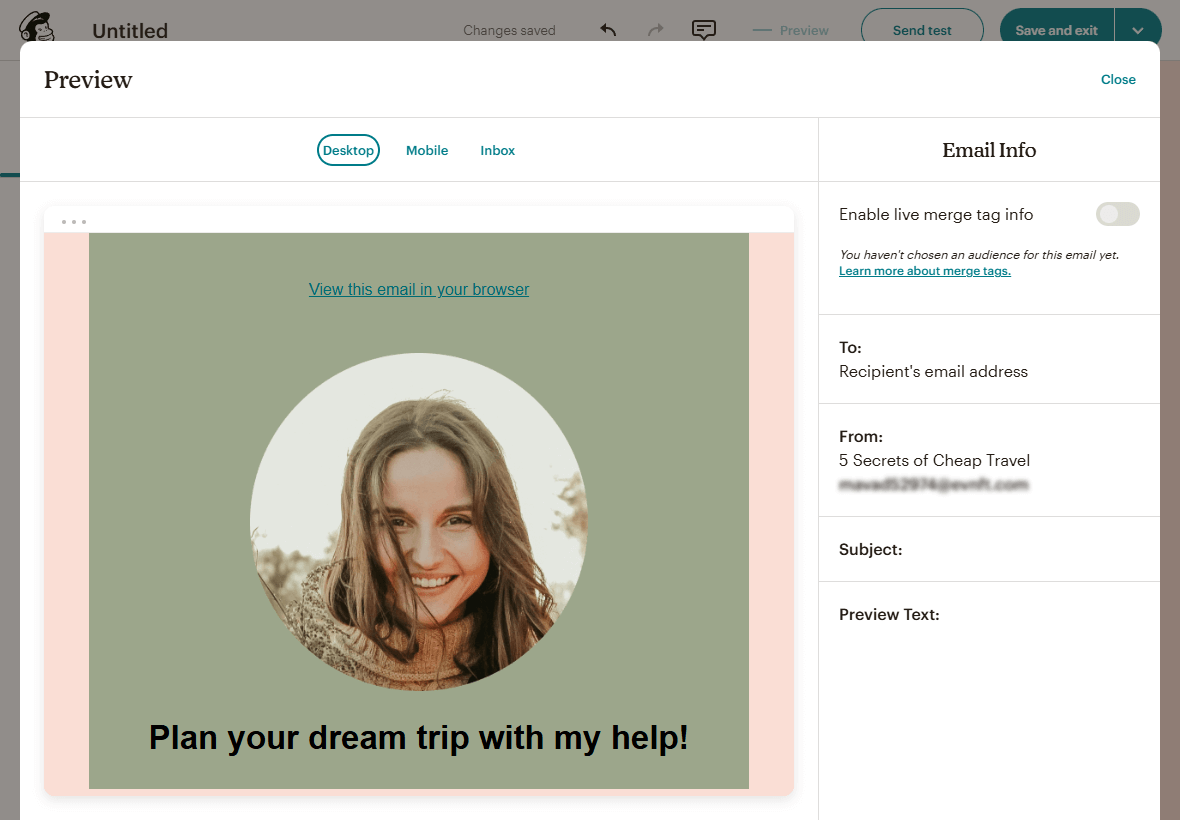
After setting up the design, save your email by clicking Save and exit.
You have now completed the email design.
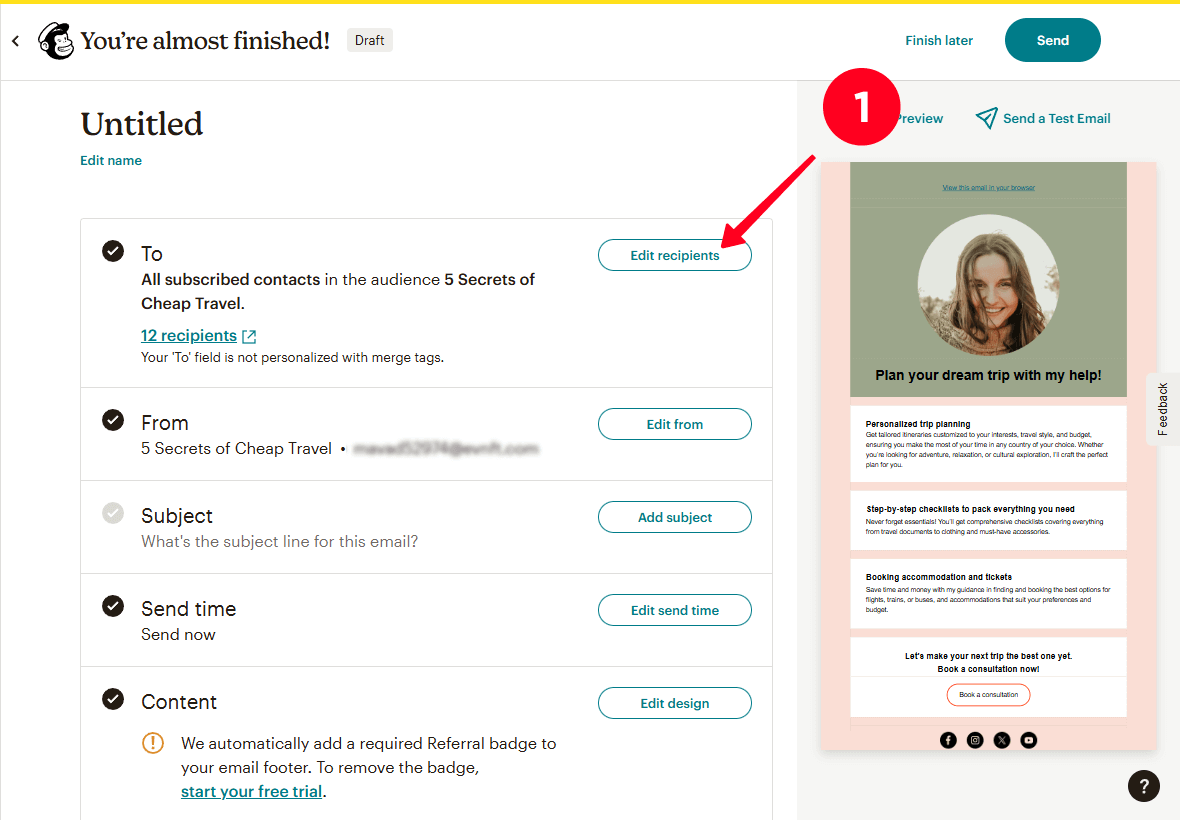
After clicking Save and exit, you’ll be redirected to the email-sending settings page. Here, you need to configure who you want to send the email to, the sender (i.e., your email address), the subject, and the email’s sending time.
Follow the steps below to set up email delivery.
01. In the To field, click the Edit recipients button to open the menu for selecting contacts to send the email to.
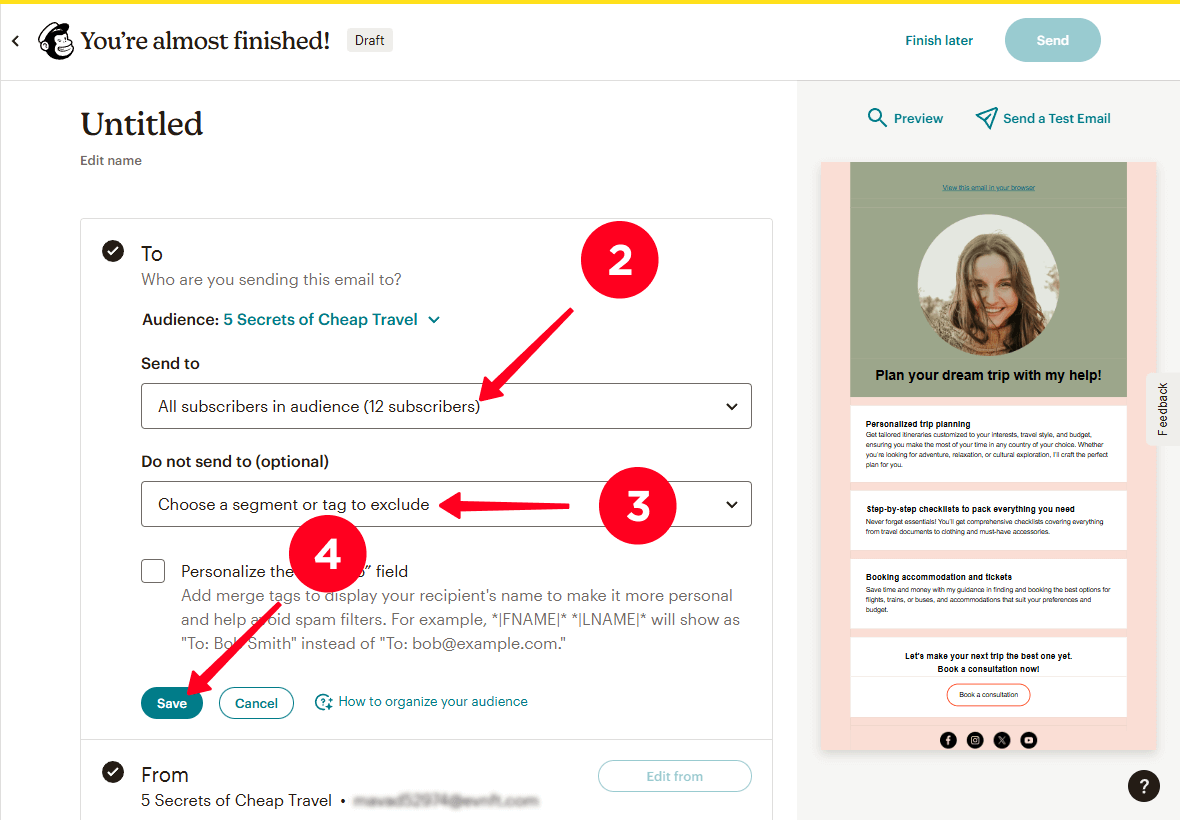
02. In the dropdown menu in the Send to field, select the audience, segment, contacts with specific tags, or pre-built segments to whom you want to send the email.
03. Optionally, in the dropdown menu in the Do not send to (optional) field, select the segments or contacts with specific tags that you want to exclude from the email list.
04. Click Save.
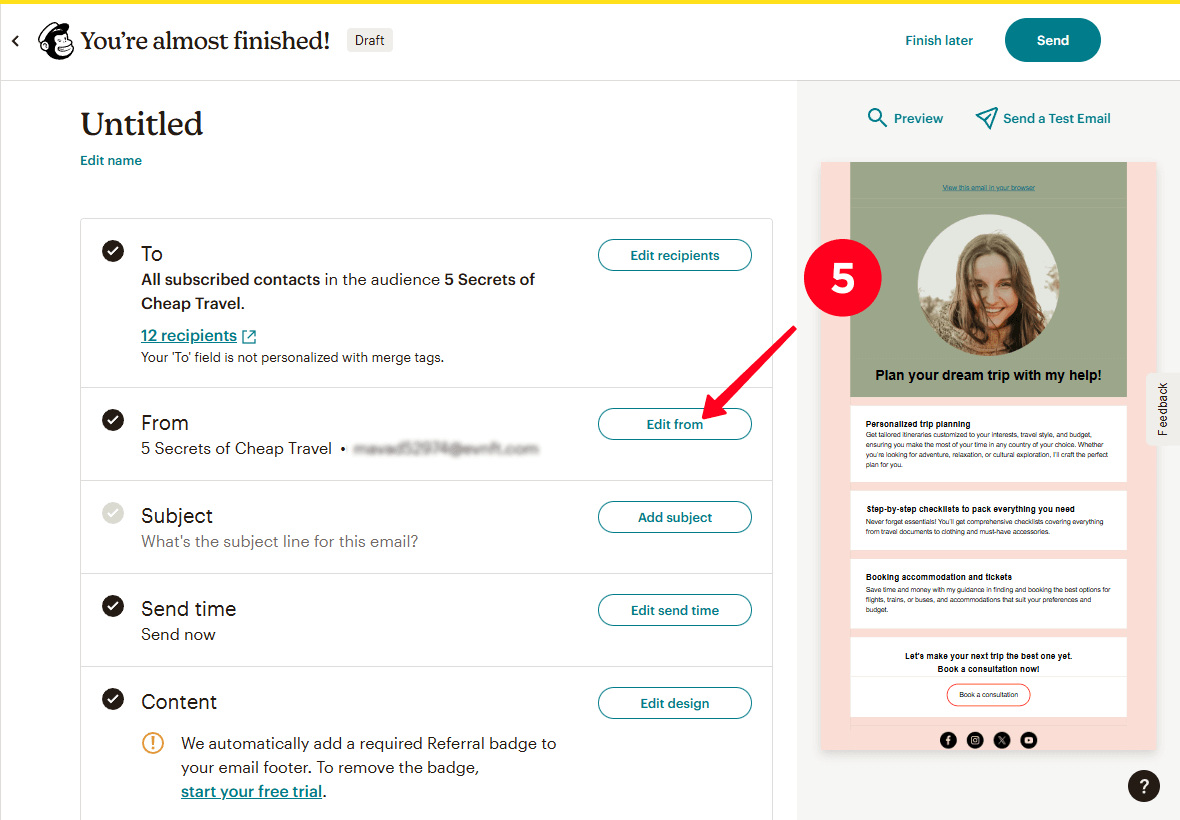
05. In the From field, click the Edit from button to select the email address you want to use to send the email.
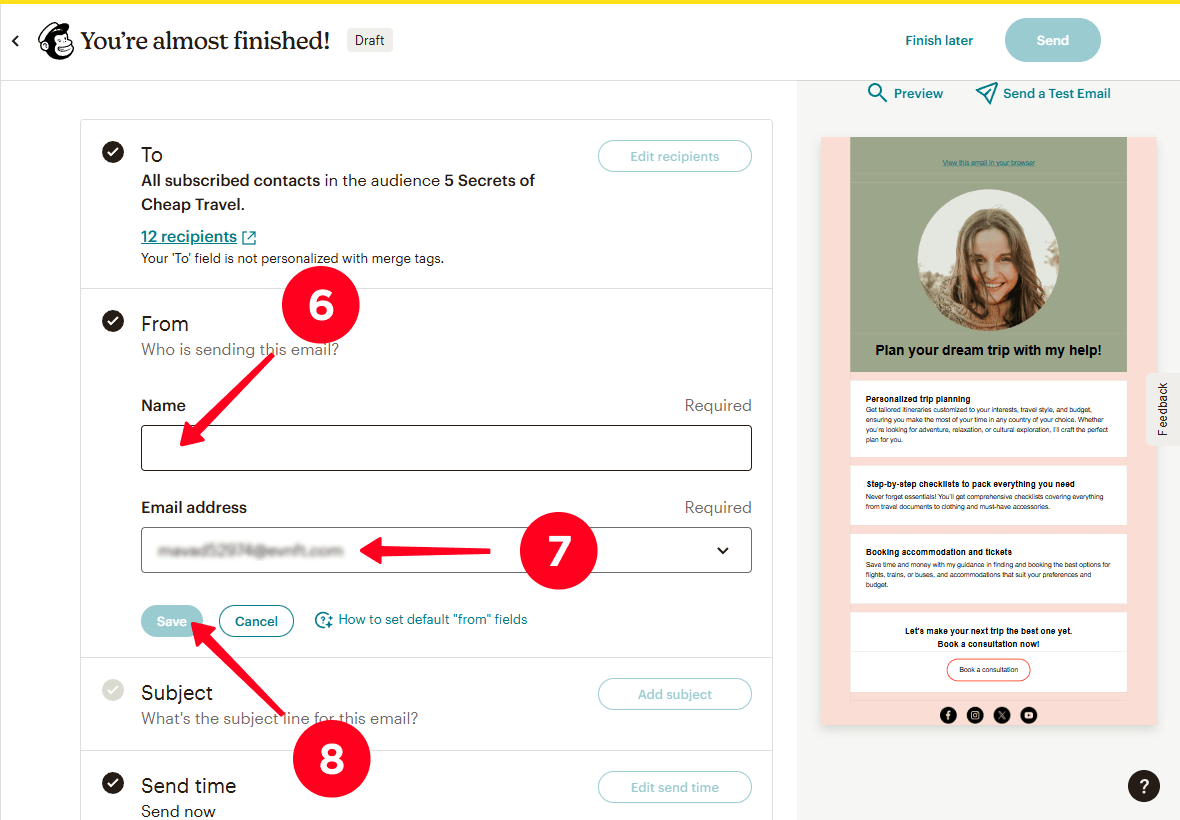
06. In the Name field, enter your name.
07. In the Email address field, in the dropdown menu, select the email address from which you want to send the email.
08. Click Save.
09. In the Subject field, click the Add subject button to enter the subject of your email.
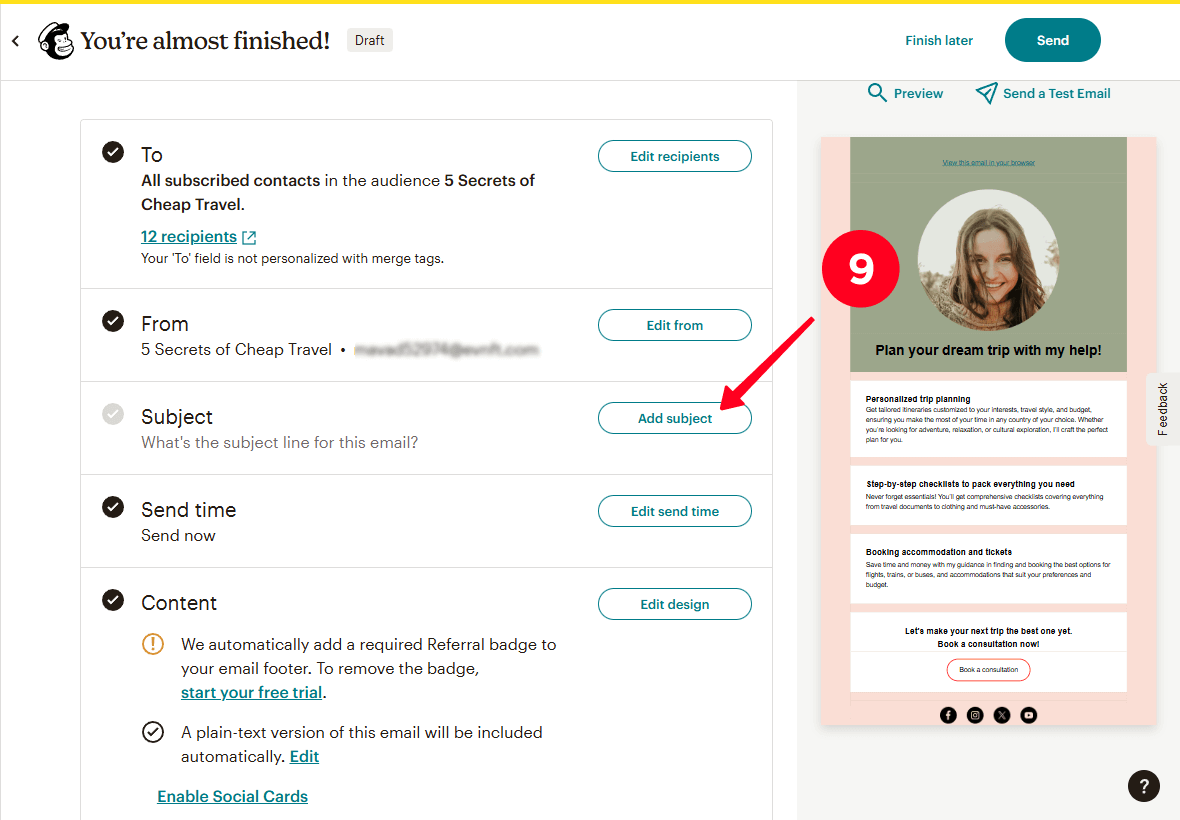
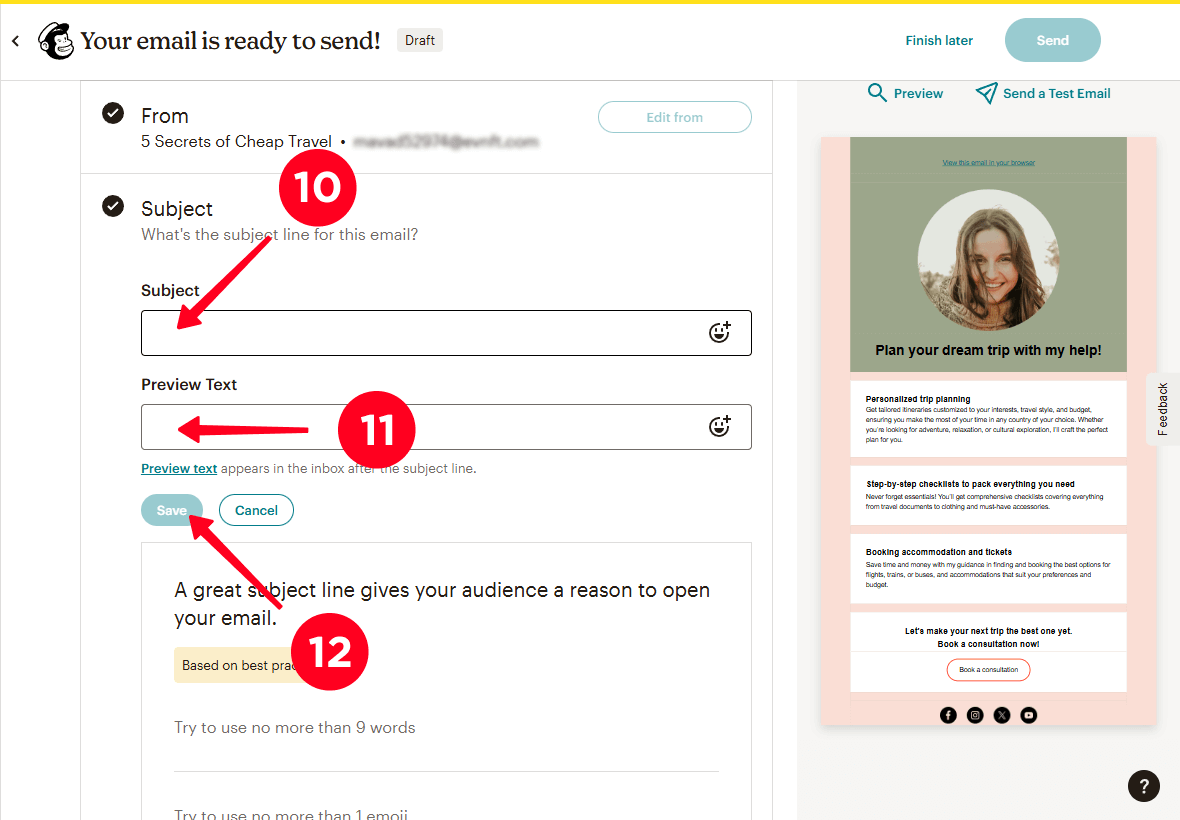
10. In the Subject field, type the subject of your email.
11. In the Preview text field, enter the text that will appear as the preview of your email in your subscribers’ inboxes.
12. Click Save.
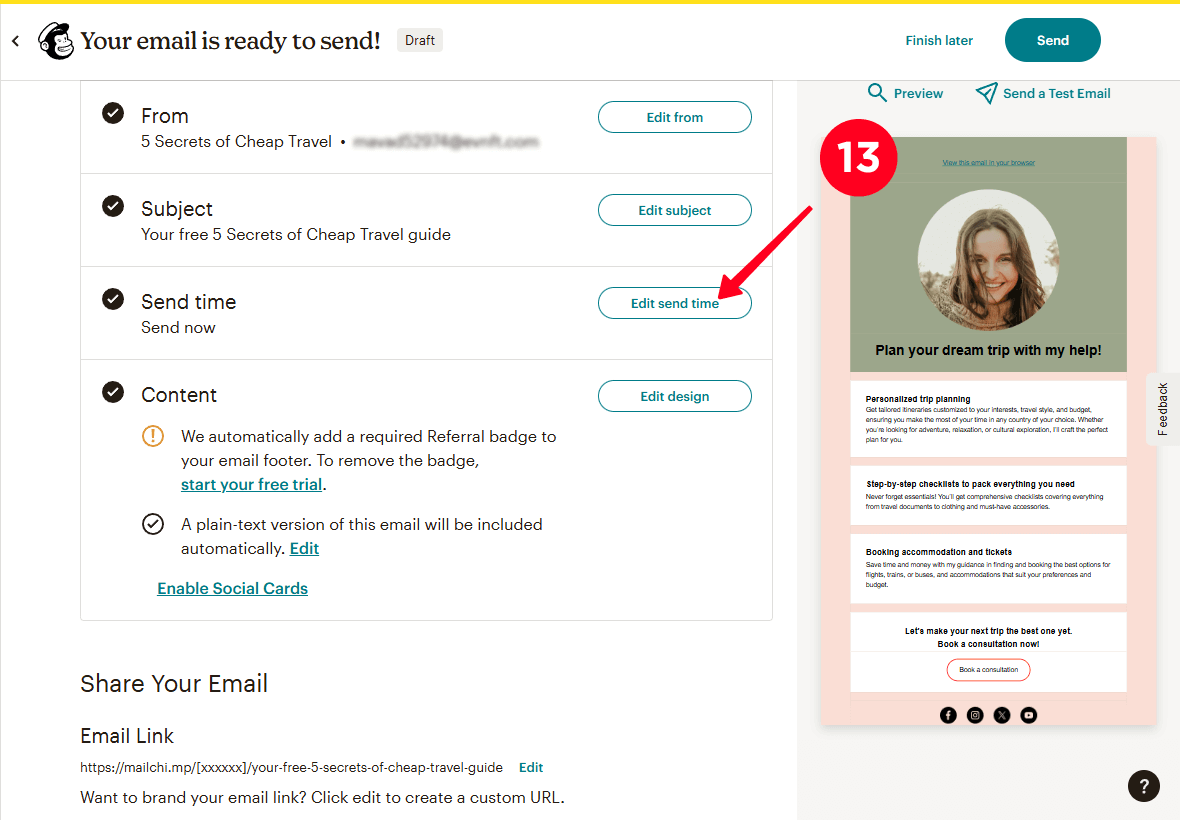
13. In the Send time field, click the Edit send time button to set up the time for sending your email.
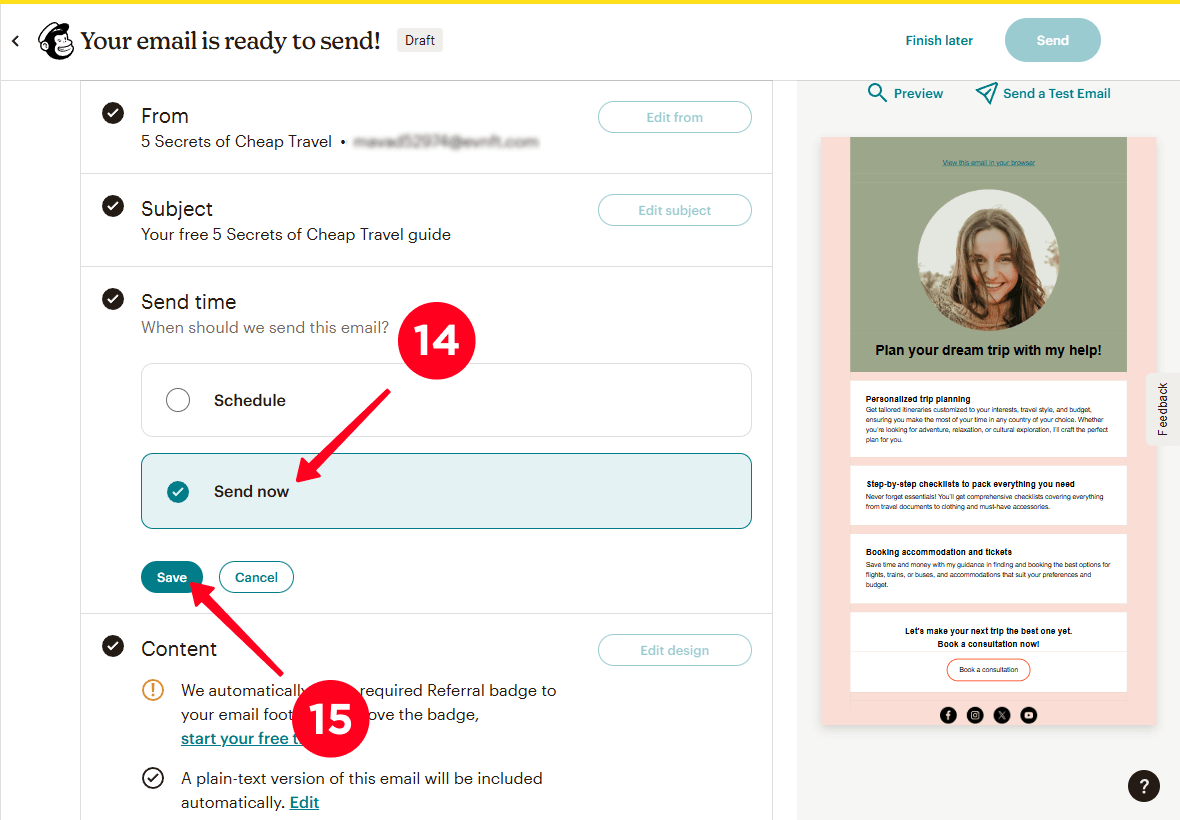
14. Select when you want to send the email: at a specific time or immediately. We’ve selected Send now.
15. Click Save.
16. Click Send to send your email.
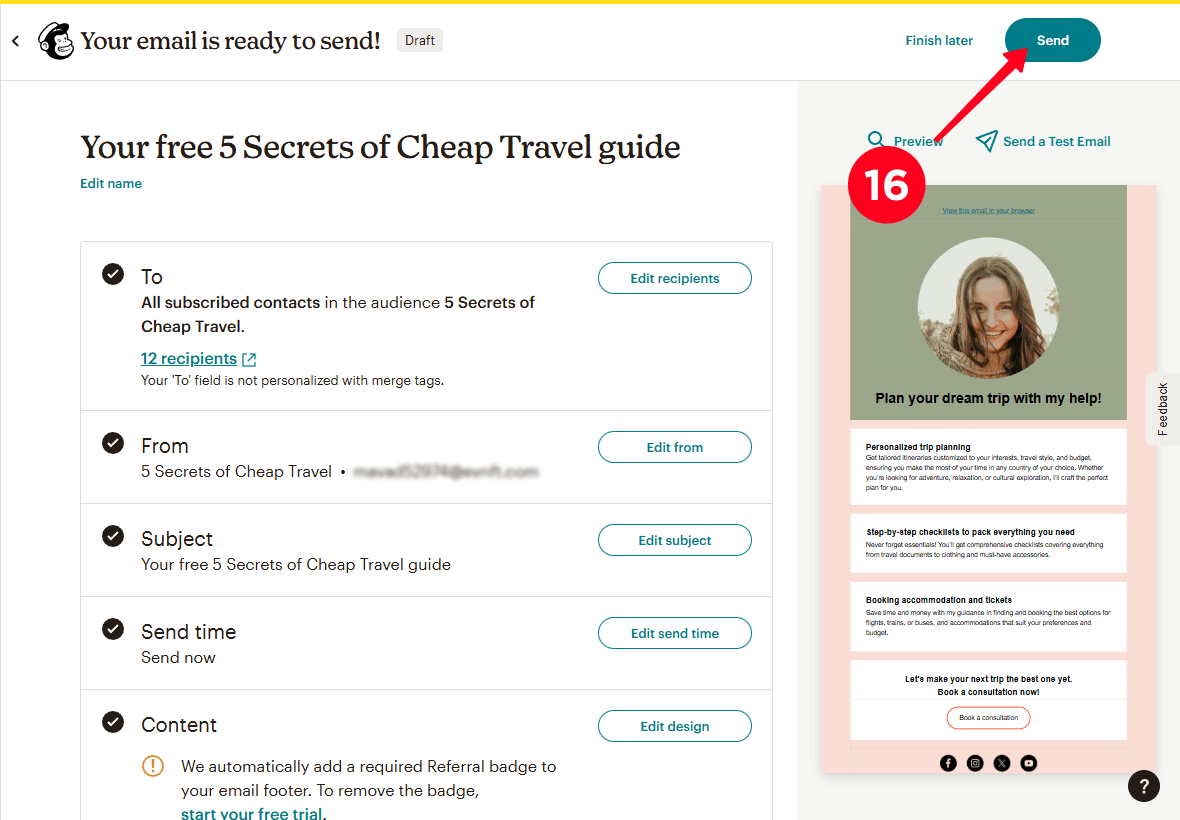
Done! Your email has been sent to all the contacts you selected for sending.
Now you know how to build an email list without a website and how to create an opt-in landing page. But no one knows about your page yet. It’s time to drive traffic to your email-collection page. Here are a few strategies.
Add a link to your opt-in page to the bio of every social media you’re on: Instagram, TikTok, X (Twitter), Facebook, YouTube, and others. Your business bio on social media is the first thing visitors see on your profile. Use it to promote your page for list-building.
In your bio, write what you’re offering and add a call to action to visit your landing page, for example: “Get a free guide via the link below!” A clear call to action tells visitors exactly what you want them to do and increases conversions.
Use our ready-made bios for small businesses, crafted according to best practices for creating effective bios.
Even if you’ve added your landing page link to your bios, some visitors might not read them. That’s why you should create posts related to the lead magnet you’re offering to let more people know about your offer.
When creating posts about giving away a lead magnet, always include a link to your page for email list building in the caption. For social media where links in captions aren’t clickable, like Instagram, encourage people to tap the link in your bio.
For fitness trainers, we’ve prepared an article with 200+ fitness post ideas for Instagram.
Run paid ads on social media or search engines which will encourage visitors to claim your lead magnet.
Define your target audience including demographic details (age, gender) and hobbies. For example, if you’re a travel blogger offering a guide to cheap travel, your audience could include young adults and young families who enjoy active vacations but can’t afford to spend much money.
When launching ads, try different platforms, like YouTube, Facebook, Instagram, Google, and Yahoo. Try also different ad formats. For example, purchase native advertising from a YouTube blogger, a post in a student group on Facebook, or an Instagram post in a travel profile.
Remember to track the analytics of ad performance: which platform and ad format bring the most subscribers. In the future, create more of the ads that work most effectively to market your page for email list building.
Yes, you do. This is important to comply with data protection laws such as GDPR in European countries, CAN-SPAM in the U.S., and others. These laws require that you inform users about how their data will be used.
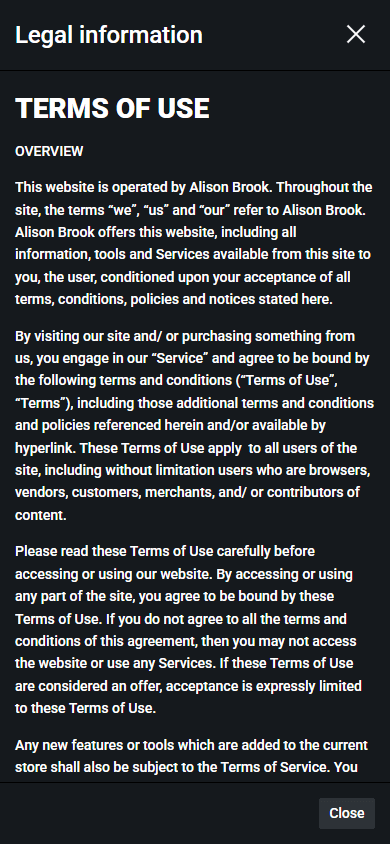
Taplink lets you add a consent notice for your terms of use. You can do this using the Legal Information add-on on the Add-ons page. This add-on lets you add the terms of use as:
- A popup: When tapping the terms of use link, the user will see a popup with the text of terms of use (to enable this, select Text in the Type field when setting up the Legal information add-on).
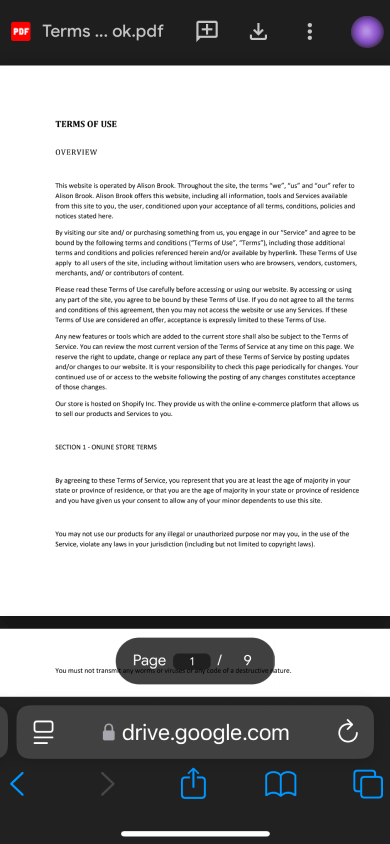
- A separate page: When tapping the terms of use link, the user will be directed to a separate page with terms of use (to enable this, select Link in the Type field when setting up the Legal information add-on).
In the screenshots below, we showed:
- A consent notification for the terms of use.
- Terms of use displayed as a popup.
- Terms of use displayed as a separate document.
We recommend using a template from the niche you work in.
Taplink offers templates for 20 niches: design, music, marketing, and others. Templates for each niche were created by professional designers who reflected the distinct requirements of various businesses. They include a color palette, font selection, graphic elements, etc.
If you choose a template from your niche, your landing page to collect emails will align with your business’s style and inspire more trust in visitors.
Yes. First and foremost, Taplink utilizes a secure HTTPS protocol to encrypt data.
Taplink also protects your account through two-factor authentication. You can activate it in the account settings. You can select the most convenient way for verifying your account login: via email or using an authenticator like Google Authenticator.
Yes, if you’ve already purchased a domain, you can use it as a link to your landing page for building an email list.
You can add your own domain when publishing the page. Read more about setting up a custom domain in Taplink in our guide.
A good frequency for sending regular newsletters is from once per month to twice per week. Emails sent during weekdays, particularly on Mondays, tend to have higher open rates.
You should also consider the preferences of your audience. Test different frequencies and days to identify what works best for your business. For instance, run an A/B test: try sending emails weekly on Mondays, then biweekly on Mondays. Compare the results to see which performs better.
Now you know how to build an email list even if you don’t have your own website. Taplink offers a simple email-collection solution, which includes:
The advanced option for building an email list in Taplink involves using add-ons like Mailchimp. With these, you can utilize email templates of different completeness, send emails to all your subscribers with one click, schedule emails for a specific time, and more.
Use Taplink to create a page for building an email list in 10 minutes and start an email list without a website.