How to create a link tree for Instagram

- How to create a link tree
- Step 1 — Choose a link tree template
- Step 2 — Set up your linktree for Instagram
- Step 3 — Add more links to your linktree
- Step 4 — Set the right order on your link tree for Instagram
- Step 5 — Delete the links you don't need
- Step 6 — Publish your link tree page
- How to share your linktree
- Share link tree online
- Share your link tree offline
- The bottom line
A link tree is a bio link site for Instagram with multiple links. These can be any links in any quantity. The only limit is your sense of reason.
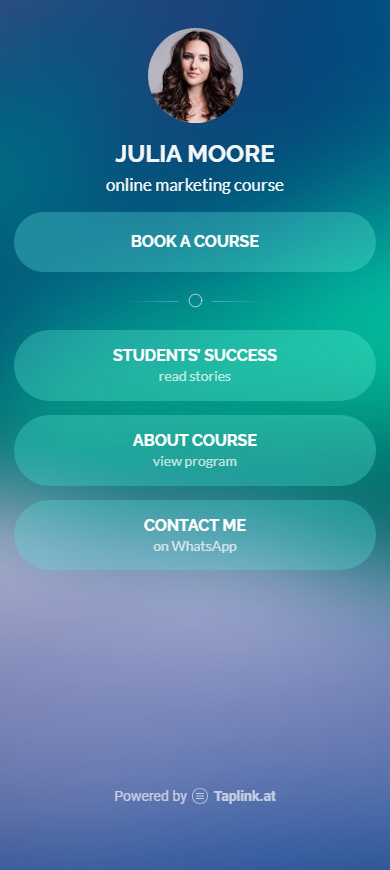
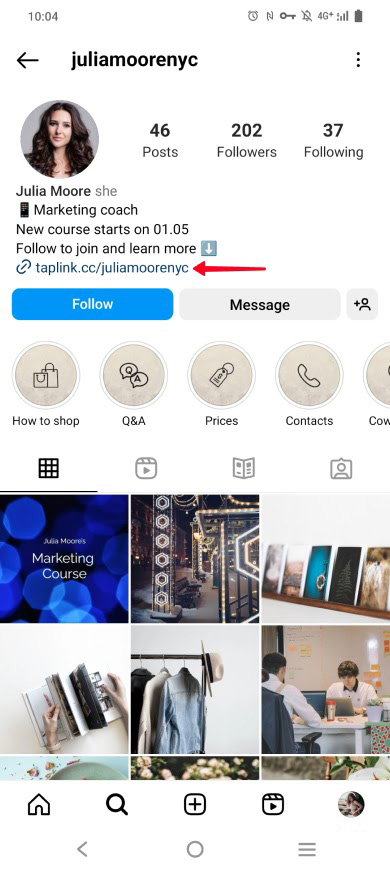
A link tree makes link sharing easy. It gathers all your links together. You give a single link to users but what they get is a variety of links. For example, you can add your link tree to your Instagram bio, and your followers can view it and select the link relevant to them:
Taplink is where you create a link tree for Instagram. It gives you a page and you add all your links on it. Below you can find step-by-step instructions.
First of all, you need to sign up on Taplink to create a link tree for Instagram, it takes just a couple of clicks.
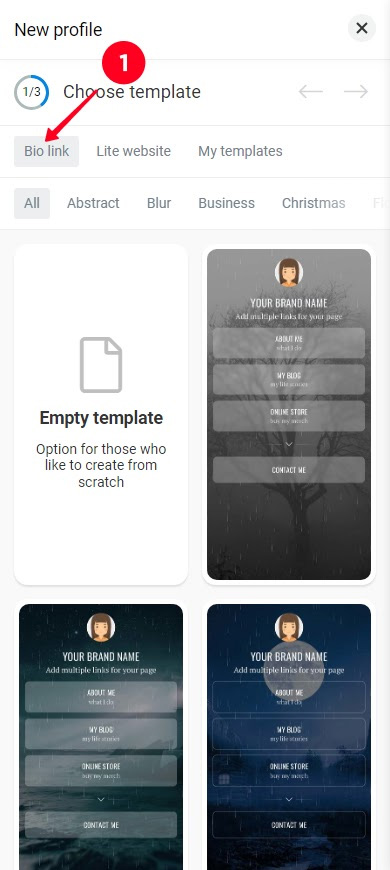
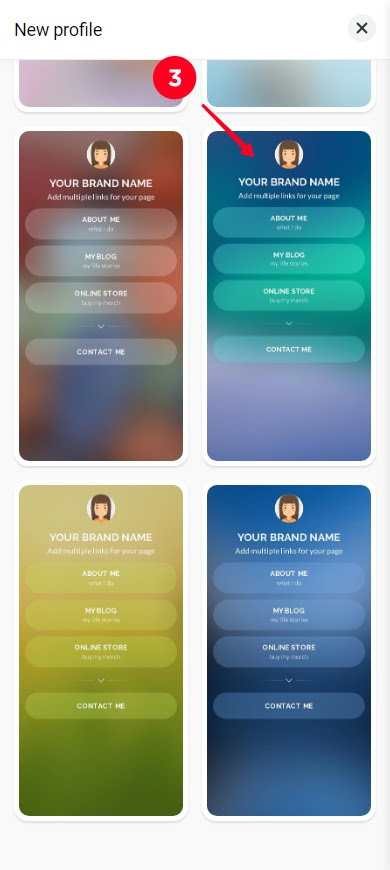
After you sign up, you are taken to a page with link tree templates. Choose the link tree page design you like the most from the available options:
01. Make sure you are in the Bio link tab.
02. Select a category to find a template faster.
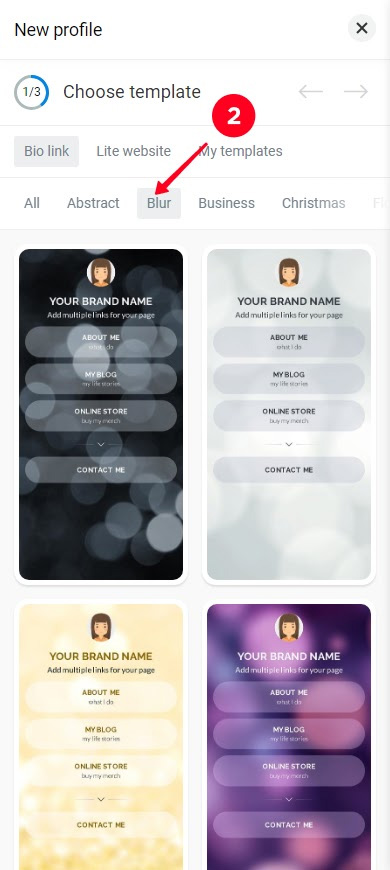
03. Scroll down and tap the template you like most.
04. Tap Choose.
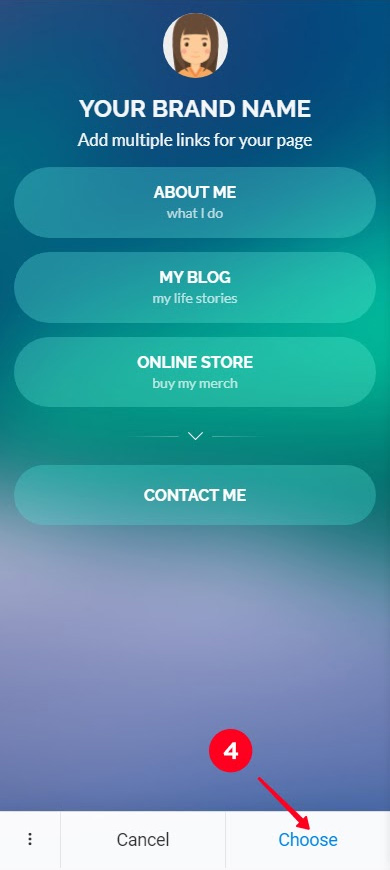
Now you have your own link tree page, congratulations.
You will see your link tree in the editor, you need to set up your link tree there.
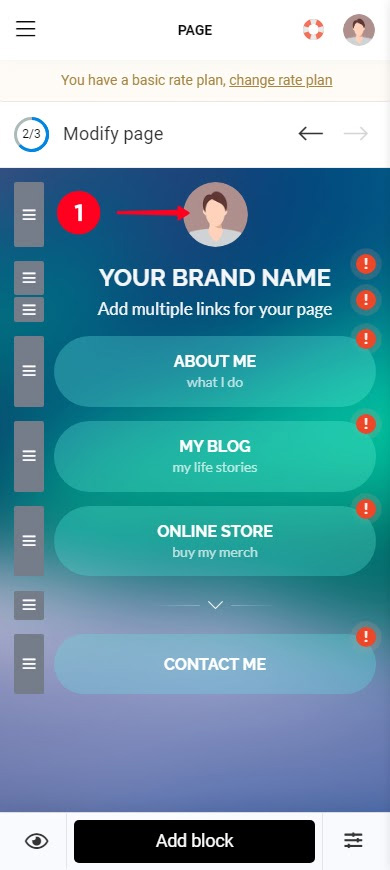
Add your photo to make your link tree personalized. When you create a link tree for Instagram, you better use your IG profile picture. Upload your photo:
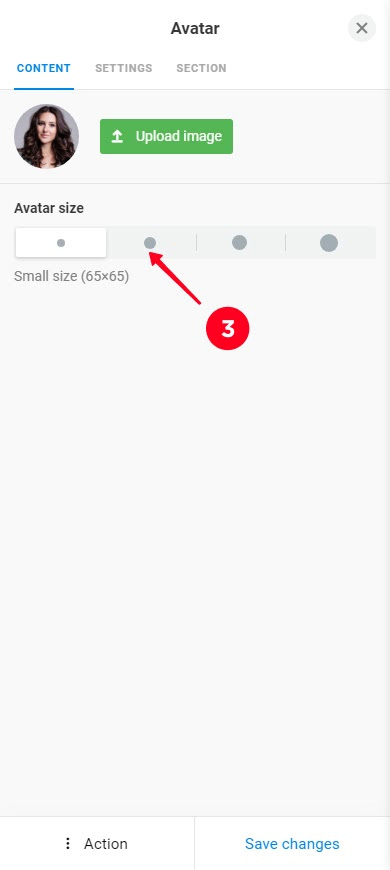
01. Tap the photo.
02. Tap Upload image and select a photo on your device.
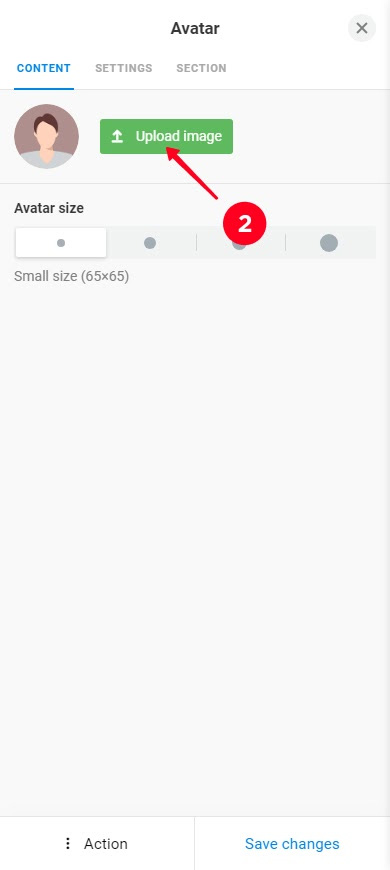
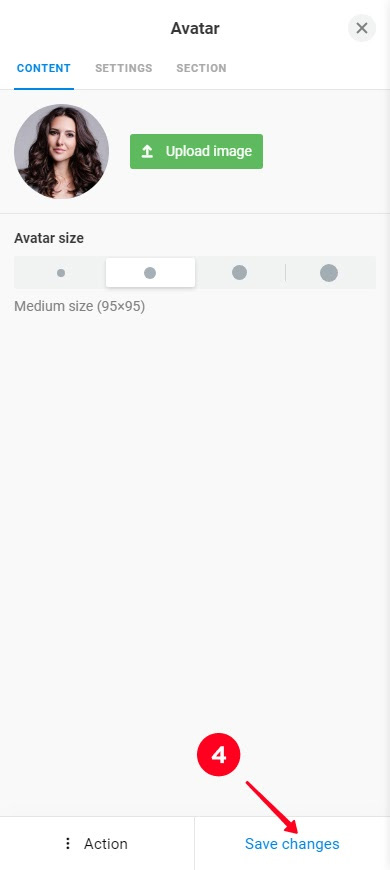
03. Optionally, select a different profile picture size.
04. Tap Save changes.
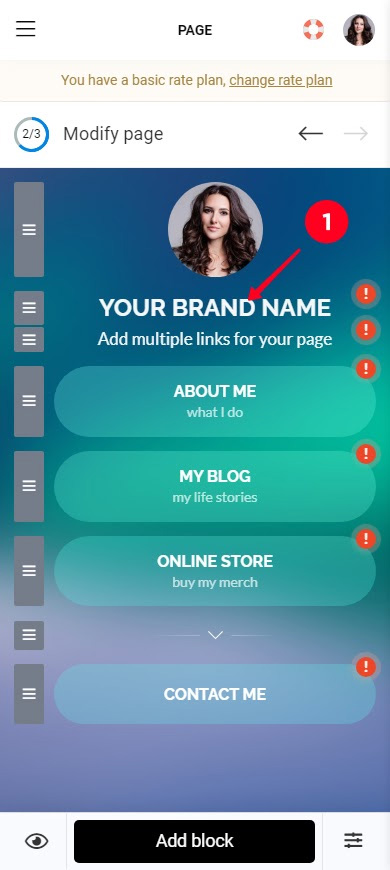
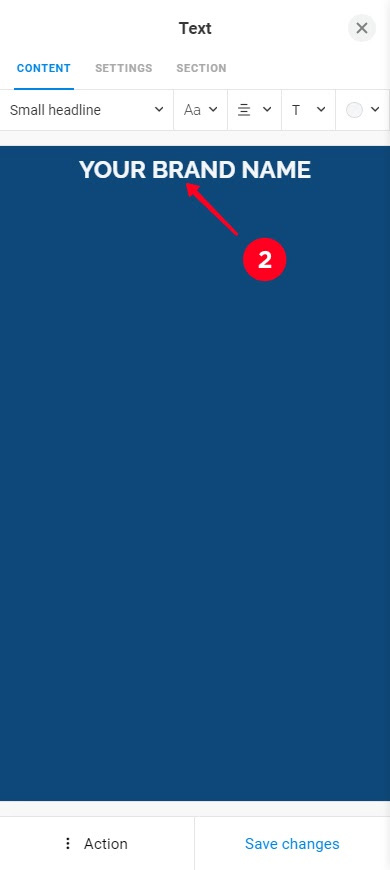
Customize the default texts, this also makes your linktree more personalized:
01. Tap one of the texts.
02. Delete the text and write your own.
03. Tap Save changes.
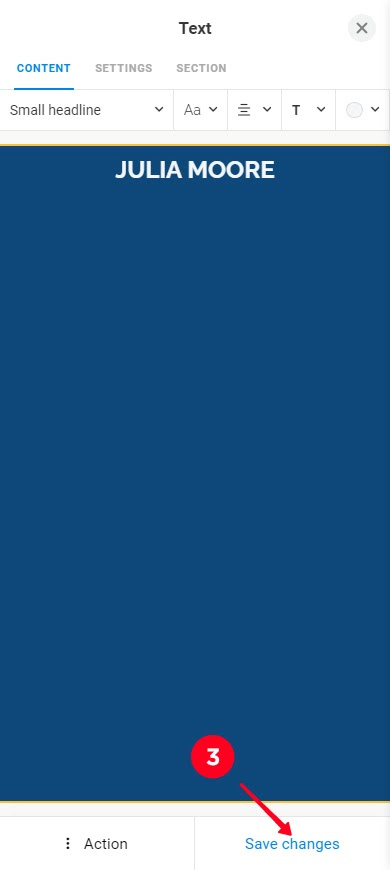
Edit the second text on the link tree page in the same way.
Next, add links. When you create a link tree, you need to specify them in the buttons' settings:
01. Tap a button.
02. Edit the button text.
03. Edit or remove the additional button text.
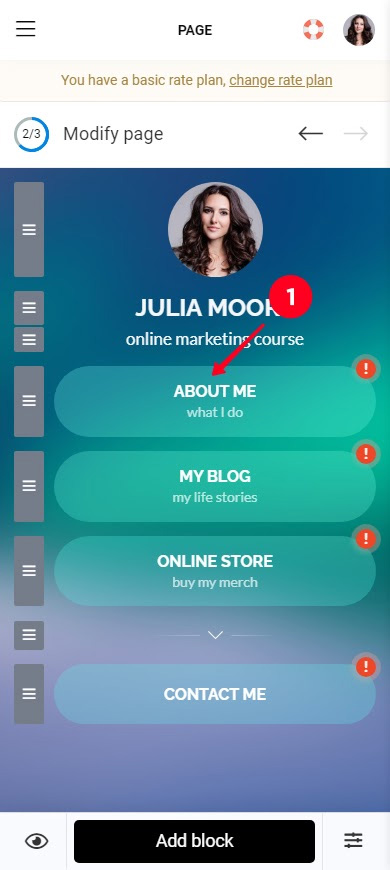
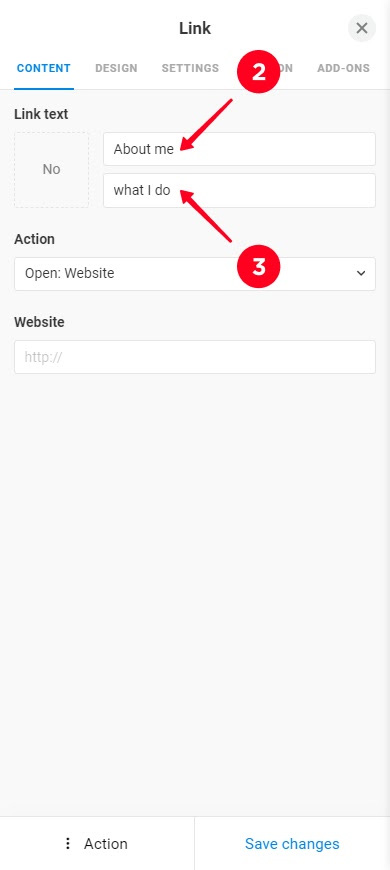
04. Paste a link.
05. Tap Save changes.
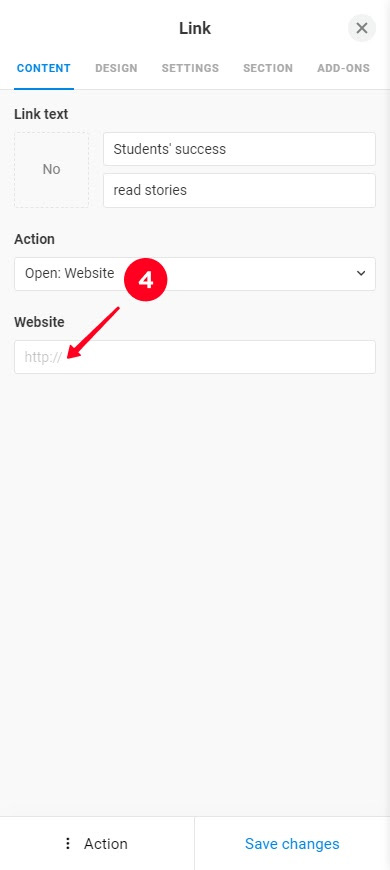
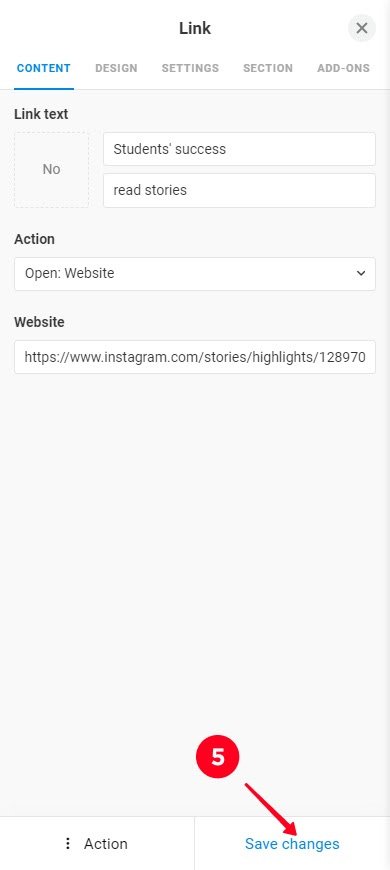
Edit the rest of the buttons on the link tree page in the same way.
You can always add more buttons for links to your link tree:
- Regular. A button in your page style. Available on all plans. (First screenshot)
- Branded. A button with the colors and logo of a messaging app, social network or platform. Available on paid plans. (Second screenshot)
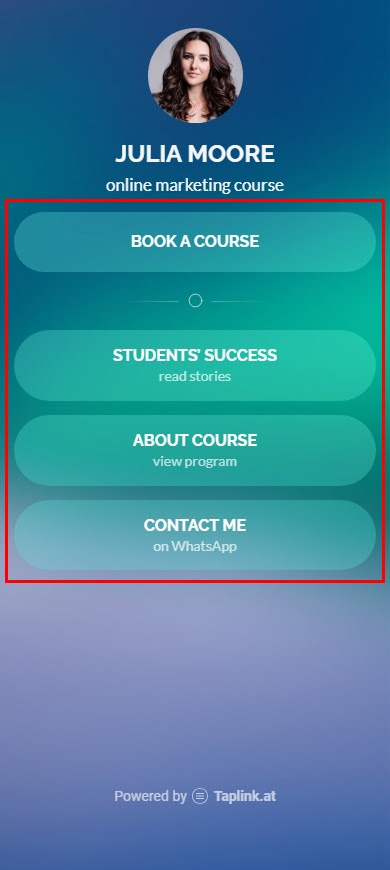
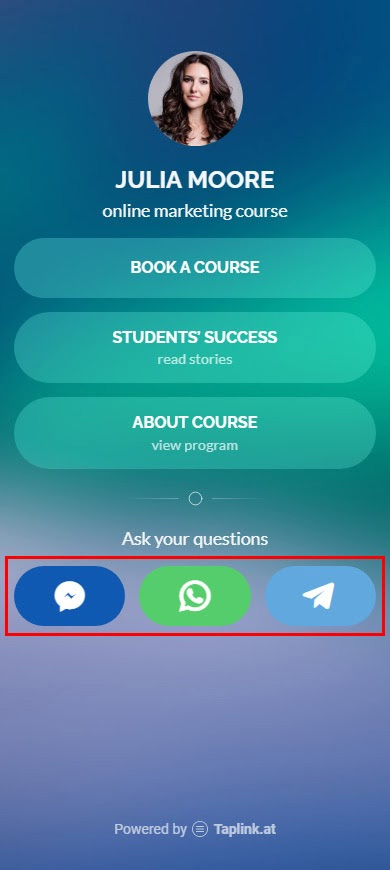
The links are added in the same way. We give an example of how to add branded buttons when you create a linktree for Instagram, so first, we subscribe to a paid plan. Then, we add links:
01. Tap Add block.
02. Choose Messaging app or Social network.
03. Select a messaging app, social network, or platform.
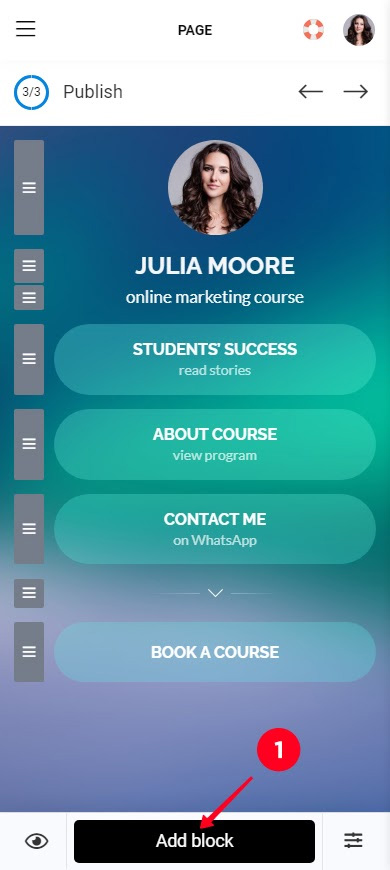
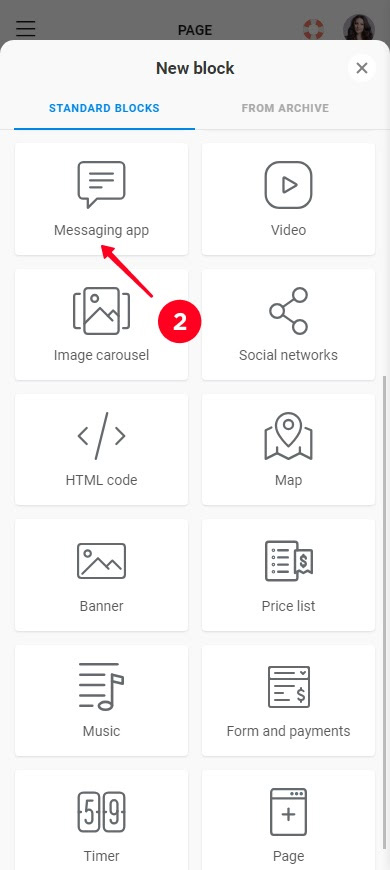
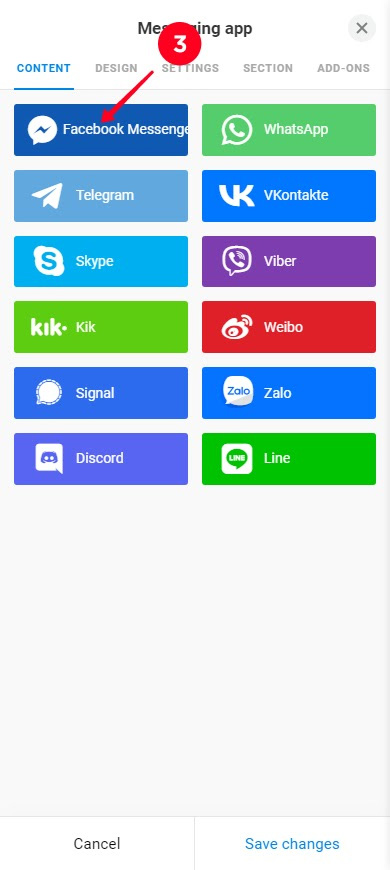
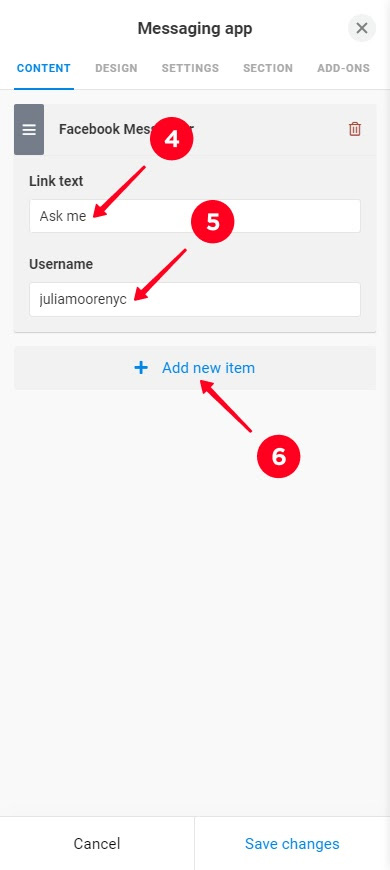
04. Optionally, specify the button text. If you don't specify something when you create your link tree for Instagram, the displayed text will be the name of the messaging app, social network, or platform.
05. Enter a username, channel name, phone number, etc. The field depends on what you selected in the previous step.
06. If you need one more button with a link to a messaging app, social network, or platform, tap + Add new item and repeat steps 3–5.
07. Tap Save changes.
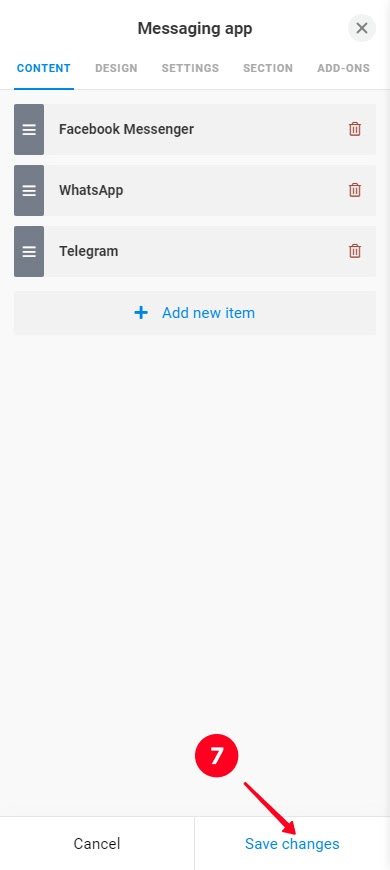
You can adjust the button design when you create a linktree or you can do this later. Here is a detailed guide about customizing the design of the messaging app buttons and here is a guide about the design of social network and platform buttons.
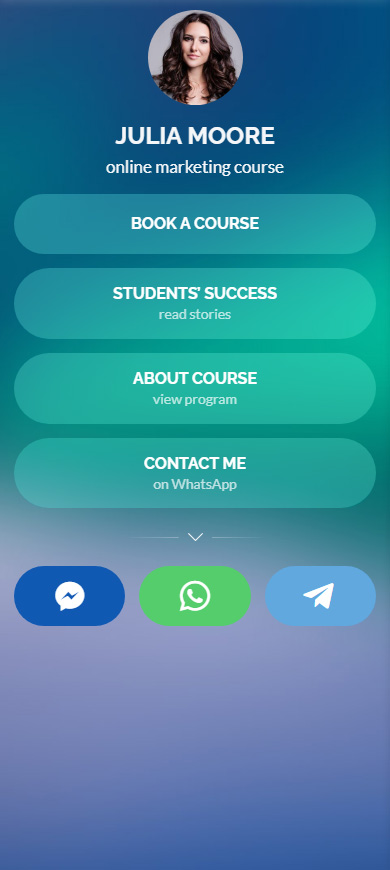
We changed the button design when we set up the link tree for Instagram, and here's what we've got:
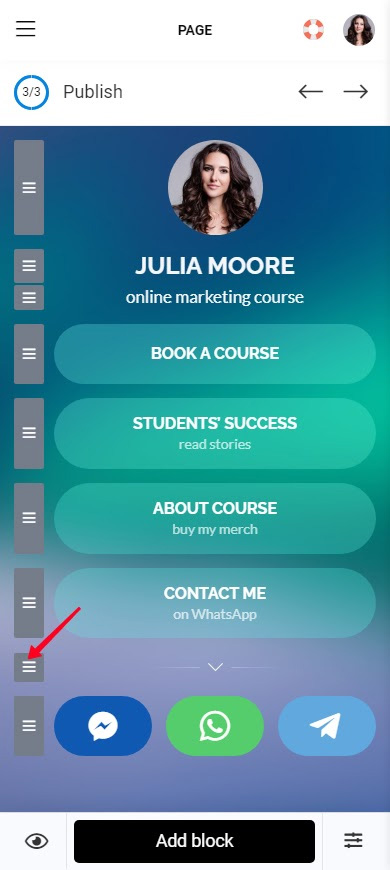
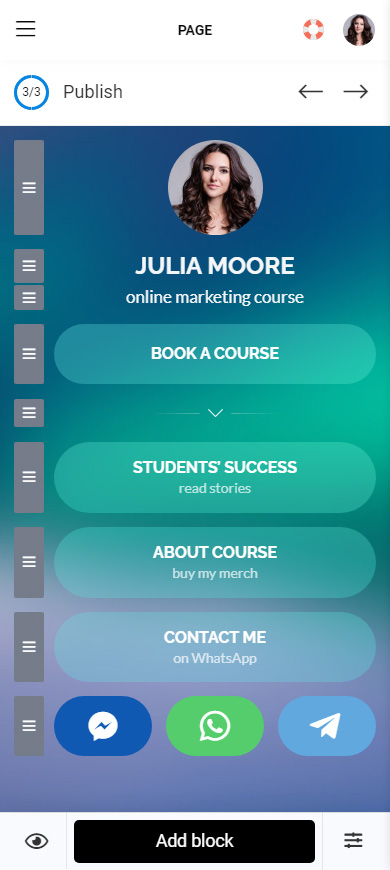
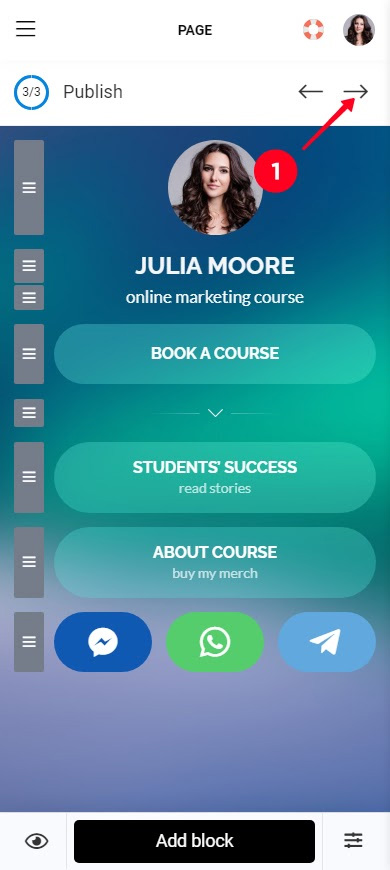
You can also rearrange the elements when you create your link tree. Press and hold the three lines next to the element you want to move, drag it to the other place, and then release it.
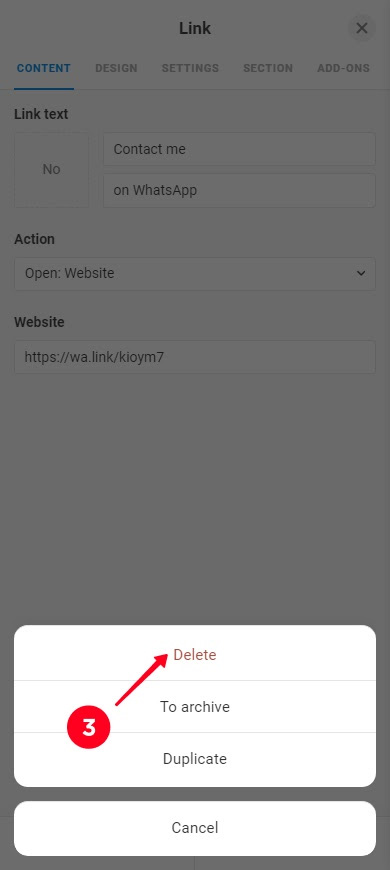
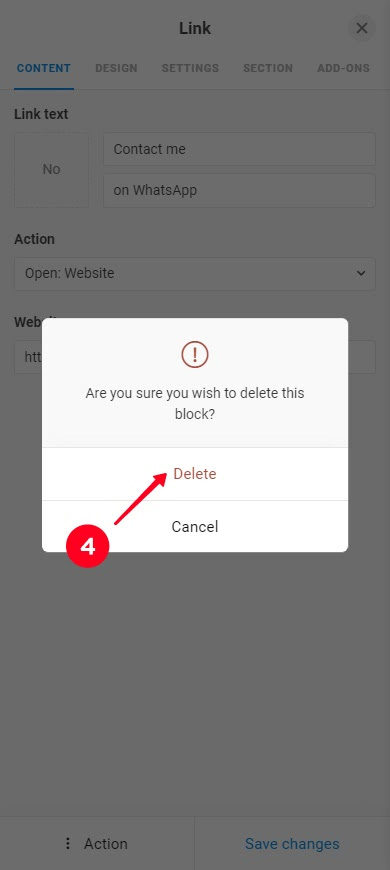
Delete a link if you don't need it on your link tree:
01. Tap the link.
02. Tap Action.
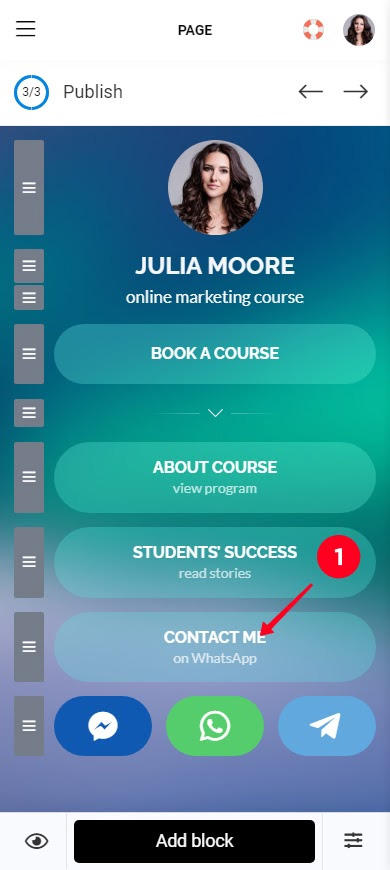
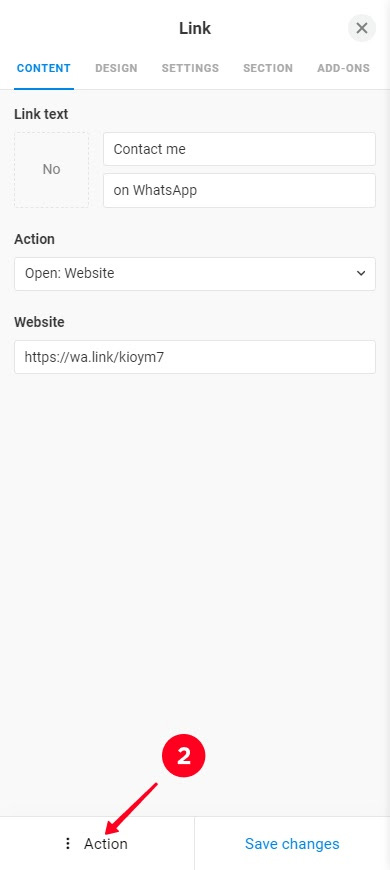
03. Select Delete.
04. Tap Delete.
Your link tree is ready. After you create your link tree for Instagram, you need to get a link for it. This is the link you will share in your social profile and send in messages:
- Proceed to publish the page.
- Set the unique part of your link tree link. For example, when you make a link tree for Instagram, enter your IG username.
- Tap Connect.
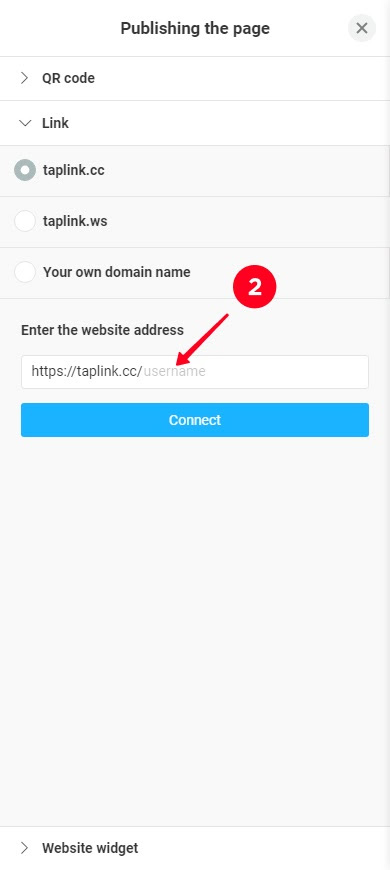
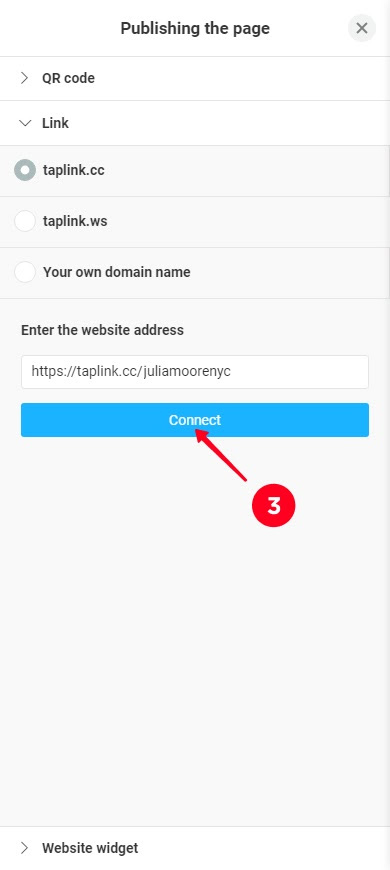
This is also the menu where you can change your link tree link, the instructions are here.
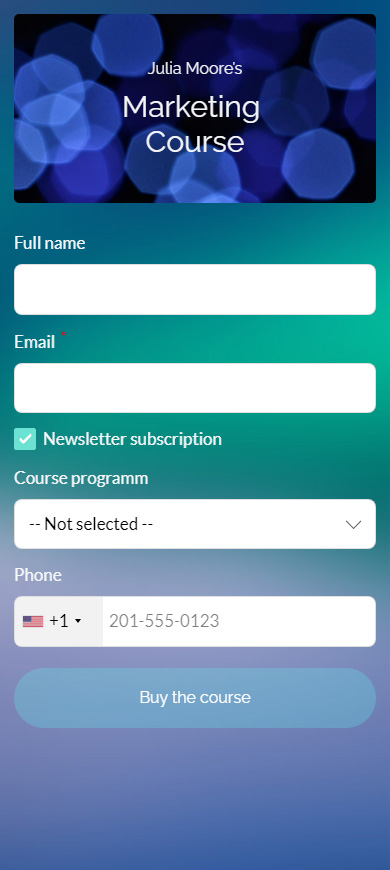
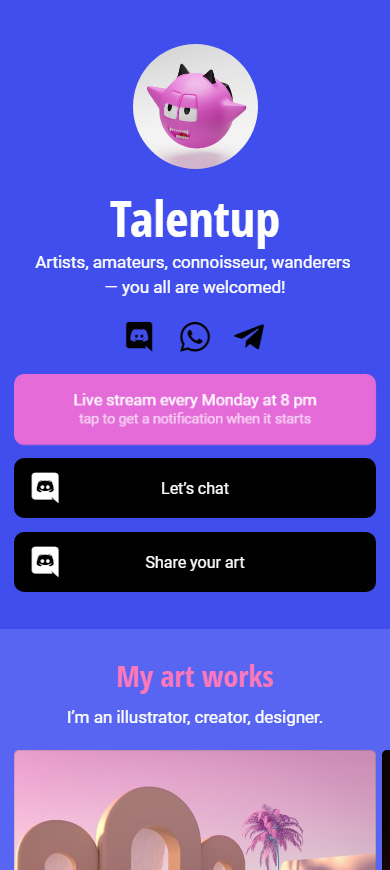
You can create a link tree for Instagram that includes not only links but also photos, videos, music, forms, timers, and many more. These items are available on paid plans. Read a detailed guide on how to create a linktree like this on Taplink.
Here are examples of the advanced pages and their templates that you can use to create a link tree quickly:

Now that you have created your link tree, let your online and offline users know about it.
Share the created link tree in your social profiles:
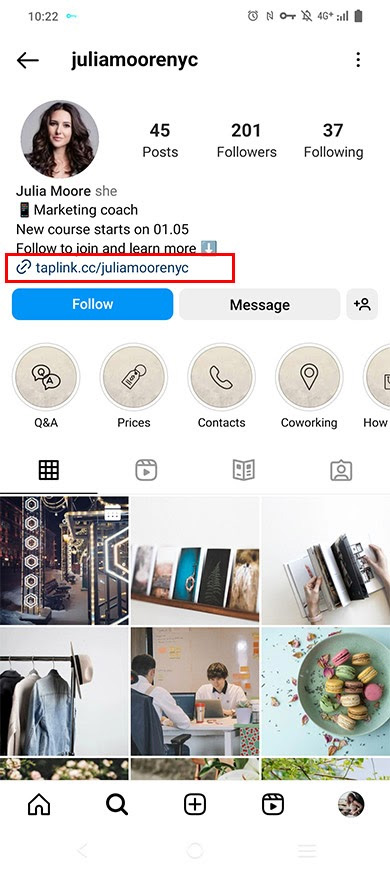
- Add your link tree to your Instagram bio, and also Twitter, TikTok, Facebook, LinkedIn bio etc. Read the detailed instructions here.
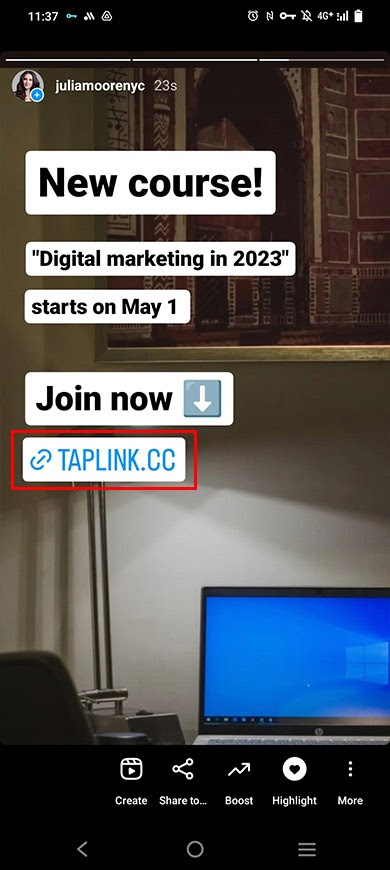
- Add your link tree to your posts and Stories. You may need to direct users to follow the link in your bio. For example, you can't add your link tree to Instagram posts, so in the post captions, you should invite them to your bio.

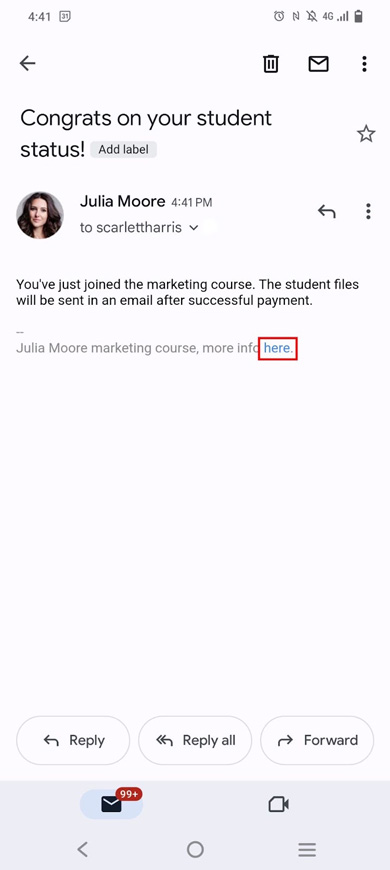
Use your link tree as your email signature to make future interactions with you easy for the recipients:
Create a QR code for your link tree to share it offline. When you create your link tree on Taplink, the QR code is generated automatically. Here you can find the detailed guide on how to download it and, if necessary, customize the design.
Print the QR code you've downloaded on:
- Indoor and outdoor advertising.
- Business cards.
- Merch.
- Product packaging.
And others.



Now you know how to create a link tree for Instagram. You can do this in less than 10 minutes on Taplink if you use templates. Share your link tree in your social profiles, emails, as well as on printed materials.
Start creating your link tree for free right now.